|
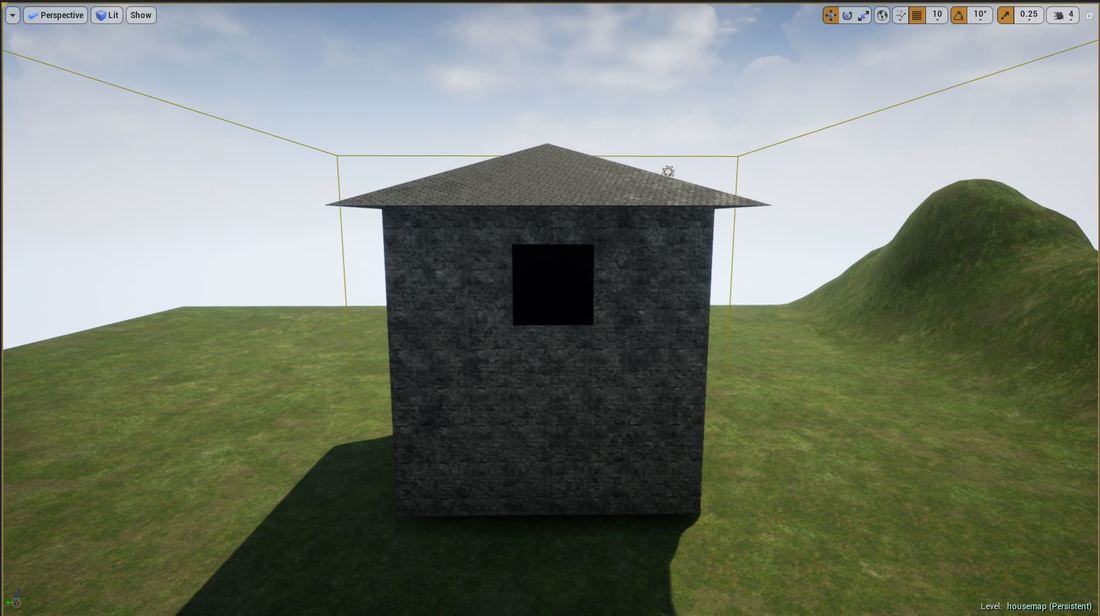
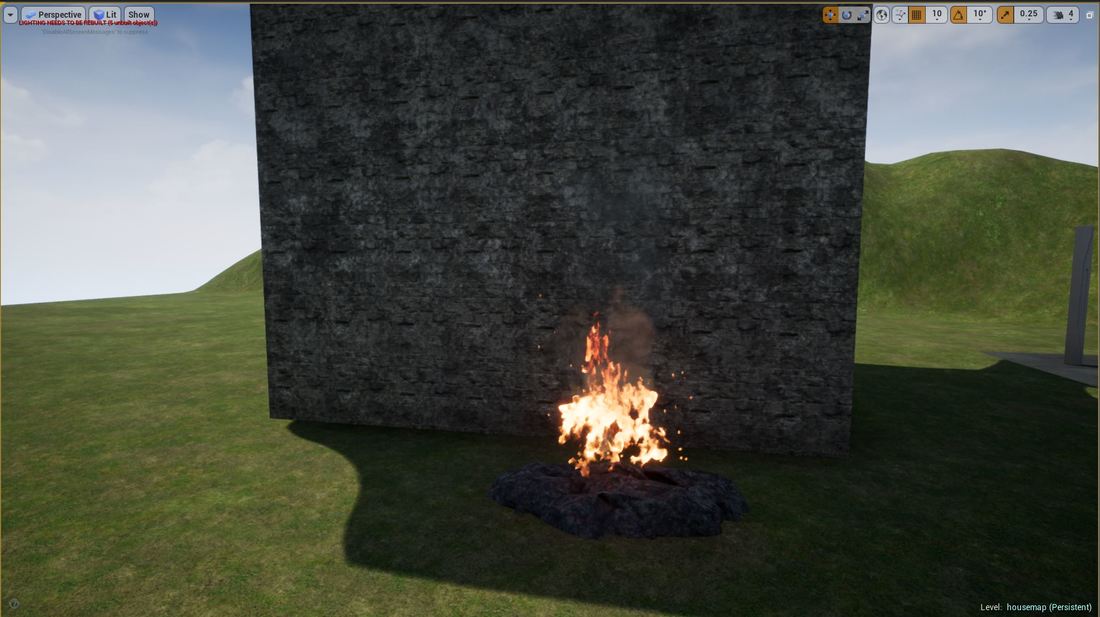
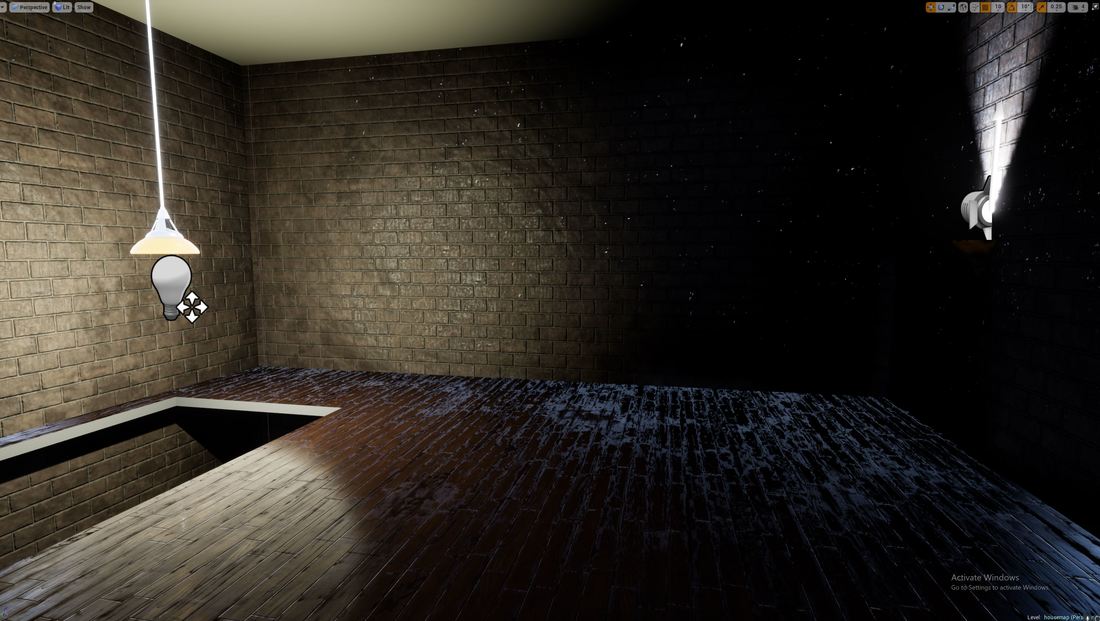
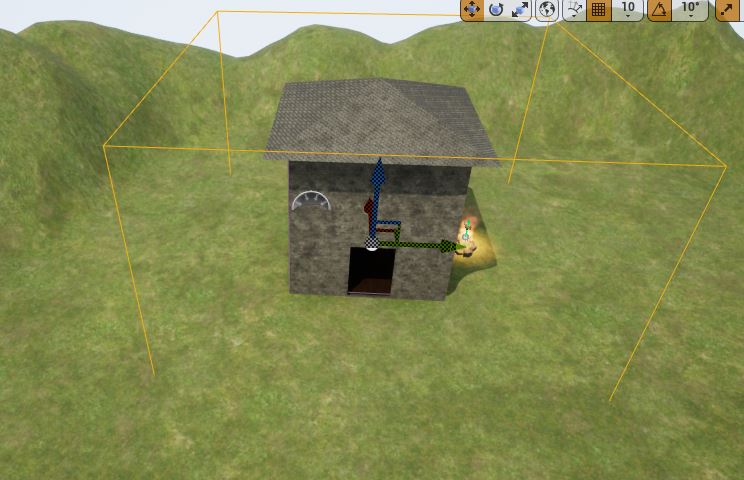
Task Timeline Pre-production Start date: 1/4/18 End date:7/4/18 For the pre-production I have given myself a week to create the pre-production for the lighting, this involves looking at lighting research techniques, creating mind maps and mood boards of the lighting style that I want for my game. Practice scene Start date: 7/4/18 End date: 20/4/18 For this section I want to put the research I have learned from the pre-production to practice and see how It works and how it could work in my game. I have given myself just over a week to compete this section. Lighting scenes in my game Start date: 21/4/18 End date: 5/5/18 For this task I have given myself two weeks to light various scenes in my game, I want to look to lighting an indoor scene and two types of out door scenes; night and daytime. This is where I will put all the research and pre-production to work. Live render Start date: 6/5/18 End date: 7/5/18 For this task I have given myself a day to create a live render (video) of one of my scenes I aim for the video to be 30 seconds long and shouldn’t take any longer that a day to produce this. Pre-production I started off this part of the project but researching into how lighting works in Unreal Engine and how it effects the performance, I looked at different types of static and dynamic lighting and rendering. After doing my research I look into what lighting and rendering effects that I could use inside of my game environment, from this I will then create a mood board. 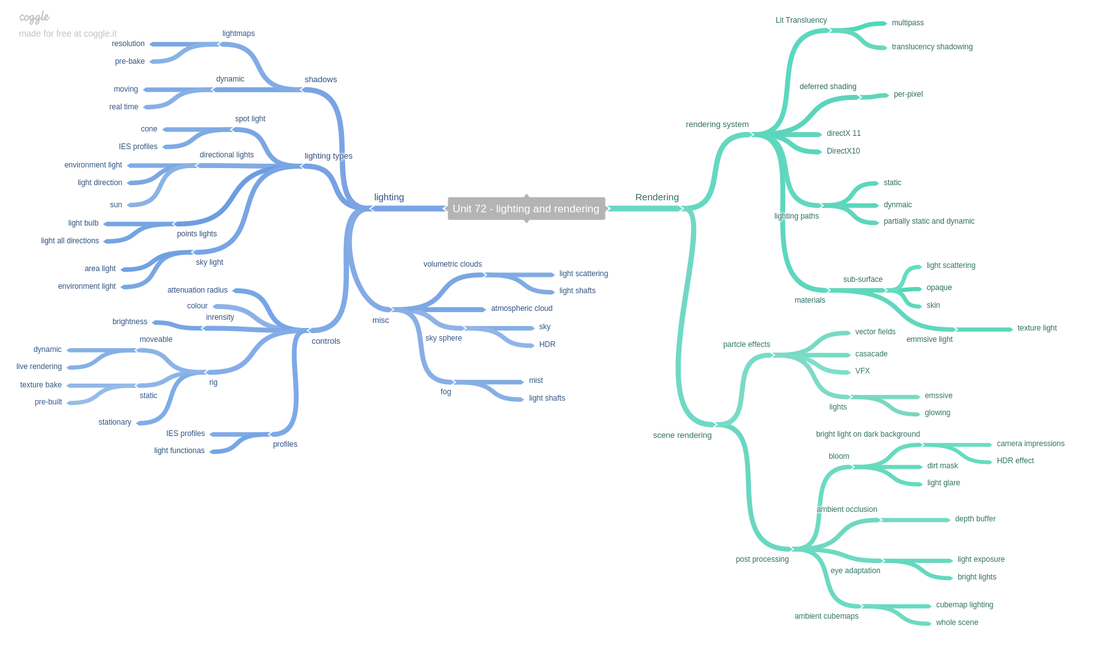 Below is my final mood board 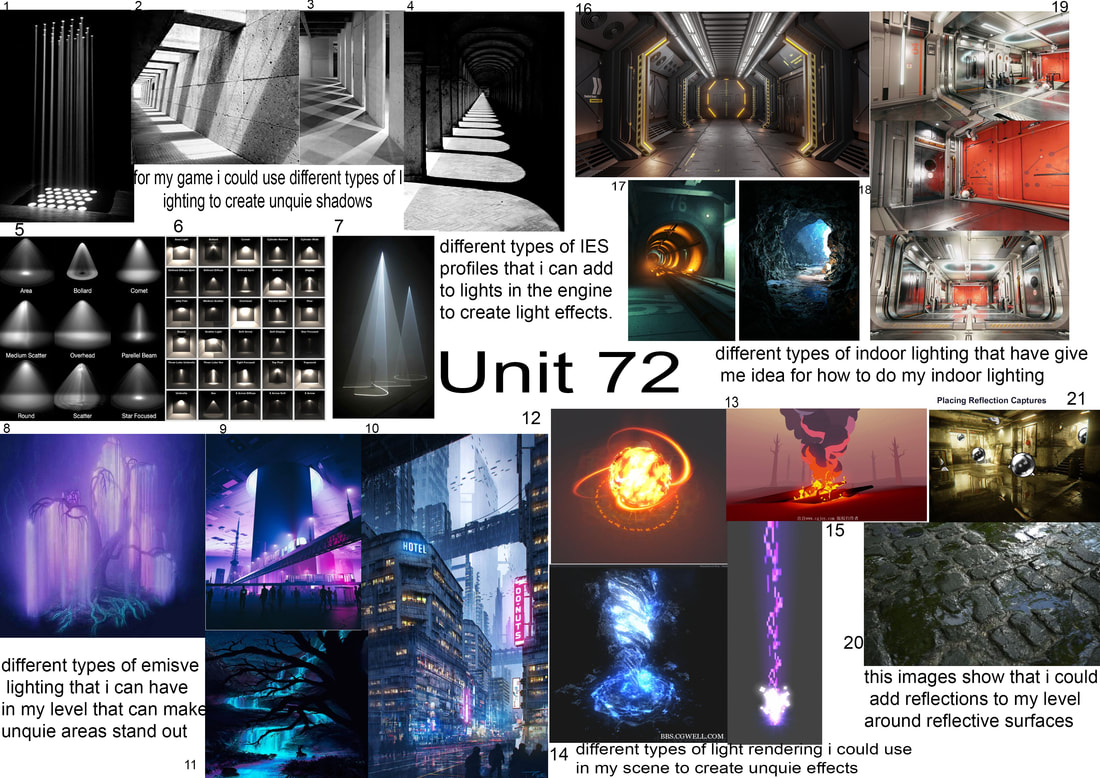 Practice scenes In this task I will practice and test out the lighting and rendering techniques I found during my research, I will create a basic project in unreal engine so that I can practice the lighting and from this I will understand how to use lighting in my own project. I started of by learning how to make the whole environment black, where nothing cast any light, I started of by turning the intensity to 0 on the skylight and directional light and then I went to the sky cube and turned all the sky colours to black and unticked determine sky by colours. After changing these settings, the scene looked like this:  I started off by adding a sky light, this light all the area up, it added a basic light to the environment not casting must shadows and was still dark. I then added a directional light with acts as the sun and casts shadows from the direction it is point from. I added it with the skylight and had it facing the door of the house so that the light would cast a shadow behind the house. wanted to try adding the last two types of lights a point light which as a light bulb and casts light in a uniform way and a spot light that cast light in a cone and emits light from the top of the cone. For my scene I added these lights, inside the house I had two spot lights point to the ceiling like a wall light and then added a hanging light model with a point light, I then added a particle effect of a fire outside with a point light, the fire uses live rendering and cast dynamic light, I added the point light to add more light from this fire. For these lights I looked into changing the attenuation radius, intensity, source length, inner and outer cone and colour After adding the lights to the level I wanted to play around with the mobility settings, I decided to change the spot lights that are on the wall to static as these wont be producing dynamic shadows, the fire outside light will use stationary mobility and the hanging light will use moveable so the player can move this light and cast dynamic shadows. I then wanted to test creating auto exposure going into a the room that is dark and giving the effect that human eyes would have when going from bright to dark and vice-versa. I did this by adding a post process volume into the house and went down to the lens tab and selected auto exposure and adjusted the settings to make it look like it slow adjusting to the new light brightness.
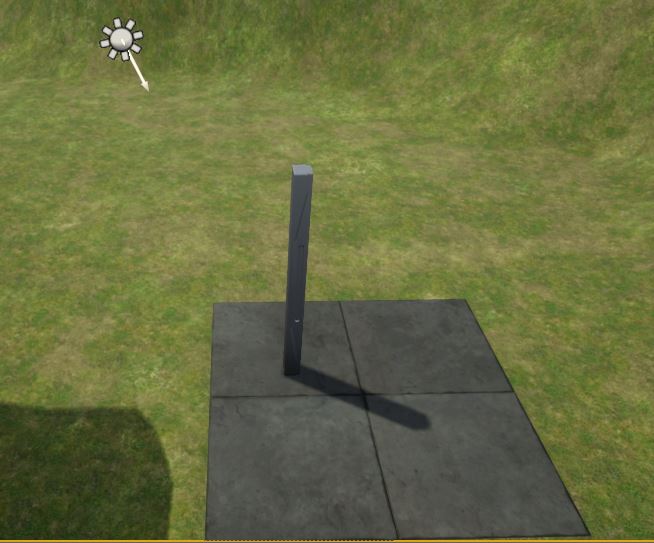
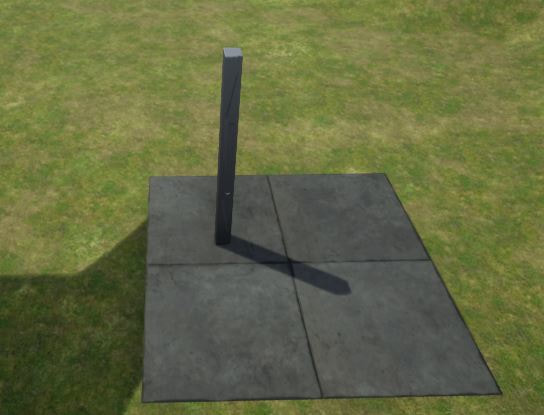
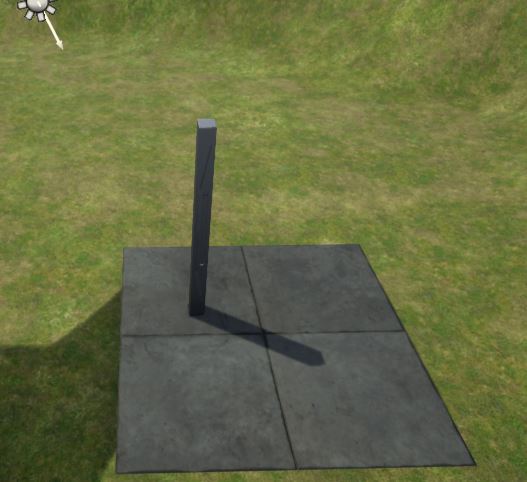
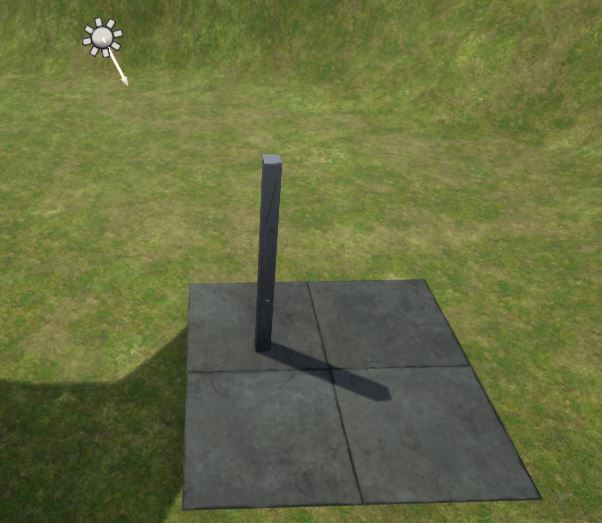
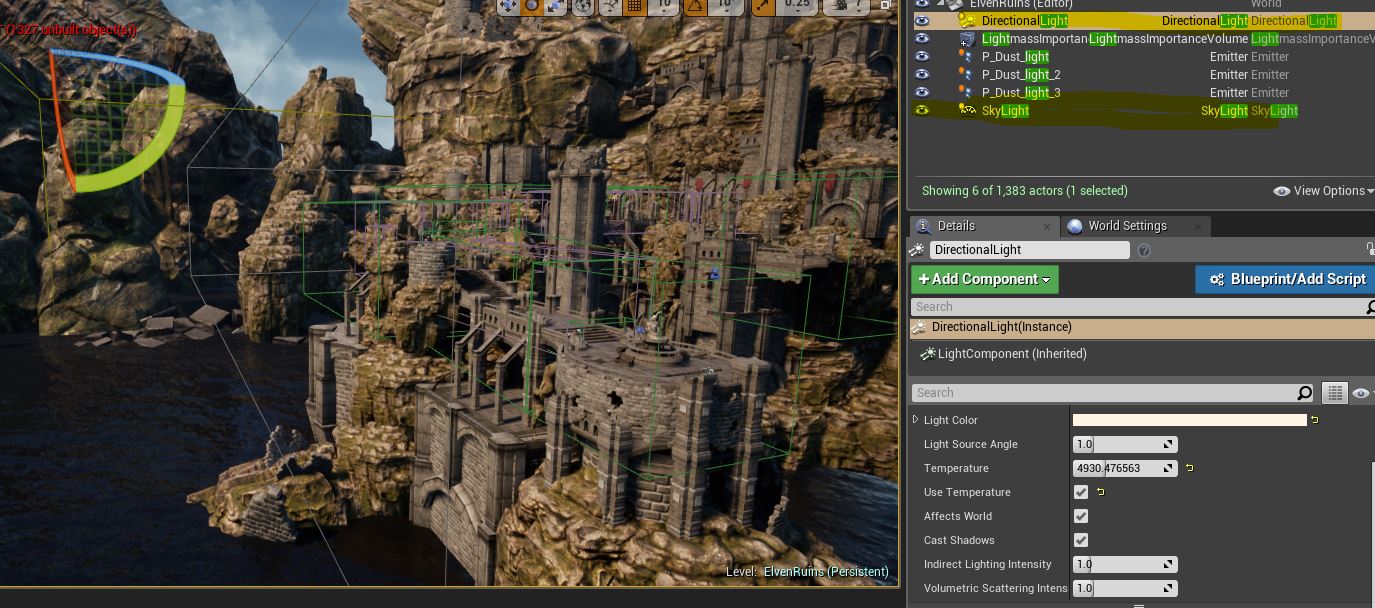
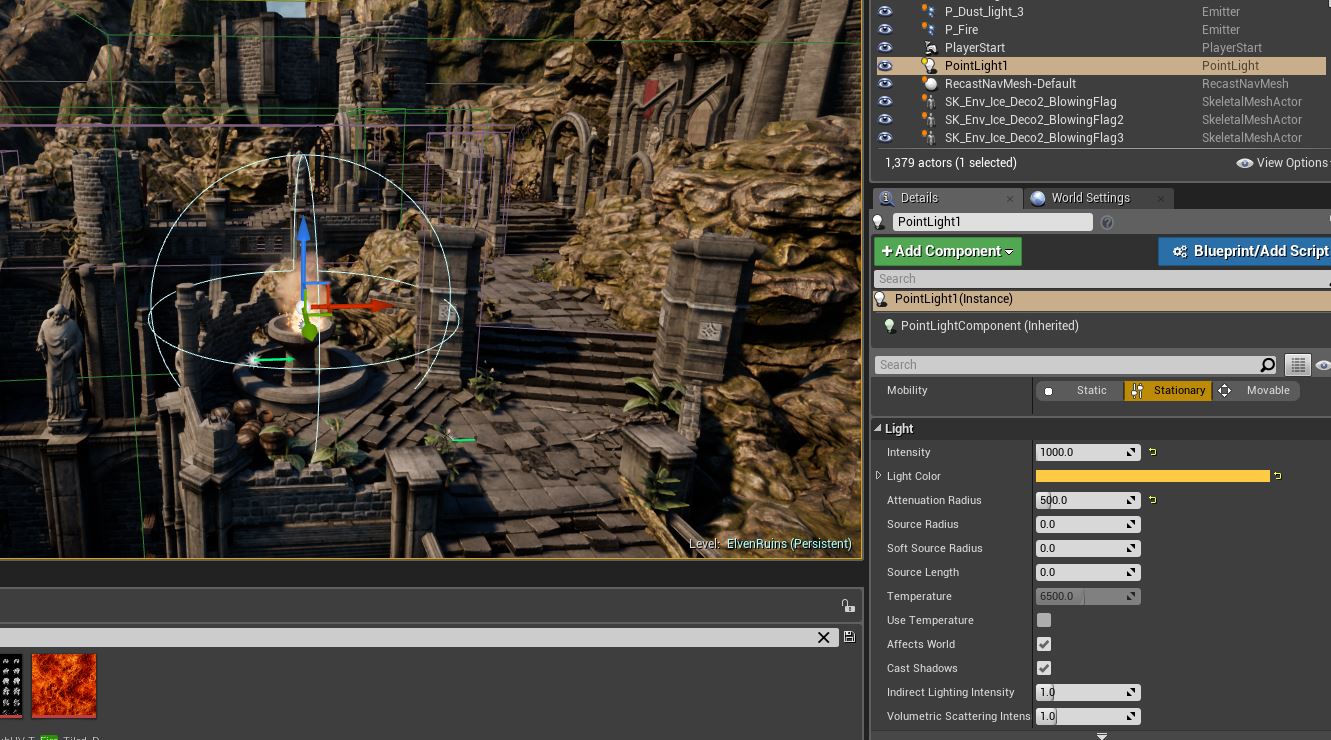
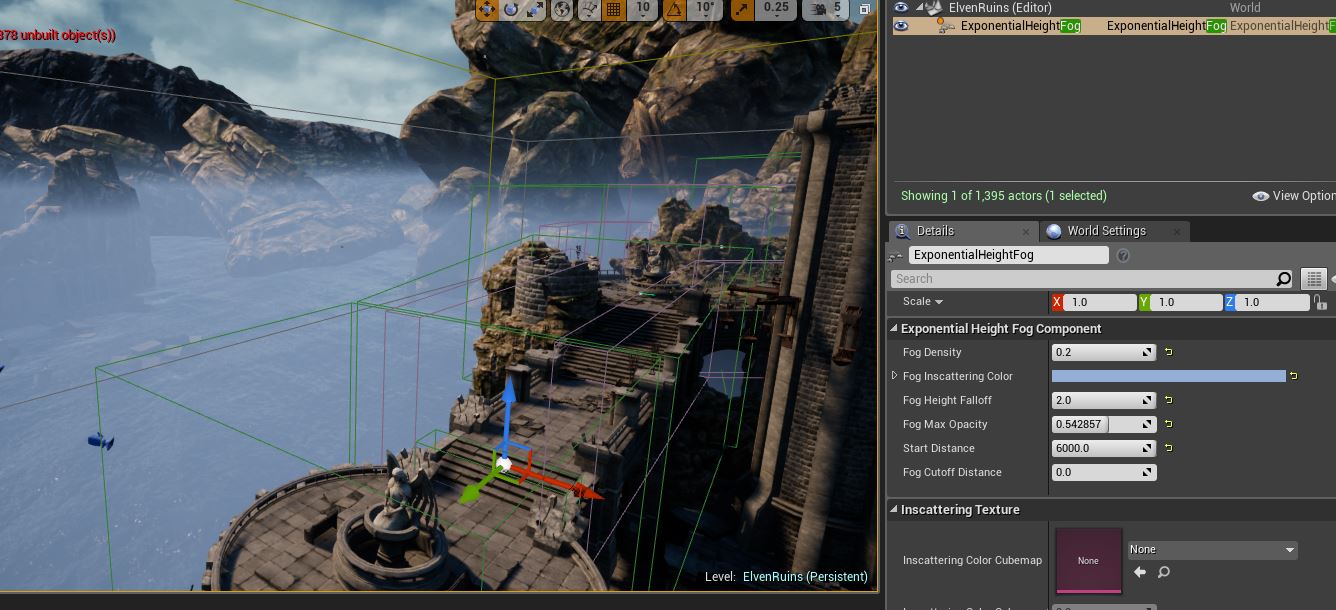
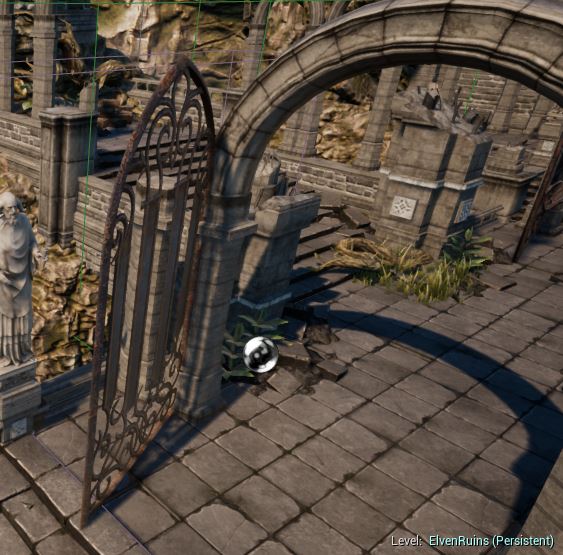
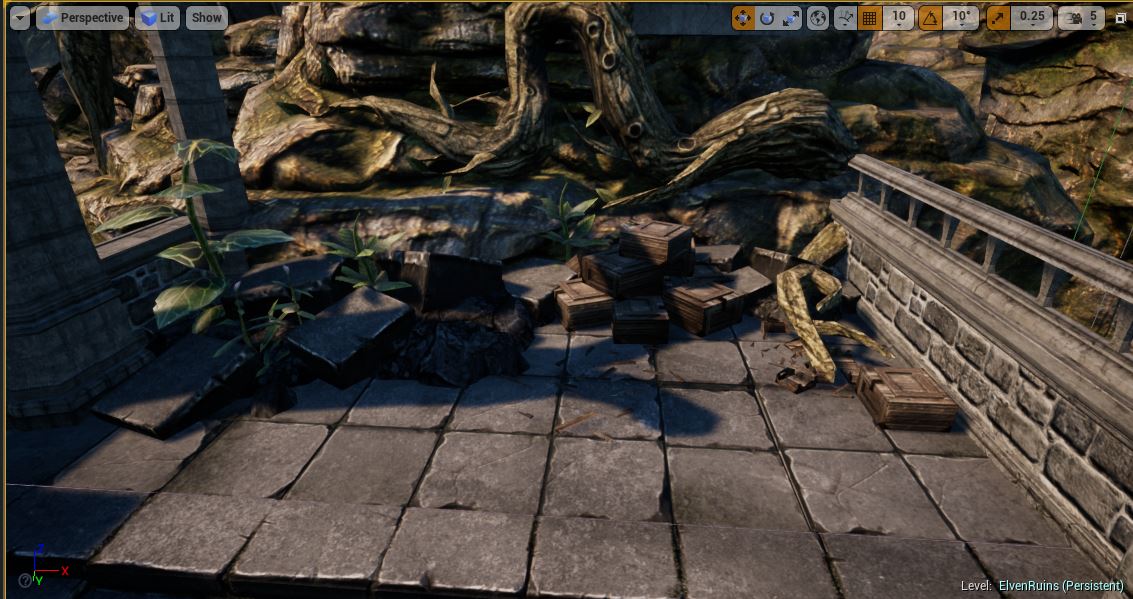
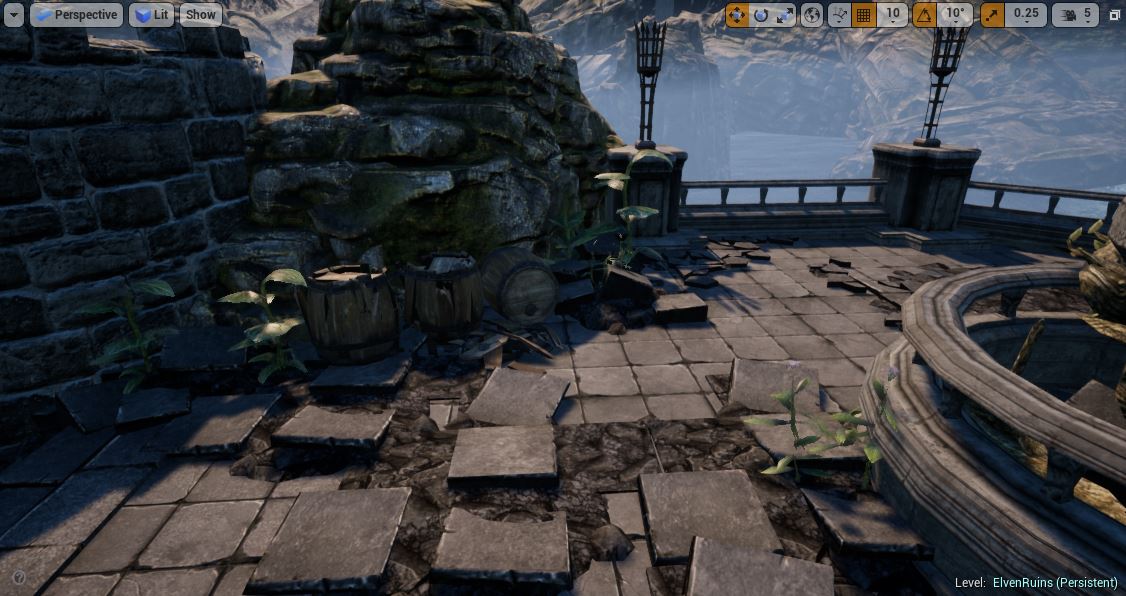
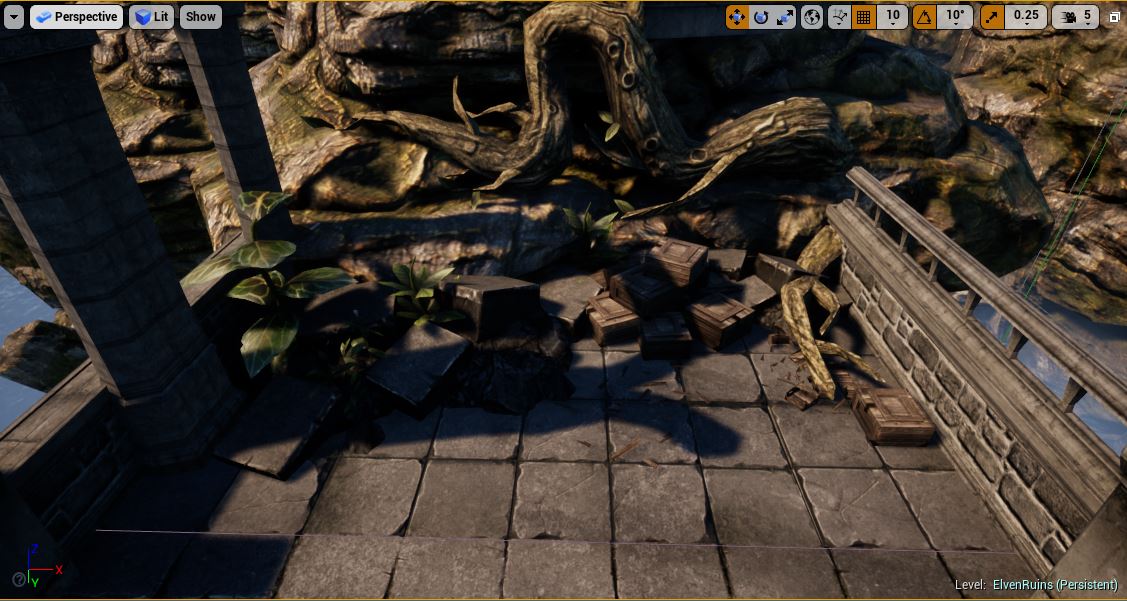
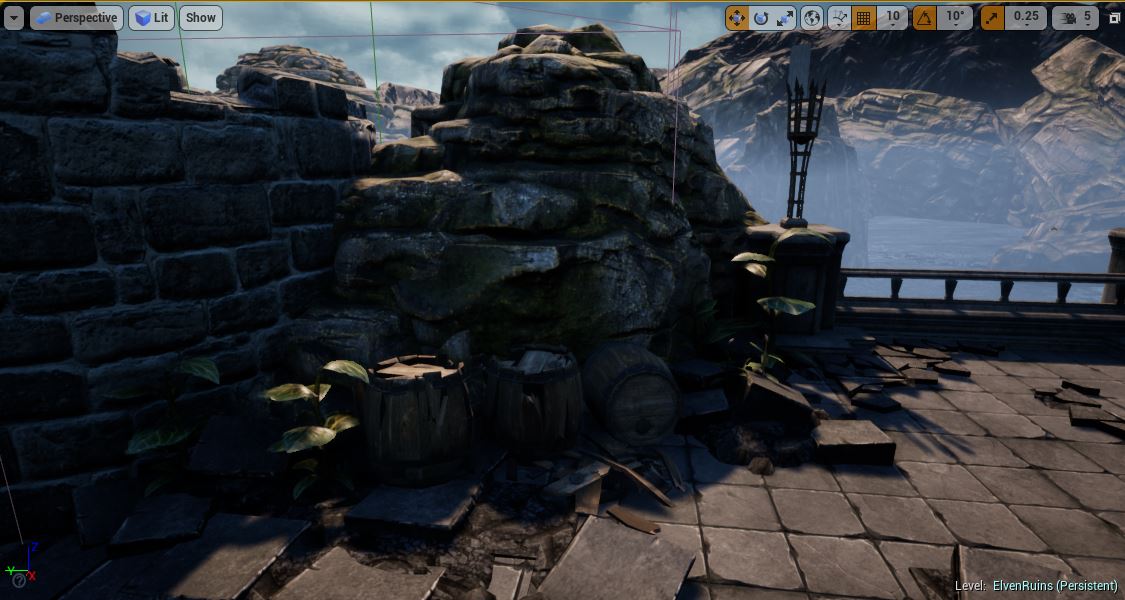
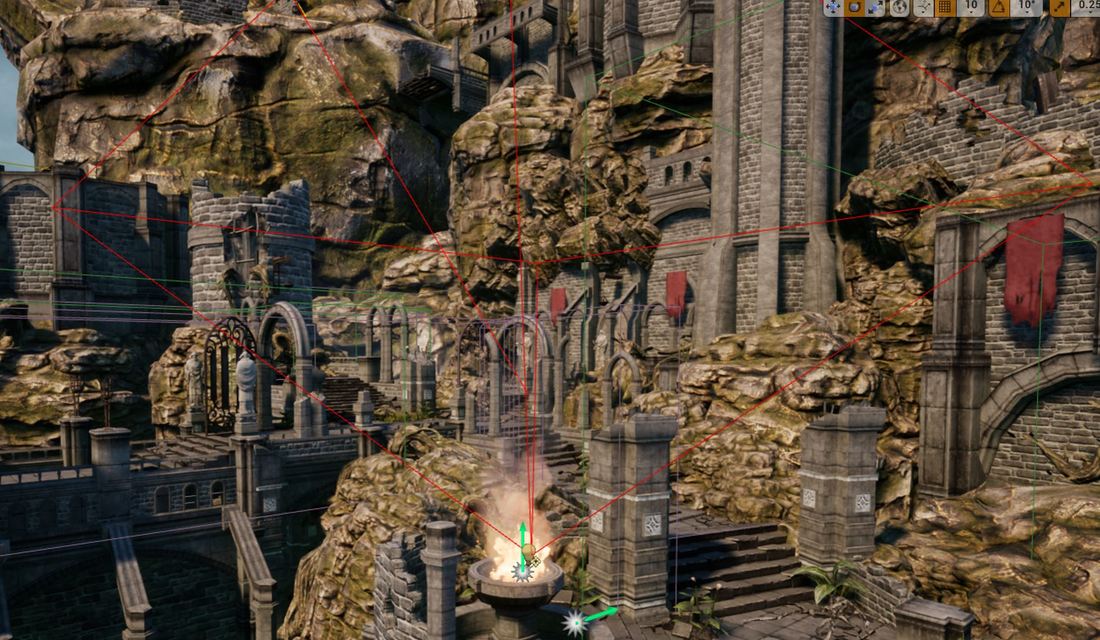
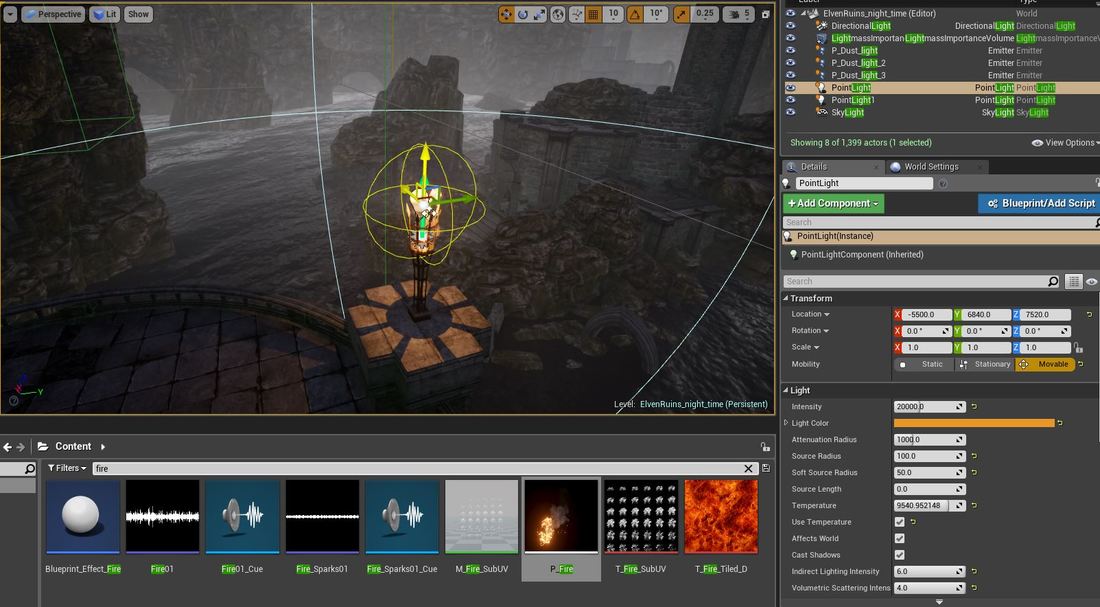
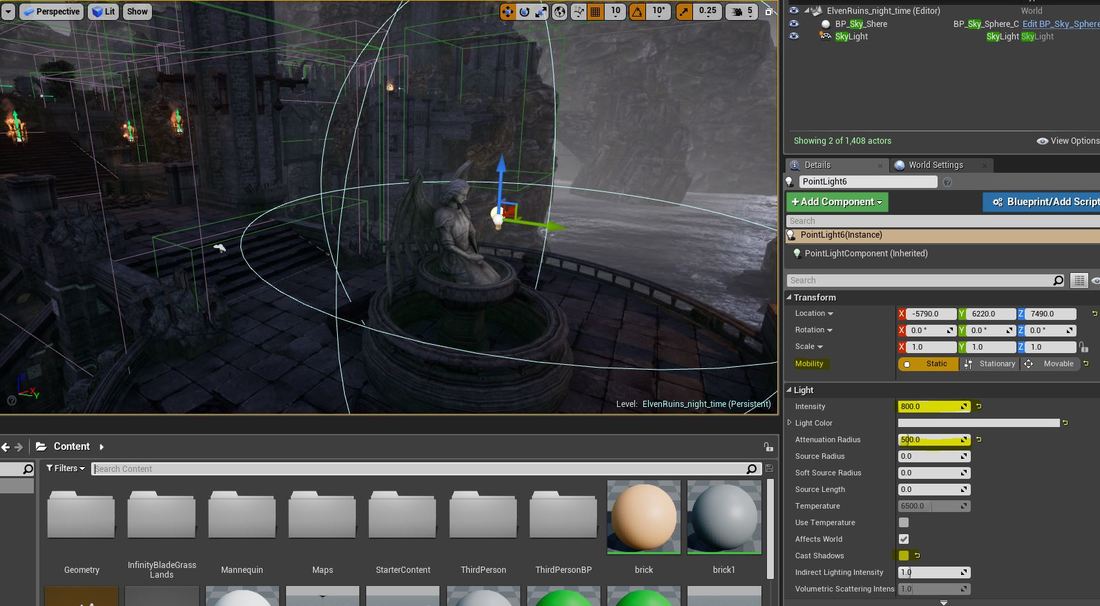
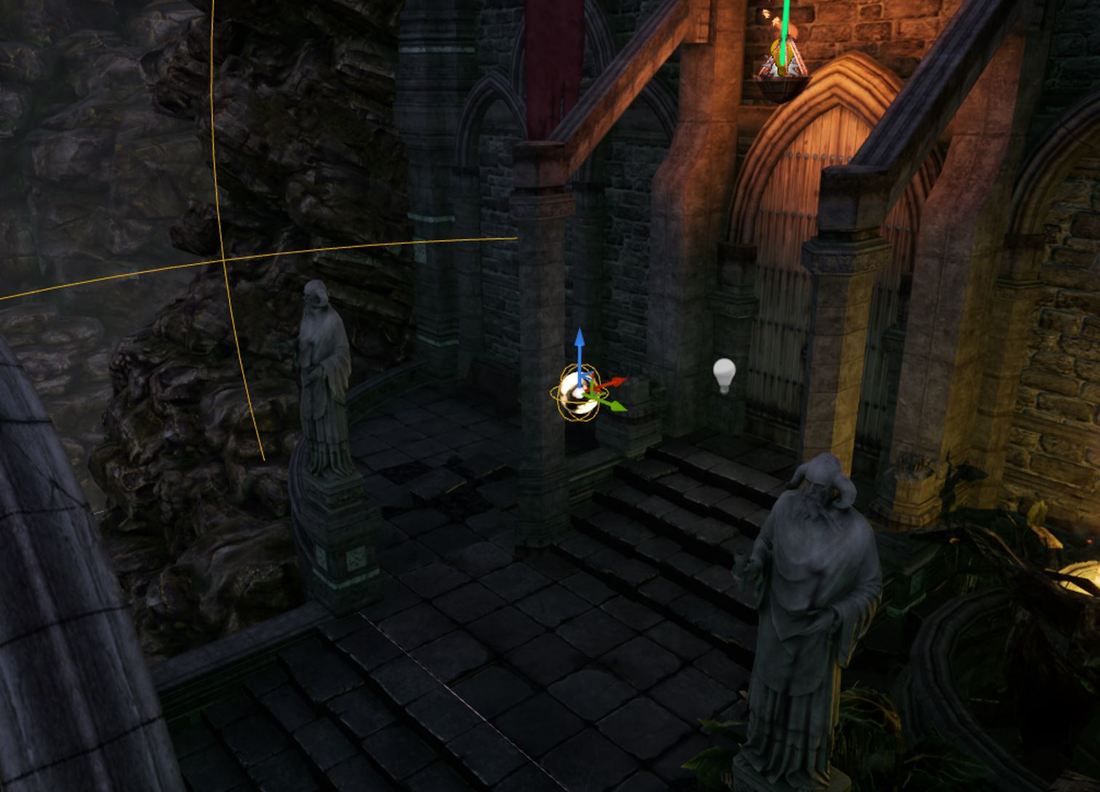
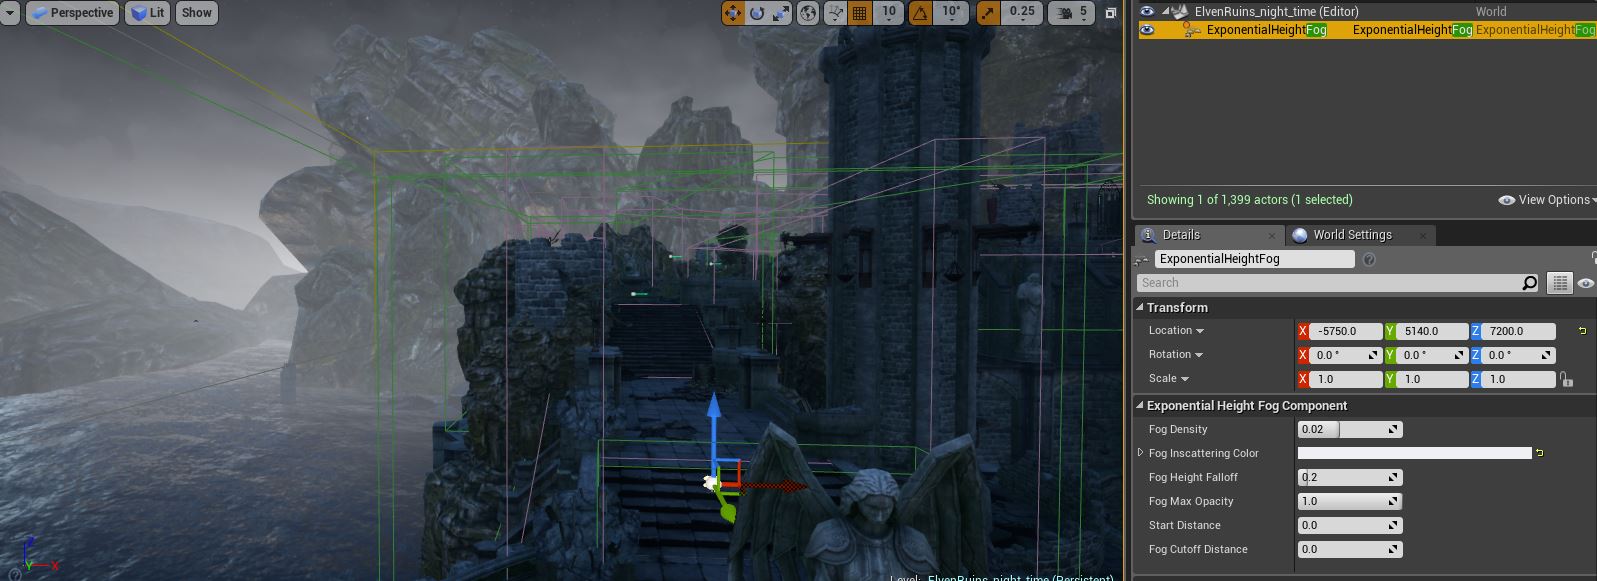
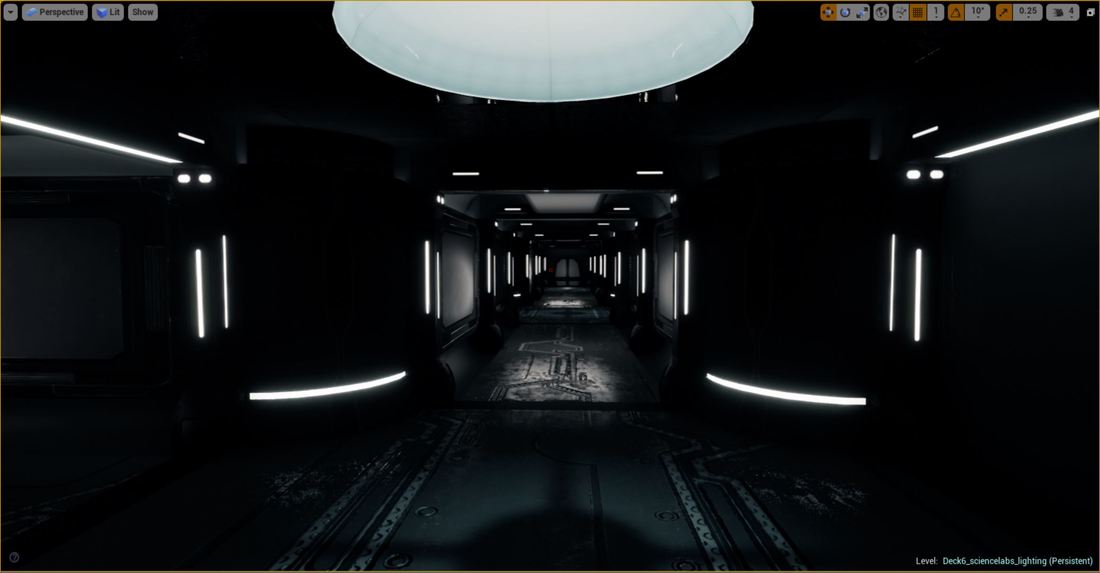
I wanted to look into lightmap resolution, lightmaps are a vital part for shadows, floors, walls and ceilings should have a higher lightmap resolution was it not the model that creates the shadows on the lightmap it is the lightmap that a shadow is been cast onto e.g. the floor, thus this needs to be a higher quality. I then placed the floor into the level and a pillar on top of the floor and angled the directional light to create a shadow. I started off at a resolution of 64, I then did resolution tests of 128 , 512 and 2048. Lightmass important volume I added an lightmass important volume around my house as I want the lighting to focus the lighting on this area and create better lighting, this mass computes indirect lighting during the build and can render this lighting data to produce dynamic objects. I then placed a visitation of the volumetric lighting, this shows little spheres as points which is an lighting sample this sphere shows the lighting direction and shadows, this is what creates the dynamics shadows. Below you can see my lighting data points the sphere are light where it shows the direction of light and on the other side of the sphere are dark showing the shadows, over the distance these sphere lightness fades which shows there is no more light source hitting this sphere and the data will know this is a shadowed area. Day scene For this task I decided use a pre-built scene and light the scene using the methods I used above and new methods to enhance the lighting. I started off by adding the unreal engine grass land pack to my project and deleting all the lights, post process and reflections. After deleting this I then added a sky light which added a basic light around the level, I set the intensity to what I felt was right for the computer, in my game I will add a gamma check so that the user can change the sky light intensity, this will make the lighting correct on the user computer. I then added a directional light and played around with the colours, temperature, direction and intensity till I found the effect I was going after. I then combined this to the skycube to update how the sky would look as this uses a reference for the sun. I then added a point light where a fire was this is to add more lighting to the particle effect, I changed the intensity, colour, attenuation radius to the light. I then wanted to add a low laying fog to my level as it is water based and fog would be seen, I started off by adding an exponential height fog. I then played around with the settings changing the colour, density, the height falls off; this is what makes the fog look low laying. The opacity for how dense the fog is and the start distance which starts the fog a certain for the player character. I then added reflection spheres to my level, this reflects the light from around the map, this is great when the level has materials with specular reflection (mirror light) or materials that have matel properties that reflect light. I placed the cube in front of metal gates that I have in the level so that I can get more light to bounce and reflect of this gate. I changed the size of the radius as I only wanted the reflections to be focused on this gate. Shadow Frustums These show the direction that the shadows are been cast to moveable objects, these shadow frustums show dynamic shadows it uses a colour box of red, orange and green, depending on distance of the attuention radius. I can get a visual representative of how the shadows look by going into the advanced options and enabling the shadow frustums. I then adjust my light to cast the dynamic shadows in the direction I want it to. Distance Field Ambient Occlusion As I am planning on having a moving sky light in my level, for a day and night cycle I needed to look into adding a distance field ambient occlusion. A skylight uses a signed distance filed volume precomputed around each mesh to generate an ambient occlusion. This supports dynamics scene changes which will affect the ambient occlusion in the scene. This takes the shadows of the meshes and makes a darker shadow over the mesh making it look more realistic and can be changed at real time. Task 1 – Night time scene Continuing on from the last task I wanted to turn this scene into a night time scene so that I can practice lighting up a scene at night. The night scene will pose some challenges during the creation, I have to think about lighting more and where it will come from as there is little light at night, how to highlight key areas without bleaching the map with light. I started off by changing the exceptional fog, I did this by changing the colour and fall off height and density, I did this to make a more black and white back drop and add white fog into the distance as the white fog will bounce the light better. After this I changed the directional light, I changed the intensity and lowered sun brightness as I wanted a night time sky. I also ticked the button to change clouds by colour this will refresh the sky to change it tonight time. To get night-time I had to rotate the directional light upwards as this shifts the days sky to night sky. To add light to my scene I decided to add fire pits and fire torches into the scene as it an old Greek style ruins. I placed these on top of the pillars, added a mesh and a fire to add the effect. I then created a light, I changed the light settings changing the intensity to between 20,000 and 40,000 added a temperature to the colour and added a source radius to blur out the intensity from where the light is being emitted. I then wanted to add highlight lights to the scene as I felt the map was dark in areas and not highlight key assets, instead of using the technique used before to light all the static meshes I decided to use point light to highlight these key areas. I used a point light and unticked the cast shadows this will just cast a light onto the model and does not cast the shadows. I then changed the intensity and attenuation radius, so it didn’t light up more than needed. After adding the highlight lights to the scene I then placed reflection sphere in the level to reflect light around the map and get light bouncing off the metal and cast deeper shadows on the assets. Below is a screenshot of a final render of the scene 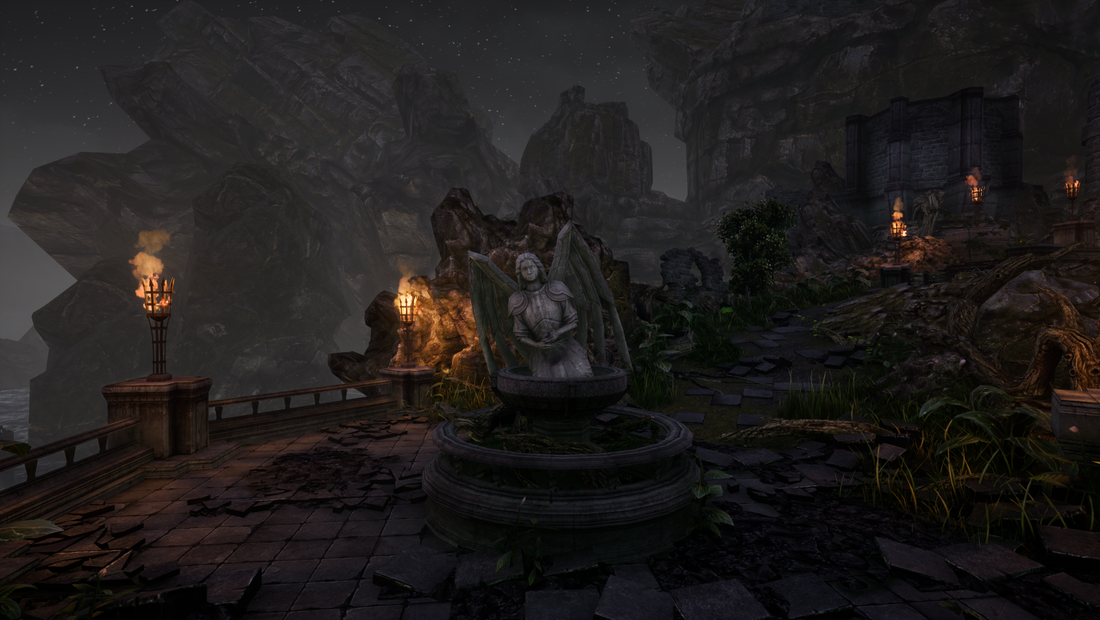 Indoor Scene For this part of the project I want to use what I learned in task one about lighting a scene and incorporate this into my own scene. I want to make an indoor scene which will be based on the space ship and the other scene will be based on the alien planet that I created in an earlier unit. I started off by opening my scene and adding a sky light, this will add a basic light to the scene and gently light up the scene. I did not add a directional light as the scene is inside and no windows are involved. I then wanted to change how the sky cube looked I started off by duplicating the material the sky uses and then I changed it so that the stars display a picture of space and then I edit the blueprints to the material to display this material instead of the default and then I change the material on the mesh of the sky sphere to the space one. After this I played around with the colours, turned off the sun brightness, adjusted the star brightness and clouds till I found a good medium for the space material. 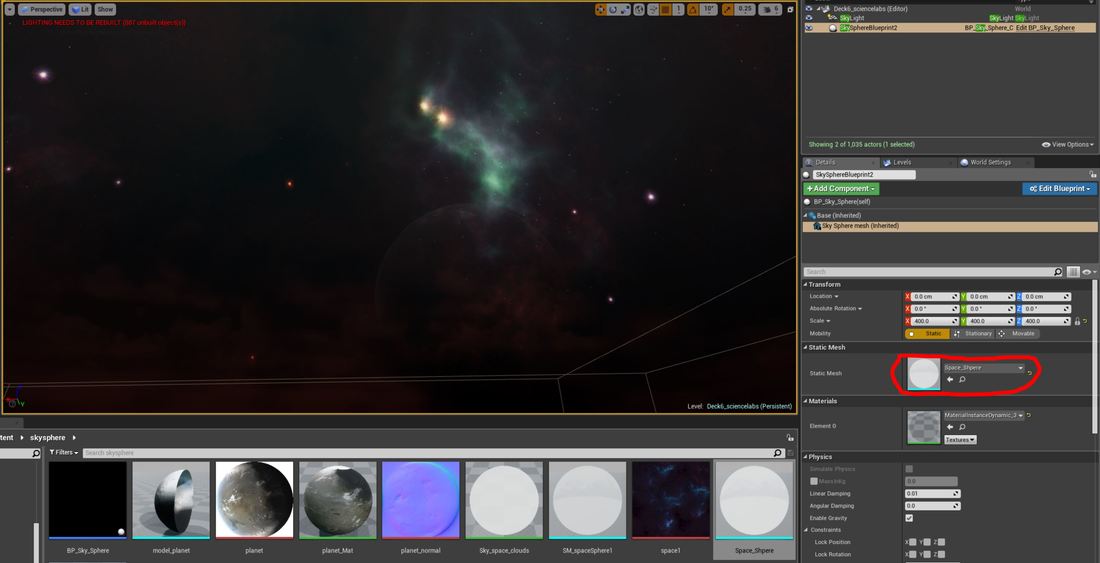 I then wanted to add a post processing volume to enhance the scene, I already had basic lighting going though the scene when I added the post processing volume, I can then remove this lighting and adjust the lighting to fix in with the new post processing volume. I started off by adding a colour grading effect to my scene the aim was to add a blue sci-fi effect to give the impression its intelligent I started off by changing the saturation to a light blue then I changed the contrast, gramma and gain by increase or decreasing the intensity of their main values. I then wanted to add effects to the light sources when the player camera hits it has a blue or glare to them, I added a slight vignette to the post processing and then I added a standard bloom with a low fresh hold and then I added an auto exposure, then I changed the depth of field to add a blur when the player is far away it blurs the what is front of the players camera at a far distance. Then I added an ambient cube map to increase the reflections of the materials and the light that bounces of these and increased the ambient occlusion to create great shadows from materials that have these textures. I then increased the global illumination so there was a basic light and could refine more with point and spot lights.
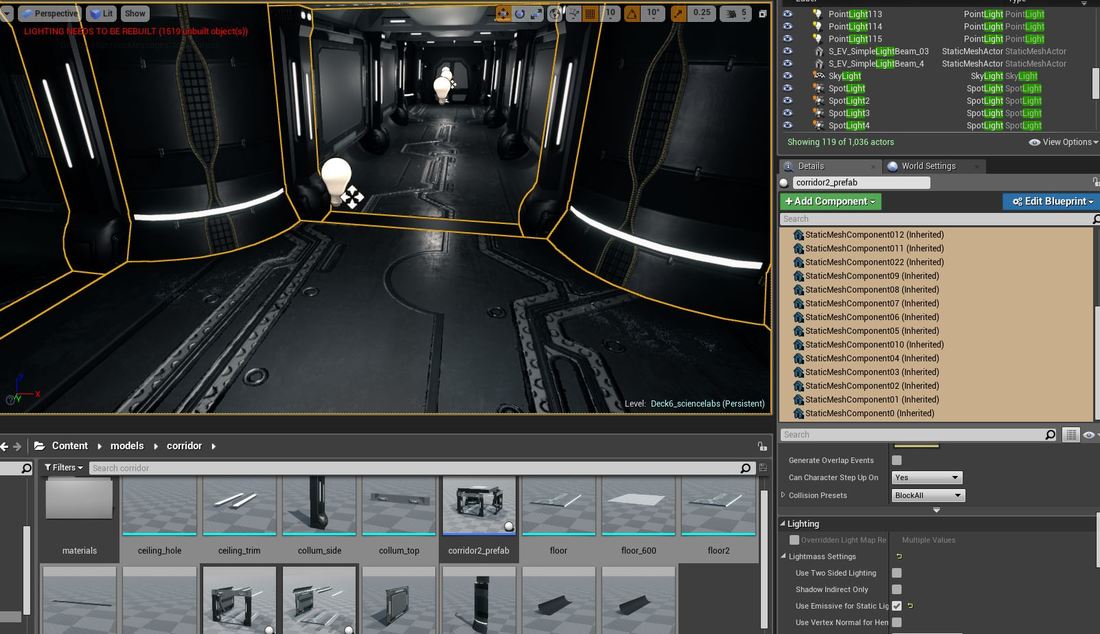
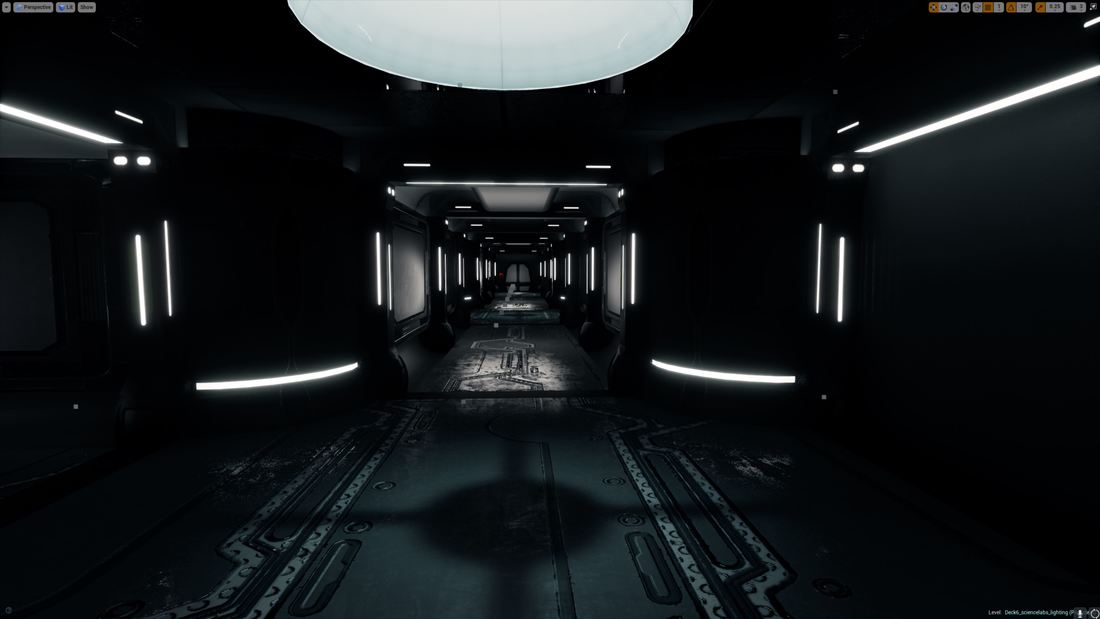
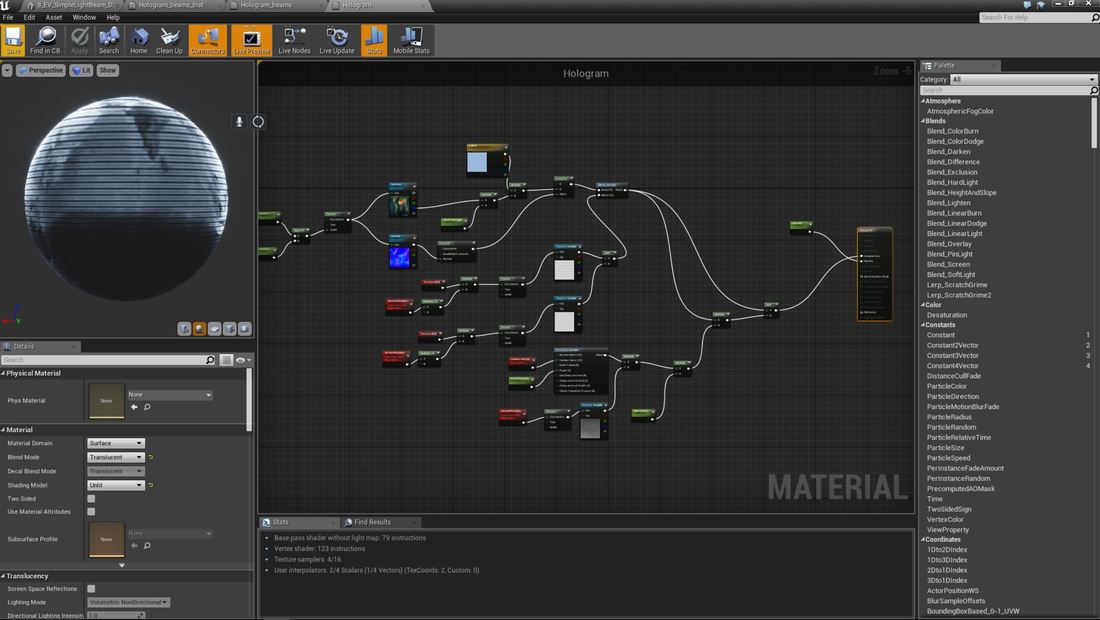
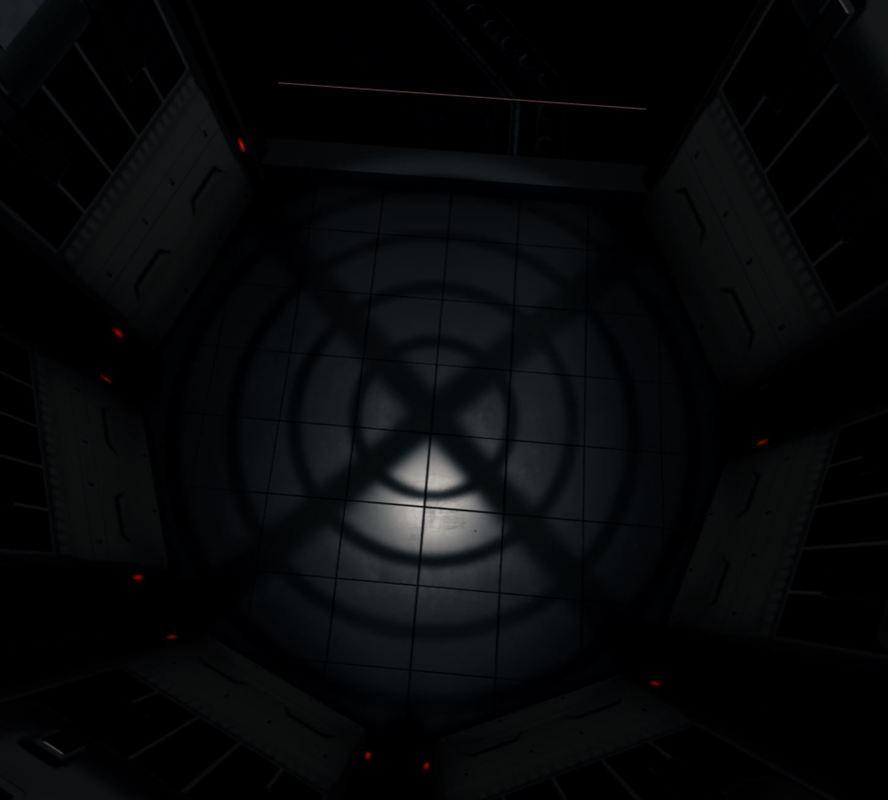
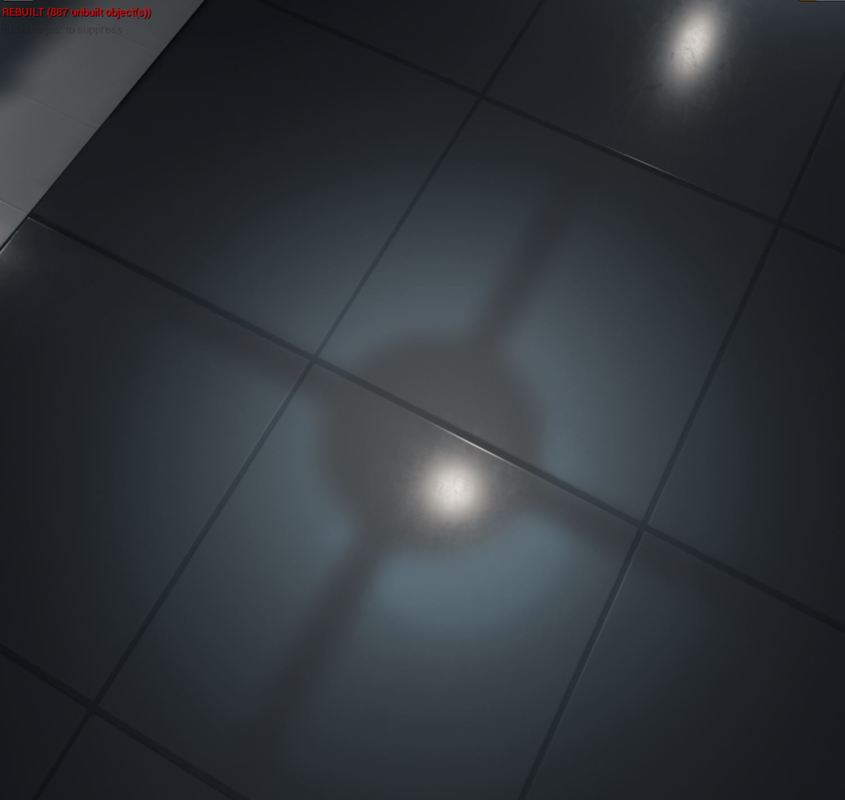
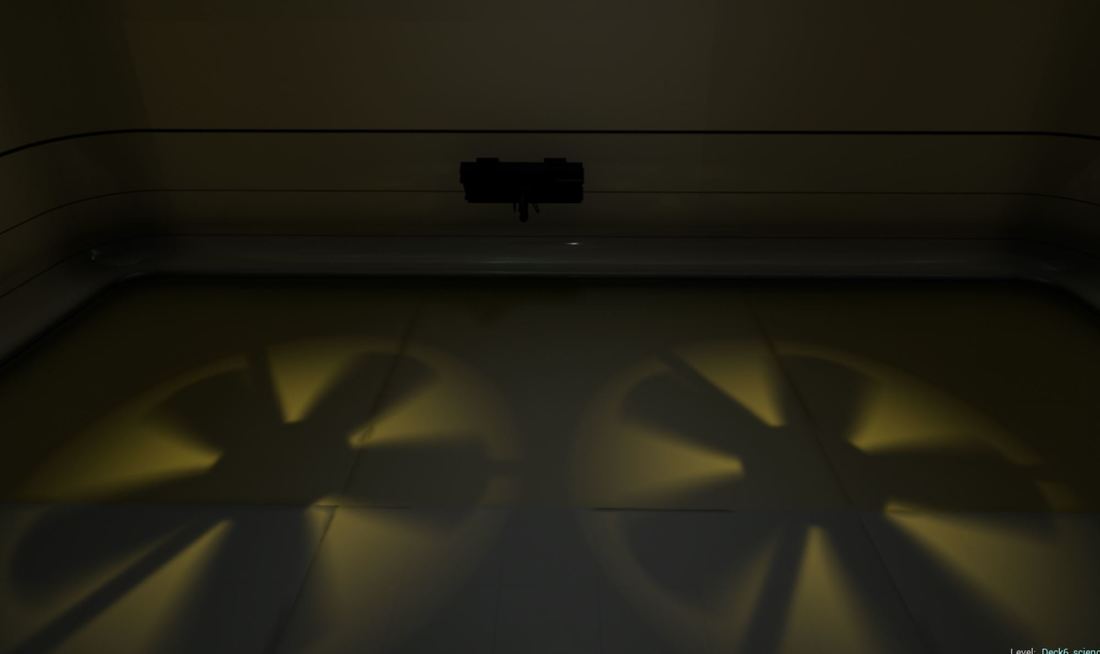
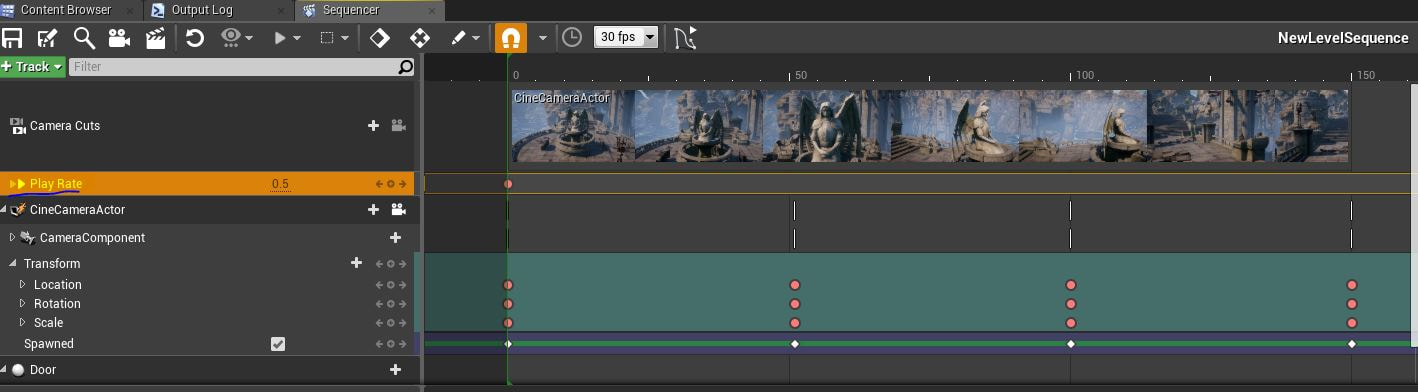
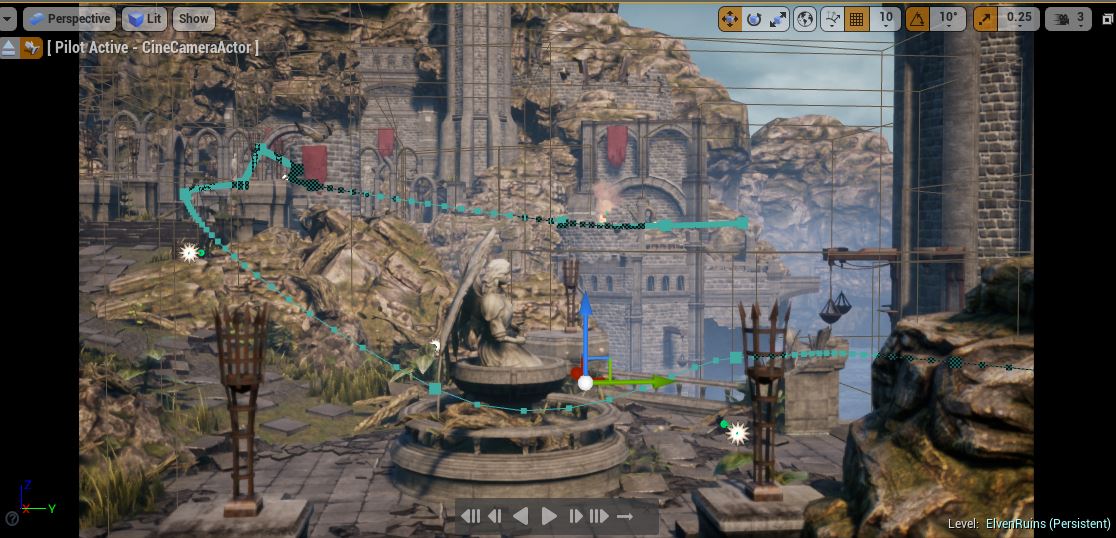
Emissive lighting For my indoor scene I want the emissive light to be the main source of light as it a sci-fi scene I felt this would be more beneficial to the scene. I started off by selecting all my assets and setting to use emissive light for static light this will help the lighting render the emissive light and cause it to create fake light. I started off by creating a basic emissive material which involved a 3-vector node multiplied with a 1 vector node that controls how bright the lighting is. I then applied this material to the assets and I build the lighting. Below are three images of different emissive light settings all increasing in strength. The last one is high and lights up the whole world. I decided to go for the medium one and light up the scene using spot and point lights. After this I wanted to create a more advanced emissive light, I wanted to create a hologram and give the impression it is been projected. I started of by using the engine light beam mesh that uses a gradient to fake god rays and light beams, I placed these onto a spot light and then I created a material that looks like single light beams I did this by using noise textures with the engine and make this flicker to give the impression that there is dust in the air I then created the hologram material which also uses emissive light, it takes an image of each and covers it with a colour that I rotate then I use simple white textures with noise to create a lines going up the hologram which flicker these combined with noise textures from the engine. After getting the emissive lighting how I wanted it for my scene I wanted to add spot lights to add more light from the ceiling lights, I changed the light colour, inner and outer cone, attention radius and added a source radius for the spot light. To add more depth to the light as I felt it just looked like a spot light I used a light material function which takes a greyscale image and cast light shadows on the floor. I decided to use light material function over IES profiles as I felt I can do more with the light material functions but the IES profiles do give the impression of what real bulbs cast but don’t show shadows like over a grate. Below are the final 3 images 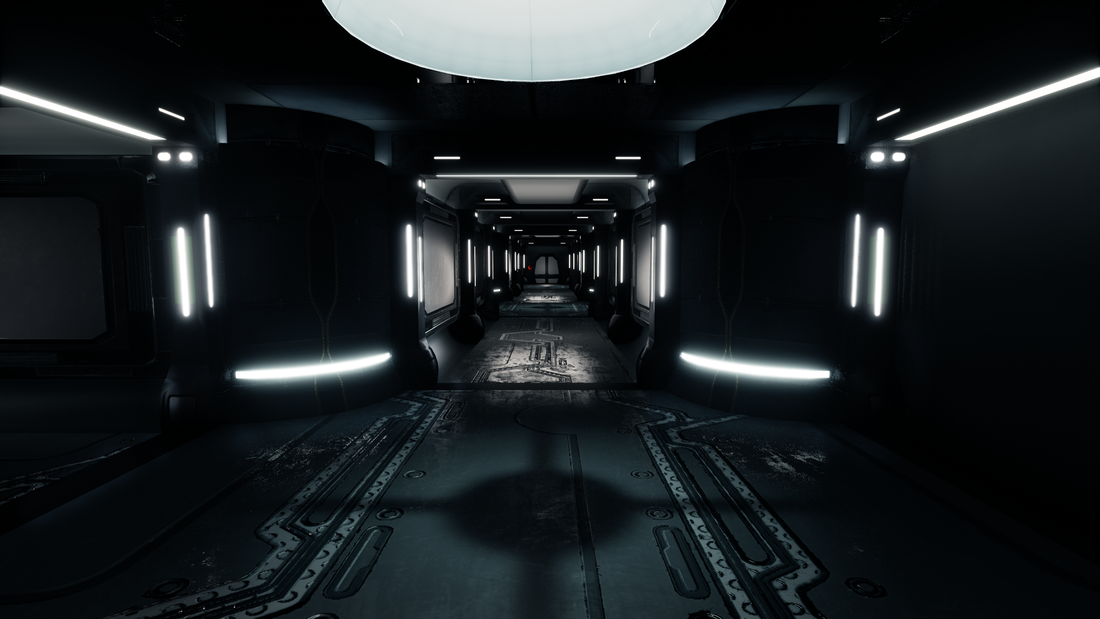  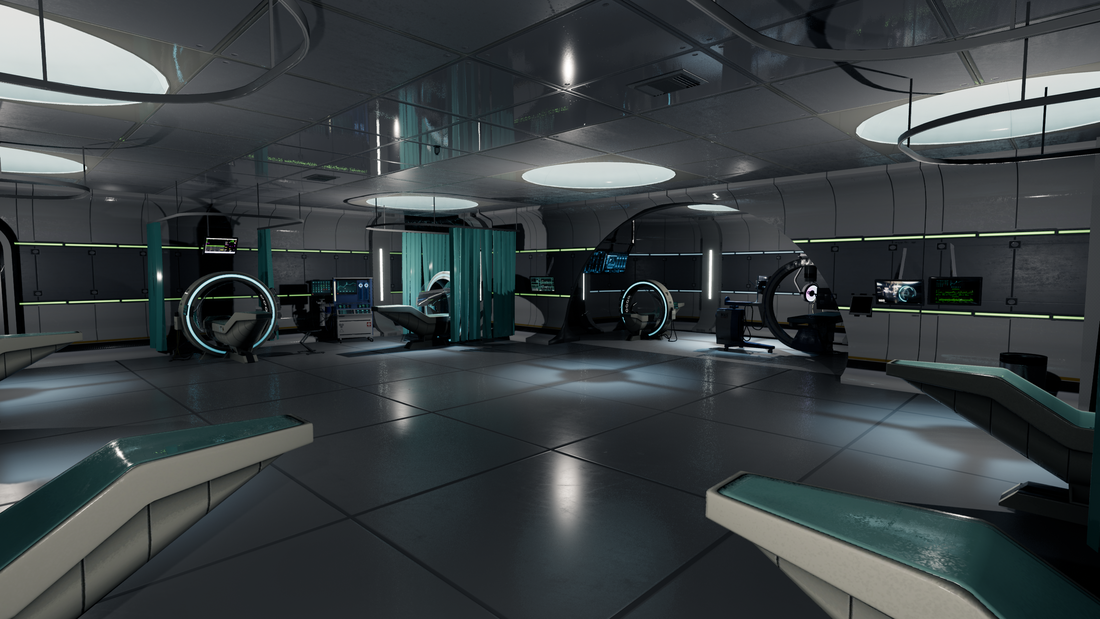 CGI Rendering I wanted to learn how to use live rendering and then export a movie clip of what happening in the scene I started off by adding a level sequencer into my scene, this gives me control of a camera and I can control everything that happens in my scene frame by frame in this like I would in animation. I started off by using the camera component and I piloted this camera and flew around the level and every major turning point I would set a frame and the camera would compile its route. I started off by using the camera component and I piloted this camera and flew around the level and every major turning point I would set a frame and the camera would compile its route. In the sequencer I made sure I showed moving objects, I let the camera focus on the a flag blowing in the window and a door opening this shows the dynamic shadows moving in the scene. After playing the video though I felt that it was extremely fast so I added a play rate to the sequencer and set the play rate, I set keys thought out the render and halved the speed it played at. Below is the video of the render I made in unreal engine. EvaluationI am going to critically evaluate my lighting that I created for my project, I am going to break this evaluation down into two subjects what well and what didn’t go so well for each task during the development of this unit.
I enjoyed doing the lighting for this project a lot, I found it very interesting and I found lighting a scene correctly was very satisfying as lighting such scene can be very complex. I have learned a lot about this crucial stage in game development as this adds more depth to a game. Overall, I found the lighting went extremely well, and I have learned a lot about lighting and how to use it correctly. I had an easy time schedule for each of the areas in this part of the project as it wasn’t as big as other areas of the project. pre-production This was a straight forward task, it involved pre-production which I used to get my ideas down in a form of a mind map and I then looked into visual references of what I was looking for in my game and from this I created a mood board. I then researched into lighting and then I created a scene to test the lighting research out. I found that the mind maps and mood boards were straight forward and just part of the pre-production and I am happy with the final outcome, creating the level to test the research was also went well with me as this helped me understand what was happing when I changed settings from reading the research. I felt that the research didn’t go that well for me in this task, I found that it was quite hard to understand, and a lot of technical information was given, using the project helped me overcome this and I found it easier to learn this way. research and project scene This was using what I have learned from task 1 and placing it into my scenes that I have built for based of my game design document and other projects along the way. I used my mood board to create lighting similar to this. I found lighting my own scenes challenging at times, but the rewards were great and deserve the work put into them. I found lighting night scenes and the indoor scene a lot easier as there is only one major source point of light / the light only can come from visible lights and this helped me a lot and I think this went extremely well. I felt that the day scene on my alien planet did not go to well and I tried to see if would work better at night time and I still did not like the lighting on this world I feel the map was to big and detail lights were getting drowned out and the problem with background meshes getting bleached by the light did not help matters either. I did not submit these screenshots for peer review as I felt this did not show my best work. CGI Render For this I created a video render of one of my scenes and then gather feed back on selected screenshots about how might lighting is in the scene. This task went okay, it was only a small task and I learned a lot about how to use the sequencer in unreal engine which can be a useful tool for me to use in the future and I getting feedback of peers other than a small selective group at the collage was also benficial. I felt the peer review I got back from the public forums was great, I didn’t get much feedback, and this didn’t help me understand how to get my lighting better, although in hindsight this could be seen as a positive as people couldn’t find much to fault with my peer review screenshots. Common lighting errors Also, to my evaluation I will talk about the common lighting errors that I had during my process of creating lighting in my scenes Black lines between meshes – I noticed on some of my indoor scene meshes had black lines between them after building lighting I look into what this was, and I found that this was a common issue with the lightmap resolution in game or a poor layout of the light map uv itself. For this it was just I needed to increase the resolution of the map and this fixed the problem. Red x over light – I saw this a few times in my scenes and this was down to having to many lights over lapping in a small space and telling the user that it will not use this light as it will cripple the performance of the game as it trying to render to much light in this area as it has 5 or more lights overlapping. Light bleeding though meshes – I had this error when I was building lighting inside and I had light coming though my planes, as it’s a plane it only has one visible face and the other side is black, unreal engine will cull the backside as it not need thus saving on performance, so if the lighting is come from this side it will shine though the mesh, to fix this error I needed to select the model and check use two-sided lighting or create a two sided material. Conclusion Overall, I really enjoyed lighting, I feel this is some I would enjoy going into in the industry. Although getting the lighting to nearly realistic as possible was extremely difficult I found it very rewarding and fun to achieve this and I really enjoyed creating night time and indoor scenes. I feel like I have learned a lot about this pipeline to lighting and although I found the technical side hard to understand I figured out using practical solutions and understood it better. The only disappointment that I had for this unit was the feedback from the public forums on my lighting screenshots I felt I could have done with more criticism to understand how to improve but overall, I fell this unit went really well and would enjoy doing this in a job as well as learning more about the sequencer. I felt that the time schedule for this part of the project worked really well I had plenty of time for each section of the project and was able to finish on time or before the deadline date.
0 Comments
Leave a Reply. |
Archives
June 2018
Categories |


 RSS Feed
