|
Once I finished my project, I wanted to make a small demo video it shows all the areas that are covered in my project. The only thing I did not get to put into my demo was the character implementation as my project demo was made on 4.16 and the character blueprints was made on 4.19 Below is a video of my game play though Below is a presentation that looks over the whole project that goes into depth about each section created for the project. Evaluation
Overall I’m proud of what I have created for the project, I felt like I kept to my game design document and that I didn’t go too far away from what I planned in this document. The only thing I feel that didn’t stay to the game design document was that character attacking and defending using melee weapons and in the game design document I mentioned ranged weapons. Nerveless I am extremely pleased with the project, I feel visually it has matched my concept art and feels like a sci-fi game. The project schedule felt help me create the project and keep the development tasks to a deadline, 80% of the time I kept to the deadlines that I set for the development task and only missed a few but these were justified and usually down to error and lack of research. I felt that the level design, 3D environments, lighting and interfaces went extremely well, these are the areas I enjoyed. I mainly enjoyed the blueprinting side of the area as well as world building once I had all the models built and enjoyed making the levels. I felt that the animations and character implementation didn’t go so well, the animations I didn’t enjoy that much and felt all the character animations were too rigged and didn’t look fluid enough, the only thing l liked about the animations was the animated assets I found these worked with my project and made it pop. I enjoyed the character implantation on the blueprint side but I feel what I didn’t match the game design project. I did learn a lot about blueprints in this part of the project. I think if I was going to choose a job based of this project that I would apply for in the industry it would be either level design, world building and game design. To conclude I am extremely pleased with what I have accomplished with this project, I have learned so much about making games and what it involves and all the areas and the works each area has. It has made me understand what I want to do in the game industry from this project.
0 Comments
In this blog post I will look at other projects that I have done during this academic year and show how I plan to advertise myself with a portfolio and looking for companies and jobs in the surrounding areas. Game Jams Since the beginning of the year I wanted to try a game jam, I wanted to try that task of producing a small game within a short duration for a few reasons; working in a team; to see how far I could push myself; to be outside my comfort zone; to learn and work under pressure as well as having time constraints. These are a few reasons that I felt that could benefit me as a person as I feel these are topics that I would encounter once I get a job in the industry. The industry is a fast pace, constantly changing and always need to learn and adapt. The first game jam I entered was Unreal Engines Winter game Jam. I teamed up with a fellow student Lee Stockton as well as support for one of the tutors Pete Gibson-Black. The theme was “on thin ice”. Me and Lee brained stormed and decided to do some that neither of have done before and base if on a class arcade shooter style. We went for a top down shooter, we decided to create three small levels with a small story of a guy getting stuck in a snow storm to find that he was trapped with possessed snowman by an ice king. We had basic mechanics inside where the player could shoot at the enemies. We also had picks up for health, armour and ammo and had traps like ice that made the player loose movement controls. We broke down the tasks and we took control of areas of the project. Lee did all the mechanics for the top down getting it all set up, he also did the models and animations. I felt he did an amazing job of modelling the snowmen and animating them, even thou Lee doesn’t enjoy animation that much he did a great job on it. We had Pete create the background artwork for the UI, he did an amazing job for this and this help us out massively and fits really well with the game. I did the level designs, some of the smaller game mechanics like pickup, the post processing and the texturing as at the time Lee did not have substance painter while I had access to an indie licence for this. Conclusion This was a massive learning curve for myself having 3 days to produce the game was a mammoth task, we planned on a simple game but got carried away with the levels designs and started to produce to much work in a small time. We decided as a team to cut a lot out as we would of ran out of time and keep it simple to the idea that we original had. This was the idea of doing game jams we all about learning and knowing when to stop making something or asking the question is it needed? Also not having a form of source control had made transfer files harder sending the project back and too for both of us to work on it. Overall, I enjoyed the game jam, I learned a lot, I enjoyed working as a team with lee as we both came up with great ideas and felt the end was fun to play with. It had a few issues but that was expected within the time limit we had. We didn’t win anything for this game jam but that didn’t mean much to me as it was something I enjoyed doing and found it extremely fun. Below is a video of the game we made for the winter jam. For the second game jam we entered into Unreal Engine spring jam, this jam had a longer time frame than the winter jam which gave us a little bit more breathing space. The theme for this game jam was Transition. I teamed up with Lee again and another lad from out course Jamie Dubuisson. For this game jam I decided to take the role as project lead as I came up with an idea for the theme. For the transition theme we first came up with the idea to have 3 different eras that start of in the 1950 that transition over 1970 and 1990 then when we started to write the list of stuff we needed what we came up with would have taken a lot longer over the time period with three people. we then decided that if we stay to the 1950’s theme and have a transition between two characters that need to complete a number of puzzles to meet up and complete the level while telling a story like the player is taking controls of actors in a film. This gave us the idea of having a TV set as the screen and having the environment as a movie set. I set the tasks for the members, I looked at the time constraints, availability and the members strengths. For Jamie I asked him to take control of designing the robot that would be one of the playable characters and designing a couple of the models within the levels as well. The effort and time that Jamie put into his models where outstanding, I only sent him a few image references of what I was looking for and he went above and beyond trying to make the models. For Lee I asked him to take control of doing the large-scale models for the levels, create the non-playable charters and other smaller jobs in the project. The model’s lee created for me where high standard and did a marvellous job on everything he created the project. Giving lee access to the project via source control was also a huge beneficial as lee didn’t have to keep sending me the files and he could upload the models and set them up for the scene. My role in the project other than project lead was the game design and level design. I set up the basic mechanics for the game that the player would interact keeping it simple. The level design as well was simple, it was over two levels the first level was the menu which was just a camera that pans to different points in the level to give the impression of movie credits. The second level was the full demo level and all the blueprinting was mainly done in the level blueprints to make it quick using event dispatchers and trigger boxes. Conclusion I found this game jam more enjoyable that the first, it was a nice theme to work with and we had more time so it felt like there was more room to breathe and we didn’t swap our self serves with to much workload. The use of having source control also helped speed up the design process as we weren’t letting one person do all the work, so this saved time as they could import the work into project and set it up to be used. But the lack of spell checking I feel hampered the overall effect of the game but this is something we have learned for the next game jam. The work done by the team was outstanding and knowing that all three of us was working during the game jam as well made this jam feel like more of achievement and I am extremely proud of what we have accomplished for this game jam. As this was a recent game jam we still don’t know how well we did in the game jam but regardless of the results I am still proud of the team and the work we put in. Below is a video of the game for the spring jam. Self-advertising In this section I will look at how I could advertise myself to find a career in the game industry and look at where I can send my work to local games companies. In the games industry a CV can only get you so far without been asked to show previous work and a form of a portfolio. There are many websites like art station where you can upload your own images but due to the high demand on these websites a less popular artist might have the images drowned out. I first decided to create my own portfolio website that would show visual references of my best artwork for the areas I am currently interested in trying to find a position. I enjoy world building areas so something like Level and game design would suit me best. These are the areas I mainly targeted on my portfolio and getting a selection from the projects that I created and showing my work in slideshow galleries. I also showed model as I kept my option open for environment artist encase I was offered a job in that area, this showed unique models that I have created over the two years and as well as modular building. Below is a link to my portfolio https://alanhortonportfolio.weebly.com/ I then looked into social media, this can be used a powerful tool to advertise yourself and your work I looked into two popular platforms: Instagram and LinkedIn. Instagram will be used for a running live portfolio of my work posting pictures and videos of my work when it reaches a suitable standard and targeting certain areas using hashtags to advertise my posts in that area. LinkedIn would be used more a professional route, where this would be a live CV that would advertise my skills and send my profile to companies that have jobs advertised.
I set up my LinkedIn talking about my skill sets, employment history, projects and interests and set it up so that recruiters can look at my profile. https://www.linkedin.com/in/alan-horton-5120a7141/ I also found a few websites that I can upload a portfolio and browse jobs https://jobs.gamesindustry.biz/ https://jobs.mcvuk.com/ https://datascope.co.uk/ https://aswift.com/video-games-jobs/ Below am I going to keep track of the key developments that I plan to do for each unit and miscellaneous tasks that I need to do to complete my game demo before June 2018. I will set deadlines for each core development to be completed and highlight these if I was able to complete on time. Have in a schedule will have me work to deadlines and keep myself on top of my work flow to create a better end result for my game demo. Unit 76 Development schedual
Unit 79 Development schedual Notes* the items in blue underline are one day tasks
Unit 74 - Animation
Unit 70 - Environments
Unit 52 - character implementation
Unit 72 - Lighting and rendering
Miscellaneous Tasks
Task Timeline Pre-production Start date: 1/4/18 End date:7/4/18 For the pre-production I have given myself a week to create the pre-production for the lighting, this involves looking at lighting research techniques, creating mind maps and mood boards of the lighting style that I want for my game. Practice scene Start date: 7/4/18 End date: 20/4/18 For this section I want to put the research I have learned from the pre-production to practice and see how It works and how it could work in my game. I have given myself just over a week to compete this section. Lighting scenes in my game Start date: 21/4/18 End date: 5/5/18 For this task I have given myself two weeks to light various scenes in my game, I want to look to lighting an indoor scene and two types of out door scenes; night and daytime. This is where I will put all the research and pre-production to work. Live render Start date: 6/5/18 End date: 7/5/18 For this task I have given myself a day to create a live render (video) of one of my scenes I aim for the video to be 30 seconds long and shouldn’t take any longer that a day to produce this. Pre-production I started off this part of the project but researching into how lighting works in Unreal Engine and how it effects the performance, I looked at different types of static and dynamic lighting and rendering. After doing my research I look into what lighting and rendering effects that I could use inside of my game environment, from this I will then create a mood board.  Below is my final mood board  Practice scenes In this task I will practice and test out the lighting and rendering techniques I found during my research, I will create a basic project in unreal engine so that I can practice the lighting and from this I will understand how to use lighting in my own project. I started of by learning how to make the whole environment black, where nothing cast any light, I started of by turning the intensity to 0 on the skylight and directional light and then I went to the sky cube and turned all the sky colours to black and unticked determine sky by colours. After changing these settings, the scene looked like this: 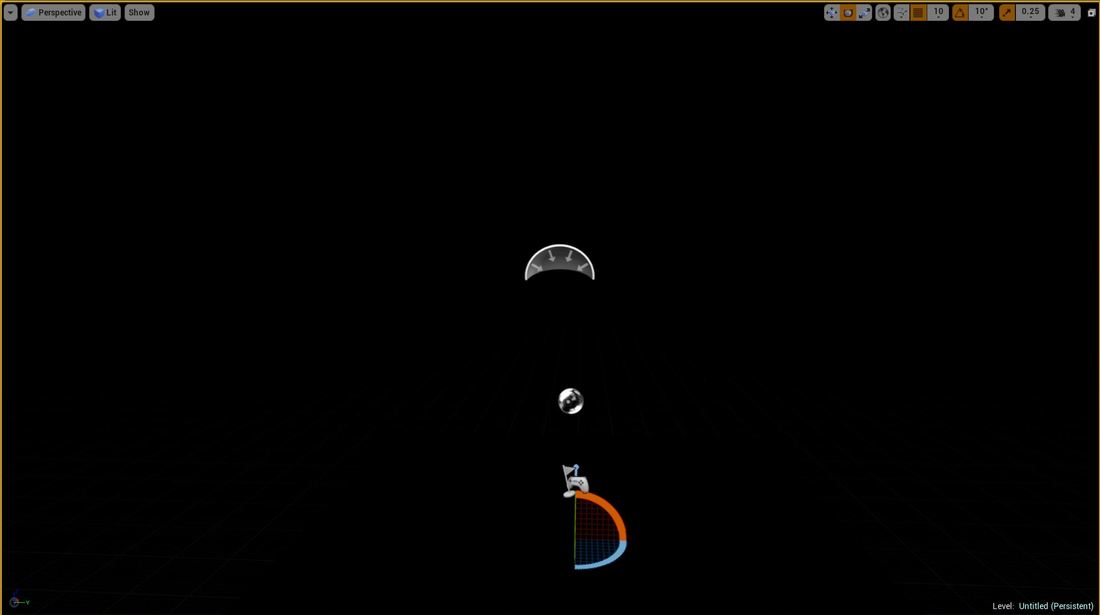 I started off by adding a sky light, this light all the area up, it added a basic light to the environment not casting must shadows and was still dark. I then added a directional light with acts as the sun and casts shadows from the direction it is point from. I added it with the skylight and had it facing the door of the house so that the light would cast a shadow behind the house. wanted to try adding the last two types of lights a point light which as a light bulb and casts light in a uniform way and a spot light that cast light in a cone and emits light from the top of the cone. For my scene I added these lights, inside the house I had two spot lights point to the ceiling like a wall light and then added a hanging light model with a point light, I then added a particle effect of a fire outside with a point light, the fire uses live rendering and cast dynamic light, I added the point light to add more light from this fire. For these lights I looked into changing the attenuation radius, intensity, source length, inner and outer cone and colour After adding the lights to the level I wanted to play around with the mobility settings, I decided to change the spot lights that are on the wall to static as these wont be producing dynamic shadows, the fire outside light will use stationary mobility and the hanging light will use moveable so the player can move this light and cast dynamic shadows. I then wanted to test creating auto exposure going into a the room that is dark and giving the effect that human eyes would have when going from bright to dark and vice-versa. I did this by adding a post process volume into the house and went down to the lens tab and selected auto exposure and adjusted the settings to make it look like it slow adjusting to the new light brightness.
I wanted to look into lightmap resolution, lightmaps are a vital part for shadows, floors, walls and ceilings should have a higher lightmap resolution was it not the model that creates the shadows on the lightmap it is the lightmap that a shadow is been cast onto e.g. the floor, thus this needs to be a higher quality. I then placed the floor into the level and a pillar on top of the floor and angled the directional light to create a shadow. I started off at a resolution of 64, I then did resolution tests of 128 , 512 and 2048. Lightmass important volume I added an lightmass important volume around my house as I want the lighting to focus the lighting on this area and create better lighting, this mass computes indirect lighting during the build and can render this lighting data to produce dynamic objects. I then placed a visitation of the volumetric lighting, this shows little spheres as points which is an lighting sample this sphere shows the lighting direction and shadows, this is what creates the dynamics shadows. Below you can see my lighting data points the sphere are light where it shows the direction of light and on the other side of the sphere are dark showing the shadows, over the distance these sphere lightness fades which shows there is no more light source hitting this sphere and the data will know this is a shadowed area. Day scene For this task I decided use a pre-built scene and light the scene using the methods I used above and new methods to enhance the lighting. I started off by adding the unreal engine grass land pack to my project and deleting all the lights, post process and reflections. After deleting this I then added a sky light which added a basic light around the level, I set the intensity to what I felt was right for the computer, in my game I will add a gamma check so that the user can change the sky light intensity, this will make the lighting correct on the user computer. I then added a directional light and played around with the colours, temperature, direction and intensity till I found the effect I was going after. I then combined this to the skycube to update how the sky would look as this uses a reference for the sun. I then added a point light where a fire was this is to add more lighting to the particle effect, I changed the intensity, colour, attenuation radius to the light. I then wanted to add a low laying fog to my level as it is water based and fog would be seen, I started off by adding an exponential height fog. I then played around with the settings changing the colour, density, the height falls off; this is what makes the fog look low laying. The opacity for how dense the fog is and the start distance which starts the fog a certain for the player character. I then added reflection spheres to my level, this reflects the light from around the map, this is great when the level has materials with specular reflection (mirror light) or materials that have matel properties that reflect light. I placed the cube in front of metal gates that I have in the level so that I can get more light to bounce and reflect of this gate. I changed the size of the radius as I only wanted the reflections to be focused on this gate. Shadow Frustums These show the direction that the shadows are been cast to moveable objects, these shadow frustums show dynamic shadows it uses a colour box of red, orange and green, depending on distance of the attuention radius. I can get a visual representative of how the shadows look by going into the advanced options and enabling the shadow frustums. I then adjust my light to cast the dynamic shadows in the direction I want it to. Distance Field Ambient Occlusion As I am planning on having a moving sky light in my level, for a day and night cycle I needed to look into adding a distance field ambient occlusion. A skylight uses a signed distance filed volume precomputed around each mesh to generate an ambient occlusion. This supports dynamics scene changes which will affect the ambient occlusion in the scene. This takes the shadows of the meshes and makes a darker shadow over the mesh making it look more realistic and can be changed at real time. Task 1 – Night time scene Continuing on from the last task I wanted to turn this scene into a night time scene so that I can practice lighting up a scene at night. The night scene will pose some challenges during the creation, I have to think about lighting more and where it will come from as there is little light at night, how to highlight key areas without bleaching the map with light. I started off by changing the exceptional fog, I did this by changing the colour and fall off height and density, I did this to make a more black and white back drop and add white fog into the distance as the white fog will bounce the light better. After this I changed the directional light, I changed the intensity and lowered sun brightness as I wanted a night time sky. I also ticked the button to change clouds by colour this will refresh the sky to change it tonight time. To get night-time I had to rotate the directional light upwards as this shifts the days sky to night sky. To add light to my scene I decided to add fire pits and fire torches into the scene as it an old Greek style ruins. I placed these on top of the pillars, added a mesh and a fire to add the effect. I then created a light, I changed the light settings changing the intensity to between 20,000 and 40,000 added a temperature to the colour and added a source radius to blur out the intensity from where the light is being emitted. I then wanted to add highlight lights to the scene as I felt the map was dark in areas and not highlight key assets, instead of using the technique used before to light all the static meshes I decided to use point light to highlight these key areas. I used a point light and unticked the cast shadows this will just cast a light onto the model and does not cast the shadows. I then changed the intensity and attenuation radius, so it didn’t light up more than needed. After adding the highlight lights to the scene I then placed reflection sphere in the level to reflect light around the map and get light bouncing off the metal and cast deeper shadows on the assets. Below is a screenshot of a final render of the scene 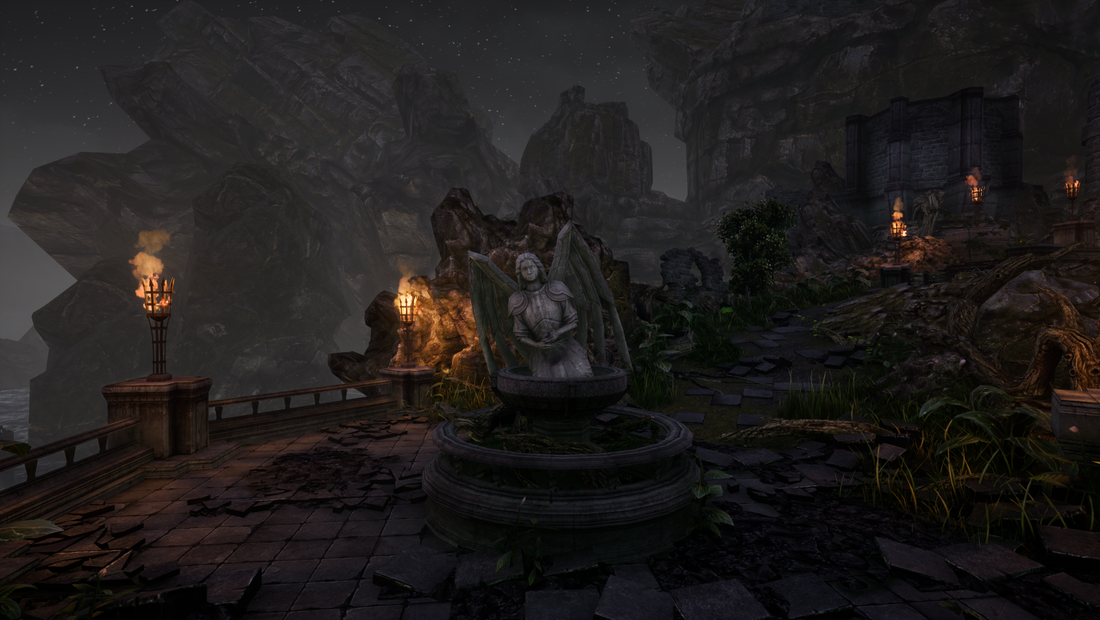 Indoor Scene For this part of the project I want to use what I learned in task one about lighting a scene and incorporate this into my own scene. I want to make an indoor scene which will be based on the space ship and the other scene will be based on the alien planet that I created in an earlier unit. I started off by opening my scene and adding a sky light, this will add a basic light to the scene and gently light up the scene. I did not add a directional light as the scene is inside and no windows are involved. I then wanted to change how the sky cube looked I started off by duplicating the material the sky uses and then I changed it so that the stars display a picture of space and then I edit the blueprints to the material to display this material instead of the default and then I change the material on the mesh of the sky sphere to the space one. After this I played around with the colours, turned off the sun brightness, adjusted the star brightness and clouds till I found a good medium for the space material. 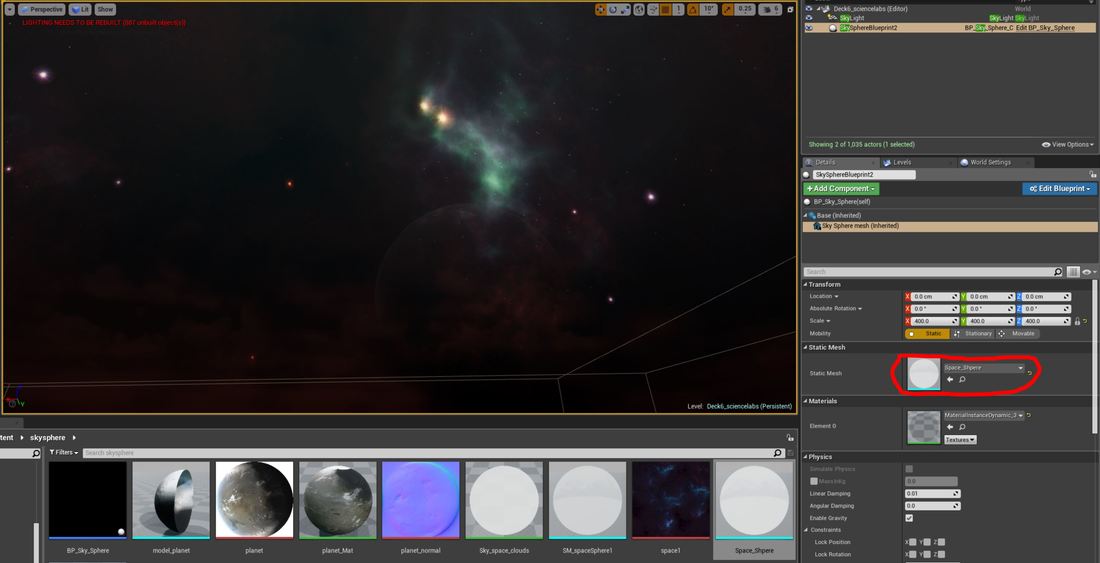 I then wanted to add a post processing volume to enhance the scene, I already had basic lighting going though the scene when I added the post processing volume, I can then remove this lighting and adjust the lighting to fix in with the new post processing volume. I started off by adding a colour grading effect to my scene the aim was to add a blue sci-fi effect to give the impression its intelligent I started off by changing the saturation to a light blue then I changed the contrast, gramma and gain by increase or decreasing the intensity of their main values. I then wanted to add effects to the light sources when the player camera hits it has a blue or glare to them, I added a slight vignette to the post processing and then I added a standard bloom with a low fresh hold and then I added an auto exposure, then I changed the depth of field to add a blur when the player is far away it blurs the what is front of the players camera at a far distance. Then I added an ambient cube map to increase the reflections of the materials and the light that bounces of these and increased the ambient occlusion to create great shadows from materials that have these textures. I then increased the global illumination so there was a basic light and could refine more with point and spot lights.
Emissive lighting For my indoor scene I want the emissive light to be the main source of light as it a sci-fi scene I felt this would be more beneficial to the scene. I started off by selecting all my assets and setting to use emissive light for static light this will help the lighting render the emissive light and cause it to create fake light. I started off by creating a basic emissive material which involved a 3-vector node multiplied with a 1 vector node that controls how bright the lighting is. I then applied this material to the assets and I build the lighting. Below are three images of different emissive light settings all increasing in strength. The last one is high and lights up the whole world. I decided to go for the medium one and light up the scene using spot and point lights. After this I wanted to create a more advanced emissive light, I wanted to create a hologram and give the impression it is been projected. I started of by using the engine light beam mesh that uses a gradient to fake god rays and light beams, I placed these onto a spot light and then I created a material that looks like single light beams I did this by using noise textures with the engine and make this flicker to give the impression that there is dust in the air I then created the hologram material which also uses emissive light, it takes an image of each and covers it with a colour that I rotate then I use simple white textures with noise to create a lines going up the hologram which flicker these combined with noise textures from the engine. After getting the emissive lighting how I wanted it for my scene I wanted to add spot lights to add more light from the ceiling lights, I changed the light colour, inner and outer cone, attention radius and added a source radius for the spot light. To add more depth to the light as I felt it just looked like a spot light I used a light material function which takes a greyscale image and cast light shadows on the floor. I decided to use light material function over IES profiles as I felt I can do more with the light material functions but the IES profiles do give the impression of what real bulbs cast but don’t show shadows like over a grate. Below are the final 3 images 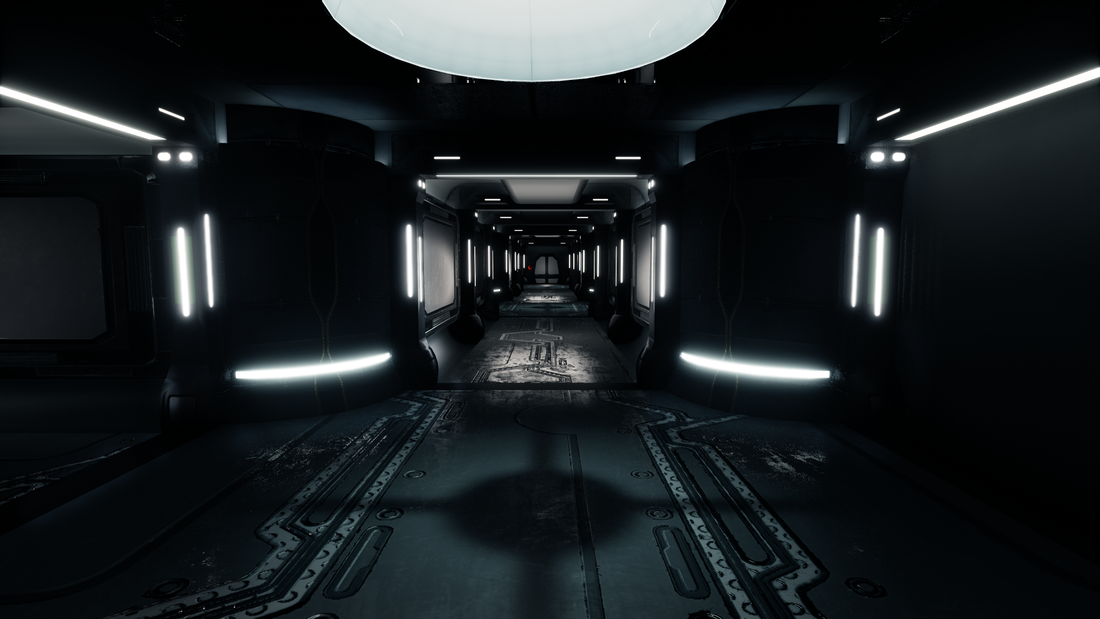  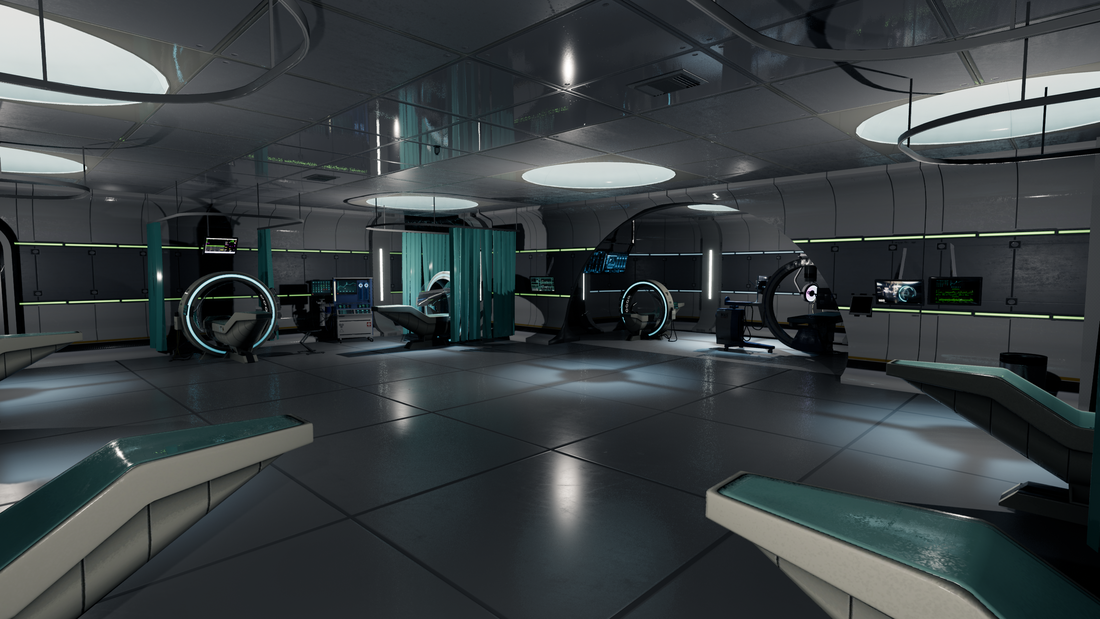 CGI Rendering I wanted to learn how to use live rendering and then export a movie clip of what happening in the scene I started off by adding a level sequencer into my scene, this gives me control of a camera and I can control everything that happens in my scene frame by frame in this like I would in animation. I started off by using the camera component and I piloted this camera and flew around the level and every major turning point I would set a frame and the camera would compile its route. I started off by using the camera component and I piloted this camera and flew around the level and every major turning point I would set a frame and the camera would compile its route. In the sequencer I made sure I showed moving objects, I let the camera focus on the a flag blowing in the window and a door opening this shows the dynamic shadows moving in the scene. After playing the video though I felt that it was extremely fast so I added a play rate to the sequencer and set the play rate, I set keys thought out the render and halved the speed it played at. Below is the video of the render I made in unreal engine. EvaluationI am going to critically evaluate my lighting that I created for my project, I am going to break this evaluation down into two subjects what well and what didn’t go so well for each task during the development of this unit.
I enjoyed doing the lighting for this project a lot, I found it very interesting and I found lighting a scene correctly was very satisfying as lighting such scene can be very complex. I have learned a lot about this crucial stage in game development as this adds more depth to a game. Overall, I found the lighting went extremely well, and I have learned a lot about lighting and how to use it correctly. I had an easy time schedule for each of the areas in this part of the project as it wasn’t as big as other areas of the project. pre-production This was a straight forward task, it involved pre-production which I used to get my ideas down in a form of a mind map and I then looked into visual references of what I was looking for in my game and from this I created a mood board. I then researched into lighting and then I created a scene to test the lighting research out. I found that the mind maps and mood boards were straight forward and just part of the pre-production and I am happy with the final outcome, creating the level to test the research was also went well with me as this helped me understand what was happing when I changed settings from reading the research. I felt that the research didn’t go that well for me in this task, I found that it was quite hard to understand, and a lot of technical information was given, using the project helped me overcome this and I found it easier to learn this way. research and project scene This was using what I have learned from task 1 and placing it into my scenes that I have built for based of my game design document and other projects along the way. I used my mood board to create lighting similar to this. I found lighting my own scenes challenging at times, but the rewards were great and deserve the work put into them. I found lighting night scenes and the indoor scene a lot easier as there is only one major source point of light / the light only can come from visible lights and this helped me a lot and I think this went extremely well. I felt that the day scene on my alien planet did not go to well and I tried to see if would work better at night time and I still did not like the lighting on this world I feel the map was to big and detail lights were getting drowned out and the problem with background meshes getting bleached by the light did not help matters either. I did not submit these screenshots for peer review as I felt this did not show my best work. CGI Render For this I created a video render of one of my scenes and then gather feed back on selected screenshots about how might lighting is in the scene. This task went okay, it was only a small task and I learned a lot about how to use the sequencer in unreal engine which can be a useful tool for me to use in the future and I getting feedback of peers other than a small selective group at the collage was also benficial. I felt the peer review I got back from the public forums was great, I didn’t get much feedback, and this didn’t help me understand how to get my lighting better, although in hindsight this could be seen as a positive as people couldn’t find much to fault with my peer review screenshots. Common lighting errors Also, to my evaluation I will talk about the common lighting errors that I had during my process of creating lighting in my scenes Black lines between meshes – I noticed on some of my indoor scene meshes had black lines between them after building lighting I look into what this was, and I found that this was a common issue with the lightmap resolution in game or a poor layout of the light map uv itself. For this it was just I needed to increase the resolution of the map and this fixed the problem. Red x over light – I saw this a few times in my scenes and this was down to having to many lights over lapping in a small space and telling the user that it will not use this light as it will cripple the performance of the game as it trying to render to much light in this area as it has 5 or more lights overlapping. Light bleeding though meshes – I had this error when I was building lighting inside and I had light coming though my planes, as it’s a plane it only has one visible face and the other side is black, unreal engine will cull the backside as it not need thus saving on performance, so if the lighting is come from this side it will shine though the mesh, to fix this error I needed to select the model and check use two-sided lighting or create a two sided material. Conclusion Overall, I really enjoyed lighting, I feel this is some I would enjoy going into in the industry. Although getting the lighting to nearly realistic as possible was extremely difficult I found it very rewarding and fun to achieve this and I really enjoyed creating night time and indoor scenes. I feel like I have learned a lot about this pipeline to lighting and although I found the technical side hard to understand I figured out using practical solutions and understood it better. The only disappointment that I had for this unit was the feedback from the public forums on my lighting screenshots I felt I could have done with more criticism to understand how to improve but overall, I fell this unit went really well and would enjoy doing this in a job as well as learning more about the sequencer. I felt that the time schedule for this part of the project worked really well I had plenty of time for each section of the project and was able to finish on time or before the deadline date. Task timeline Pre-production Start date: 1/2/18 End date: 7/2/18 I have given myself a week to complete the pre-production looking into creating a mind map, basic research into how states and game animation works, mood boards and flow charts. Basic character implementation Start date: 7/2/18 End date: 14/2/18 For this I have given myself a week to set up basic character implantation such as setting up the character to use the unreal skeleton, setting up basic walk blend spaces and basic state machines. Attacking and defending implementation Start date: 12/2/18 End date: 21/2/18 I have given myself just under two weeks to add a combo state using two different attack styles and a defending state as well. Boss and damage set up Start date: 21/2/18 End Date: 1/3/18 I have given myself just under two weeks to set up an NPC boss that can attack and dodge the player and also add damage so that the NPC and player character can damage each other. Pre-production For this part of the project I am going to look into the pre-production of character implementation, I am going to research about how to implement characters into unreal engine and then I will create a mind map and mood board and then look into other areas that can help me with later in the project. I created a mind map that looks into different types of animation that I would use for my character look at action type movement, attacking and defending and miscellaneous moving to add a unique look to the characters movement. 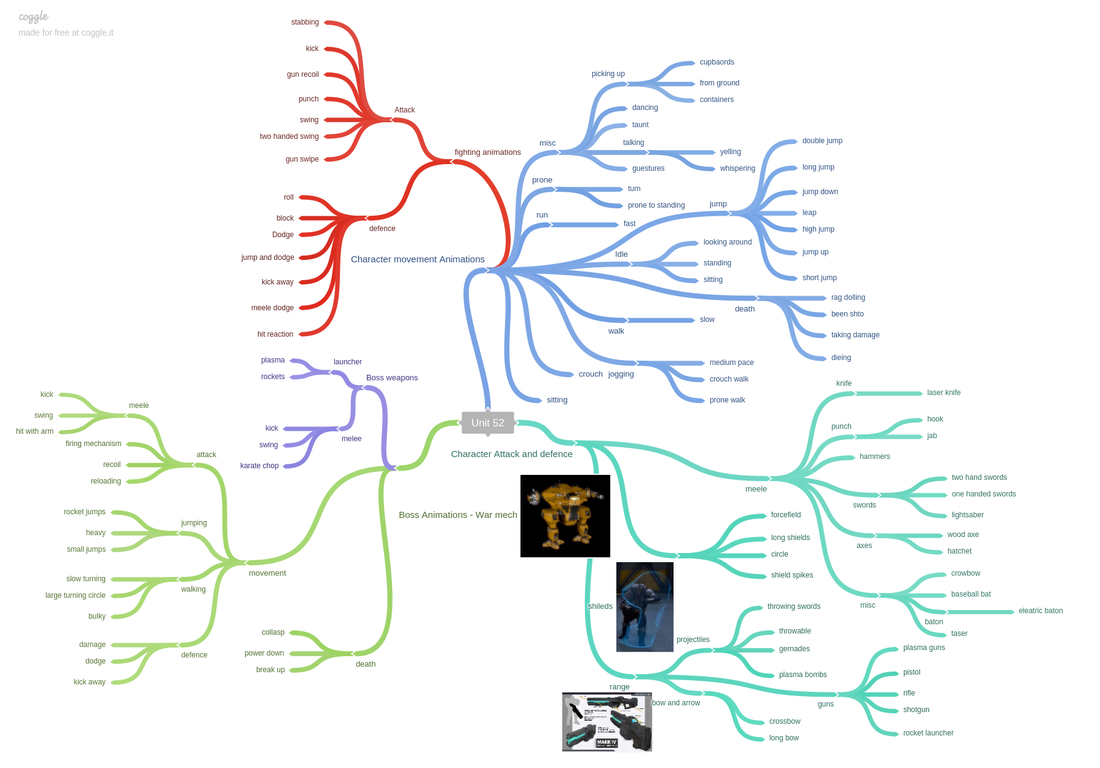 After getting my ideas down on to a mind map I then created a mood board from these ideas so that I could visual represent what I wanted to achieve in this part of my project. 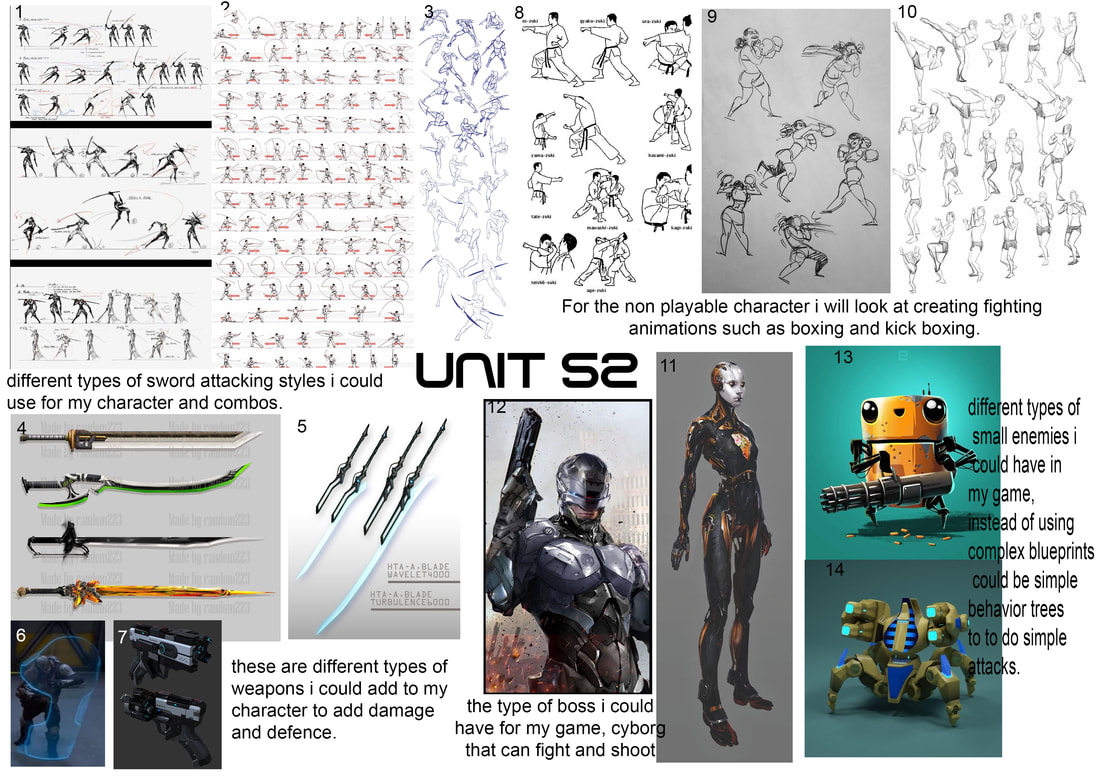 I then did research into how state machines work and from this I ended up creating a flow chart to help me create my state machines for my character. 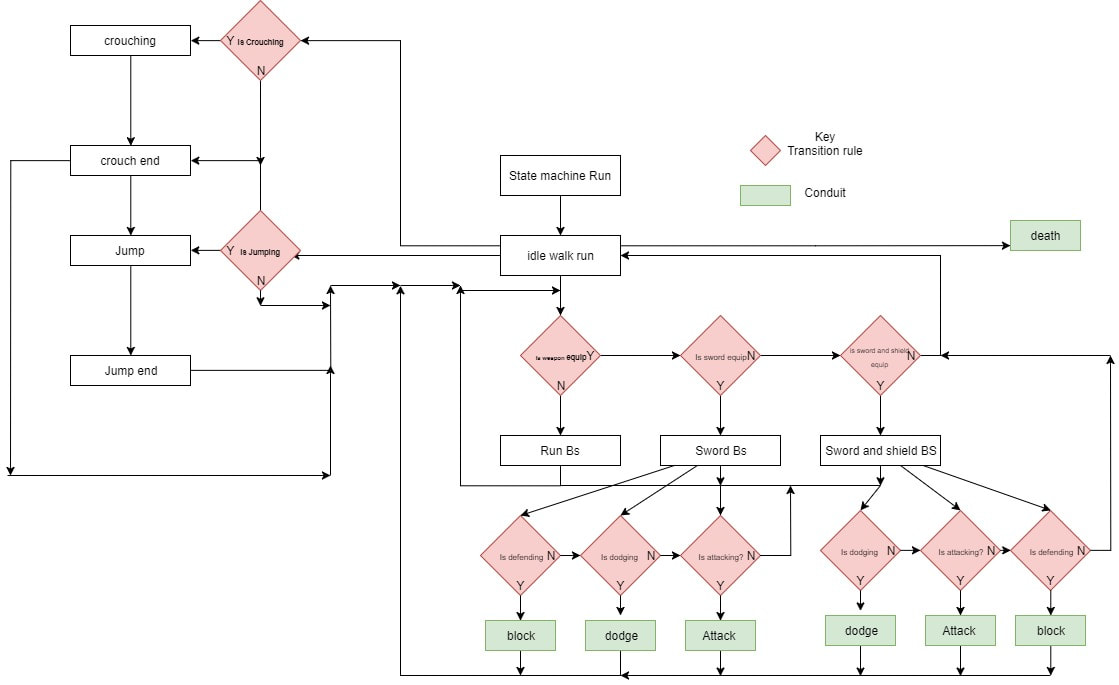 character implementation For this part of the project is all about implementing the character into unreal engine using blueprints, animations, state machines and inputs. Combine these together I will have a player that can fight, move and interact seamlessly. I started of by exporting the third person character an I opened this up inside of Maya, I want to use the third person skeleton as I plan to use animations that are based of this skeleton. I then imported my character I wanted to use and bind the skin like I did in unit 74.
Once everything was in unreal I opened up the third person skeleton and went onto the retarget manager and added a humanoid rig, I then opened up the player rig and did the same with this one. I then selected all my animations have retargeted them from the default skeleton to work with my skeleton, as these were identical skeletons there was not much needed to change the targets or poses. After this I added the sockets to the skeleton and previewed the meshes on them, so I could line them up correctly so that they fitted in the correct positions. After this I added a sheath version of the socket for when it was not equip. I then went to the character and added these models to the character and attached them to the socket. I had one equip and one sheath, I made the equipped ones invisible. After this I made 3 blend spaces for 3 different idle to runs, one for normal walk no weapon, one for the shield and sword walk and then another walk for the sword. I then added states in the player animation blueprint that starts off with the default idle/run and then depending on which Boolean variable is set from the character blueprint the other two walks is selected. 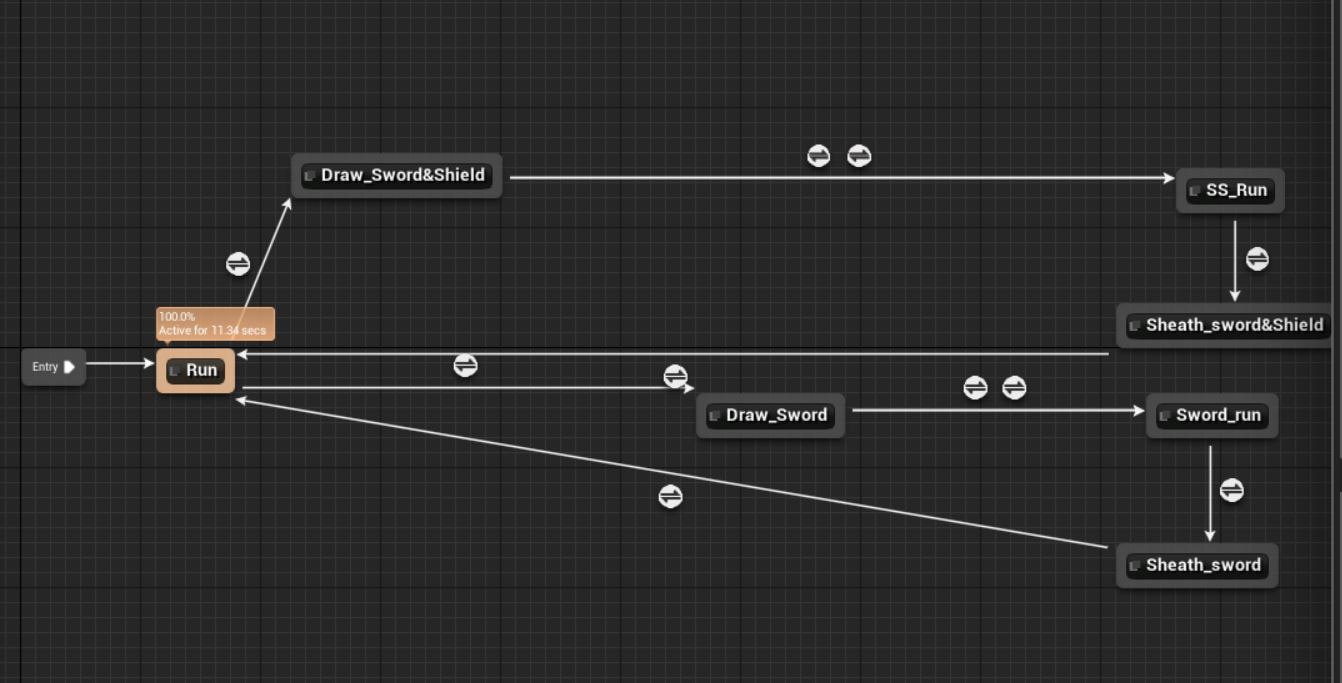 I then went back to the character blueprint and used some Booleans and branches to set up visibility on the meshes so when the character is drawing or sheathing a weapon the in-hand weapon is set to visible or not visible depending on the action and visa versa for the sheath weapons. I then used Booleans to determine which weapon was activated and when the other weapon is selected it would put that weapon away and equip the selected weapon.
Attacking and defending implementation I started off by selecting the animations that I wanted to use for my attacks for both weapons, I then right clicked on these and turned them into an animation montage, I wanted to use animation montages because this allows me to take control of the animation and control when I want the animation to play and stop using blueprint scripting. It also good for when I wanted to loop an animation to blend into multiple ones.  I then needed to set up the attack, I used the left mouse button and ran a condition checks to see which weapon was equipped and that the player is not switching weapons, then I sent another condition to see if the player can attack. After these checks I placed a switch on integer and created an integer variable and set it to one. I then added to custom events for attacking and resetting the attack. For the defense I wanted to get a blocking I started off by creating a multi-directional blend space and in this I added a forward walk, backwards walk and a left and right strafe and an idle position to blend these animations from. Depending on the direction and speed the character is moving they will blend into the direction and speed.  After this I went to the animation graph and went into my motion state and where I have the sword and shield run I added three more nodes to enter the shield mode, the shield mode itself and exiting. For the conditions I then added a Boolean that is blocking and is not blocking. In the shield mode I then added the new blend space and added the speed variable and created a new variable for the direction. I then set these in the event graph using a calculate direction and get the velocity from the vector length and then for the based rotation the actors rotation.
In the character blueprint I then added a new condition for blocking and created an on and off with the on been reversed to the off side. After this I either set blocking Boolean to enable the blocking state in the animation blueprint, I then set the max walk speeds to make it slower in blocking mode and then I add an orient rotation to movement from the character movement, this disables the rotation movement so that the character can strafe. I then added a use controller rotation on Yaw axis, this rotates the camera when the player is turning. Error I then tested the blocking function out, and I noticed when I blocked and walked that my player would walk and glide. Below is a video of the error After looking into this error again I realised why the player was gliding, I was calling an idle animation before and after going to the blend space, the blend space already has this inside of it so it did not need to be called, the glide was because the idle animation is a still player for 3 seconds and will glide till the animation is over. To fix this I just removed the entry and exit from the motion graph.
Adding unquie features After creating my attacking and defending I looked into how I could improve my attack system I implemented the secondary attack system that I wrote about how I could improve my combo. When the player is now attacking and the player presses the secondary attack it will find which combo has been played and play an animation equalled to that attack combo and play an unique animation. After creating my primary and second attacks I wanted to add unique features to them to add more feedback for the player, one of the things I noticed is when I walk and attack the player slides on the floor, one of the ways I can fix this is by adding a type of force that pushes the player along the floor but gives the impression that the player is moving while attacking giving great form of feedback. I did this but creating a custom event and setting the character movement ground friction to 0 then I set a node to launch the character, I pulled a pin from the velocity and got the actor forward record and times it with a float which would be the amount for launch the player at. I set these amount after each animation montage in the graph. I then added a new notify to the player attack animations called launch and set it before attacks when the first foot of the character touched the floor. I then set it up in the animation blueprint like I did for the combo attacks. I then tested out I could see if the player moves with out direction input, by just clicking the mouse I could see the player launch into the attacks. After got this working I duplicated it and did the same for jumping but using a actor up vector node and set it on certain attacks where it looked like the player was jumping into the attacks. I then investigated unique ways of adding different features to the character, I added a dodge roll so when the character is not attacking they press the f key and the character goes into a roll and can potential miss an attack form the enemy. I then added a camera shake, when the player attacks with the special attack it shakes the camera to give the impression of a big hit. After this I then added a zoom function which uses a timeline to make the camera change from 90 field of view to 70. I have not found a use for this but I feel it will I will find a use when I get to defence and make the camera zoom in on a block. For this part of the project I want to create an NPC that will sense me and then find and attack me using different ranges (close and far) depending on the range it will decided which attack to at random. I started off by duplicating the third person template so that I had a clean character to work on but had all the basics set up like animation blueprints, blend spaces etc which later I can change into what I want as these are just place holders. Once I had the template I opened it up and added a sensing pawn, this is so the pawn can sense the player when he is near, I can also add hearing to this and set it up in the future so when the player walks or fires a weapon it will know its last location. 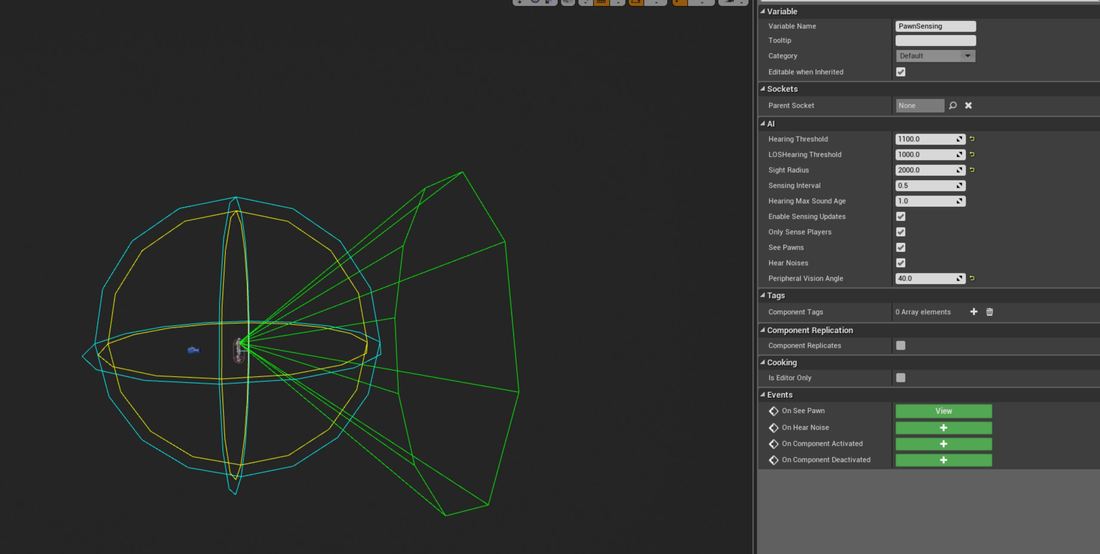 I then added a function where it will check the distance of how far away the player is away from the NPC and till I gets to certain distance it will perform long range attacks and once it enters that radius it will switch to close range attacks. I then added a float on random and set it between 0 and 4 this make the NPC select a number between 0 and 4 and I set it if that number equals 0 it will perform the long-distance task. This will make the NPC run more and attack less and then to add randomness on the attacks I added another integer in random which is connected to a switch on int and the random number selects the attack. Setting up the health For the enemy I wanted to create health bars and make the visible to the player, instead of having a default one at the top of the HUD I thought it would be different to have an enemy health bar above the character that displays when the character is in a certain distance. I started off by creating a widget and setting it desire on screen and added a text of the enemy which can be change via having it as an editable variable and a progress bar that shows the enemy health. After I created the widget I placed into the enemy blueprint and placed it above the head. 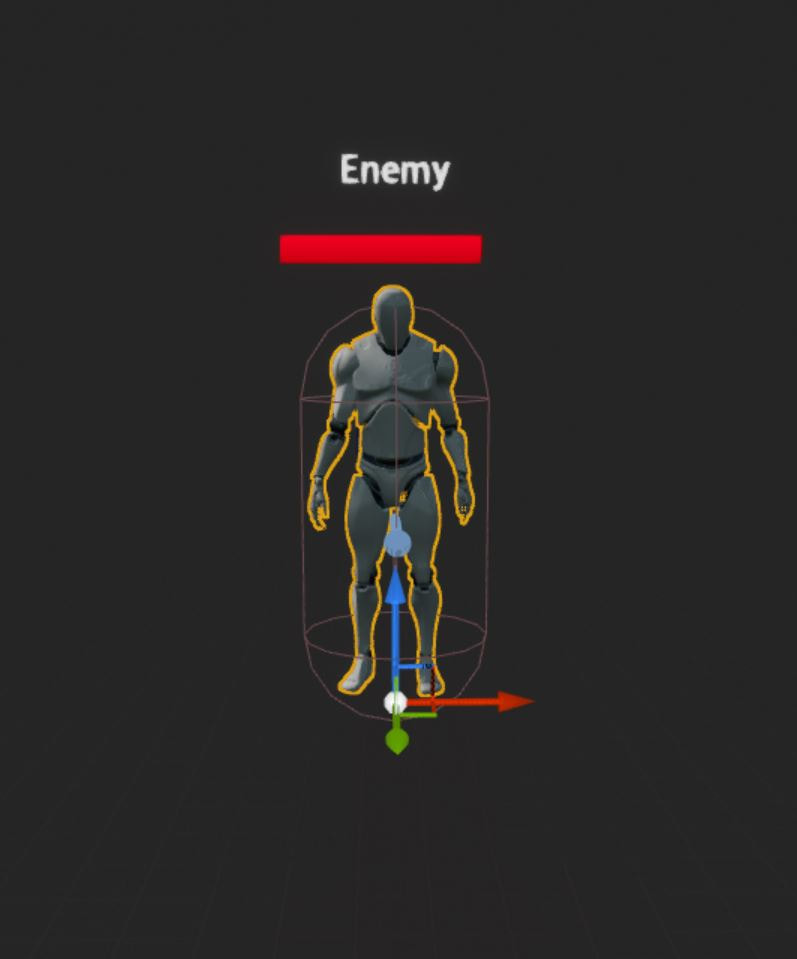 To get the widget to display when the player enters a radius of the enemy, I created an interaction blueprint and created 3 functions: On enter player radius, on exit player radius and on interact which will be used later when I’m creating interaction such as QTE etc I then added a large capsule Collison box to the player character, this will work as the Collison to display the health bar. 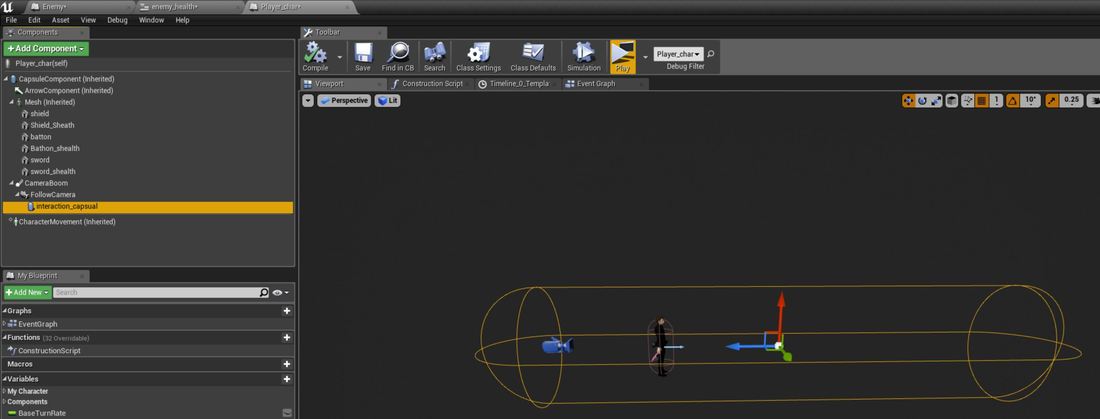 In the enemy blueprints I used the new interaction functions and called these and then set the visibly to show and disappear on the widget. In the character blueprint I used on enter and leave nodes and made sure it equals to the interaction blueprint and then call the function with would trigger the enemy blueprints to display the widget
Below is a video of the widget displaying the health NPC: Adding to the attacksAfter setting up all the basic mechanics for my NPC I wanted to add to the attacks so that when the NPC fires an attack it will damage the player and reduce the player’s health per attack. I started off by going thought all the NPC animation montages and added a new notify for each hand / foot to enable and disable. I added the disable notify to make sure when it is fired that it starts off and then turns on.   Once I had all the notifies set up, I then created custom events in the enemy blueprint and then I attached these custom events to the notifies in the animation blueprint. After this I then went to the enemy blueprint and added four capsule collisions around the players foot and hands and then attached these to the sockets of the respectable positions and then zeroed out / placed them. In the NPC blueprint I for each custom event I then reference each capsule and on enable I set the collision and then on disable I disable the collision. I then set up for each collision on overlap to check to see if it the player character and then print a string to show it has been hit. I wanted to add a visual reference for when the NPC hits the player, looked into a few ideas of having like numbers floating on the screen, or comic book style words like pow, pop etc. I then looked into creating a hud that flashes on damage. I then decided to create a sprite that shows when the character is hit. I started off by duplicating the fire particle effect and removing certain parts of the particle so only the shockwave part of the particle effect is showing. I then went back to the players’ blueprint and created a new custom event and added a sphere trace for objects that will spawn to check to see if the player is in range. I then got the collision box and used the location to spawn this trace for object. I then break hit result to check to see if the player in the collision box if true I then spawn the emitter at the location. dodge After getting all the basic movements working on my NPC, I wanted to little features to make the enemy more realistic. On my distance check I added extra pins to the close range so that it would choose 4 different dodges, then changed the random probability so that It would randomly choose between attack or dodge. This will give the player a bit of breathing space and also give the option for the enemy to go back to its chase / long distance attacks. projectile I wanted to create a projectile that can be thrown at the player, I created a new blueprint actor and added a sphere mesh and collision box. I then added a rotation movement and projectile movement this will make the sphere rotate and move to words the location. I then went to event graph and used the player location as the fire location and then used a collision overlap to check if it is the player hit, if it did it would cast a blue particle effect and if not it would spawn a red particle effect. Future I plan to make this better in the future as I want the projectile to look like a grenade than rather the a straight line fire and gives the player better change to dodge the attack than instantly getting hit by it. Debuffs I then wanted to add debuff on the character when the NPC uses some attacks. I started off with a simple one where the enemy changes the speed of the player. This give the impression that the character is dazed after a heavy punch. I used a custom event and used the character movement to a lower effect and then after a delay I resort it to its normal speed. Future To improve this, I could look into adding like a post processing effect to add like a dazed or spinning effect. I could do this by adding a post processing effect in the character blueprint and just set the visibly when the debuff is active. The second debuff I added was a burn effect. I wanted to add this when the plasma bomb hits the player, I added a new collision box into the character blueprint. I then added a custom event and then I set the visibly of the collision box and added an spawn emitter which I attached to the collision box, I then added a delay for how long I wanted this to be visible for and then change the visibly of the collision box. I then created a new blueprint actor for the fire debuff. I added a collision box and fire particle effect in this, I used simple code to display the fire if the collision box was overlapped, this will spawn the fire if it hits any object or the player. If this hit the player it will spawn the fire on the back of the player. I then went to the projectile and added a custom event to spawn the fire debuff blueprint this will spawn the fire debuff at the location of impact. Below is a video of the above added to the enemy ,For the minion I started off by creating a new character blueprint and added a character created and animated in an earlier unit, I then added a sense node so when the player is in this radius it will trigger the behaviour tree. the behaviour tree it uses a selector branch node that choice between the two if it doesn’t see an enemy it will find a random point and move to it and wait. The other node is an selector node that checks the distance if it meets a distance it will move back to it start position, the child branch underneath run the distance check and if it see the player it launches the attack and follow the player. I then created a blackboard and added various variables that will be used in the character blueprint, to set the variables that will trigger the behaviour tree, the other variables will be ran in service, task and decorator blueprints that will be part of the tree branches that will check conditions. The main conditions for the behaviour tree is that it will attack the player on sight or if hit, the NPC will set once a certain distance is met between the player and NPC and it will return it starting position, using location variables to wonder from it start location and finally triggering the death animations. Task 2 - Damage and DeathIn this task I want to create how the player will damage the boss and how the player will receive attacks from the NPC. I started off by going to the player blueprint animation and creating a new state, in this state I want to have multiple death animations. I added all the death animations to the state and then I added a blend poses by int and then promoted the variable to an integer. I then went to the event graph and called the variable and added it to a random integer in range to randomly select an animation. I then created a Boolean variable in character blueprint and called it death and repeated the same in the character animation blueprint and set it up to when the player dies it sets the animation blueprint variable. I then set this variable as a condition on the state so when it is triggered it plays the animation. 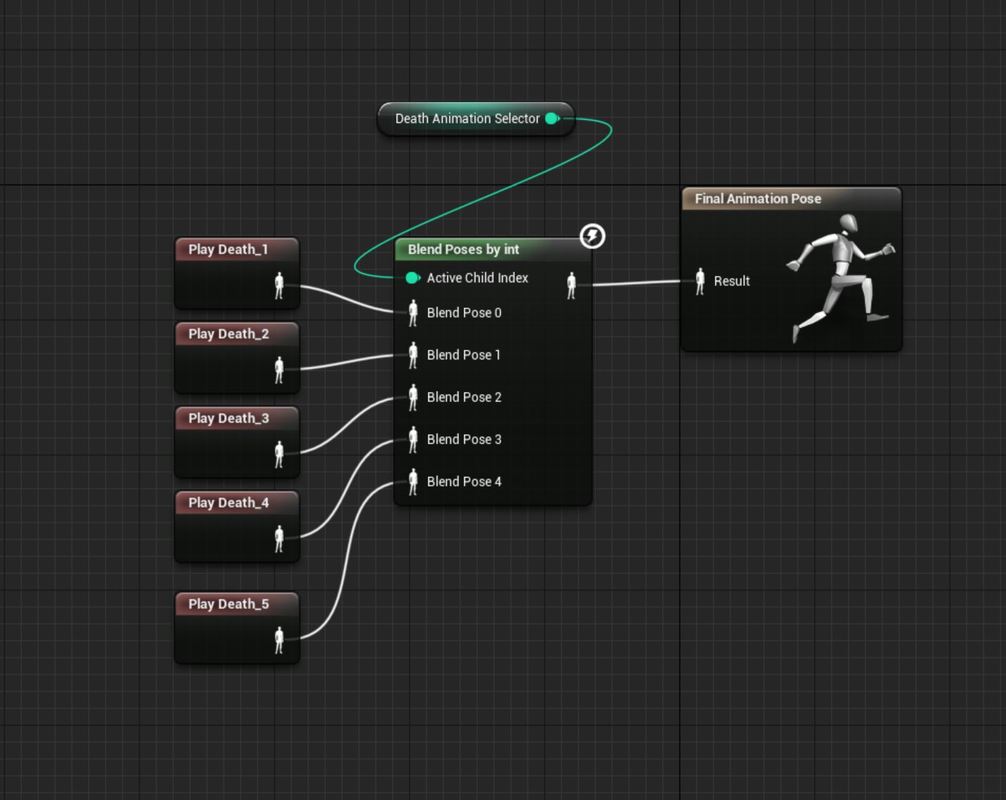 To trigger damage by the players weapons I set up the same process of what I did with the NPC and added a collision box to the weapon and then added notifies on the animation montage to enable and disable the collision box.  I then a min and max damage to each of the attacks and put in numbers to suit each attack. I then added a begin overlap for each collision box I added on the weapons that then gets the apply damage and uses a random float in range and uses the min and max damage that is set. I then added an event any damage, this is used to take health of the player when damage has been applied to the character. I then ran a condition to check if it is the character and then I use armour that takes away from the current value. When it equals 0 it starts to take from the health. When this reaches 0 it triggers the death variable. For the shield damage I don’t want to make the shield give damage but to absorb the damage, to implement this I added a condition in then damage taken nodes before the character health / armour is taken it will check to see if the player is blocking and then check to see if the player stamina is above 0 if not it will take the damage from the player’s health and armour. I then player a custom event that plays an animation montage of the player been hit / knocked back and then spawns a hit sprite for visual references. Each hit then subtracts the damage given from the stamina till it reaches 0 where I will then start taking it from the player’s health or armour. Below is a video of the shield taking damage. Ultimate AttacksTo add onto my damage, I want to create 3 ultimate attacks one for each mode that the player will be in, I will look at making a whirlwind effect for the shield, a high damaging sword attack for the two-handed sword and a healing mode. I started off by creating a new actor blueprint and adding two baton meshes into the blueprint and used the character as reference, I then increased the size and added a collision boxes to the batons. I then added a rotating component to make these spins. After this I removed the character reference. 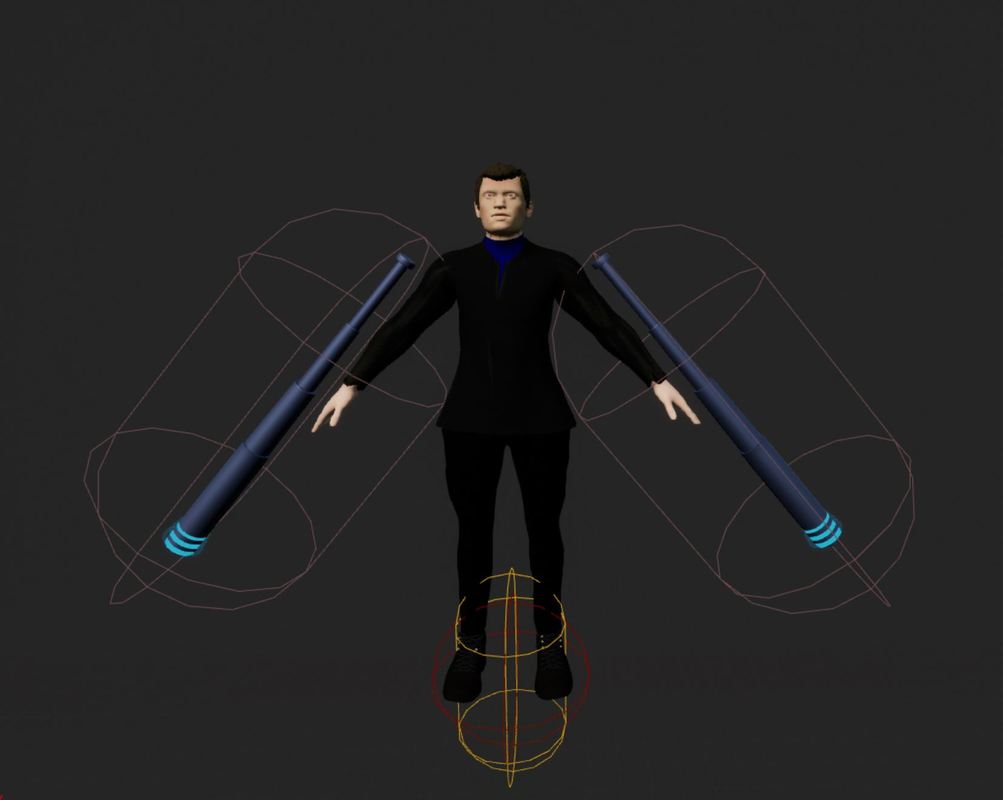 I then made a weapon trail using a particle effect and changing the colours and making sure no velocity was added to the particle. Then tested it out. I then added a particle effect on the animation montage to show it been active and when to hide and show the battons. Two Handed Sword I then repeated the same process for the two-handed sword attack. I used the player character as a reference and scaled up the sword, I then removed the physics so when it spawns it will drop to the floor. I added a collision box around the sword. Special Attack For the last unlimited power, up I wanted to create an health buff, what I want this to do is drain the NPC health and then replenish the players health. I started off by duplicating the fire particle effect, I removed everything except for the embers, I then changed the colour to more of a healing colour, then I created a new animation unlimited to look like it is casting a healing spell. I then added particle effects to the animation notify, this is to play the animations for the healing effect. I then created a custom event in the character blueprint and I used the min and max damage to add health on my player when taken. I then used Booleans to active this custom event and to check to see if any other skill is active and to check if the player has more than 30 stamina and if it does remove 30 stamina and enable the healing spell. 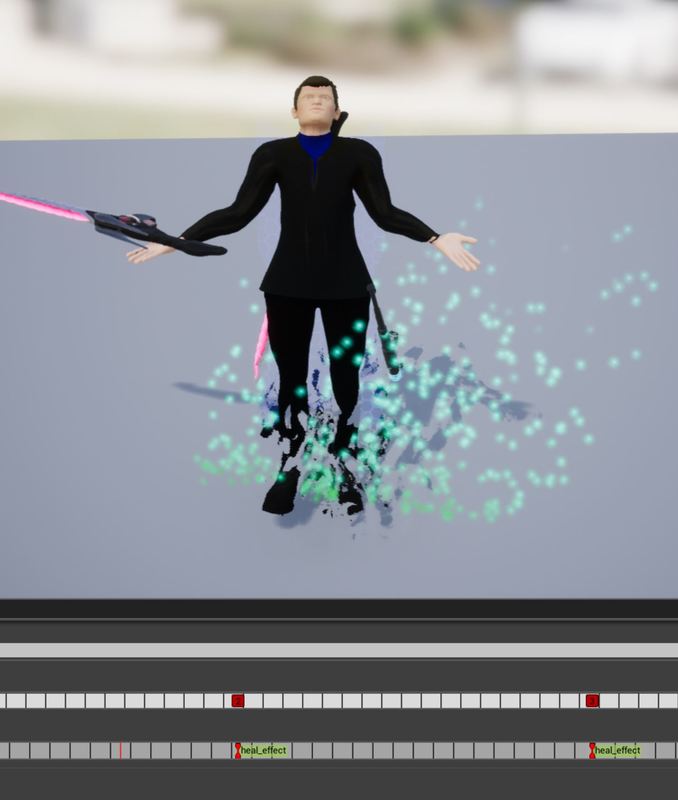 Evaluation Overall, I enjoyed unit 52, making a character come alive in the game engine. The complete process was interesting, learning about how to take my character add animation to it and then call actions on these animations to perform certain actions. I also learned how to do this by using the state machine using conditions and using a montage that where called from the character blueprint.
Overall I felt the first part of the project went quite well, for this task I created a mind map, mood board and looked into creating a flow chart for my states on my character animation blueprint. I also look into a bit of research to understand how this worked. For this task I have no negative points that didn’t go well. I made a few changes to what I created in my state flowchart, it was simple changes that I didn’t know about or could have done more research into. I also add more to the states in the animation blueprint than I had originally planned but this was down to adding extra features to the character. Overall I felt setting up the character implementation was the big task to this project, I had to create both the character and NPC blueprints and then add damage to both so that I could interact with and battle the NPC and he could battle with me two. For the charter I feel the whole implementation went well, I was able to add the UE4 skeleton to my own character and then import that into the engine and add marketplace animation to this skeleton, I feel this went well, I had to go between ue4 and Maya a few times to get the painted weights working. I had no issues creating the states for my character I feel the flow of the character changing from the run blend space to the sword and shield and long sword blend spaces worked well, I had a few issues with the equipping of the weapon and switching which I had to fixed by adding extra conditions and checking which was been used, after some time I fixed this issue. I also add a combo system this was straight forward once I had figured out how to use the notify system in the animation montage I was able to call events to trigger these animations from the character blueprint. I had a few issues with overlapping animations, but this was an easy fix by putting in a delay to let the animations finish before starting the next combo. I also had issues with the player going back to equipping the weapon state which took some time to figure out as at the end of every combo it would play this animation. I ended up fixing this problem by adding an extra condition in the state. I have problems blending the animations with a walking animation. I wanted the upper body to attack and the lower body to walk, I was unable to do this, but I used a different system that launches the player forwards when attacking giving the impression. This is something I will look into in the future to improve on as I feel it is a standard in most games now. The next thing I feel that didn’t go to well was the blocking, I had a lot of issues trying to get the player to enter the blocking and exiting encountering a lot of gliding, this was down to the animation states. I also feel this could be done better and I don’t like how the whole system works. I was able to implement a basic damage system using collision boxes that turn on when a animation notify is trigger from the character blueprint. I feel this is an old way to doing damage but is a quick and simple way to do it. I am going to look into new methods of adding damage via the animation montage and create a custom notify. Overall, I think the NPC turned out well, I was able to create a custom boss using blueprint, that used a range checker and from this range checker it decided which attack to use. I felt this worked really well in the game. I am also pleased with how the minions came out as these uses a different system to the boss by using behaviour trees, it needs a little work on it when the player attacks it but this is minor work on changing variables. I had a few issues with setting up the collision boxes for damage as this was a punching enemy it would damage the player multiple times, I fixed this by using a do once, but I will look into the above method for damage on this. I also feel like the grenade doesn’t work how I want it to and is more like a homing missile and gives the player a better change of dodging. I really like how the NPC looks after upgrading it to 4.19 and using the paragon addons to create an AAA game boss that taunts the player and uses partial effects on attacks. Conclusion Overall, I feel like 52 went extremely well, I have learned a lot from this unit about how to implement a character and it has taught me a lot about the engine and how to use new features in the engine. I feel after doing this unit and learning how to create a custom character and implement all the animation and attacks as well as the boss I feel like it is something I could be interested in doing for a job in the industry. I also has taught me how to problem solve and I feel this has improve a lot for me, when I was stuck I would try different methods to get past the problem and if this did not work I would research the problem to see if I could find a fix. Future improvements Two blends spaces – legs walking with upper body attacking Notify damage in the animation montage New blocking system Improve the grenade – less homing missile like The purpose of this unit is to understand how create animations for characters and assets using Maya, look into rigging a character and then creating a lip sync video. For task one it is looking into creating different types of animated assets, for task two is creating lip sync and character animations. Pre-production Start date:25/11/17 Completion date:1/12/17 I have given myself a week to look into pre-production such as mind maps and mood boards, looking into animation research and looking into how to rig animate characters. Animated assets Start date:30/11/17 Completion date:4/12/17 I have given myself just under a week to create 8 animated assets. This should be a quick process as all the models are pre-made. Lip sync Start date:5/12/17 Completion date:21/12/17 I have given myself just over 3 weeks to create an lip sync video based of a video from youtube, this will take a large portion of the time frame as it is a big task to copy the actions from the video. Character Rigging Start date:28/12/17 Completion date:3/1/18 I have given myself a day to complete a character rig so that I will be ready to animate. Character Animations Start date:3/12/18 Completion date:12/1/18 I have given myself 10 days to complete 5 character animations. The timeline for this project has taken into account the Christmas holidays and has been fitted around the holidays, making this task schedule tighter. Pre-ProductionIn this blog post I will look into the ideas of the animations I want to create for my character such as movements like walk cycles and then consider animated assets I could use following my unit 75 brief. I will then create a mood board to get visual ideas of how to animate my movements for my characters and assets. After this I will produce digital sketches to highlight bones, NURBS handles and the movement paths. I started of by creating my mind map consider character movement animations and general animations I could use for my character, I then look into different types of animated assets I could use in my game and I quickly looked into the animations I could create for my boss NPC. Below is the mind map I created: 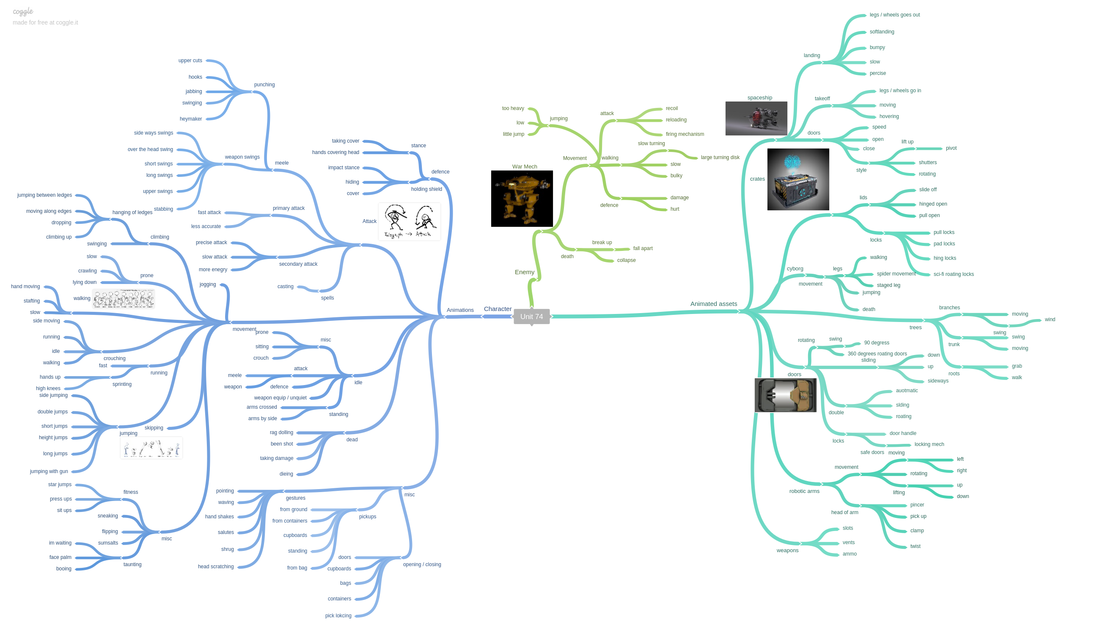
After getting my ideas down onto paper in the mind map I then wanted to get some visual referencing to help me with my animation, I looked into walk cycles, facial expressions, idle and movements, fighting and also looked into some ideas for my animated assets. 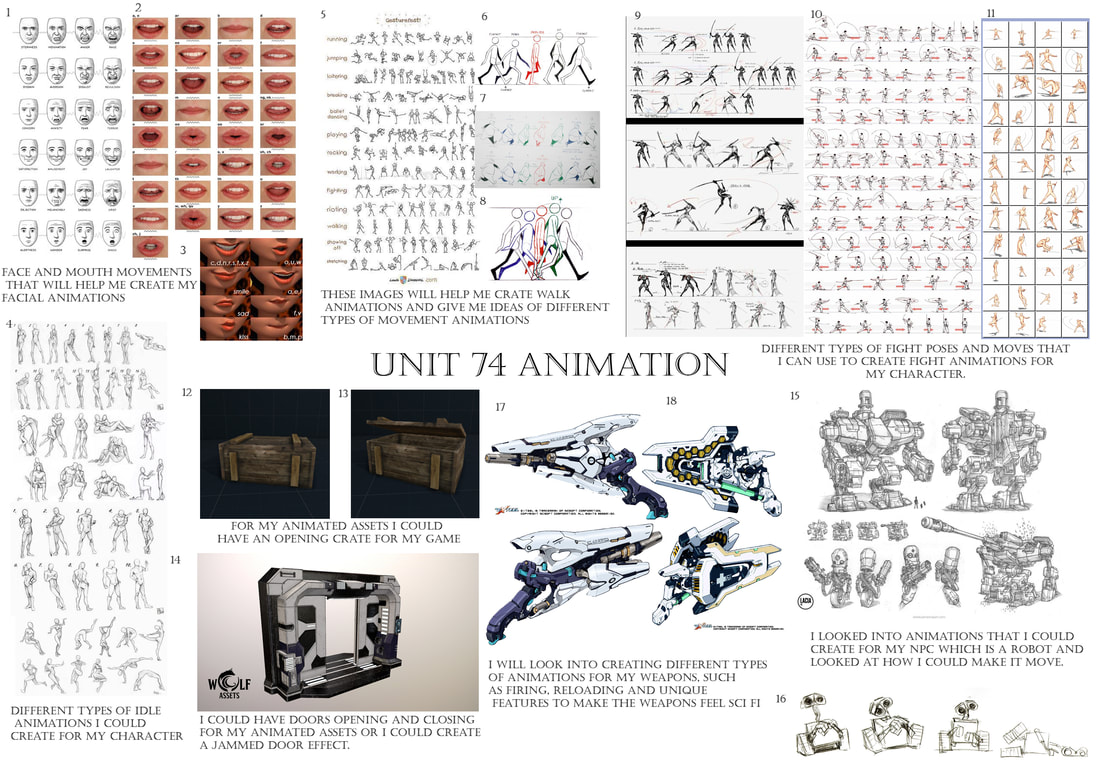 I then drew sketches of the assets that I plan on turning into animated assets, once I got the basic outline of the assets, I then looked into where I would place; joints, bones and how it would move so I could get a visual reprehensive. 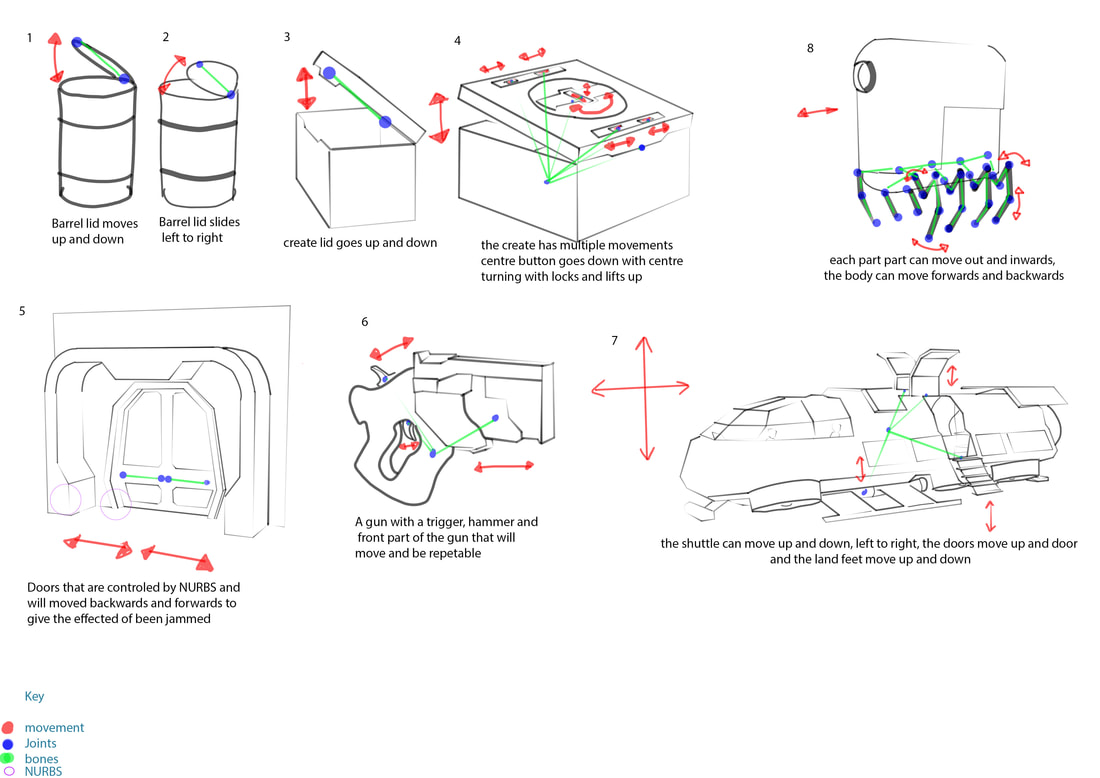 I then repeated the process for my character bone structure.
Task 1 - animated assets Another part of task one I had to create animate assests, for this I wanted to start of by learning how to add joints and over each asset I want to make it more complex. For my first asset I wanted to learn how to use the key frames, so I started off by crating a simple box with a lid. I started of by moving the axis point to the edge of the lid. I then press the S key to set the key at frame one I then moved the box lid to the side and downwards and then set the key when I got the lid in the place I wanted. I created a short video of how this animation looks: For the second asset, I decided to use a joint for this asset. I wanted to create a barrel opening and using the same process from asset one to key the movement but by the joint. Below is a video of the asset rotating Then I did the same barrel but with the lid sliding off For the next asset I wanted to add controls to the next asset, for this I wanted to make it easier to select the joints. Below is a video of the asset rotating For my next asset I wanted to have a more complex joint system using a root bone and have multiple joints moving and rotating Below is a video of the asset For the next asset I wanted to create jammed doors, I edit the graph to create a more stagged effect. For the next asset I wanted to combined the graph and multiple joints to create a weapon firing. Below is a video of the asset I then created another smaller weapon so that I had two different types of weapons for For the next asset I wanted to create a long animation that combines moving, multiple joints and graph For the next asset I wanted a more complex joint system, as it a complex skeleton I had to learn to paint the weights of the mesh to stop deformations. Task 1 - lip sync For my lip sync I wanted to create one using a character that I create by keying each of the facial movements by hand inside of Maya and then I want to look into using a camera to capture facial movements that is then transferred onto a 3D character. I started off by creating a character that I can use inside of Maya, I created my character using adobe fuse and then uploaded it to mixamo to get a skeleton and facial blend spaces. I then opened this inside of Maya and used the mixamo facial rig plugin on the character to add NURBS controllers to the face and body so that I can control the animation and set keys. I then went and found a video on YouTube that I wanted to recreate, one of my favourite films is the Shawshank redemption and I decided to do a famous speech of Morgan Freeman at his parole talking about rehabilitation. The clip is around 2 minutes 30 but when broken down the actual time Morgan freeman is talking is just over 60 seconds. I plan on making a scene in Maya and exporting a render of my character talking as Morgan and then edit the two clips inside of an edit software to make a seamless video. I started of by opening my video in photoshop, I only want the main part of Morgan freeman talking now so I cut it down to his bit only this part. I then went to export and selected render video I then chose image sequence in the drop-down box. This breaks the video up into images for each frame. I then exported this, I got over 3000 images from the video which is equal to about 1 minute 30 to 2 minutes depending on playing speed.
I then went back to my scene in Maya and added a new camera to the scene I then went to the details panel and selected create an image plane for this camera, I then loaded up the first image of the clip. Then I ticked the box that says use as an image sequencer this will player each image at every frame rate. 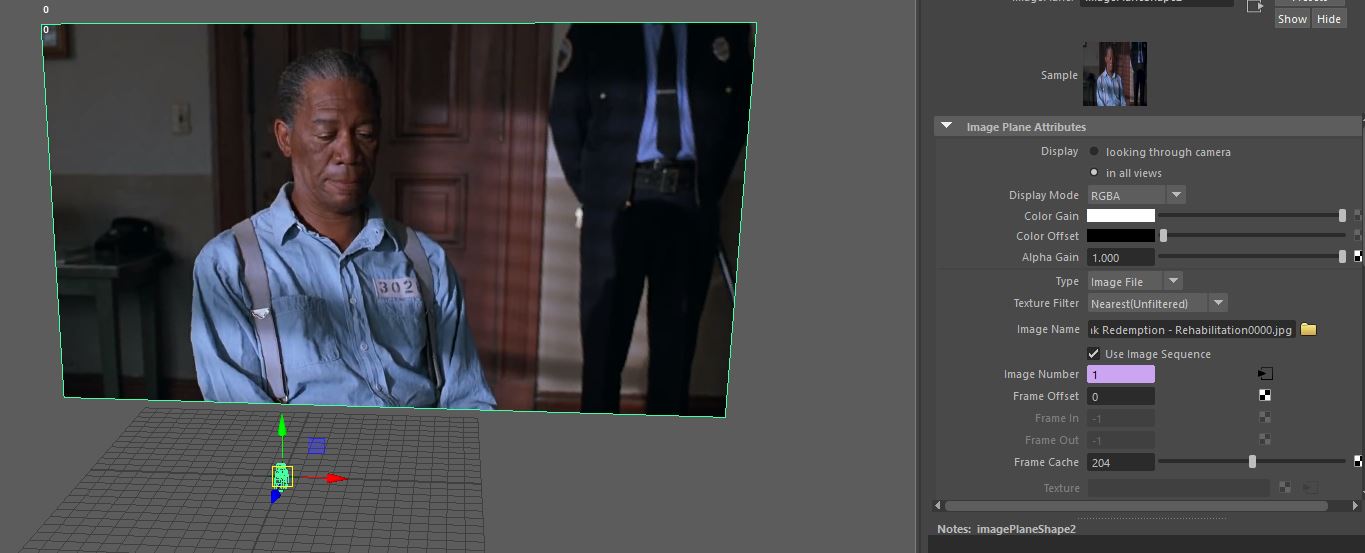 I started to key frames at key moments of movement. I decided to use a stop start type system when I would add a key at the start of the movement and the end of the movement, when it came to complex lip movements this involved a sequence of keys to make this happen. 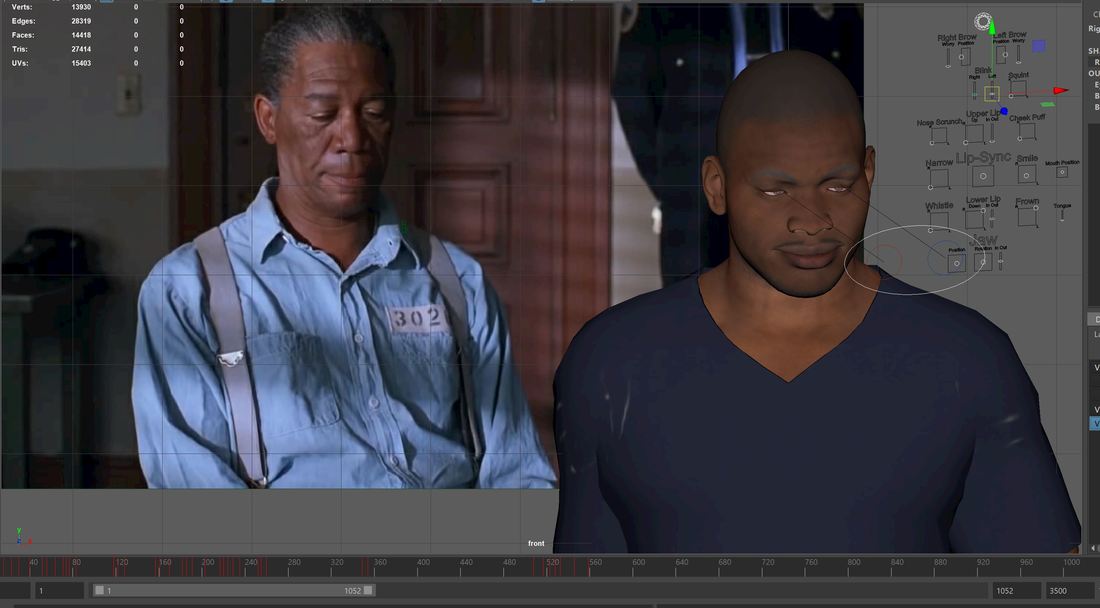 Clean up For the clean-up process I want to go though my recorded keys using the graph editor and change the smoothness of the keys and edit any movement that looks sharp or doesn’t fit the source image as I could of add extra during the keying the frames stage. I started off by going though the animation using the graph I changed the curves of the animation to be smoother and to make them flow better. I also added a tangent of linear to the curves as well.
I then went thought the animation deleting and adding keys to parts of the graph editor that I felt need a smoother animation or need some extra keys to add to the animation. To do this I selected on the curve and right clicked to add a key to delete, I selected the key and pressed delete.
Below is a video of the clean-up Scene and export Before I export my animation, I want to create a basic scene to give the impression of what is seen in the video I created a basic 3 wall room and a door which I then took into substance painter and textured them. I then went into fuse and created a prison guard like in the video. I then added different types of lighting to the scene to get the right balance. I found this extremely hard and did multiple renders before finally finding a lighting system then I was happy with; a directional light to light the scene up and then a point light to light up the character up.
After exporting them I wanted to turn the images into a video, so I went to adobe premier and created a new project. I then went to import to import my images and selected the first one, I then clicked the box that says image sequence. If I don’t do this, it will import each image and add a 5 second duration to it. I then synced the edited video to my lip sync and played it, I adjusted it but there is a slight out of sync towards the end of the clip but only slightly noticeable. I then brought in the original video and edited that, so it displayed the start and endings and placed in parts where Morgan Freeman isn’t talking. I then created a picture in picture to see the original vs my lip sync. task 2 - character rigs In this task I want to create a skeleton for my character and non-playable character so that I can animate my own animations onto the skeleton and use these custom animations in my game. I started off by creating a basic skeleton for my character 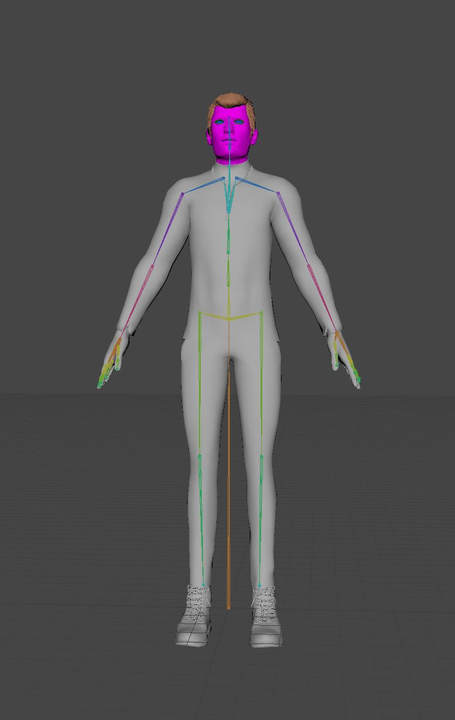 I then painted the weights to stop any deformations 
I then used unreals animation tool set to set up an NURBS control system. 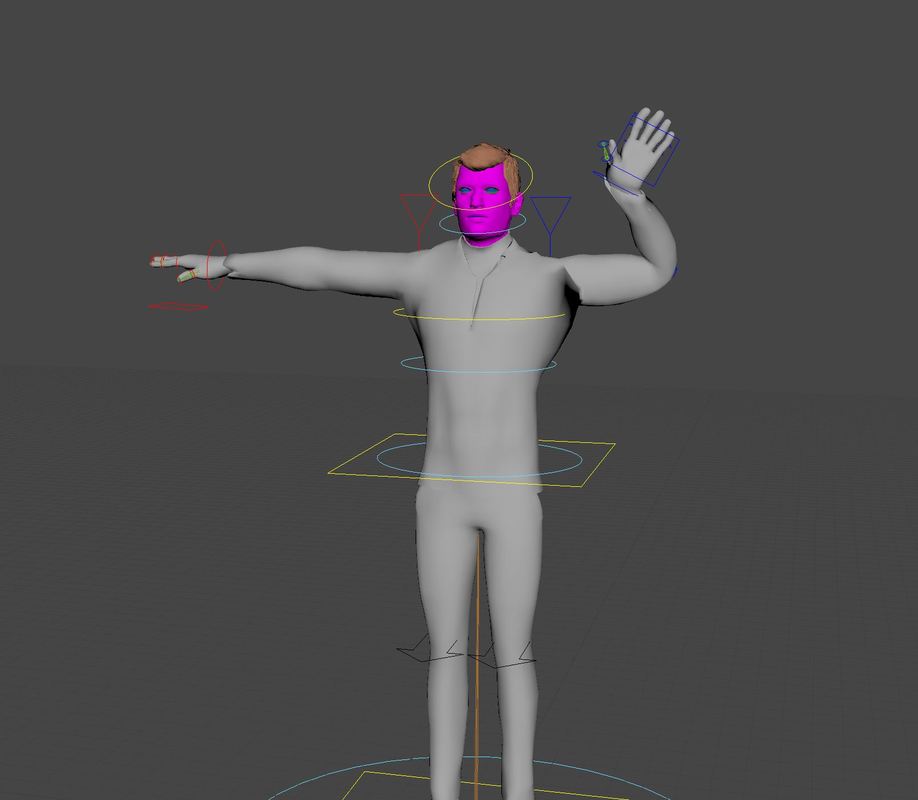 Rigging the NPC For my non-playable character which will be a mini boss in my game I have decided to rig that character myself without using any auto rigging tools, mainly for the reach as it is not like a normal biped and is quite unique. I started off by placing joints at those locations and renamed them according. I then parented those joints to the root bone and make sure the arms and legs followed the correct parent / child chain.  Issue I then tested all my joints and I had a massive problem with the deformation of eacj joint pulling the mesh from all areas. I decided to look at the painted weights and noticed that the joints were pulling the mesh from all over. I fixed this by tidying up the painted weights by removing the white areas that I did not need by painting them black.
After fixing the painted weights I then need to create some controls for each of the joints, I did this by using the NURBS and placed them at each joint and named the controls for each joint. I then needed to connect these controls to the joints, I started of by selecting the root control and parented it to the root bone. For all the others I selected the controls and then the joints and used a parent constraint for each of these.  Animating the character After trying to use motion capture and unable to sync the two together I have decided that I am going to key my animations for my character. I am going to create animations that will be for my game only and will be unique to this game. To create this, I will use props I have created for my game to give me the idea of world space to help me create these animations: I am going to create the following animations:
I started off by importing my rigged character into an new project and then I imported the doors and button to the project, I then lined everything up as it would be in game and positioned the player to roughly the same location it needs to active the button  I then keyed the character to move its arm to press the button, adding bend and a twist and lifting the palm up to tap the button I then twisted the spine and other arm to move with the head to give the impression the character is looking at the button and pressing it. 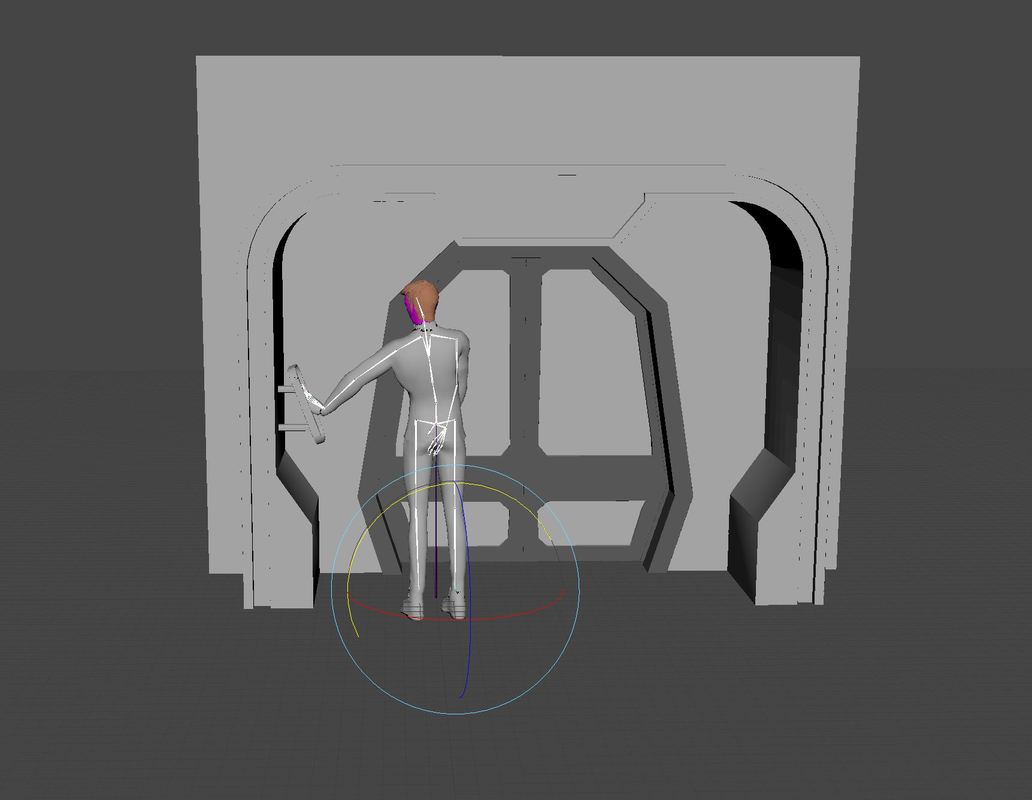 For the single door animation I imported all the files that create the door and positioned the button to the same height in the game and positioned the character when it would be active in game. I then created the animation bring that character arm up and turning the body, arm and head towards the button to look like it is looking towards it. Salute For my next animation I decided to do a salute as the game follows a type of military rank system, I thought it would be good to have a salute for the captain and other high-ranking officers. I broke the animation down into two parts I wanted to create a similar army salute so started off doing the formative stance with the character, I brought the legs closer and the arms straight against the body with the back straight, I then added the salute where I brought up the right arm to the forehead and then back down. Alien salute For my fifth animation I wanted to do some unique but staying to the military salutes but think on the lines of what about alien cultures how would they salute. I decided to create a mash up of 3 salutes, I wanted to incorporate Leonard Nimoy famous Vulcan salute and a royal salute by kneeling onto one knee. I then wanted to add a finishing touch to the salute by adding a type of war beat to the chest but more of a loving one than intimidating salute, I did this by gently patting the palm of the hand on the check back and forward. Evaluation
This is the first time I have ever tried to animate any of models and I have learned an incredible amount from it for this part of the character pipeline. It has shown me how to use bones, create animations using Maya, create a lip sync following a video and how to import my animations into my game. Learning animation has shown me how complex and it is and how difficult it can be at times but is extremely rewarding with the final product. the animated assests was enjoyable as it showed me how to create animations for my assets using bones and without, how to use the graph editor and outliner, it was a good learning curve and I felt I progressed and improved on each animation I did trying something new. I am quite proud with how some of the assets have turn out such as the jamming doors and the create that has multiple animations. What didn’t go to well for this task was trying to get some of the assets to skin correctly to the assets and I had deforming on some assets this was down to the lack of knowledge of painting weights and how I can stop this using this tool. I also had a few problems trying to export the models to unreal and found that using controls cause all sorts of errors and set my project timeline back a day or so trying to figure out this problem. The final version of the lip sync was worth all the hard work that came with creating the lip sync, I am extremely pleased with how the lip sync turned out and I feel I got most of the facial expression matching to the video as well as getting the mouth moving in time with the audio even thou in some places it does look out of sync. I felt some parts of the lip sync could have been improved like before starting adding ribs to the character to add breathing as the video had big inhale/exhales and feel this ruins the effect of the lip sync a little, also issues with the lighting could be improved as I found it hard to get the correct lighting when rendering out. for my character using software and technology, with this task I also decided to create my own rig for my characters as I had a unique biped in the form of a war machine which would need unique bone structure. Creating the rig went was a huge learning curve as it wasn’t expected but I wanted to learn this, I followed online videos of how to do this as well as using industry standard pipeline tools to help me rig and add controls to on my characters. When it came to animating these character I found it straight forward after my practice with the assets I found animating a lot easier as I had already practiced on this before. I am pleased with how these animations turned out especially the war machine animations, I feel this make the machine look more real. What didn’t go to tell was the technology I wanted to use when I tried to use motion capture I could not get the technology to work, I had a lot of huddlers setting up and running the software and once I got my animations recorded I came across more problems trying to get the animation onto the character and encountered a number of more problems. This left me with an option to create my own character animation which I felt look a bit robotic and need more work in making them more smooth and fluid. Conclusion Overall, I feel like I have a love, hate relationship with animation, I found certain parts extremely difficult but the end results are amazing when they turn out correct. I feel like my knowledge has increased over the unit and I feel like I understand more about the animation pipeline. It was a challenging unit but extremely rewarding, I don’t think character animations is something that I want to progress not but understanding how the pipeline works is great. Creating animated assets is something I am going to keep working on as I feel like I can use a lot of this in the future on other projects. This unit has also shown me areas where I need to improve on such as my researching techniques to find more information to understand tools before trying to use them as something I felt that I didn’t look into this enough and struggled to grasp the tool. Future development In this blog post I will look into how I can use animation in the future for my projects and how I look into how I could include this into my development. I plan on creating more animations for my characters for unit 52 this is a unit about character implementation and will be look into blend spaces which uses the combination of animations and blends them together. With this I could look into creating more movements for my characters, such as jumping, side turning and walking sideways I can also look into adding the animation for weapons and how the character could move with these weapons. Also creating assets for this current project and future projects is going to help massively and it is something I am going to counting to develop as I feel it adds so much more dynamics to any game and will help with any development. Overview The purpose of this unit is to understand how to create environments using heightmaps and the landscape tools inside of unreal engine, create models to populate the environment and also create background models to add depth to the environment. For my first task I have to look into different software’s to create heightmaps and how to create environments then create mood boards and mind maps to get an idea of what type of environment I am looking to create. For my second task I will consider creating my environment using software’s and tools that I researched. Then for my 3rd and 4th task I will consider creating models and materials to use on my landscape. Time scale Task 1 – pre-production Start date: 22/11/17 Completion date: 6/12/17 I have given myself two weeks to create pre-production for my environment and research techniques that I could use to create my environment. Task 2 – Environment creation Start date: 7/12/17 Completion date: 20/12/17 For creating the landscape, I have given myself two weeks to apply the methods from my research and create a landscape matching my pre-production. Task 3 / 4 – model and materials Start date: 21/12/17 Finish date: 21/1/18 I have given myself a month to create models and materials for the environment, including the background models and landscape / foliage as well. This time also counters for Christmas and new year holidays. Task 1 For this task was about consider research about how to create environments that I could use for my environment and then from this create a mind map and mood board. For my researched I considered different processes of creating environments and terrains that would be used in the game industry, I looked at the unreal engine tools that are mainly used to create and sculpt environments. I then looked into alternative ways to create landscapes, I looked into using software such as world machine, photoshop and Terragen, these are used in the industry but not as common as using the tools that comes with unreal engine. From my research I found that I can make background models that I can use with my environment as well. From this I considered creating heightmaps using these software’s and how to use satellite images to create landscapes based off real world locations as well as creating my own unique heightmaps using with this software. After this I then researched how to create landscape materials but looking at the unreal documentation and how to use blend materials to create height based materials which is a customary practice in games, I then also looked into using 3rd party plugins that has a high-end material that saves time creating materials for the landscape and gives you an AAA quality material to use in the game. From this research I got an idea how to create an environment for my game, I then created a mind map of different ideas I wanted to incorporate in the environment, how I want it to look like and ideas for props I can use for the environment. 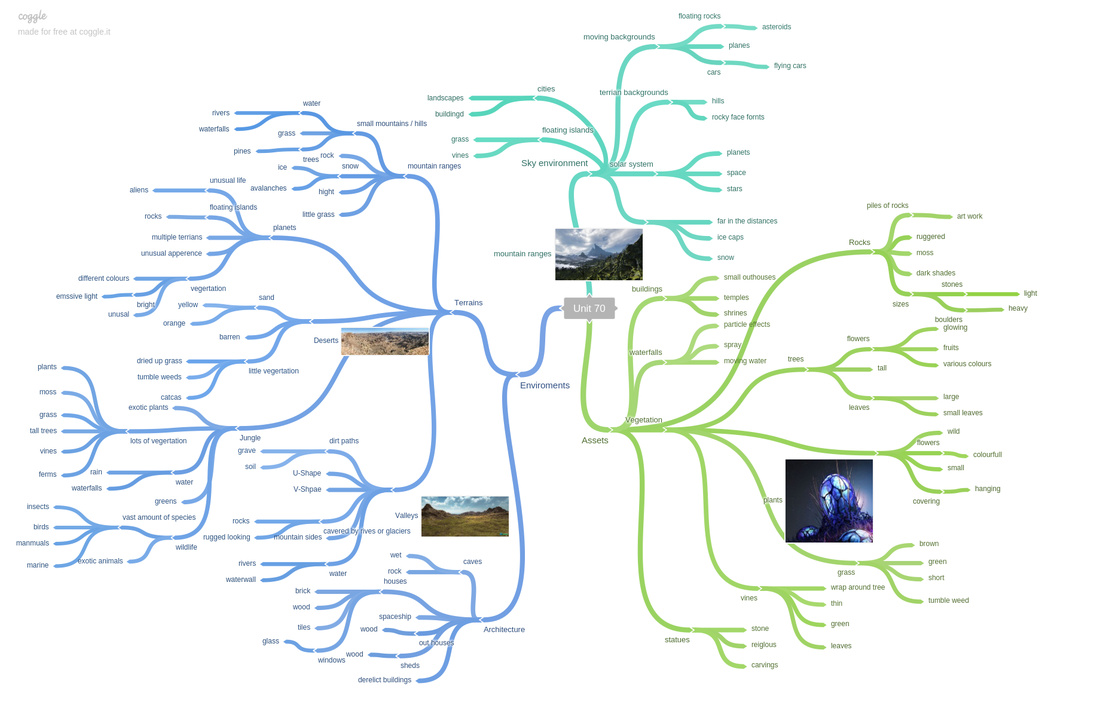 Once I had ideas for my environment I then created a mood bored to get visual ideas of what I want to create for my game, I used my concept art as inspiration to give me ideas of the colours and style I was look for. 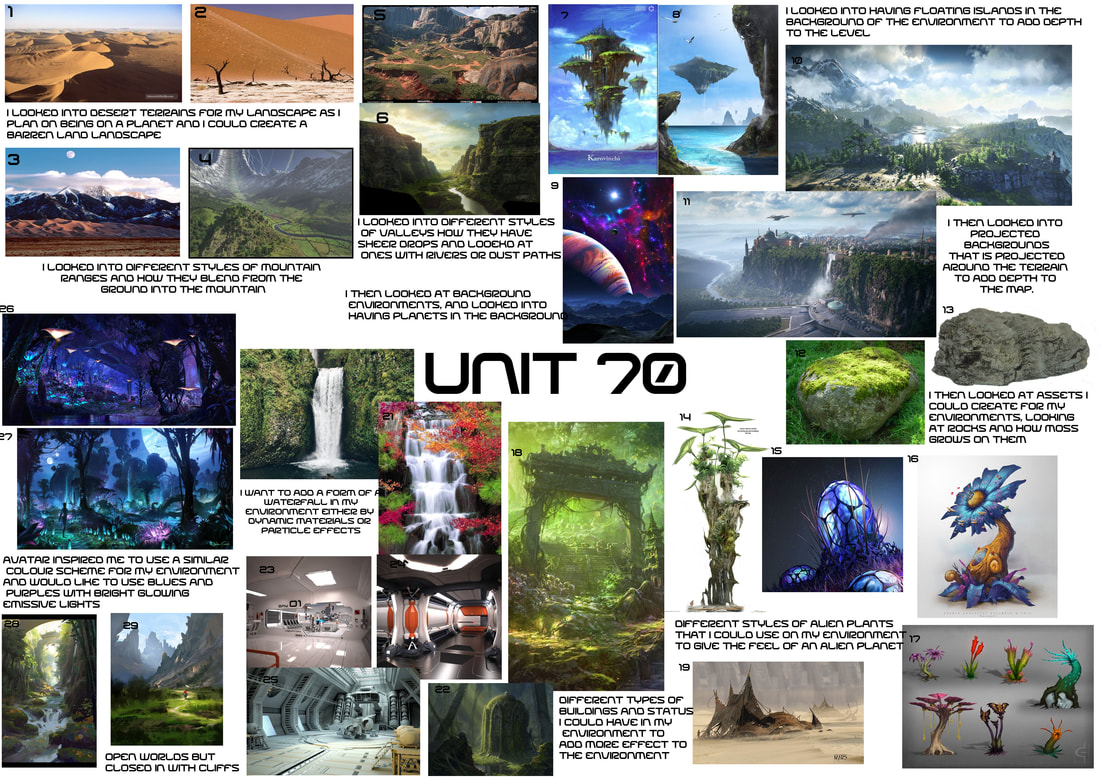 I then created basic sketches of the level design so I could get the main features down on to paper before creating the environment so I could get an idea of what I am creating for my landscape. Task 2 For task two I wanted to experiment with height maps before I started creating my terrain I looked into different methods that I could use for my project, I looked into using satellite height maps of other planets I used a height map from mars, then I also looked into creating my own custom height map for my level using Photoshop and using clouds trying to create the valleys and after testing this out I wanted to try a final method of using real world locations and turning them into a height map so I could find someone in the world that has the bending valleys that I am looking for. Below is screenshots of the height map and how they looked in unreal engine. For my project I decided not to use a height map I felt that when I was testing them out I could not find a valley that suited the style I had intended to have in my game. I decided that to have a landscape that I intended to have in my game I will have to sculpted my own terrain. I started off by creating a landscape and then I sculpted the mountains ranges around the landscape creating a basic path to the boss arena then I built up smaller hills around the path to create a unique environment for my game. I then placed a basic landscape material on the landscape so that I could see how the mountains fall and where the grass and slopes are visually. Below are screenshots of the first stage of the sculpt After I got the basic sculpt on my landscape I decided I needed to work on a better material for my landscape I decided to use an AAA quality landscape material to make my landscape pop more, the other reasons I wanted to use this is because of time it was quickly to use a plugin and play material then spending a big chunk learning how to create a high end material. Once I had the material added onto my environment I needed to import textures into my game and apply them onto the landscape. I started off by finding material I wanted and then opening g them into Photoshop and then I changed the colour of these textures to fit into my environment and colour scheme that I picked in my concept art. After this I then used painting weights and blend spaces to paint on different textures on to the environment to create the paths and grass areas and add sand to the rivers and waterfall areas. Below is screenshots after the material has been added to the landscape. I then wanted to add water features to my game to add more detail to the environment I used a spline to use the same mesh over and over again and this allows me to add bends into the mesh as well, I placed this on the river bed following the curves of the river and then I used the same method to create waterfall. To make the waterfall stand out more and make then look more natural I added a mist particle effect and water dripping on the water below, after this I then add sound to the waterfall to enhance them. Below is the screenshots of the water added into the level After creating the landscape for my game I then decided I need to create some background models for my environment, this will help to make the environment look larger than it actual is and give the impression there is more land past the playable area. I started off by creating a model inside of world machine I used nodes to create a mountain and then I used more nodes to add smaller details like fallen rocks and snow fall. After this I used nodes to export the model and height map of the mountain I created in world machine. I then took the model into Maya since it was high poly I decided to create a low poly version of the model by using the quad tool and then smoothing it to fit into the groves of the mesh I then took the low poly into substance painter and then I baked the high poly onto the low poly to get all the details from the high poly onto the low poly. I then added different material to create the look of the mountain using mask to use multiple materials and then using alpha masks to add unique features onto the mountain like fallen snow. 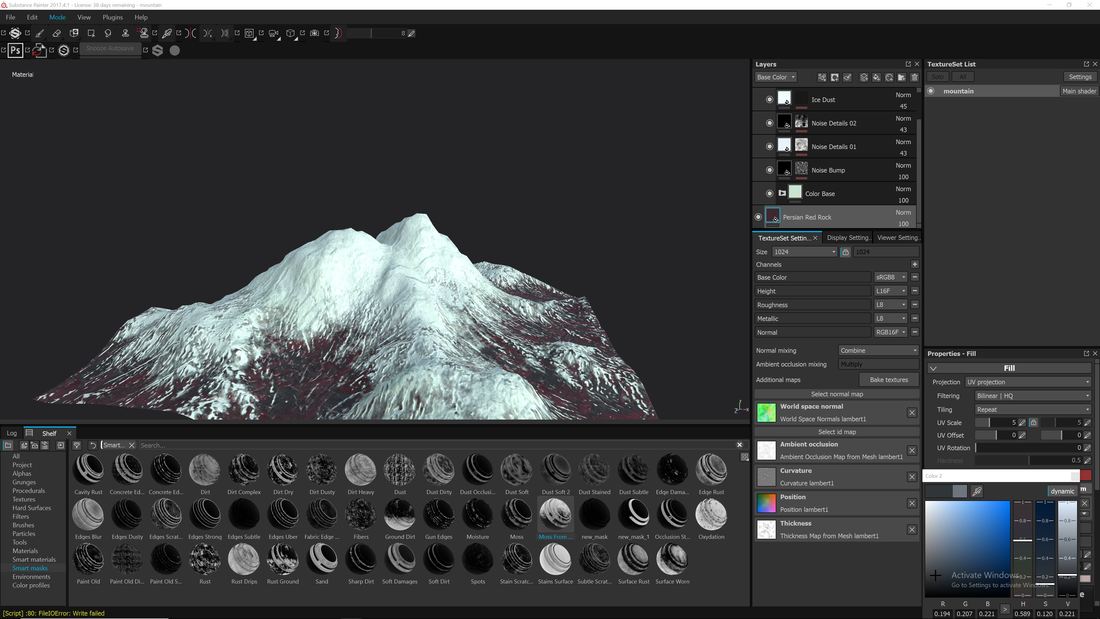 I then imported the model and textures into the landscape and placed them behind the terrain and placed them around the level to give the appearance of mountains in the distance. 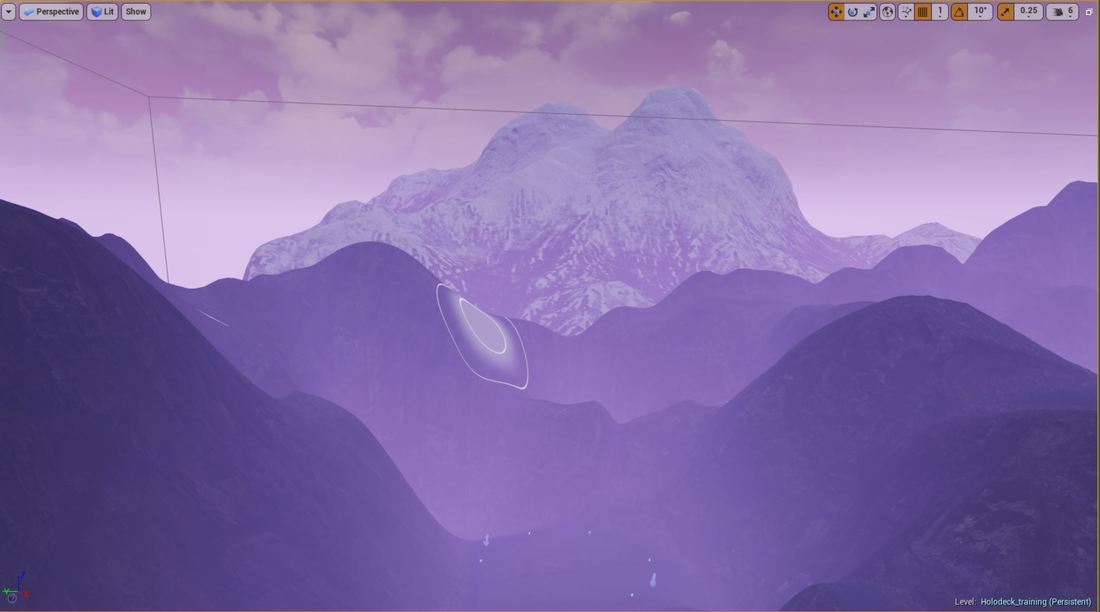 Below is images of the background terrain added to the landscape Task 3 & 4 For these tasks is about populating the level with models and then creating materials for each model, I decided for this task that I would use new software such as Zbrush and other tools in the substance package so I could familiarize myself with software used in the industry. I planned on creating a couple of models that would be widely used in my level; crystals, rocks and foliage. I started off by taking photos of rocks so that I could get an idea how I could break down these rocks and create a model of them.
I then used Zbrush to create a high-poly model of the rocks, using tools to morph it into the shape of a rock then add details to build on top of the rock and then used noise to add fine details into the rock such as air holes. Once the rock was created in Zbrush I needed to create a low poly version so I took this into Maya and then used the quad draw tools to create a low poly version then from this I was able to take it into substance painter and I was able to bake a normal map of the high-poly and place it on top of the low poly.
After creating the rock, I then took this into substance painter and then added materials onto the rock to give it a sci-fi look to fit into my concept. From this I then exported the materials and imported then into unreal engine. Improve the cosmetics of the rock After placing them into my level I found that these rocks looked two clean and decided that I needed to add some dirt and grim to these rocks, I decided after looking at photos of natural rocks that they had moss growing on top of them, I could do this in substance but the rock would look repetitive, I decided to create a shader in unreal engine. I used a moss texture which I turned blue in substance bit2material so that I would fit into my theme, I then used a material to create a shader that would place the material onto of the rock and give it parameters so that these could be edited for each rock. I then added a world space so depending on the position the moss would change.
I felt that I need more to my environment to make it more alien esque I decided on creating crystals, I plan for this to also help guide the player like the small orb plants but use these less frequent but at major points. I want to create a crystal that uses an alpha texture that I have created and use basic parameters in a material to change the colour of the crystal and take advantage of the alpha texture to make a unique pattern, I then plan to add a shine effect to the material. I then opened the crystal in substance painter, I wanted to create an alpha base material to get the patches on the crystals like you would find on cloudy quartz crystals. I started of by making a dark grey base layer and then I created another fill layer, I then added a smart mask to this layer to add a patchy mark onto the crystals.
I added my texture to a new material which I plan on been my master, so I can create material instances for this. I then created two scalar parameters to be used as my light and dark colours, I added these to a lerp along with the base material and added it to the base colour. I changed the material blend mode to translucent with a lighting mode of surface translucency. I then added an opacity texture which is a gradient created in Photoshop and also created emissive node to control the amount of light produced, I also created a colour normal map and specular and roughness nodes. 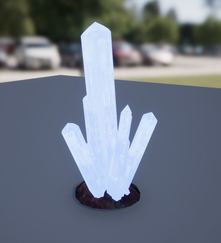 Error I then spent time trying to make the mesh look less opacity as it was causing clipping issues, looking into forward vectoring but was unsuccessful, I also try adding more to the refraction to create a more realistic shimmer but these was not working as well due to the clipping of the mesh. Solution To fix the clipping problem I turned the transparent blend mode off and replaced it with opaque which turns of the refraction which ruined the shimmer effect I was after, to solve this I created a line texture in photoshop and added to an world position and panner to move the texture across the crystals to give an effect of it shimmering in the light. 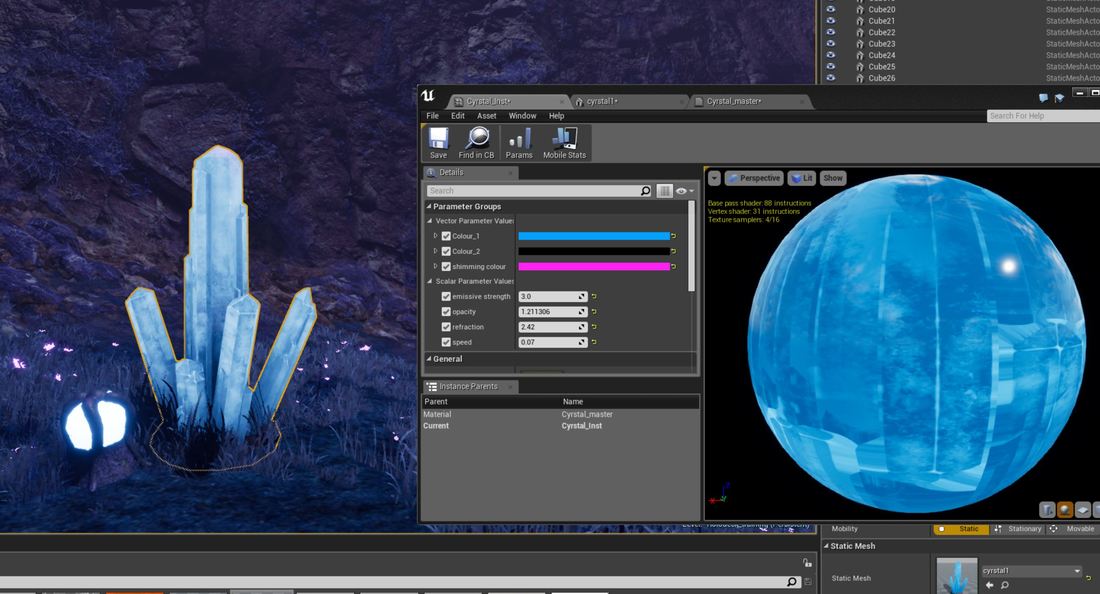 For the foliage I will consider creating my own using 3D software’s and I will also look into using game engine ready grass and migrating / exporting these and look into modifying them to suit my environment. I will then consider adding illusion to my foliage such as wind to give that feel that there is an environment. I started off by creating my grass, I wanted to create an alien looking grass, so I started off by going into ZBrush with a small plane, about 100by100uu. On this plane I used the fibre mesh to produce grass and then I played around with the settings till I found a happy medium of grass blades and then I exported these. Then I exported this to Maya and rearranged the grass blades to fix into a close square.
I then wanted to add wind effect to the grass so I found a video to how to create a shader to give the impression of wind I applied this to my grass I look into this a found that in unreal engine I can create a grass landscape type node, in this node I can add my grass mesh and tell the engine how many grass meshes to spawn on the landscape per 10meters squared in unreal units, I can also add unique features like scaling and rotation to the meshes to make it more random and also add a culling distance to help optimization. It is also an array, so I can add as many meshes I want to this node and it will spawn them depending on how many to spawn per squared meter. I found the textures for the meshes and exported the diffuse mesh out and opened it in photoshop and used the hue and saturation to change the colour of the texture. I then wanted the flowers to glow to make them more alien like, so I decided to cut the flowers from the image and place them into a new image and created an alpha channel for these by duplicating one of the RBG and then I imported this back into the game engine.
Below is an image of the final grass 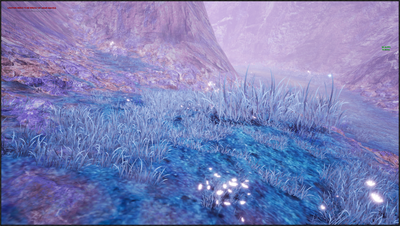 Optimization To improve the optimization of the level to get better performance I will look into different aspects of areas for optimization editing the landscape, level of details of assets and materials including billboards and level streaming for the indoor sections. Optimizing the landscape since I have created a large landscape with mountains around the edge of the landscape there is a lot of sections to the landscape that are been rendered that the player will not see, deleting this will help the performance a little as it will not have to render unseen landscape taking pressure of the CPU and graphics card.  Level of details For each asset I wanted to create level of details of the mesh. this is an automatic process that I can use in unreal engine, it reduces the number of polygon based on distance to be rendered. this use to be done in Maya by deleting edges on the mesh. Now its automatic process in unreal engine where you selected how many LODs you need and select the distance to apply the reduced rate. For each model I created I added 4 levels of detail to the model and changed the reduced percentage to 75 / 50 / 25 depending on how far away and added a distance of the same values. To help the performance during the level of details I can also set the textures to change at each point of distance in the LODS, to display a reduced texture size which will help the graphics card process quicker the materials and geometry around it without bottle netting and causing a performance issue I set up my tree material before so that I could change textures by using a master material and creating material instances from this master. to get reduced textures I opened my full resolution textures into Photoshop and went to the image size and reduced them to 1024 by 1024 and 512 by 512.
tree billboards To optimize the trees even more I decided to create tree cards for my trees, these are an image of the tree rendered onto a plane so when the user reaches a certain distance it shows a silhouette of the tree and when they get closer it turns into a model. I took a screenshot of the tree I wanted to turn into a billboard and created an alpha channel on this in Photoshop. I then created a plan that matched the tree. I then exported this and added this onto the level of details for the tree. I then created a material that makes the plane and texture of the tree follow the players’ camera so it looks like the tree is always in the correct ordination to the player. Culling the environment Since I have added high quality textures and a lot of models / foliage this takes its toll on the game and its performance. I have been running stat fps though the creation and I get an average of 60 – 120 frames per second. This is a basic performance test and I am going to look into improve the frames so that I can achieve a high frame rate in the areas I am getting 60 fps. I am going to look at 4 other performance stat commands:
I started off by adding a cull distance volume, this culls the models in the volumes depending on size and distance to the camera. I set up distance of anything under 100uu to be culled at 3500uu away from the camera and anything under 200uu at 4700uu, and anything under 500 to be culled at 6500. The next area to cull is the foliage as this might be low poly having it in large clumps that move in the wind is costly on the GPU and this could be where the performance drops are coming from, I opened the grass landscape node and changed the start and end cull distance to a low and high number as these were set to 0. I set it to be 250 is the start of the cull and the maximum is 2500uu from the camera. I then ran the performance stat tests again in the same area that is get low performance. The fps has shot up and now in these bad areas I get between 75fps to 90 which is a huge increase from 60fps. The unit stats have stayed around the same area but seemed to produce the same figure with out dipping.
The RHI shows that the tris count is now around 1.5million which is over half cut of the original test and shows this is helping the performance. The scene rendering shows that the times have dropped as well dropping form 11/12ms to around 6.5 to 7.5ms which has helped the performance massively as it not trying to render as much and the lag has reduced. Conclusion Overall I really enjoyed this development, I have learned a lot about creating environments and how to optimize large scale environments. I enjoyed creating and scuttling a custom environment and creating my own foliage and models to populate this environment to add feedbacks matching my concept art. I didn’t encounter any problems but I feel it has helped me learn more about unreal engine and how to use the tools inside to my power and create powerful landscapes. It has also shown me areas where I could improve on such as improving on my researching techniques to find more reliable information. I could also improve on my pre-production creating more and covering more areas as I felt missing out the character customization was something to overlook. The development went well, I was able to produced everything I had planned, either on schedule or before the schedule date. There was one task that was over the date completed but this was down due to the scale of the models that needed to be created and learning new software. Overview The purpose of this unit is to understand how the interfaces work in the game and why they are so important. also looking at different elements of technology, styles of interfaces, human factors, design principles and feedback of the interface. for my first task I have to research these types of elements and write an essay on how they will relate to my interface for my game. After this I have to look into pre-production ideas such as mood boards, mind maps, flow charts and wire-frames of how my menu will work and look. Then I will create this menu from my wire-frame and add functionality and then test my interface and get peer review. Time scale Task 1: Research Start date 18/9/17 Finish 30/9/17 I have given myself just under two weeks to complete the research into interfaces looking into forms of feedback, technical, types of interfaces, human factors and user interface design principles. Task 2: Pre-production Start date 1/10/17 Finish 10/10/17 I have given myself the time scale of 10 days to create pre-production of mind maps, mood boards, wire frames, flow charts and a basic block out. Task 3: adding functionality to my interface. Start date 10/10/17 Finish 5/11/17 I have given myself just under 4 weeks to add functionality to my interface the major developments I plan on creating in this month are: Character selection Character customisation Checkpoint saving Game difficulty Game settings Interactions Level streaming in game menus; pause, HUD and lift menu 3D environment and graphic, post processing (in each of the sections above) Task 4: Testing and reviewing Start date 6/12/17 Finish 13/11/17 For this unit I have given myself a week to gather peer review and to test my menu system with white and black box testing methods. Task 1 For task one I had to research and write and essay on about interfaces looking at 4 keys areas, technology, interfaces, human factor, user interface design principles and forms of feedback. For each key area I had to look at several aspects and write and understand how this could influence and have an impact on my interface system. For technology I considered keyboards and mouse as I plan on my game been produced to be used on a computer I looked at how interfaces used keyboards before moving to a point and click system. From here I considered screen resolution as ever user could have a different monitor size to what the game is developed on, I found out from my research the most used was 1280 by 1024 or higher. For interfaces I considered sense oriented and how interfaces don’t have to be a 2d graphical image but could be more diegetic and immerse the player into the game more. For example, having the health bar on the player. I then considered voice recognition but didn’t pursue this as unreal doesn’t support this feature. I also looked into command line inputs for cheats and Easter eggs to add a uniqueness to my game. For human factors I researched about user experience and how much a user plays games leading into adding difficulty settings to add challenges. After this I looked into accessibility and how my menu could be use with people who have mobility, hearing and vision impairments. For user interface design principles, I looked at the architecture of interface systems and what makes a good interface system looking at complexity, easy to understand, sub-categories and how the interface looks and typology that makes an interface system. Finally, I considered forms of feedbacks I used three industry standard games interfaces (Dead space, Fallout and Prey) and looked at the physical, perception, visual and control methods. this gave me a great understanding how interfaces work and the types of feedbacks that each interface gives and what would be expected of mine Time scale I was able to produce my research essay within the deadline I set for myself most of this was spent finding articles to refence and finding realisable sources of information. After creating my draft, I only had to make minor changes to the essay before finally submitting it, all within my time scale. Task 2 For task 2 it was about pre-production, I had to research several types of interfaces to get an idea of how I would want mine to work and look like. I broke this pre-production down into, research, mind maps, mood boards, flowcharts, wireframes and a block out of my interface. I started off by doing added research I wanted to consider colour psychology and shape psychology as I felt this had a massive impact on the type of feedback my interface would create depending on the shapes and colours I chose. I considered what each colour and found out how it could influence people and then I did the same with shapes. After my research I wanted to get my ideas I had for my interface down onto paper, so I decided to create a mind map, in this mind map I broke it down into three areas: types of feedback, architecture and interfaces. For feedback branch I considered different types of feed backs I wanted to give my menu such as the physical feedback for example; colours, shapes, sounds and typology. I also considered visual feedbacks such as; button styles and graphics type. For my architecture branch I broke this up into three subcategories the first one been interfaces where I looked at the type of interfaces I would have, how I would be able to navigate in my interface and what I could have in my interface. The next branch I considered peripherals and looked at different types that I could use to control and navigate my interface and continue using this into the game. for the final branch of architecture, I looked at different human factors such as: age, localizations, the user requirements, and experience levels. For the final major branch, I looked into interfaces, for this branch I wanted to come up with as many ideas as I could that I could use in my interface and what my game would require, I also looked into other options that I could use in the future if I ever wanted to expand my game. Below is my mind map 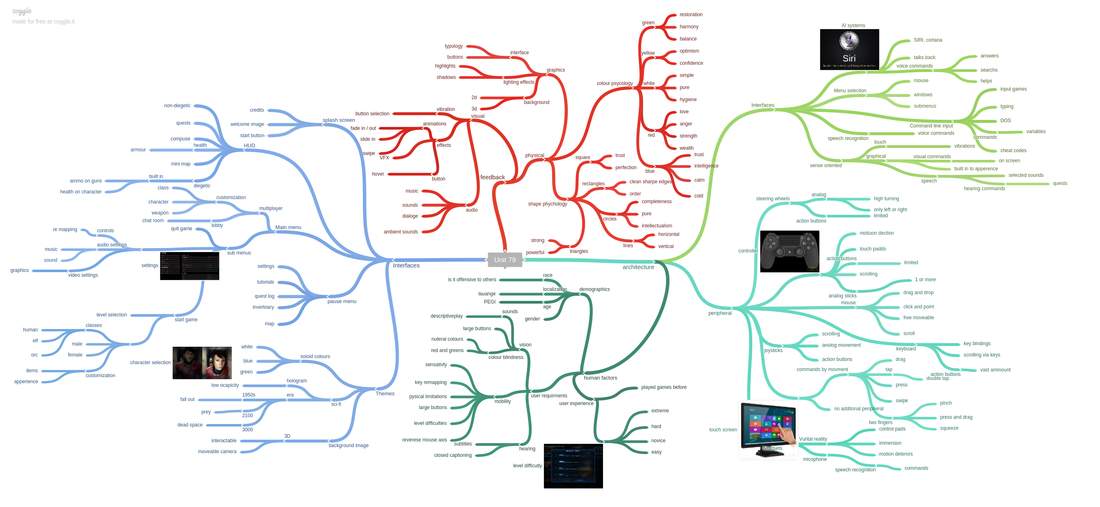 Once I created my mind map I wanted to get my ideas on a visual representative, so I decided to create a mood board to find my ideas so that I could visualise the feedback and style that I wanted to create. In my mood board I looked at different menu styles, the several types of interfaces such as options, character selection, customisation and how I want my menu to look like. I also looked at other ideas I wrote down such as HUD elements like health and ammo and in game menus that I could use to help improve my game. Below is an image of my mood board: 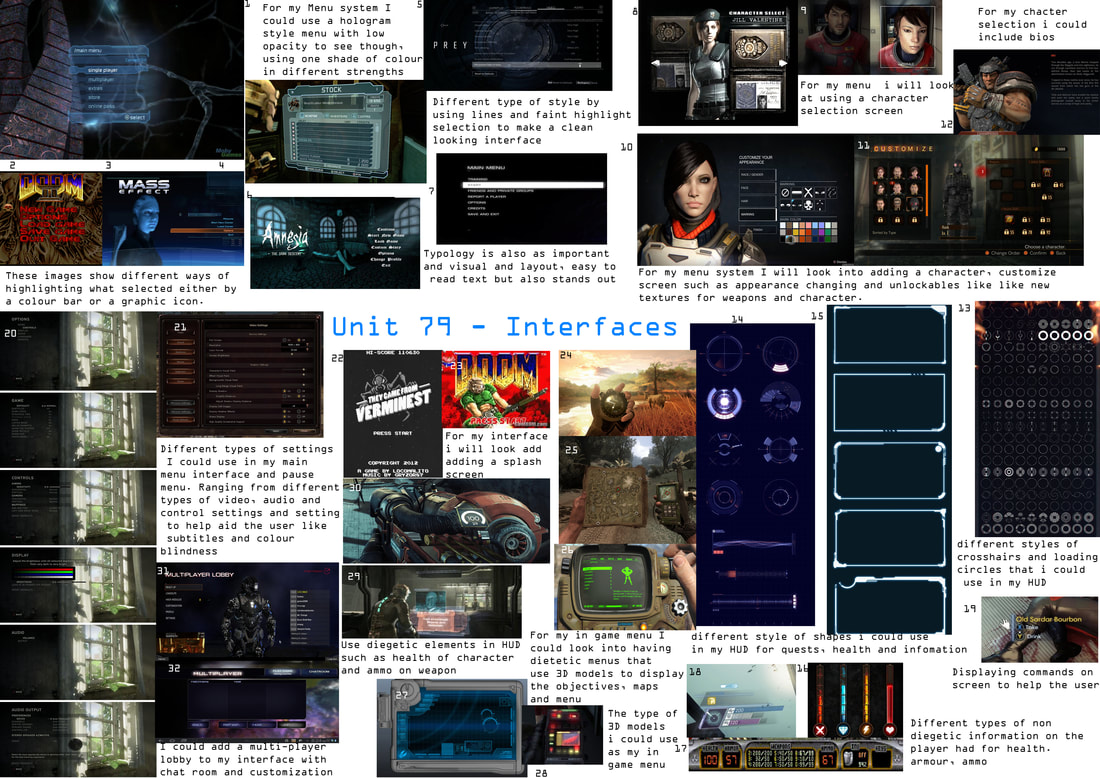 After creating my mood board, I had a few ideas how I wanted my main menu to look like so I decided to sketch these ideas down onto paper so that I could have a visual idea of what I wanted to achieve. I drew three sketches all having a space theme, my first which was a simple menu based in the solar system for a background using horizontal lines to keep the buttons and text into a section. I then had a console looking sketch idea where it looks like the user is controlling a console station it would have had a 3D model of a space ship rotating and all the buttons would have been at the top. Then my third example was a large open environment with a small simple menu system in the left-hand side with the buttons. On the right-hand side would have been a large planet rotating. After getting my sketch ideas down onto paper I then decided to create a flowchart of the main interface, pause menu and other in game menus. These flowcharts show the main interface is connected to the in-game interfaces and what happens on completion and death. in red squares is the main interfaces that people will use and interact with. The blue circles represent the sub-categories of the main interfaces and command buttons that direct them to another interface. Green diamonds represent gameplay and cutscene that are triggered by the interface. I then created flowchart diagram using the same methods as above for the in-game menus that do not connect to the main interface system for example the lift and holodeck menu. From the flowcharts that I created, I wanted to create wireframes of each main interface and sub-interface, on these wireframes I want to show the position of the buttons and type of button, text, canvas, background images and the information each interface has. I created this by drawing basic shapes to outline the boundaries of the canvas, the location of buttons, text and miscellaneous items. I created an HUD wireframe as well, so I could get the positioning for the health, armour, enemy health and ammo. I also created wireframes for the in-game menus such as the lift and holodeck menus to get an idea of how these would look like too. These wireframes can be seen below After creating my wireframes, I decided I want to turn those wire frames into the interface. For this I just wanted to create a basic block out, to get the positioning correct before I add functionality and graphics. I started off by creating canvas for each of the sub categories, once I got the position for the title and horizontal bars I duplicated these to all the other canvas that had these. I also create the basic layout for my settings and character selection so that they would be ready for any functionality to be added to them. Below you can see a few screenshots of the interface. Changes I made a few changes from my flowchart/wireframe and when creating my block out, I planned on having the difficulty setting after the character selection but the camera transitions going back and forth didn’t feel right so I decided to move the difficulty settings in front of the character selection. Time scale For my pre-production I gave myself 10 days to complete any pre-production. I was able to get the bulk of it done in a few days, the wireframes and turning them into block outs took the longest but this was expected as creating the widgets in unreal engine can be a time-consuming process to get every element in the correct location. I didn’t run over my time scale to complete my pre-production, I started to blend task 3 into my time scale once I was towards the end of creating the block out for example adding ability to swap canvas to show the sub-categories when a button is clicked. Task 3 For this task it is all about the core functionality that will be include in my interface system, I broke down the core developments for each task and setting individual deadlines for each task. This will help me project manager my core development and help me stay on top of the easier developments that I might forget to do. The core functionality and mechanics that I will aim to focus on are:
Character selection For my character selection, I started of using a template that when I click on a static mesh I would load the character details, I decided not to use this after testing it. I was able to work but for my game menu system it would not work as I planned on creating my interface its own level and I had to spawn the correct character selection over to a new level. This involves saving those variables selected. This method I started using if the game wasn’t too large and I had planned on using persistent levels with sub levels below. After researching on creating a custom character selection that would work for my system of having the menu system in its own level before the user is teleported to the starting level. I started off by creating blue and pink character meshes for my character selection screen, for the time being these meshes is what the user will take control of to play as either my male or female character. I then created a save game instance and set up my menu level to be the default map. After creating the meshes I added three variables into the save game, an integer for the user index, a string for the save slot and a Boolean to check if the male is selected. Then I went into the blank character blueprint and added a spawn actor that would spawn the newly created meshes in my main menu widget. When the male is selected the female mesh is depsawn and spawns the male mesh in front of the camera and vice versa. In the event graph I used the Boolean to determine if the male character is selected or not, I then created functions that would use the save game instance to save this Boolean and the other variables. I then went to my character blueprint and added the same functions so when the player starts the game the character mesh is spawned and selected from the set variables in the save game file. Every time the player changes level these variables will be loaded, and it will be the same mesh. A demo of the character selection can be seen below in its block out state. Character selection update 17.10.17 After implementing my character customisation, I was able to import and create my character. As I had to edit my selection screen to accommodate my customisation screen I felt it was necessary to update my character selection. Instead of spawning one mesh now when male or female is selected the blueprints that I edited now spawns 6 skeletal meshes that share the same animation blueprint that makes the mesh move simultaneously. This is what allows my character customisation screen to work as it is changing one of those body parts. Also since creating the character selection the environment has been improved and now features the character in its own quarters when the user is selecting which character. Below you can see a video of the character screen after it been updated. Character customisation screen For my character customisation screen, I wanted to let the user be able to customise the character that they have selected regardless of if it is male or female. I came up with the idea of keeping the change unisex so looked at changing the hair colour, uniform colour, hair style and adding a PDA on the character arm. I started off by uploading my character to mixamo so that I could get a quick skeleton and animations so that I could add my custom character in to the game. Once the character was rigged I then took it into Maya and I started to separate my mesh into 6 parts; hair, head, uniform top, uniform shirt, legs and pants. I then exported each of these meshes with the skeleton and imported them into unreal engine. Error When I tried to create blend space and animations for my character so that it could go from idle to running it was not working. I decided to have a look at the skeleton in unreal engine and it had only imported two bones from the skeleton. I then opened the exported file in Maya to notice during the export the mesh had unskinned from the skeleton. This was a simple and quick fix by reskinning the mesh to the skeleton and reimporting. After doing this I was able to add a blend space and animation to my uniform shirt, I used this as the base so that I could get a visual representation that the animation was working. I then selected each skeletal mesh and assigned the skeleton to the skeleton that has the animation. Each body part now uses the same animation blueprint. I then went to the character blueprint and added skeletal meshes under the mesh for each of the body parts. I left them blank, so I could assign me meshes to it. I then went and edited the character selection changing this from spawning just the one mesh but to spawning each of the body parts in the skeletal meshes that I assigned in the character blueprint. After I had sept up the mechanics for the custom character I started creating my widget for the character selection, I started off by changing the material by casting to the character blueprint and getting the reference to the hair/uniform body part and then setting the material for these body parts. I set up buttons with different colours. After this I imported hair meshes that I created for my character and used the same method of getting the body part reference and setting the mesh to the new body part. For the PDA this was a mesh that I connected to a socket on the characters body and I turned the visibility to off. In the widget I added an event dispatcher that I could call on a flip flop to turn the visibility on and off. After I got the widget set up I added the code to display the widget on a console and added a camera for it to transition too and a spot light to light up that character. Below is a video of the final character customisation screen: Game Difficulty After my research into game interfaces I wanted to add a level of difficulty to my game, for user who have never played games to users who game regular can both enjoy my game, for the difficulty setting I have decided it will affect the player's health, armour, ammo and enemy difficulty. I decided only to implement the health and armour for the time being and will add more to this in the future. I started off by creating a game instance that can communicate to blueprints and levels. In this instance I added health and armour variables as an integer. I then went to the main menu widget and for each button I cast to the game instance and set my health an armour. To see these variables, I then used variables inside of the widget with values of 200,150,100 and 75 depending on the level and connected these to the set values. When the player selects the difficult these variables are set in the widget and transferred to the game instance. I then went to my character blueprint where I wanted to set the characters max health and armour by using the variables that were selected in the difficulty settings. I did this by casting to the game instance and referenced these variables. I then created a health and armour integer variable in the character blueprint as these will be the live variables and set these and connected the game instance reference variables to these new set variables to set the values. After this I needed to set up a HUD system to show my health and armour, I created a new widget and placed to progress bars at the bottom with text. I created a bind function to these and cast to the game instance to get the max health and armour and to the character selection to get the current values. I then used simple maths to work out the percentage as a progress bar works form 1- 100 percent. I then created a simple function to remove health to test my health and armour. A video can be seen below Update 28/10/17 Since creating my game difficulty and HUD I decided that I need more of a visual representative when the player gets low health, so I decided to add an animation to play flashing the screen red around the boarders to simulate this. I did this by creating a simple image in photoshop and then created an animation in a new widget to remove the visibility of the image and show it again. The results can be seen below Checkpoint saving and loading The main aim for my save and load function of my game is that all the information of the player gets saved at the end of a level (health, armour) and loaded into the next level the player selects. When the user exits the game, player will be spawned at the beginning of the level selected with the current health and armour. I started off by creating an enumerator, in this enumerator I added all the level name that I wanted to have for my checkpoint save. I added this enumerator to a new blueprint called checkpoint and made it editable so that I could select the level in the details options. In the checkpoint blueprint and the save game instance I created new variables, a vector for location, text for current level and four integers for my max and current health and armour. I then added an collision box with an overlap and then from the player begin I created an branch to check for a save file so that it know to create or load one. From here I cast to my save game file and I set all the variables I then cast to my character blueprint and got a reference for the current health and then I cast to the instance to get max health and connected these to the set variables from the save game file. I then wanted to save the location so form the collision box I got the current location of the actor and set it in the vector variable in the checkpoint blueprint I then cast to the save game and set this variable using the checkpoint variable to reference where the player was. I then also used the text variable and enumerator to select and set what level the checkpoint was on, so those coordinates were set on the right level. Error As you can see in my video it saves the information on what level the player is on, but it isn't saving the coordinates of the location, I spent many hours and solutions trying to get the player to spawn at the checkpoint and decided to leave it as the player is spawning at the start point of the levels and saving what level the player is on. this is something I will come back revisit and figure out how to spawn the player to that location, but first I need to carry on with the rest of the save and load function as I didn’t want to run over on my project schedule. I then went to the character blueprint and added two functions to save all the current health and armour to the save game file and another function to load these back into the character when the game is loaded. To load the save game file I added a simple line of code in the main menu widget that loads the save game file and loads all the variables teleporting the player to start of the level with the current health and armour that the user had. The can be see below been tested: Changes that I made In my flow chart and wireframe I planned on having a canvas with four loading saved games I concluded as I didn't need this as I could just load the last game by clicking the caption button instead of selecting previous saved games. It will also be easier for the user to navigate though. Game settings Video settings For the graphics settings I used arrays to store text values and console commands, I decided on using this method as it keeps the interface looking tidy without having multiple buttons all over the interface for each setting value. I started off by making a text variable I turned this into an array, named its main settings and added 4 elements to this array, this is where the text will get the level of settings from so I added low, medium, high and ultra. After this I created 8 more text arrays with 4 elements inside, each of these arrays would be the console commands so for graphic array this would change the resolution of the screen so I put in r. screen percentage 25,50,75,100 for the levels. After creating the arrays, I made 8 integers, and gave them all a basic value of 3, this value will represent which element is selected in the arrays. After creating the variables, I took the main setting variable and got its length and sub stroked 1 from it and added a clamp to stop it going below 0, I did the same with the internet variable when the user clicks the left arrow but for the right button I added 1 instead. These connect to a site, which set the integer variable. The set variables connect to an execute console command which would change the setting on the arrow press. When the user press the arrow now the setting will go up or down and display what level it is at. Using console command changes, the settings in the engine so I don't have to save them like I did with the character, I could save them to a config so every time it the game loads up it remembers the last settings instead of going to the default value. Below is a video of the graphics settings: Audio settings For the audio settings I have master volume that is also a slider. This slider controls the master volume for the whole game, to cast this though the whole game I used the game instance that I made for the difficulty level. I started off by creating a float variable and called it master volume. I, then we to the blueprint of the game instance and created an 'event into' and connect this to a set base sound mix and created a new sound mix file. I then created a custom event and set the master volume and connected the float to this custom event. I connected the set variable to a node called the 'set sound mix class override' set my sound fixer in this and selected the pre-made file of master in sound classes. Then I got my variable and connected it to the volume. From this I went to my menu interface and selected the slider and clicked the change on value button and from this I cast to the game instance and pulled out a pin to my custom node and connected the audio volume to the slider value, this will set the volume when the user uses the slider. I placed some music into my level and gave it a test, the slider reduced the volume. Changes After getting my master volume working I decided I wanted to add more control to the audio settings, after research I found out I could assign audio its own sound class which means I could control these sounds classes by its own slider and connect it to the master control. To implement these changes, I duplicated the code in the game instance and added new variables and custom event and set it up in the same as the master. Below is a video of the audio level been tested. Interaction 1 For my first interaction I have set up a system for user to select a combination of buttons that will set the bridge into a red alert senior as the user has turned on the gravity, the NPC will float and this is where the player can use radial impulse to move the character in the gravity. As I started off by duplicating my character blueprint and deleting the none essential code and left the movement feature. I then move the collision box away from the character to stop strange physics. I then placed this into the game work and made the character look like it is in the chair. I then changed the global gravity to 0.5, and placed a physical volume around the level. I then cast on a key combined for the player to jump and on a delay to ragdoll and this is what makes the player look like it floating in the low gravity. Once the character is floating then enabled radial force with a line trace then I attached this to a tick with a gate so when the player clicks open the gate it fires the radial force and pushes the player around. I then used event dispatchers on the buttons clicked on the console and used Booleans to check if the buttons are selected and when all the buttons are selected this will enable the interaction and radial force. I then wanted to add visual effects in the environment to create a red alert, I started off by getting references for all my emissive lighting in the environment and adding a set material to all these changing the white emissive material to a red material. I then changed the point lights by referencing then and changing the intensity and colour and to add more effect I enabled a sound to play. Below is a video of me testing the red alert interaction Changes / updating the visual effect For the red alert I wanted to a give the impression that the lack of atmosphere is affecting the camera system, so I decided to do for a glitch type of post processing effect. For this I used a third-party plugin in for this as creating a glitch material is very time consuming. I started off by creating another post processing volume and placed it over the first camera that user interacts with, I then created an array and added the material instance to the post processing material. In the event graph I added another pin to the sequence pin and then got a reference to the new post processing volume, from this I got the enable the volume. I added a delay connect to a random float to randomize how long to wait before enabling and then added another delay with an random float to randomize how long the effect will be on for. To add more effect, I created an camera shake blueprint and added a node called the client play camera shake to the blueprint that will add a subtle camera shake when the post processing volume is enabled. Interaction 2 I wanted to create a field of asteroids that spawn in front of the spaceship that the user can fire and blow them out of the way, I started off by looking at mechanics of how I could trigger an event to destroy the asteroids. I created a new blueprint actor and place a cube inside of this, I then went and added a button to the main menu that I could fire and destroy the cube. I came across a few errors for this system and I had problems respawning the asteroids so I decided to create a dispatching system with a life spam to destroy the mesh if it’s not had any interaction for more than 30 seconds. Once I had the dispatching system working and had random asteroids spawning over a large area I decided to turn these meshes into destructible meshes and I then added a radial damage node with a particle effect on impact. This will destroy the destructible meshes and look like the explosion has destroyed them. After this I wanted to add random effects to the interaction so I added a dynamic material instance function connected to random floats so that would change the colours randomly on spawn. After this I wanted to add a post processing effect to give the impression when this random effect is selected the user is under a drug influence. I used a simple post processing volume and enabled the chromatic effect to add a light blur and also changed the depth of field to add a slight blur. This can be seen tested in the overview of the menu video around 6.30 seconds Level streaming I wanted to use the level streaming features to make my game run more smoothly, I started off by selecting the part of the level I wanted in a new sub-level and then I went to the levels tab and created a new level with the selected actors. I then went to the level blueprint and added a node to the door button to load the new stream level, from here I wanted to the steamed level to deactivate when the player goes back though the door, the way I did this was by adding a trigger box inside the door frame and using a Boolean that the player sets every time they walk through the trigger box. It will then use this condition to see if the player has walked through the door after the button is pressed if they have the level will deactivate. In game menus; pause, death menu and lift menu For the pause menu all I did was duplicate the main menu widget so that I had the same layout and deleted the canvas that I did not and any code that was not needed I then changed the buttons to match my wireframe and then I set up the mechanics in the character blueprint to display the widget and pause the game. I then repeated this process for the death menu and for the lift menu I just added buttons with graphics that I created and just added code to load up the level selected.
Conclusion
I really enjoyed this part of the development, I feel like I have learned a lot about interface systems and it has broaden my knowledge of what is required to create a good interface system that is easy to use but also gives the right forms of feedback to the user. I found that certain areas gave me a challenge and made me work hard to figure out the problems I encountered but this overall improved my knowledge of how blueprinting works within unreal engine. It has also shown me areas where I could improve on such as improving on my researching techniques to find more reliable information. I could also improve on my pre-production creating more and covering more areas as I felt missing out the character customization was something to overlook. Overall, I think the development went well, I was able to produce everything I had planned, most of these were on schedule or before the scheduled date. I had two development tasks that took longer that the deadline that I had set myself. The character selection took longer than anticipated as I didn’t realise that I had to implement save and load functions of what character was selected as I was using my own menu map and not streaming from a level in the game. This added time onto the development task to get this feature working. The next development task that took longer than I anticipated was the checkpoint saving this was mainly down to how complex it was and getting all the variables to save and load up the correct ones was time consuming but a good process to learn. Even with these two development delays I was still able to produce everything planned for and was able to produce the menu that I was looking to create. Overview The purpose of this unit is to create a basic 3D environment in block out form. From this block out the form I have to take screenshots of the environment and take these screenshots in Photoshop and composition these screenshots to look like my mood board and vision from unit 75. I have to create 3 images from the start of my encounter, the middle and end of the encounter. Once I have created the concept art I have to go back the block out and add functionality and game play. Once I have added this I will add basic lighting and simple materials that match my concept art and mood board. Time scale Task 1: Pre-production Start date 18/9/17 Finish 2/10/17 I have given myself two weeks to complete the pre-production of mind maps, mood board, research and the basic creation of my block out of the levels I am planning on creating Task 2: Adding game play functionality Start date 3/10/17 Finish 9/10/17 I have given myself the time scale of a week to add the game play functionality as I have most of the resources created from previous units and I just need to improve these. Task 3: Concept art Start date 10/10/17 Finish 30/10/17 For my concept art I have given myself 20 days to produce 3 different types of art work, I have broken down how much time I plan to give myself of each of the concept art. For the first image I have given myself 12 – 20 hours to produce this which will take around 7 days. For the second image I have given my self-6 – 12 hours to produce this which will take around 5 days. For the third image I havegiven my self-6 – 12 hours to produce this which will take around 5 days. I will have 3 days’ spare to consider peer reviewing of my concept art and to make any adjustments. Task 4: lighting Start date 31/10/17 Finish 15/11/17 For this unit I have given myself 14 days to create the lighting effects, particle effects, lighting functions and materials to my block out level. I plan on giving myself 10 days to complete this with 4- 5 days to complete peer reviewing and evaluation. Task 1 For task 1 it was pre-production task, I started off by creating a mind map to get my ideas down, for my mind map I broke it down into two major categories; environments and game mechanics. For the environments category I looked into various different types of environments that I could include in my game such as sci-fi (alien planets, space ships) different types of landscapes (valleys, mountain ranges, rivers). I broke these down to what each type would include, the type of materials and vegetation each area would have. After I looked at the different types of environments I looked into what different types of structures could be found in these area. I also looked into different lighting styles for the environments, such as; post processing styles, the atmosphere style/lighting and lighting types. For the game mechanics category, I looked at different types of core mechanics I would want to include in block out of my game that I could work and improve on. I looked at level mechanics, such as checkpoint saving, trigger sounds and animations. Then I looked at player mechanics how they would move and fight. After this I looked into boss mechanics how the boss would move and attack and looked at basic AI and behaviour trees. From here I looked at how the weapons would fire and the different styles of attacks. For my mood board I looked into ideas that I wrote down in my mind map. I started of using Pinterest just to save photos before I created my final mood board. In my mood board I looked at alien worlds that people had concept drawn, alien vegetation, already made sci-fi games and their styles. I also looked into materials I could use for my block out and concept art. I also looked into different styles of concept art painting, looking at the brushes and basic drawing techniques like drawing perspective points. Finally, I looked at different styles of lighting and the colours I could have used. Below is my mind map and mood board from unit 76 Before I started to create my block out I did some additional research for my concept art that I would be doing in task 3. For my research I looked into colour psychology, looking at the positive and negative of major colours and how it could have an influence on your art work, this also helped me when I was creating the lighting for task 4. Then I looked into shape physiology, I decided to look into this as I was creating a sci-fi styled level and the flow of shapes is extremely important. After this I looked into perspective lines and single points which would help me create my concept art. Then finally for my concept art I looked into different styles of creating concept art; digital art and composition, looking at the different styles and how each is created. After this I started to create my block out in unreal engine, I started off by selecting the map layouts that I created in unit 75 and started to block out my level to how I have drawn them. Once I got the basic layout down I started to created detailed BSP models by using different BSP and using the subtract feature to add unique shapes to these BSP. I then selected these BSP and turned them into static meshes so that I could easily change them when I create them later on. I created the alien world by using the landscaping tools and quickly block out a small hill range with a path that U-bends to make the impression that the path is longer. I then added basic solid colour materials to the walls, floor and ceiling to establish them. Below is screenshots from my block out Task 2 For task two I had to add gameplay functionality to the block out that I have just created, I had briefly touch up on some of the mechanics that I wanted to include in my game from unit 75. I started off by adding all the input keys that I will be using for my game and added a console controller for future adaption. After adding the input keys, I then draw how I would have wanted my camera for my game, I decided instead of having 4 camera I decided to have two cameras for first and third person view and then use an enumerator for the third person camera and when I selected the name it would offset the shoulder camera using a location node to offset it. Then I added key binding so that I could swap between the two shoulder cameras and then swap back between first and third person. A video of this can be seen below Once I had created my camera system I wanted to create a custom interaction system as I had problems when I used other methods in previous tasks that the player could not interact correctly with two cameras as the method I used suited more the first person camera. I started off by looking into line trace as I wanted to use a line trace to trigger the interaction on hit. I decided to use the line trace with a capsule on the end as this will give me a large radius to interact with blueprints. I started off by creating a blueprint interface as this will be my new interface action node and from here I went to the project settings and added a new object channel and trace channel which will show up in the collision detail tab. I then went to the character blueprint and created a new function. In this function I started off with an event tick, as I wanted the line trace to fire from either first or third person I got reference to these. I placed the line trace by capsule into the function and then I used select node to determine if the player is in third or first person and to get the world location of the camera. I then used my enumerator to get the variables for another selection function, in this select function I set the distance the line trace would fire for each camera. I then added them together and added them into the start and end pin of the line trace. I then added a break hit result and added my blueprint interface to the hit actor as well as promoting it so I could set it once it had been hit. I then used my interaction action input key I created before and called the promoted variable and connected it to the player interact After I got the core mechanics working for my player interact system I created a basic door system that I could walk up to and press the interact key to open the door. To create this, I created a new blueprint and added door models to the blueprint. I then went to the default tab and added the newly create player interaction so I could call it in this blueprint. I called the node in the event graph and then added some basic code to open a door. A video of this can be seen below After getting my interaction system working I was able to adapt on this and I started to create more complex blueprint systems I wanted to use a button system to open my doors. To do this I created the same process as the door but instead of adding blueprint code I use an event dispatcher to call the doors and other mechanics such as lights. I tested this system and I noticed a small error, not that it wasn’t working. The problem is that the radius of the line trace was small and it was hard to hit the button. The solution I came up with was to make the radius box large and slightly extend the line trace to make sure it hit the interaction system even if the camera was not pointed directly at it. After this I created a similar system to turn on lights which can be seen in a video below:
Task 3 For this task I had to choose three images from my block out and create concept art from them, it had to show the flow of gameplay from start to finish with the boss in the final image. For my first image I decided to do my corridor to show the direction the player would go to start the mission. I decided to do this concept art as digital art. I started off by drawing perspective lines to find the vanishing point, from here I started to draw basic outlines to create the basic look of my corridor. I used the pen tool to create the outlines and then I merged these layers to create the final layer. I then created a new layer and filled it light grey to help me see the outlines, I then created a new layer and added more details to create panels and lights. After creating the outlines, I then used a new layer and selected the lights I just created and filled them white to create the illusion they are emissive lights. From here I started to select part of the corridor using the magic wand tool and created a basic metal texture to using different shades of colours to add depth. Once I had these areas fill with the material texture I used the dodge and burn tool to add light and shadows to each area. I then wanted to add more depth to the concept art, to do this I downloaded custom brush tips of metal panels and grids and I placed them around the corridor to add more depth and realism to my concept art. After this I added text using the perspective lines to get the right direction for the text. I then used image adjustments to add a post processing effect type on top of them image. After this I wanted to add lighting to the concept art, to do this I started off by creating a new layer and used a white brush to paint where the lights are and then I added a Gaussian blur to give the impression of emissive lighting. I then used IES profile brushes to add unique light detail and to add realistic lighting I used the lighting filter to add more depth to the lighting. Below is the final image of my first concept image. 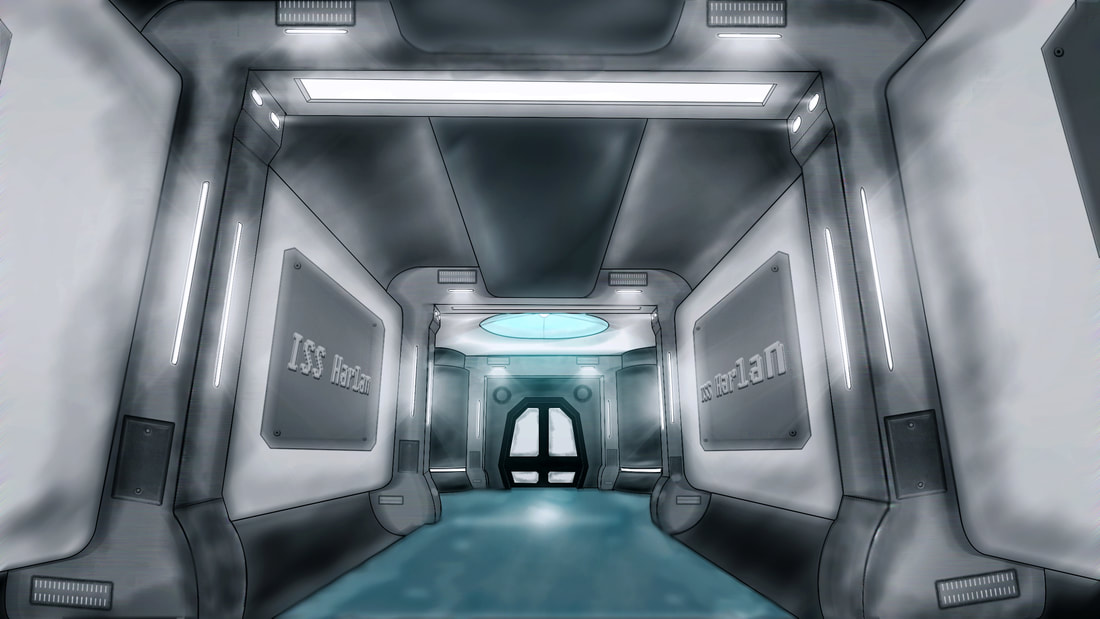 For my second concept art I have decided to create a photo composition, this will be for my middle phase of the gameplay flow. I based this concept art work at the start of the alien world. I started off by looking for reference images, once I found the images that I want to use I placed my screenshot from unreal into Photoshop. I started off by separating the sky by using the pen tool to select around the mountains once I had selected the sky I cut this into its own layer so that I could make selection for mask quicker. I started off by adding the sky image and selecting the empty sky with the magic wand tool and then selecting the image and adding a black mask to this to only show the selection, I then did this with the photo of space and lowered the top sky photo opacity to make the stars appear though. I then edited a planet image that I found by using the colour range selector. I selected the background using this method and delete it. I then added the edited planet and placed it between the skies. I then changed the levels and brightness/contrast to this layers to make them blend in more. I then added the dust road to my concept art and added a black mask to it and drew the type of path I wanted to have on my concept art. I then used a dirt brush tip and used the eraser tool to remove parts off the path to show the grass though. I then repeated this process for the mountains range and used a dirt brush tip to lightly remove parts of the mountain range. I then changed the levels, curves and brightness/contrast to make this blend in. After this I edited the images of alien vegetation that I found by using the colour range to remove the background and then I placed them in the concept art duplicating them and using the transform tools to warp and make them smaller. I did the same with the minion NPC and transformed then to make them look like they were running down the hill side. After this I repeated the process to add a group of characters to represent the player and the team. I then changed the levels, curves and brightness/contrast to make all this blend in. After this I added emissive light like I did before in concept art 1 by adding brush strokes behind the light sources and using the Gaussian blur to blur them and then I added lighting effects to add detail lighting to the concept art. I asked for peer review on my concept images and a few people commented that I needed to add more shadowing to this concept imaging, from the feedback I added shadowing to the concept art. I used simple techniques such as burn tool and using the paint brush to add casted shadows on my concept art. Below is the final image of my second concept image. 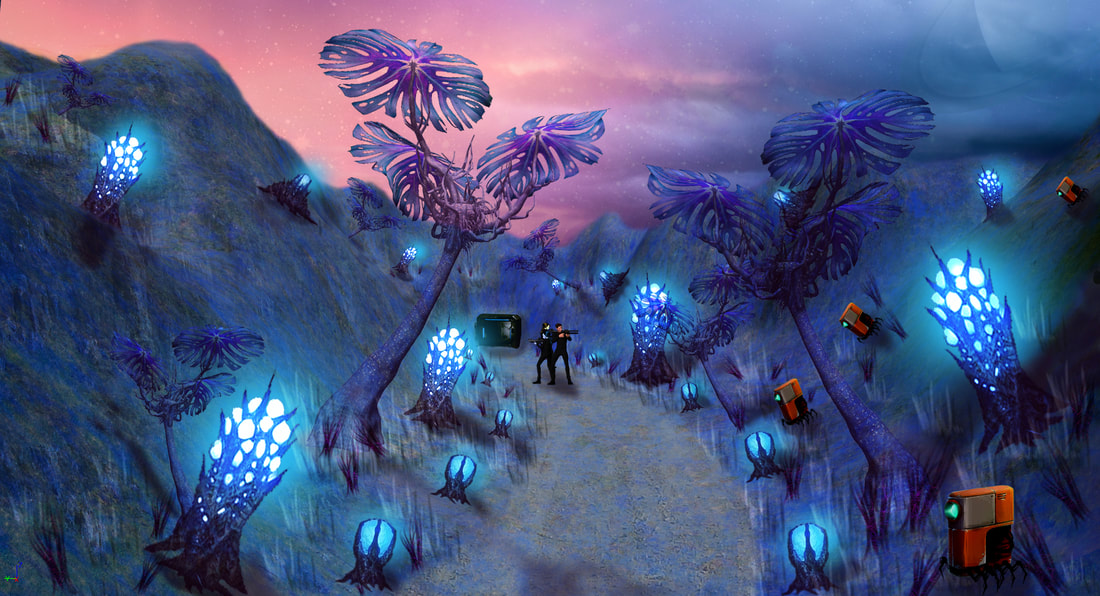 For my final concept image, I decided to do a combination of both digital art and photo composition. For this concept image will be at the end of my gameplay flow and show the boss. I started off by gathering image resources. I used the same methods in concept image 2 to create the sky with the stars and planet, the mountain range and gravel path. Using masks and brushes to create the effect that I am looking for. I then imported a spaceship, I edited the space by removing its background by using the pen tool and inversing the selection to delete the background. I then used a perspective transform edit to position the spaceship on the concept art so it followed the lines of the perspective point. I then used the clone tool to remove old geometry from the block out. I used the magic wand tool to change the hue/saturation of the selection on the spaceship to add the colour of the sky reflection on the metal. I then placed a dust image behind the spaceship and used a black mask and a brush to add a dust cloud. I then brought my war machine into the concept art and I then added brightness/contrast and curves adjustments to blend the war machine into the scene. I then added a shadows underneath the war machine and spaceship. I then placed in the vegetation like I did from the second concept art and I then added emissive light behind these using the Gaussian blur and then I used the lighting effect to add more detailed lighting. I wanted to create more realistic shadowing for my concept art so I followed a YouTube video on how to create realistic shadows, I started off by duplicating the tree and then using the warp transform to change the shape of the tree and then I added blending effects to the tree to make it solid black and then I change the layer blends to remove certain dark shades and lowered the opacity. I then used a brush tip of grass to added the effect of grass, I changed the giter and spread of the brush and made it use multiple colours. I then added my characters to the concept art and arranged them to make them look like they are in battle with the war machine and I then created a custom beam effect in another document I then added this to the player’s gun to add to the effect that the boss is been fired at. I added smoke effects to the players’ guns and added fire exploding to the bosses’ gun to give the impression it was firing. After this I placed explosion marks on the ground to give the impression of fired rockets from the boss. After this I added a post processing effect to the image changing the overall brightness/contrast/ levels and curves. Below is the final image of my last concept image. 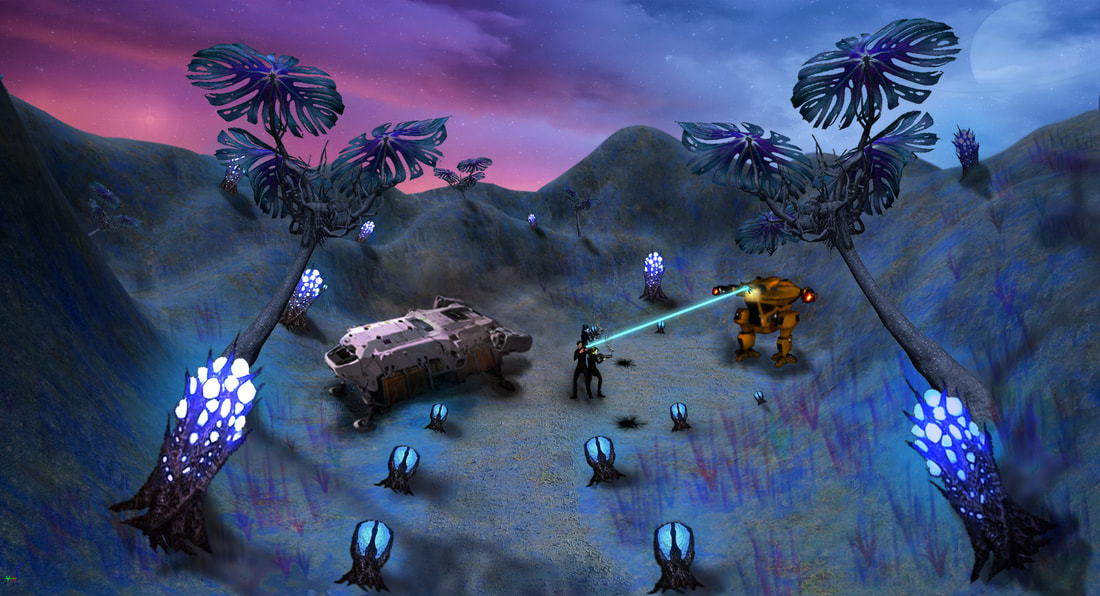 Task 4 For task 4 I have to add lighting effects to my block out level, for this I will look into different styles as lighting effects, such as: atmosphere, post processing, lighting, light functions and particle effects. I also plan on adding materials that give the impression of what the scene will look like at its final stage. I started off by creating a mood board to get my ideas of the lighting styles that I was looking for to add to my block out. In this mood board I looked at different atmosphere sky such as space and alien planet concepts. I then looked at particle effects and the light the emit, I also looked at IEs profiles and light functions. After this I looked at different types of post processing and materials I could use. This can be seen below:  I decided to start with the atmosphere for the space part of my block out, I found a large photo taken of space and I imported this into unreal engine. I duplicated the sky blueprint and materials so that I could edit them. I then edit the atmosphere material and added the space texture to where the stars should be and lower opacity to around 0.75. I then created a sphere in Maya and cut it in half and imported it into unreal engine and applied a texture to give it a planet effect. To turn the atmosphere dark, I turned the source light upside down and the lowered the intensity to show the planet and space. For the alien planet I added the blueprint that I created for the space and placed it into the atmosphere I then changed the horizon, cloud and overall colour to make the sky more purple/blue. Then I added exponential height fog and changed this to a purple colour to add more of a mist effect to the game.
For lighting I adjust the lights that I already placed in my level to give a more sci-fi look, I then added spot lights at certain points in the corridors and changed the light colour to blue. I added IES profiles that I downloaded. IES profiles are realistic light emission that are saved into a texture file. I added one of these IES profiles to my spot light and adjust the light settings to add a subtle effect. Above these spot lights I had a ceiling light, I created a simple emissive material to added to the effect. I then wanted to create light functions, these are materials that use greyscale textures to read what light should be emitted and what should be blocked. I started off by creating a simple black and white grate texture in Photoshop to add the effect that the light was beaming though a grate. I then wanted to create a more advanced light function, I wanted an fan rotating so I used the same method of creating a black and white image in Photoshop and in the material I added a rotator node to the texture and set a speed variable to control how fast the light function is moving. This can be seen below in the video As I didn’t have enough time in my project schedule to create my own particle effects I decided to use free ones provide by unreal engine and edit these as this is a quicker process and fits into my timescale. I started off by going to the contents example and migrating a beam particle effect over to my project and I started editing it. I removed the source to make the beam straight but and reducing the roughness to add a slight jitter. I then increased the size of the beam, and edit the material to produce a more intense emissive light. I then found a dust particle effect from infinity blade project and I migrated this over, I didn’t do much edit to this particle I just scaled it up and changed how much dust is produced. I then placed this behind my spaceship I finally took a gold particle effect from the same package and edited it to spawn more particles and remove an glowing effect from the base of the particle I repeated the process off editing the material to make a stronger emissive light. For post processing I wanted to create global post processing system that I could use for each level I started off by adding a global colour grading I changed the saturation to a light blue and then I increased the values of the contrast, gamma and decreased the gain. I then added images effects to change how the camera reacts with the light so I added a slight vignette and bloom to add a blur effect to the light. I also added an auto exposure to auto adjust to the light system. From here I added an depth of filed to slight blur the materials in the far distance. Below is screenshots of with post processing off and on Conclusion
Overall I think this unit development went well, I was able to produce everything I had planned for in the pre-production and the time scales that I have set myself worked extremely well. I was able to keep to my time scale and I felt that I gave myself some extra time in areas as I wasn’t sure how long it would take me to do to find out that I had finished well under the time scale I set me which gave me more time to improve what I have created. I am extremely pleased with how my mechanics turned out in my block out. I was able to create a custom interaction system that is based on my camera which helped my how my player interacts with the world. I was also pleased with how I created the lights that warm up like a normal light before flicking to on. I liked how all my concept images have turned out I learned new Photoshop techniques for painting and photo composition. I am extremely pleased with how the second and third image turned out, I like the mood I set with the images I found and I felt I was able to create the environment I was looking to create. |
Archives
June 2018
Categories |
||||||||||||||||||||||||||||||||||||||||||||||||||||||||||||||||||||||||||||||||||||||||||||||||||||||||||||||||||||||||||||||||||||||||||||||||||||||||||||||||||||||||||||||||||||||||||||||||||||||||||||||||||||||||||||||||||||||||||||||||||||
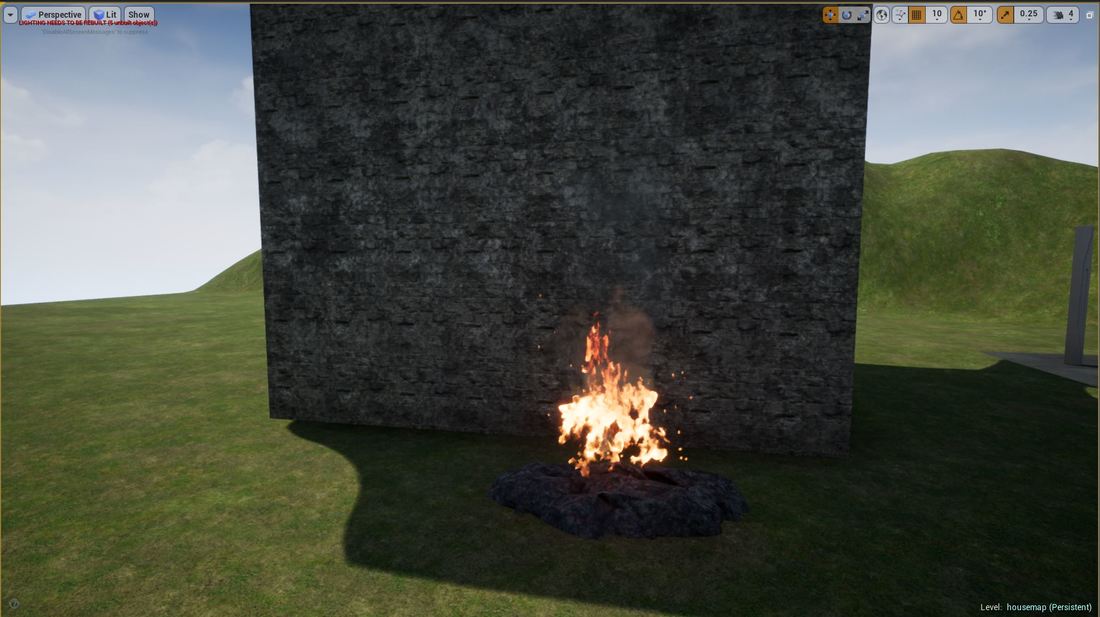
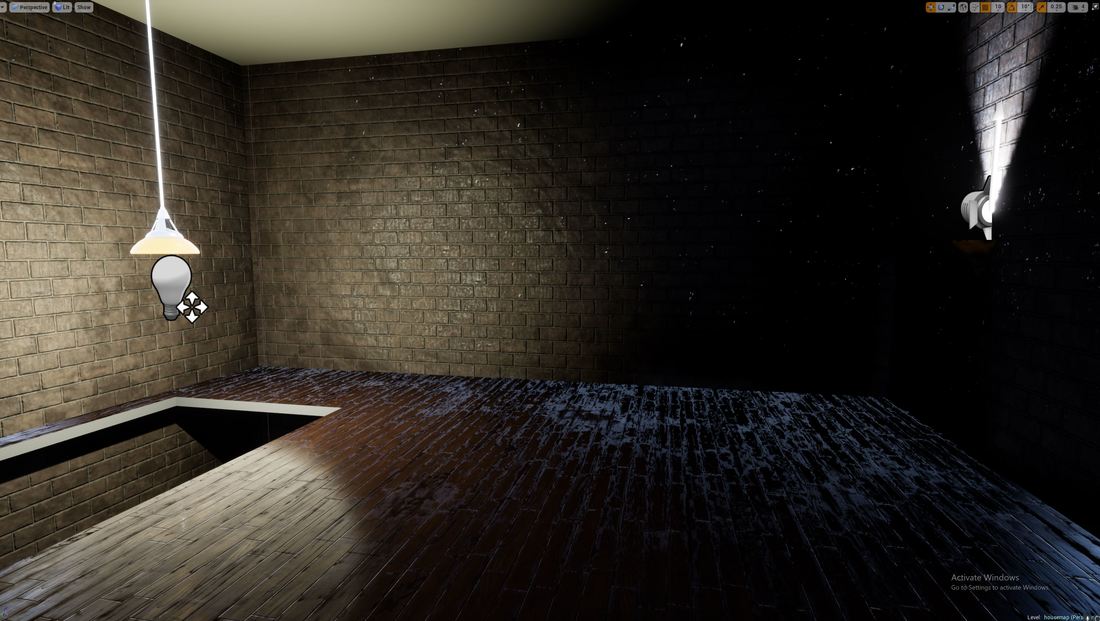
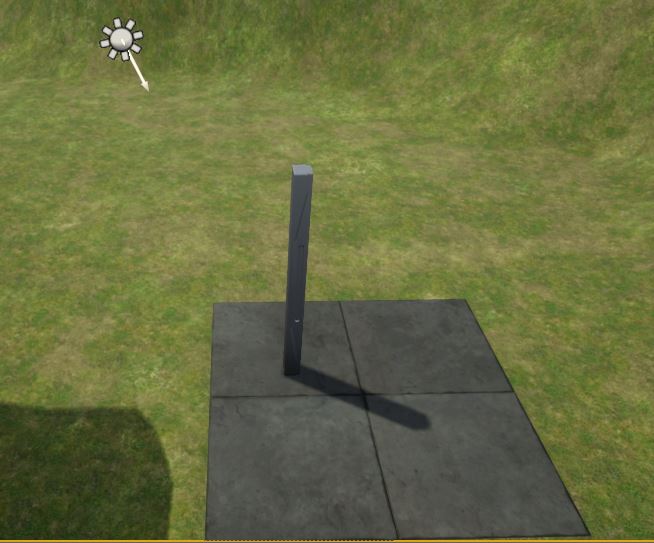
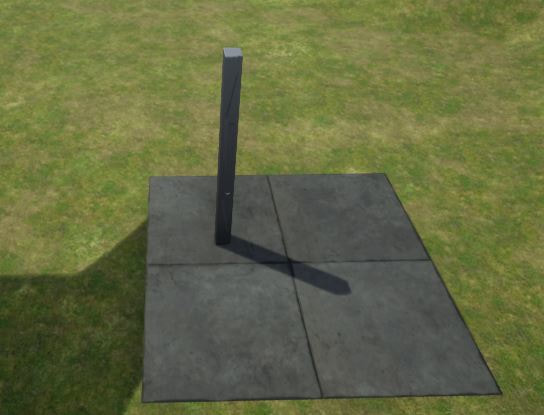
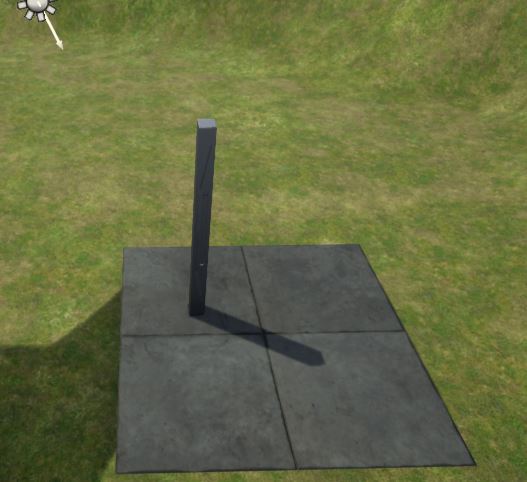
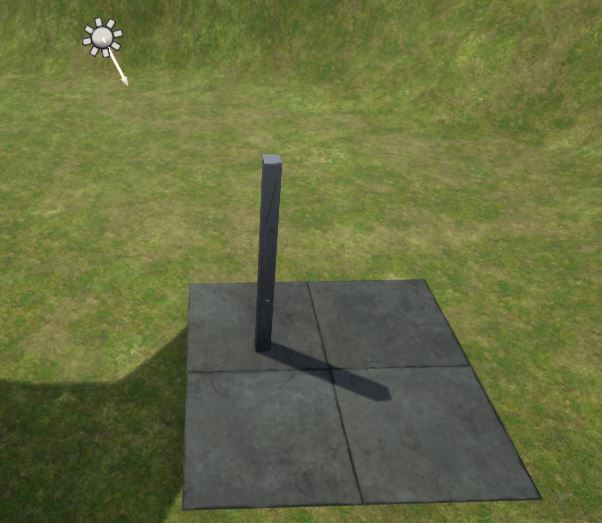

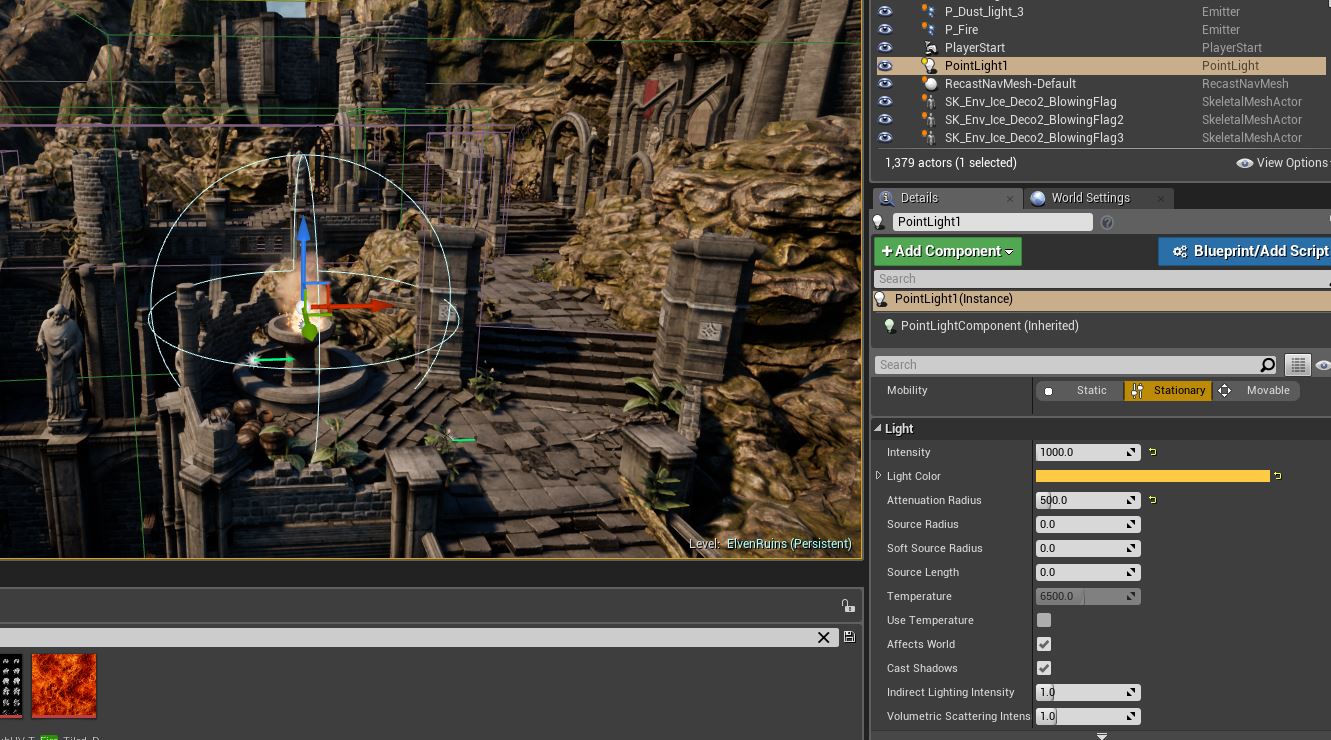
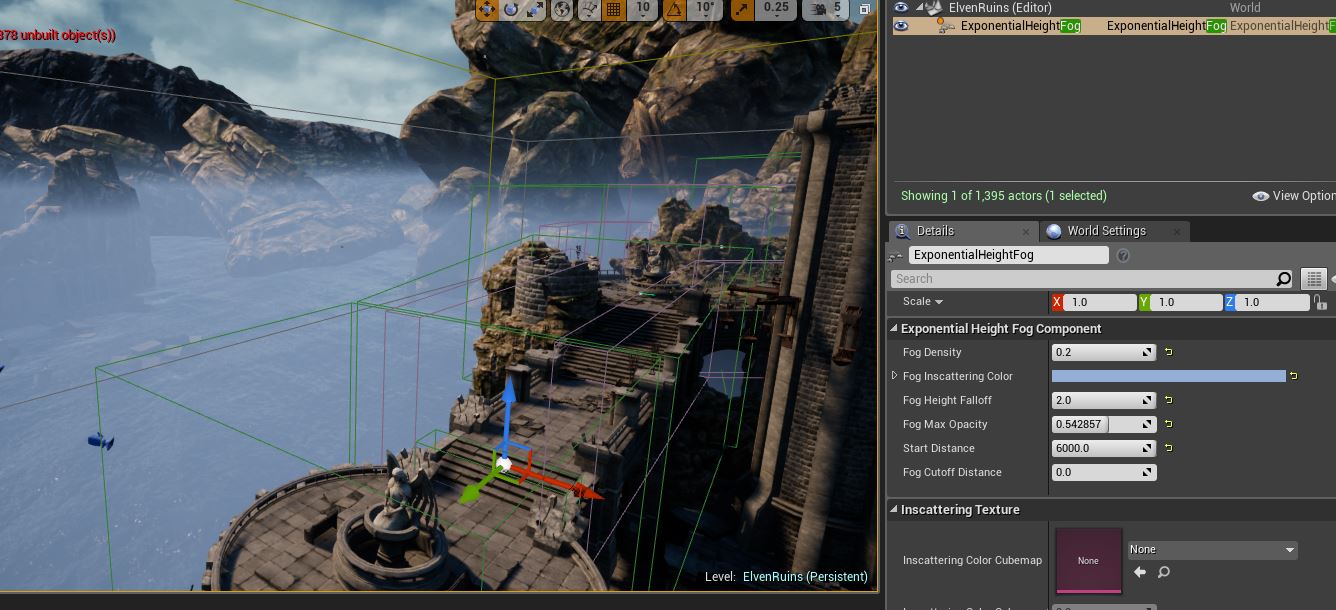
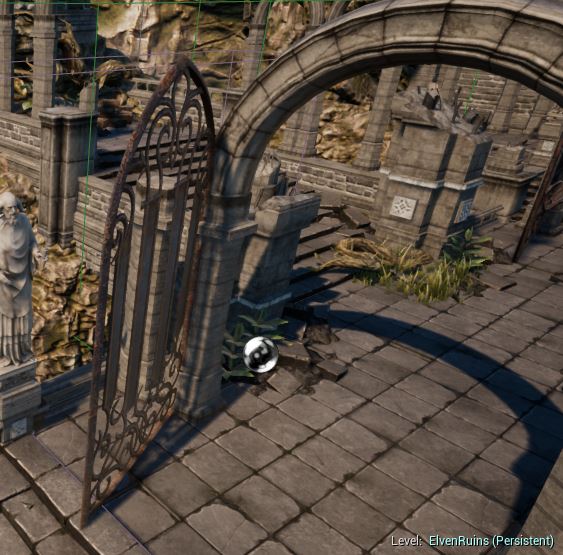
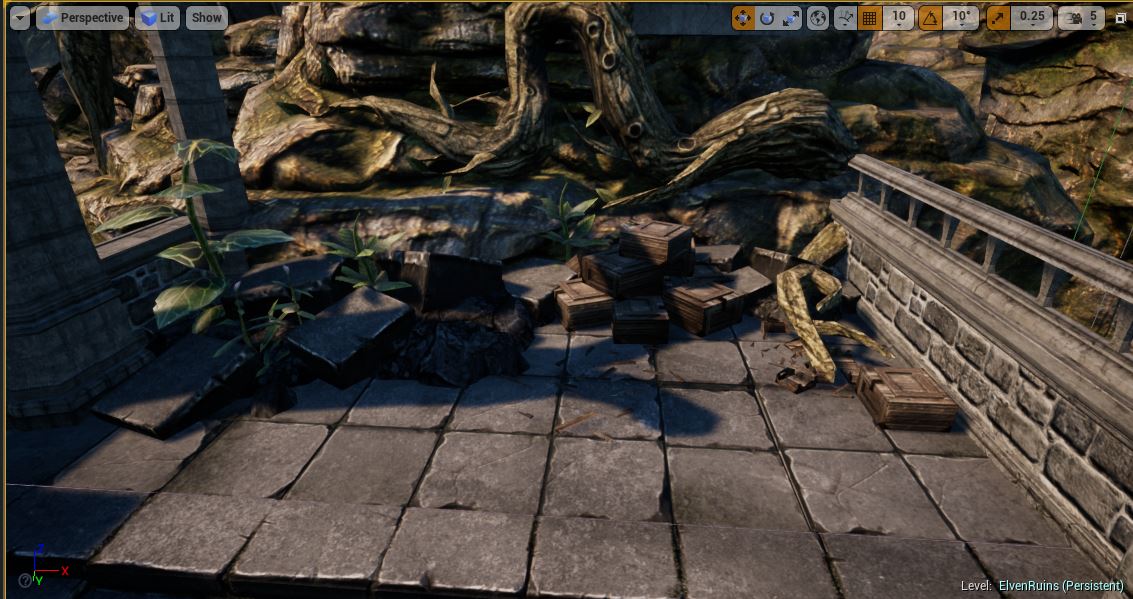
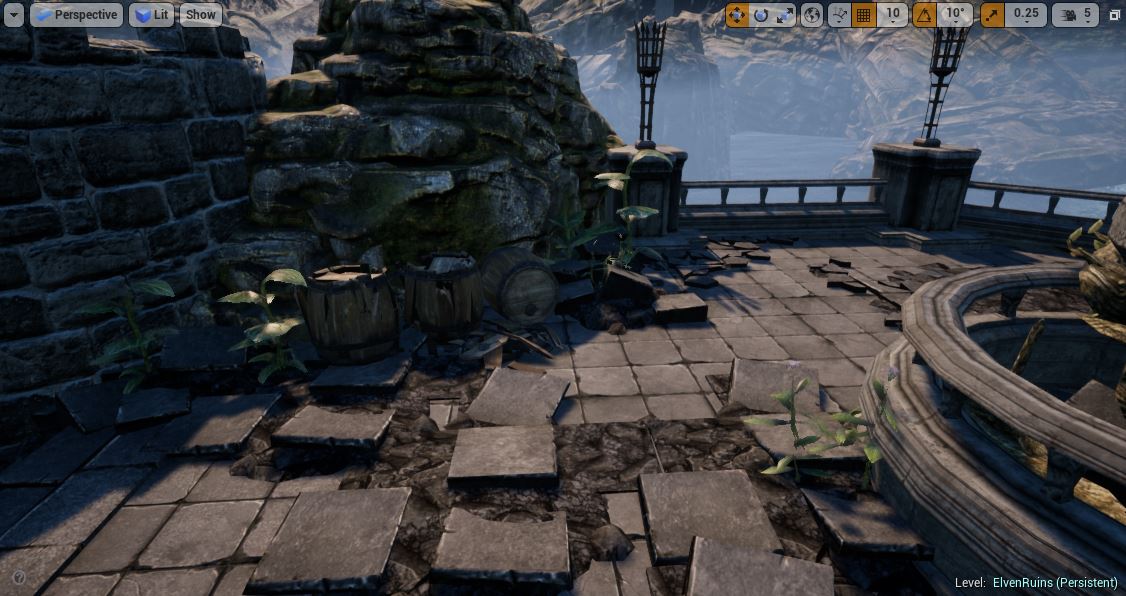
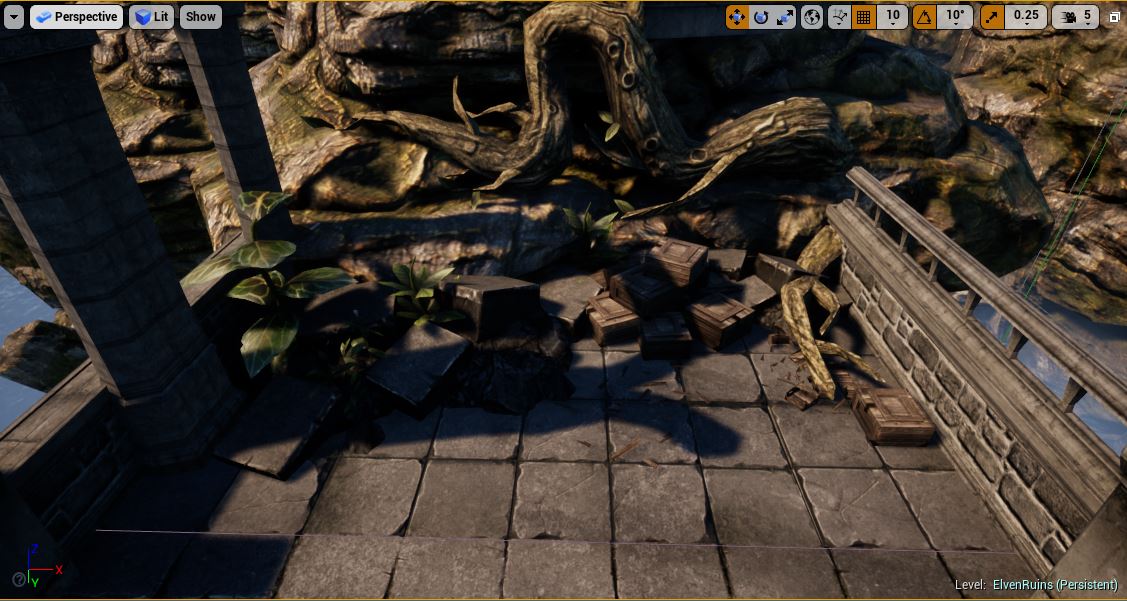
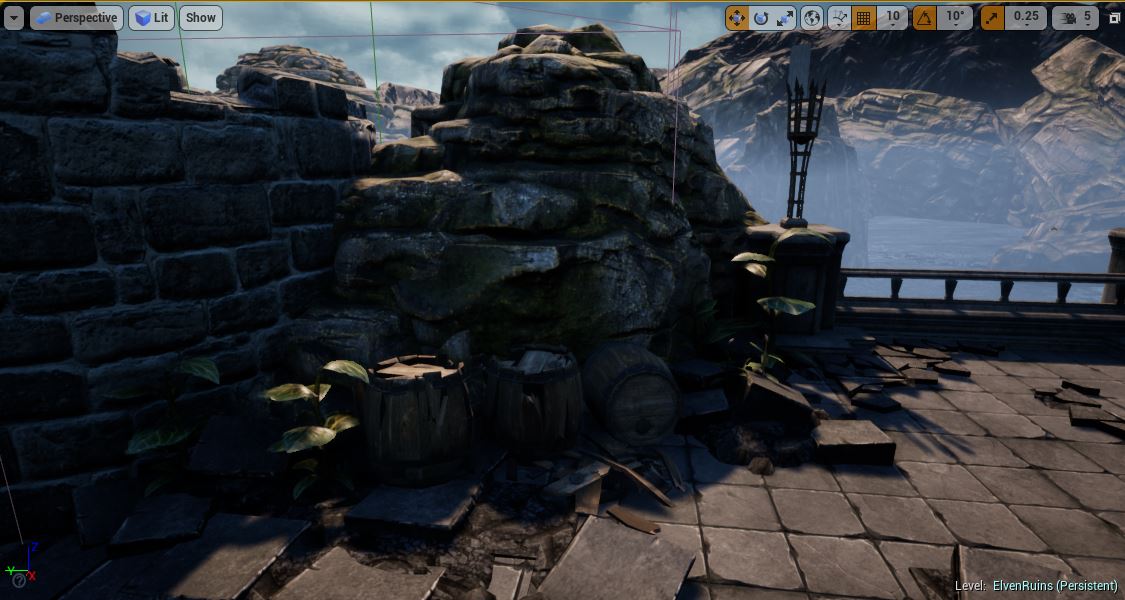
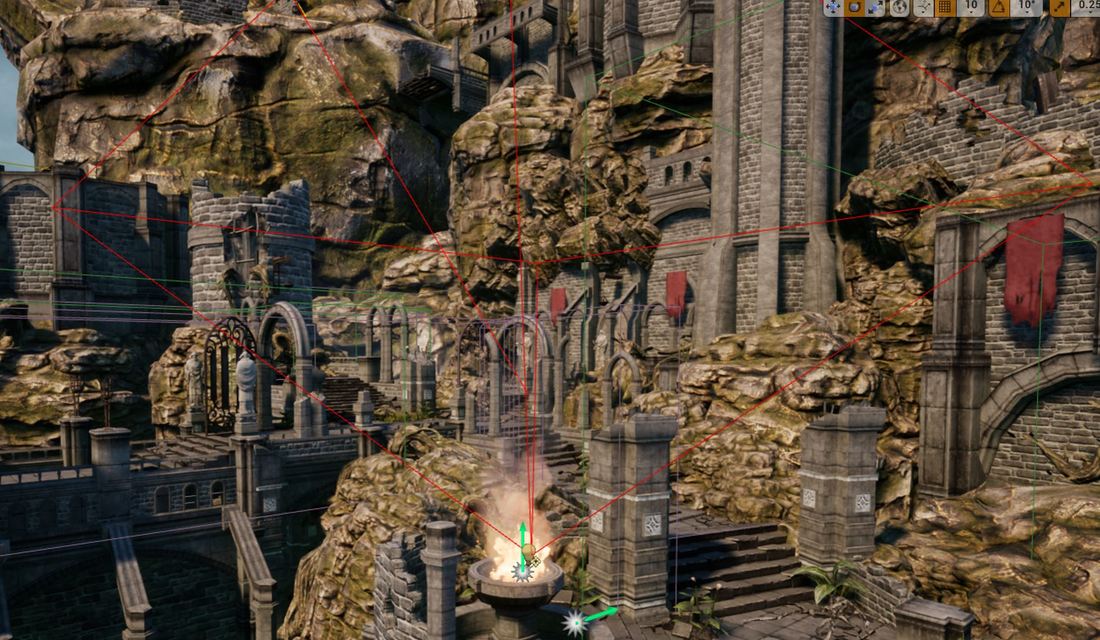
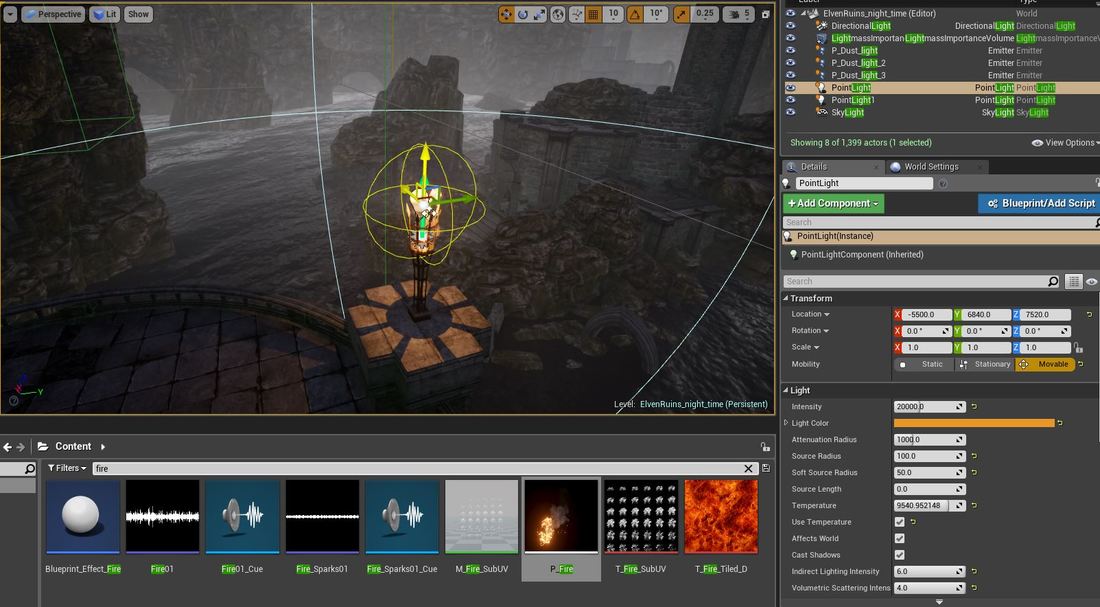
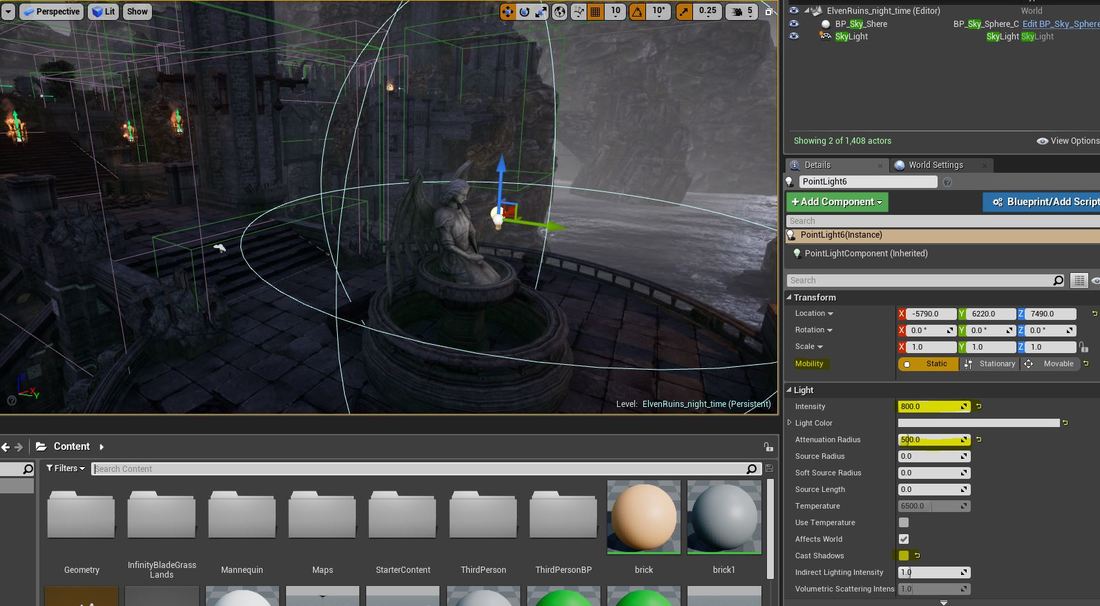
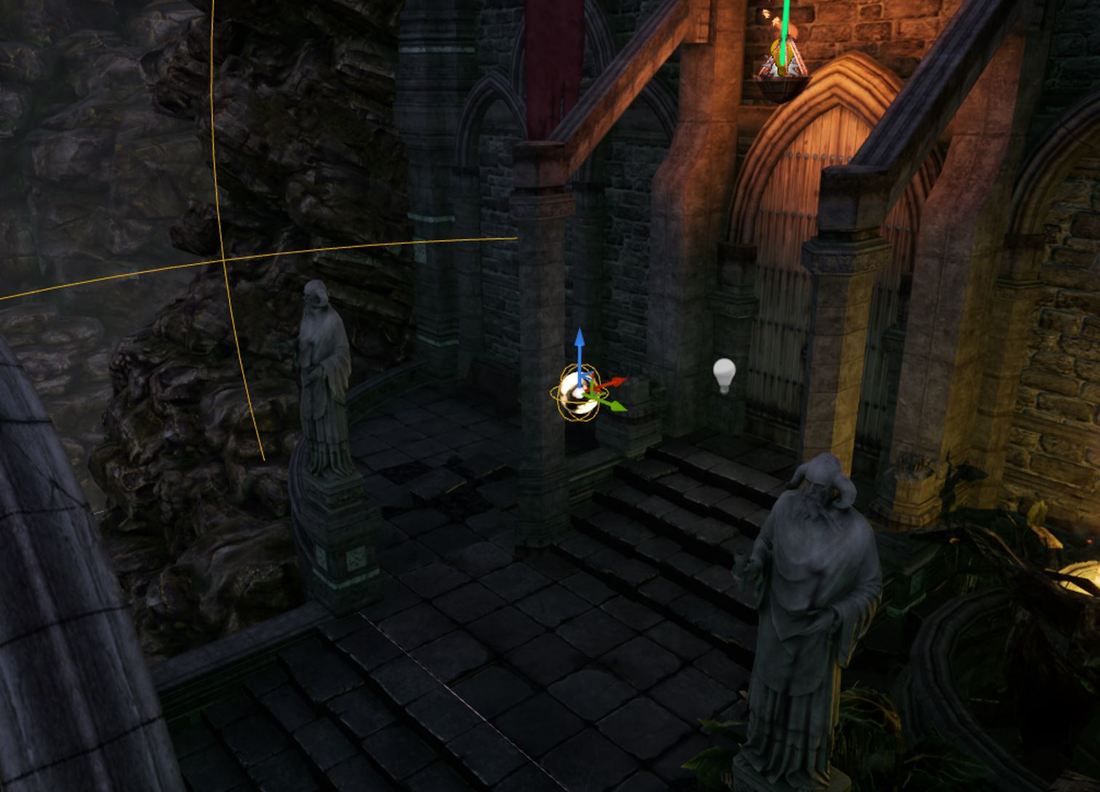
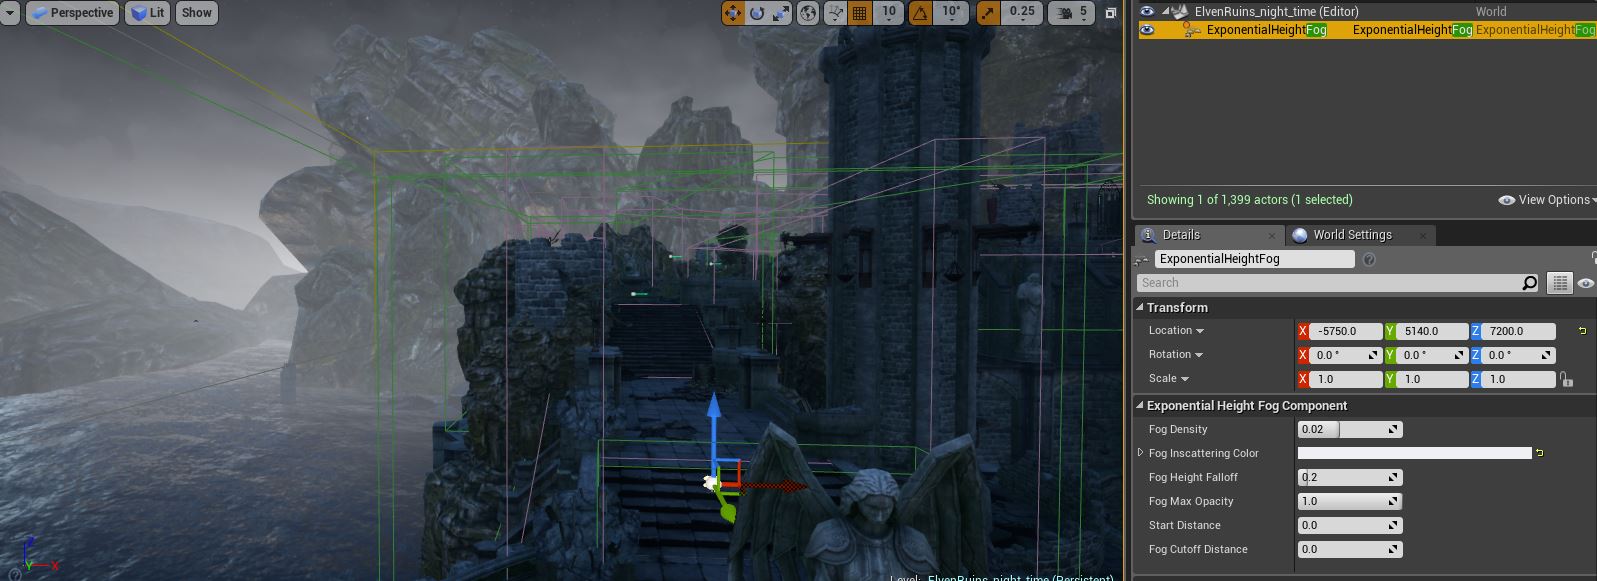

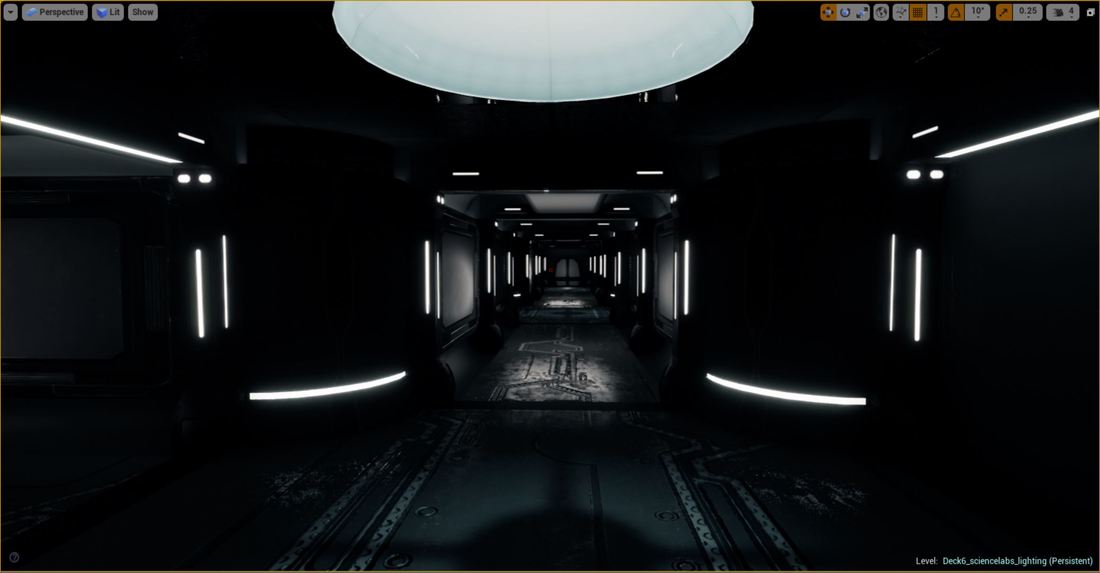
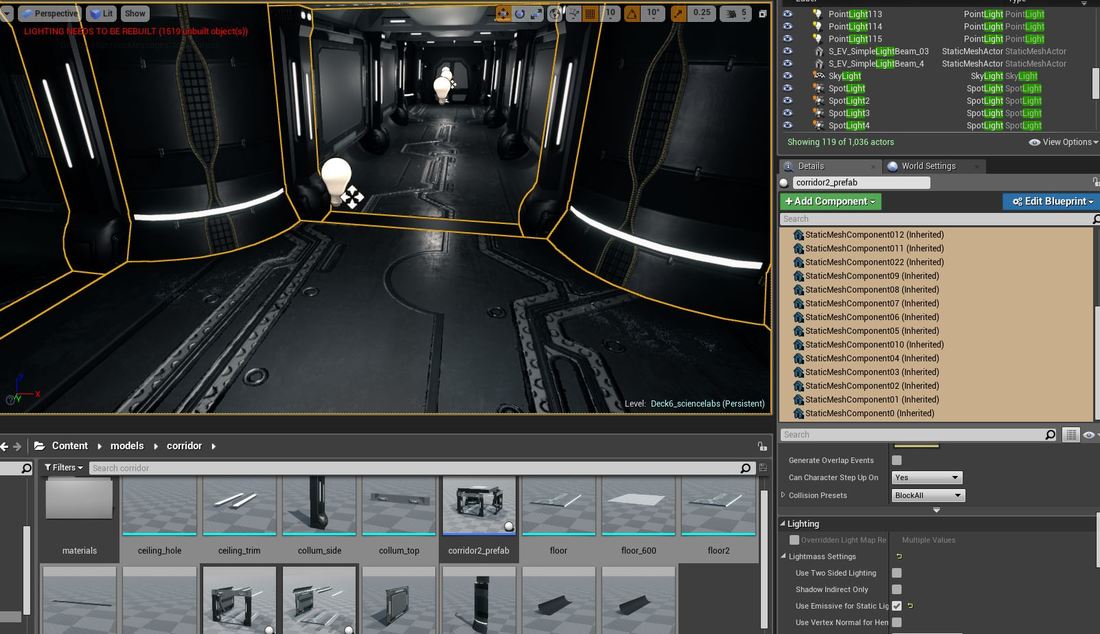
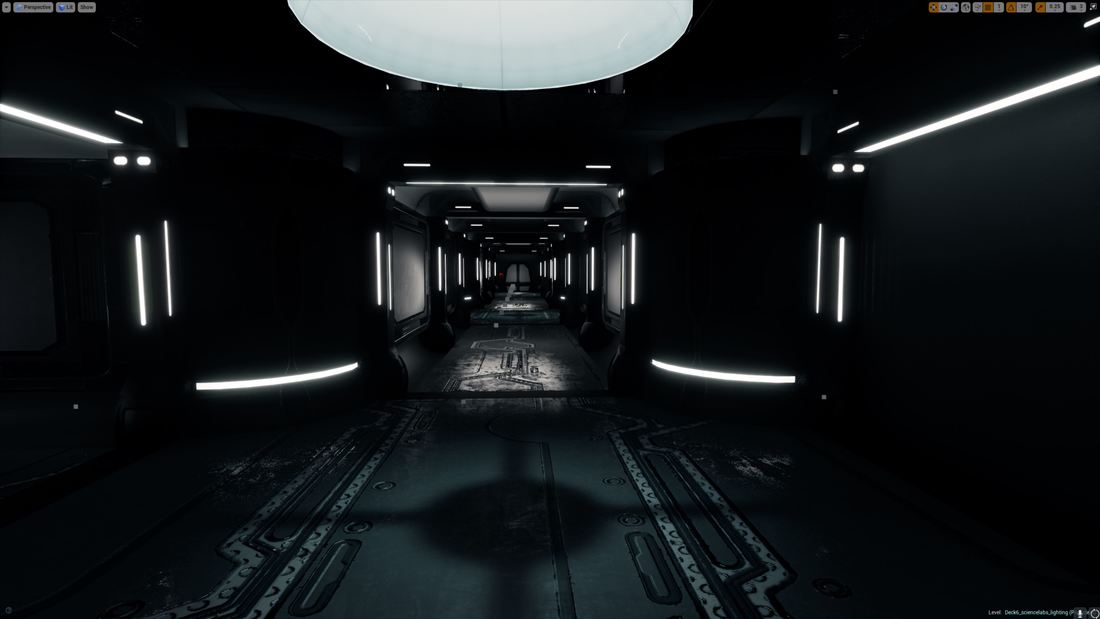
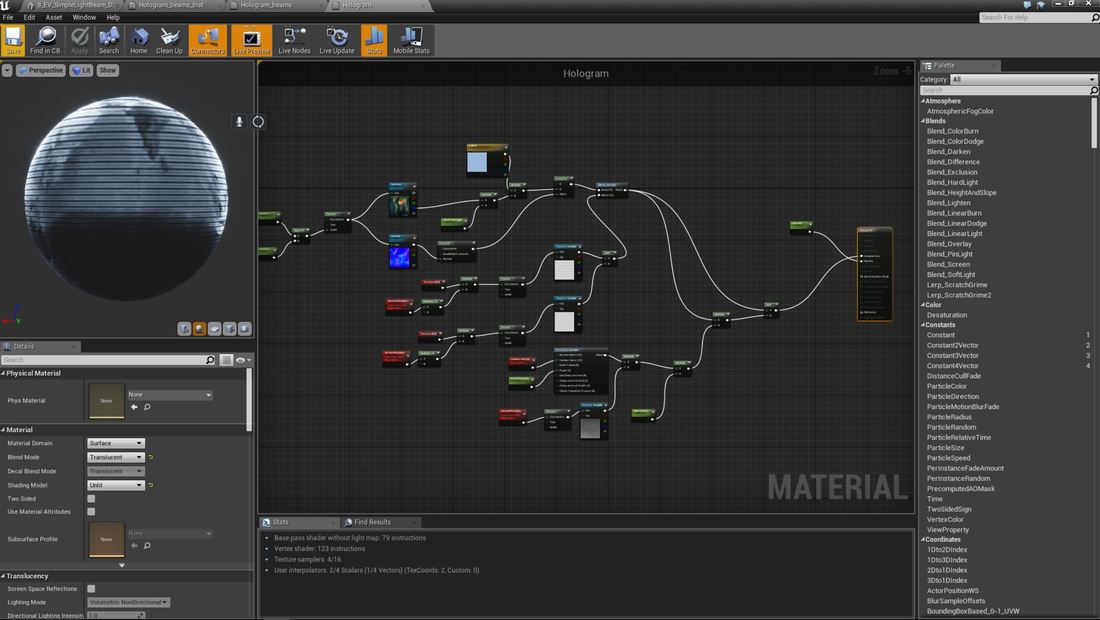
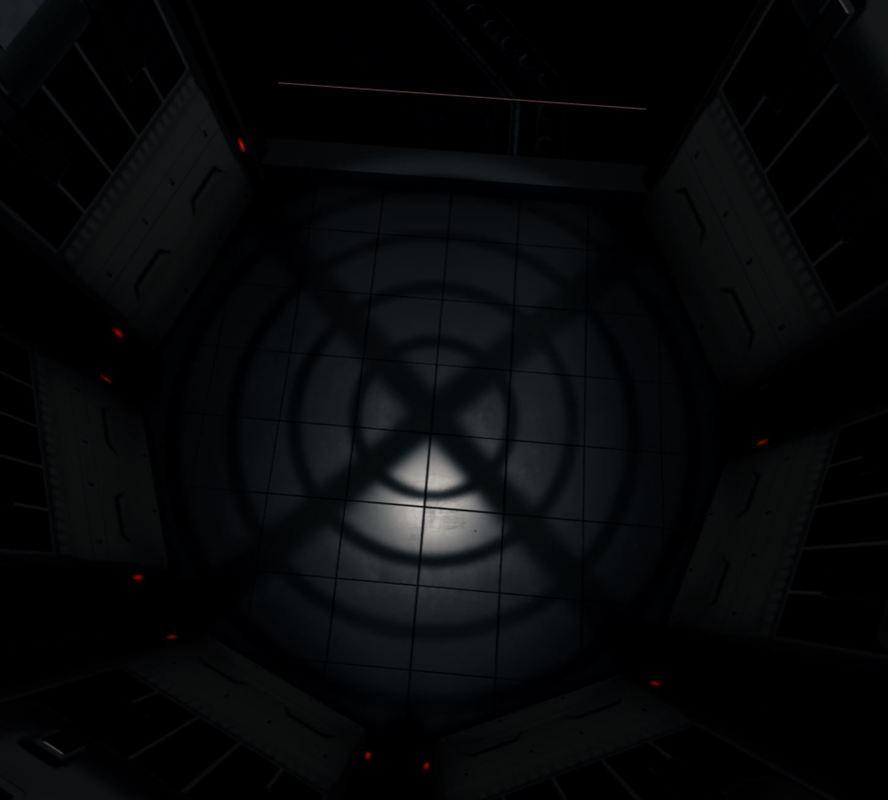
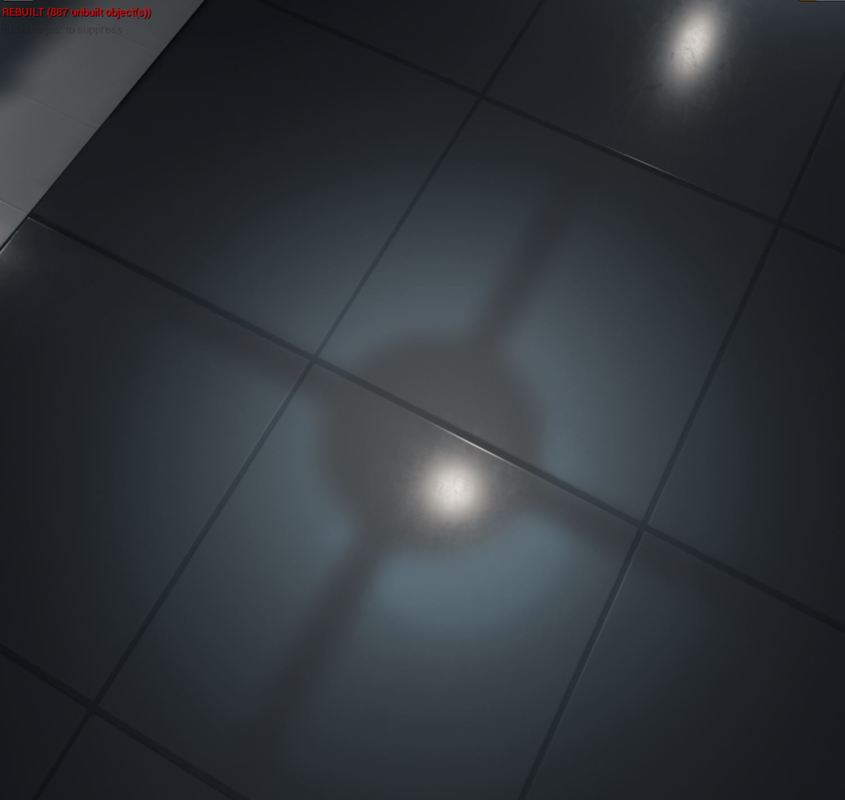
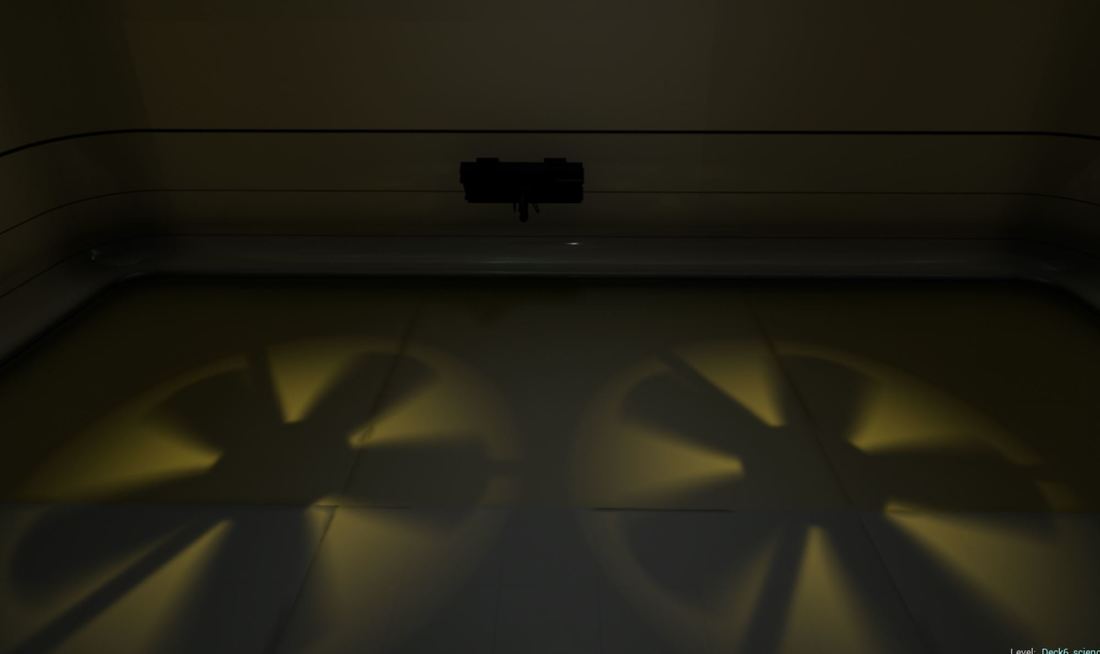

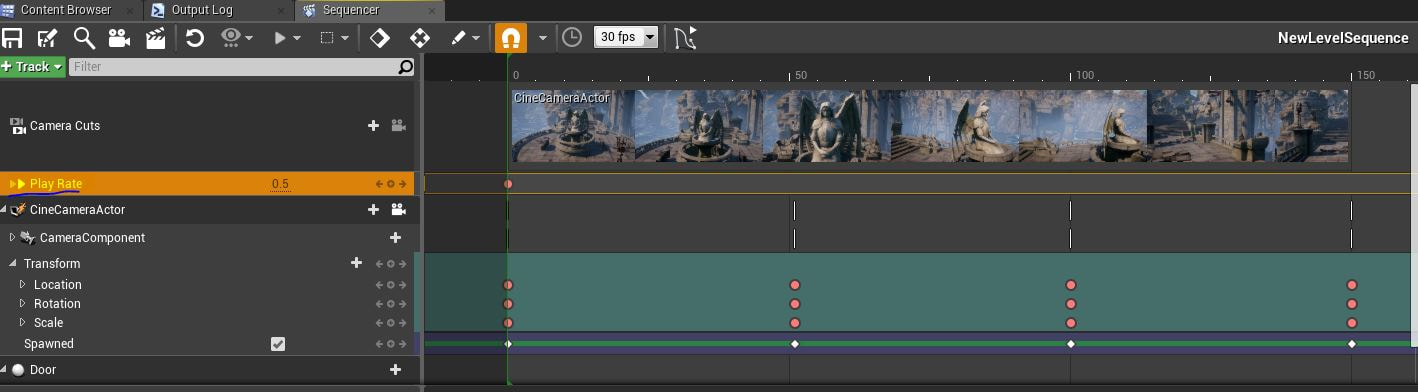
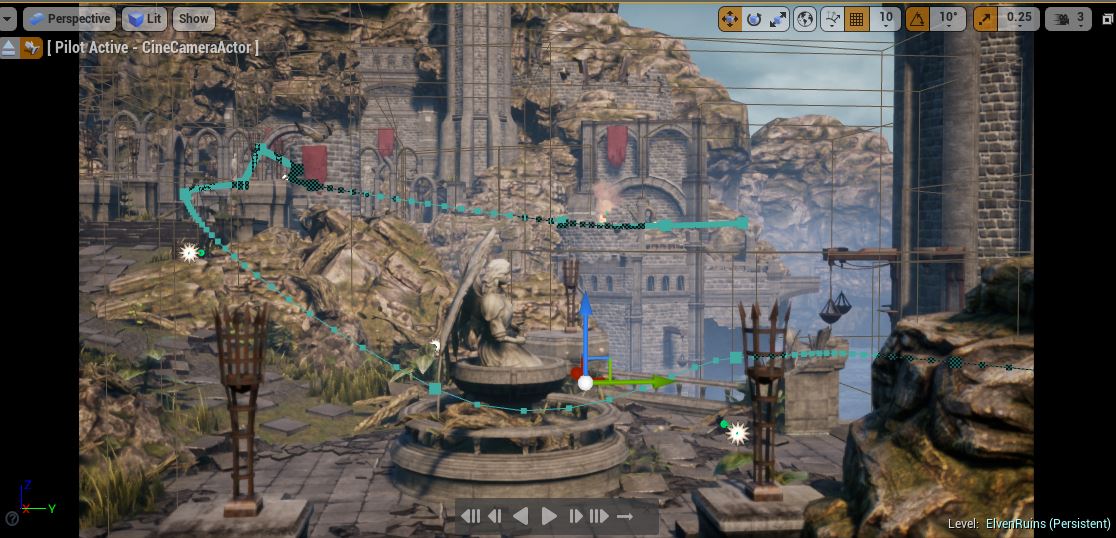
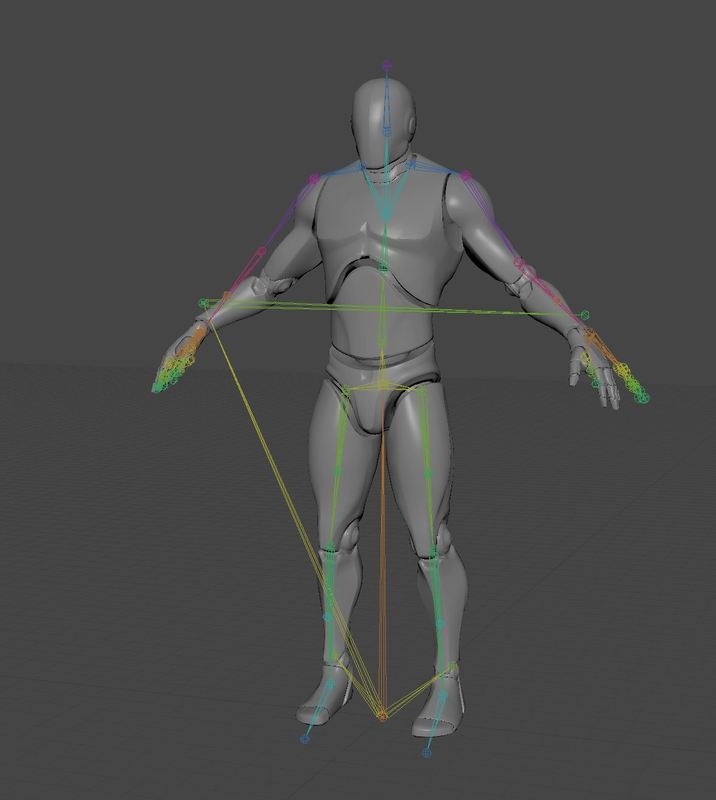
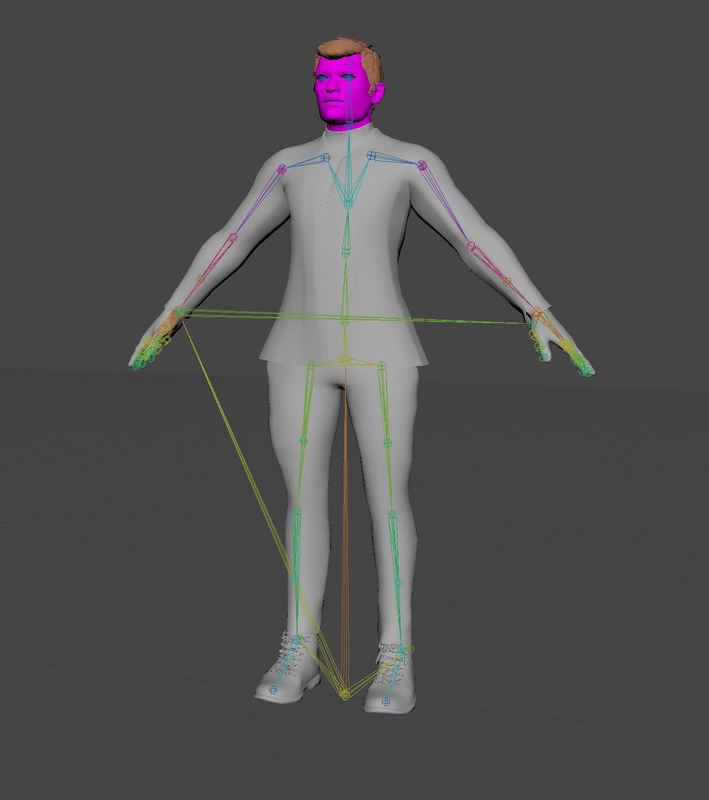
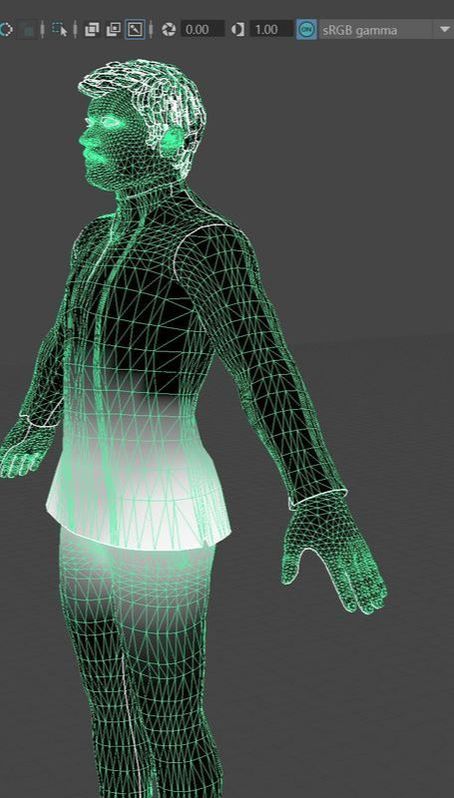
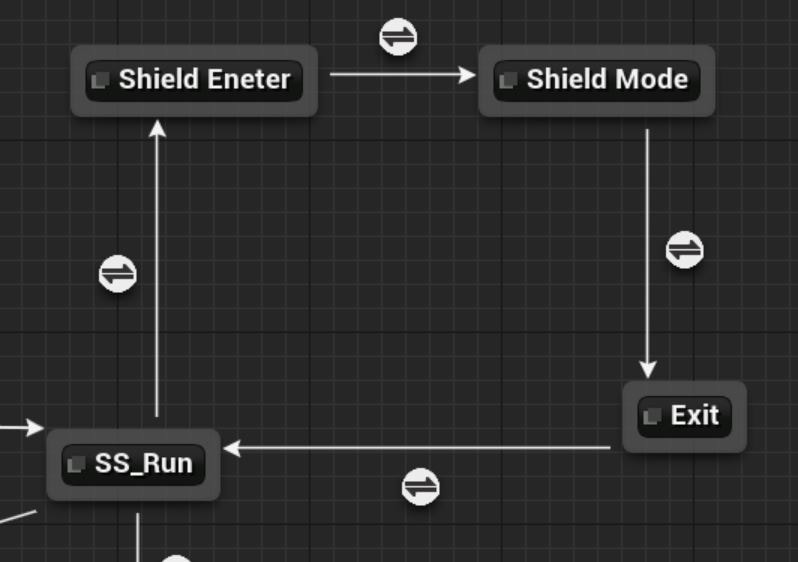
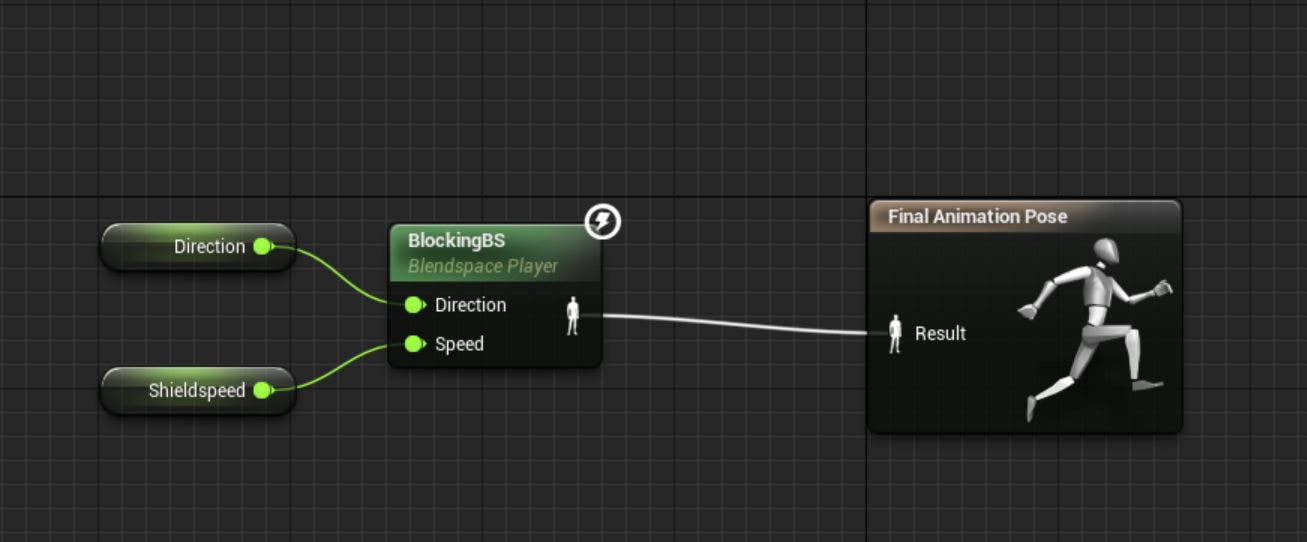
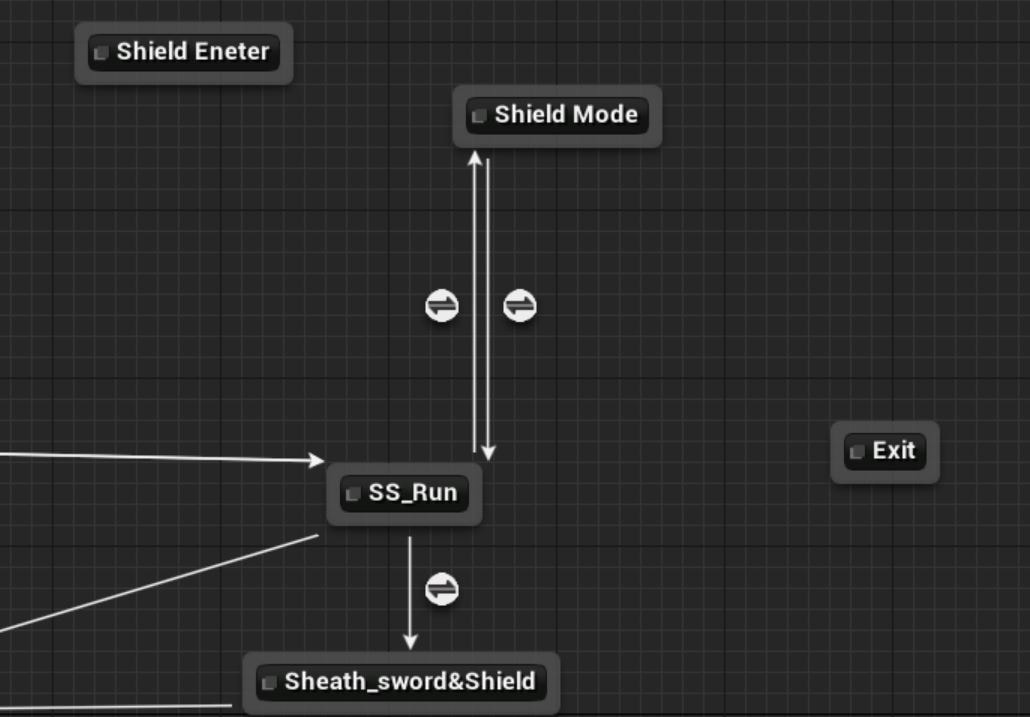
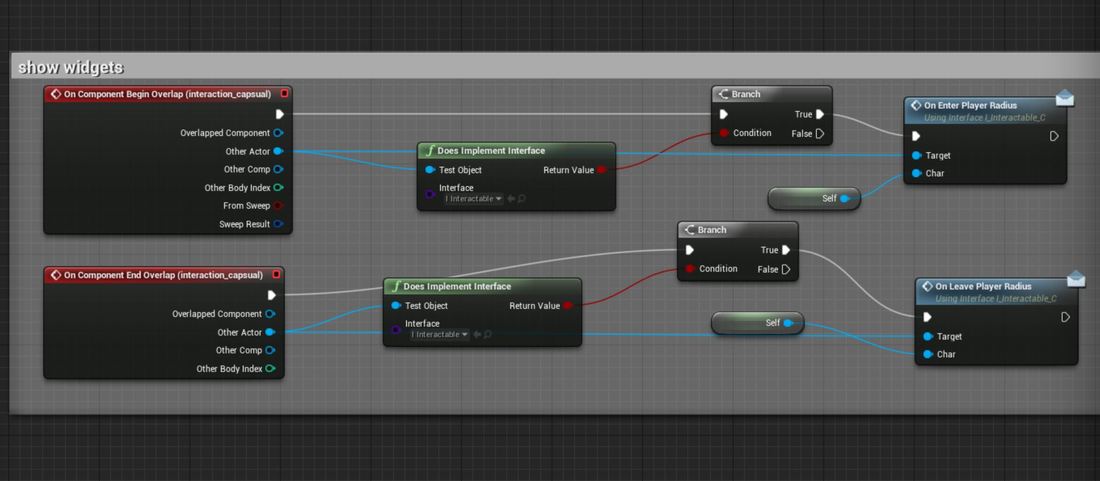
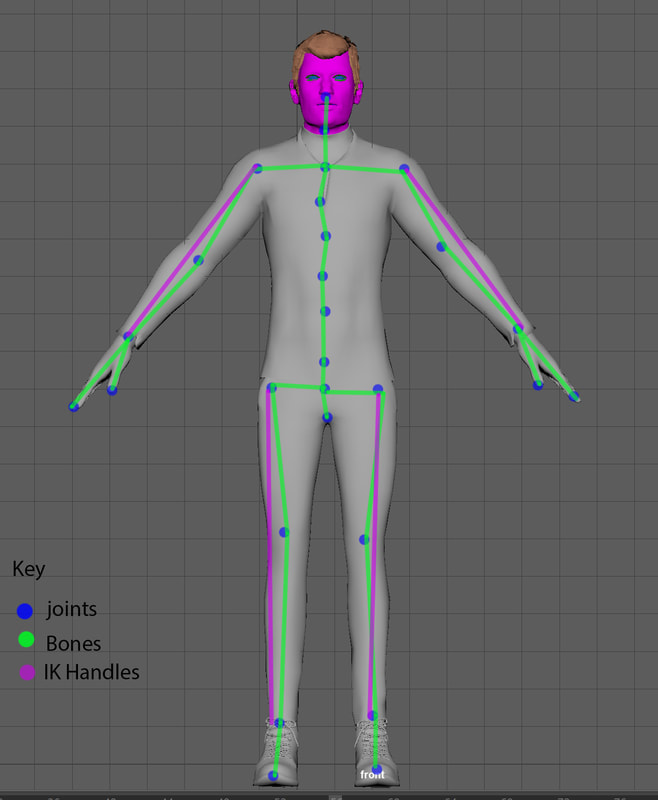
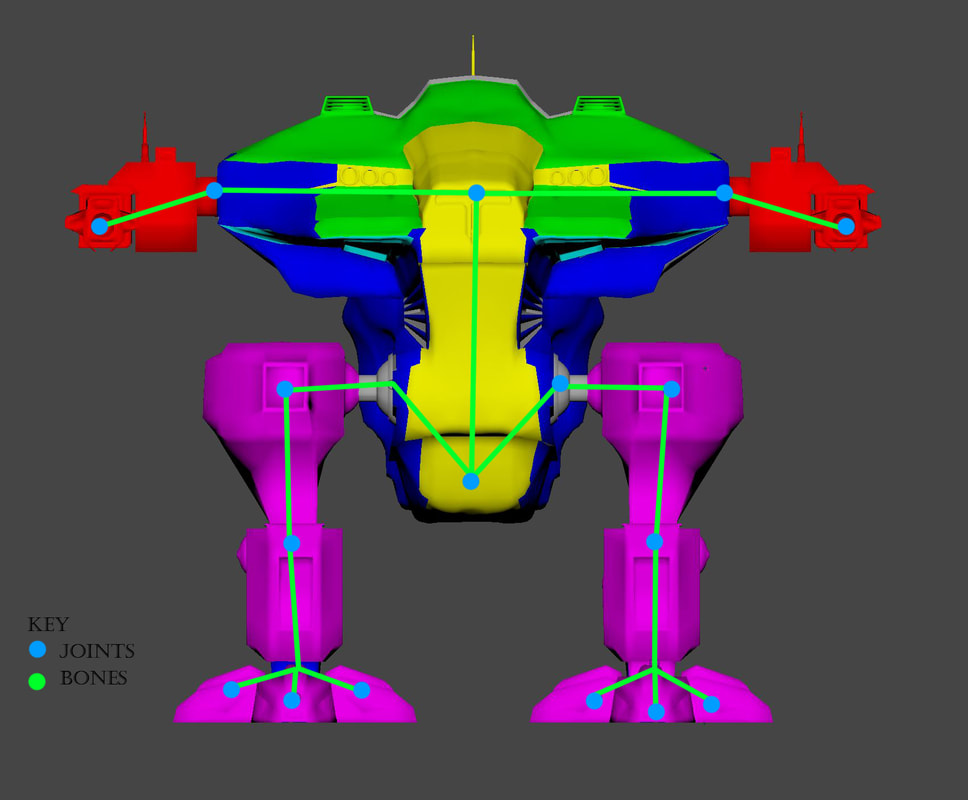
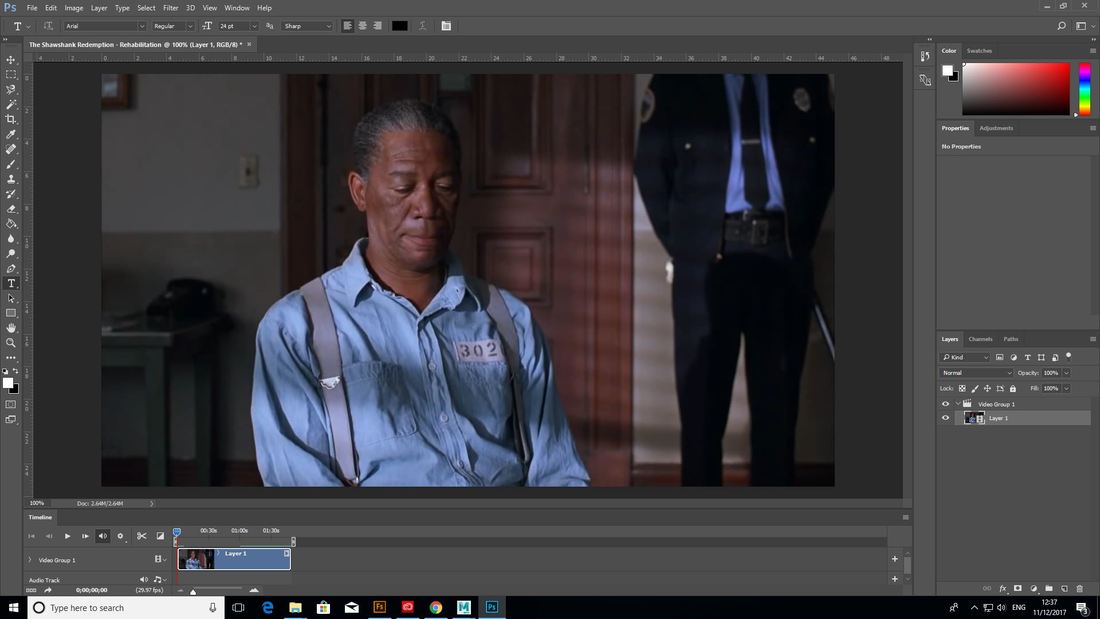
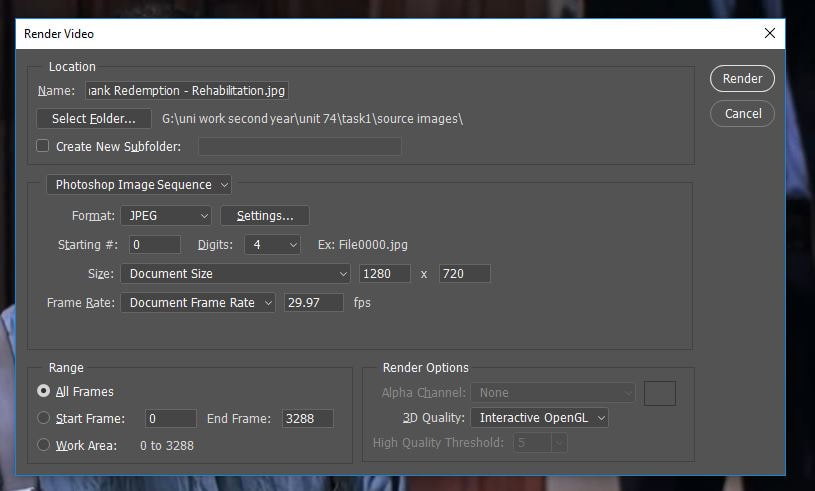
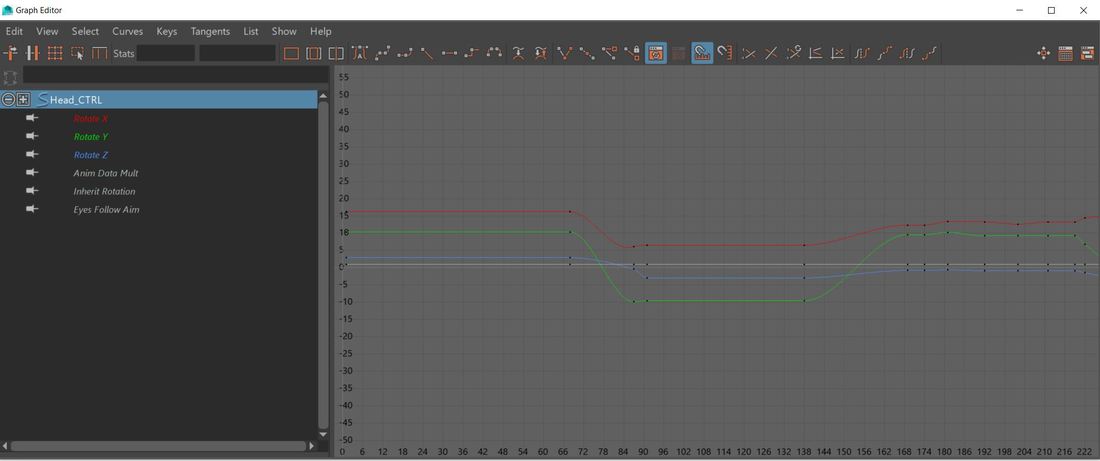
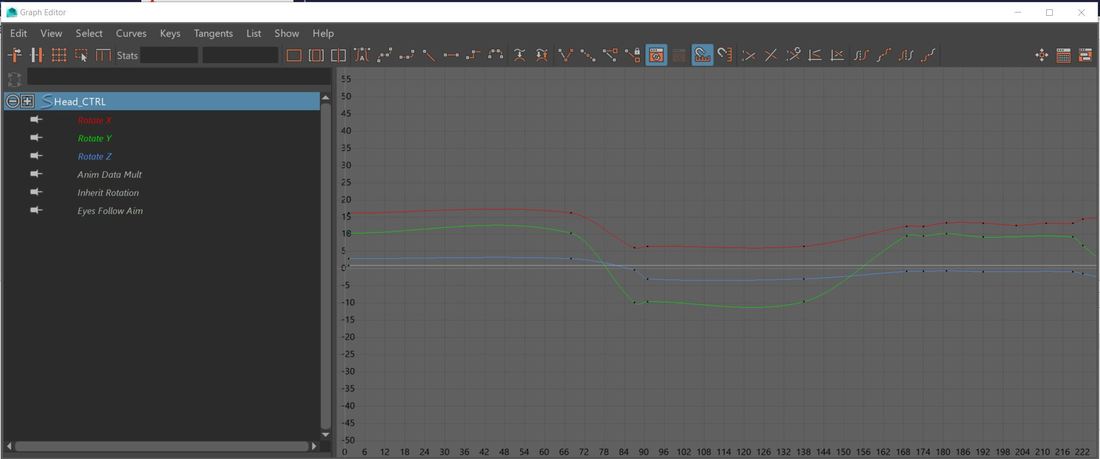
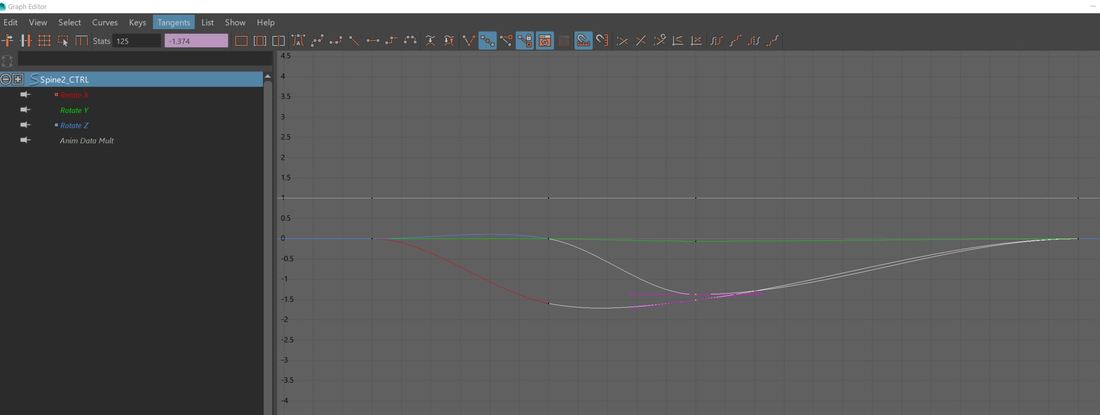
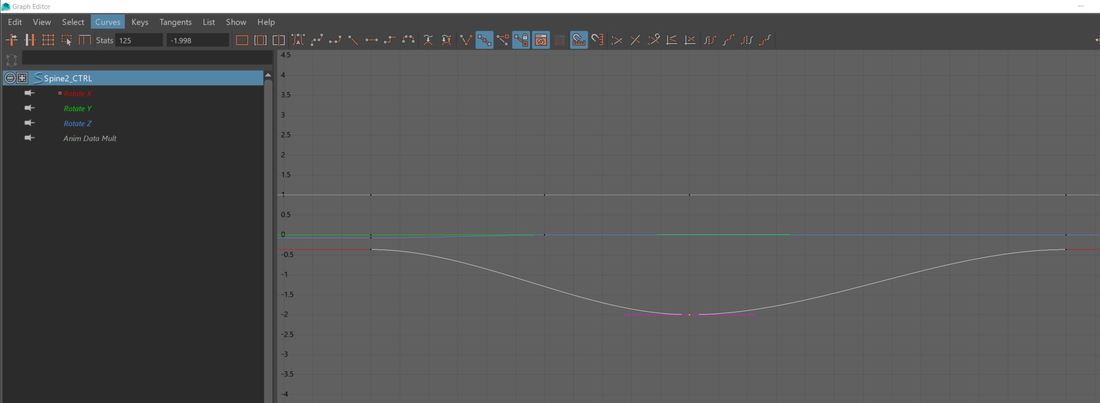
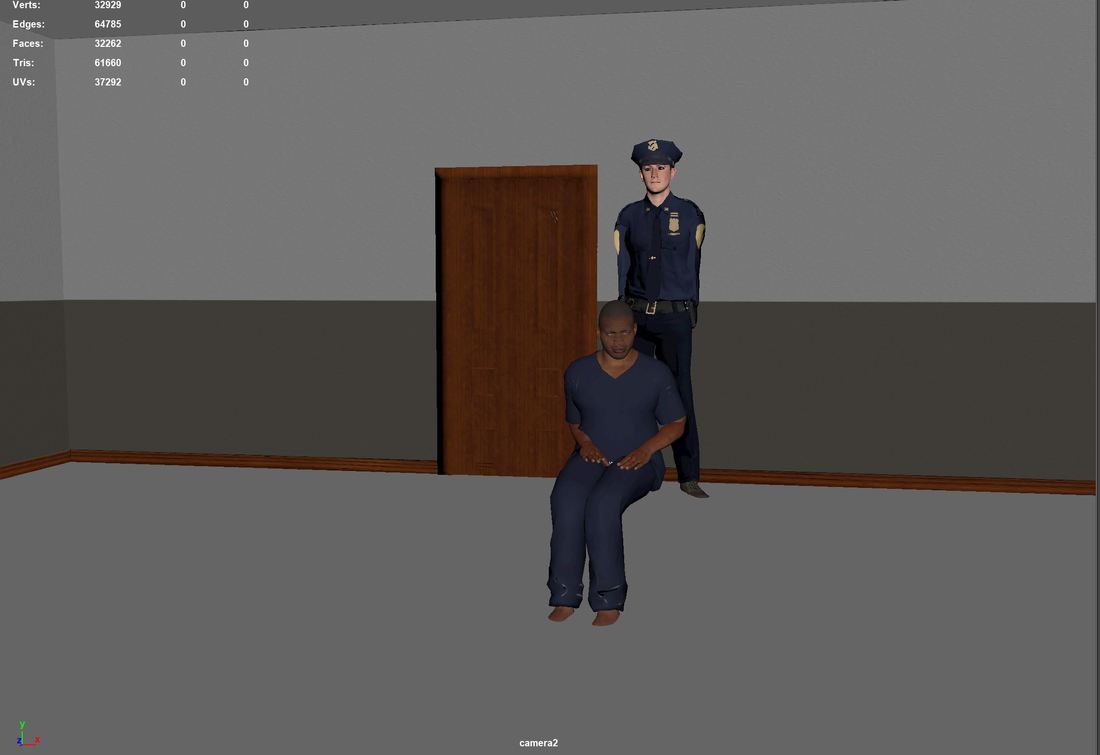
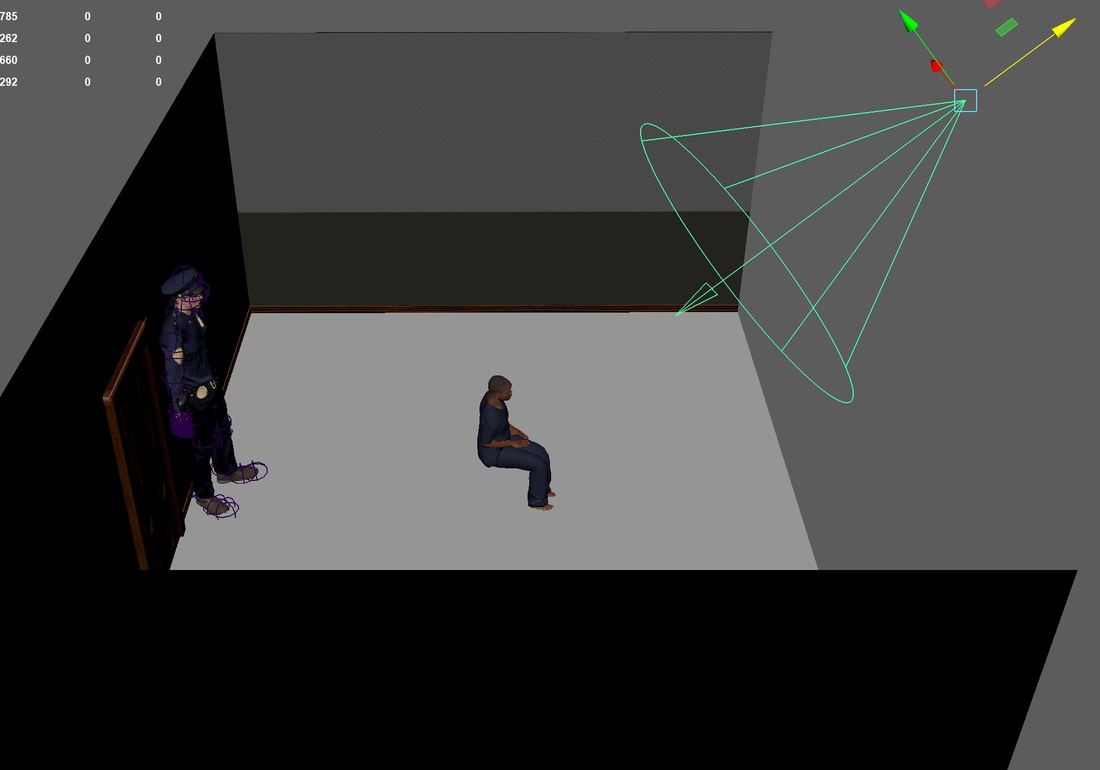
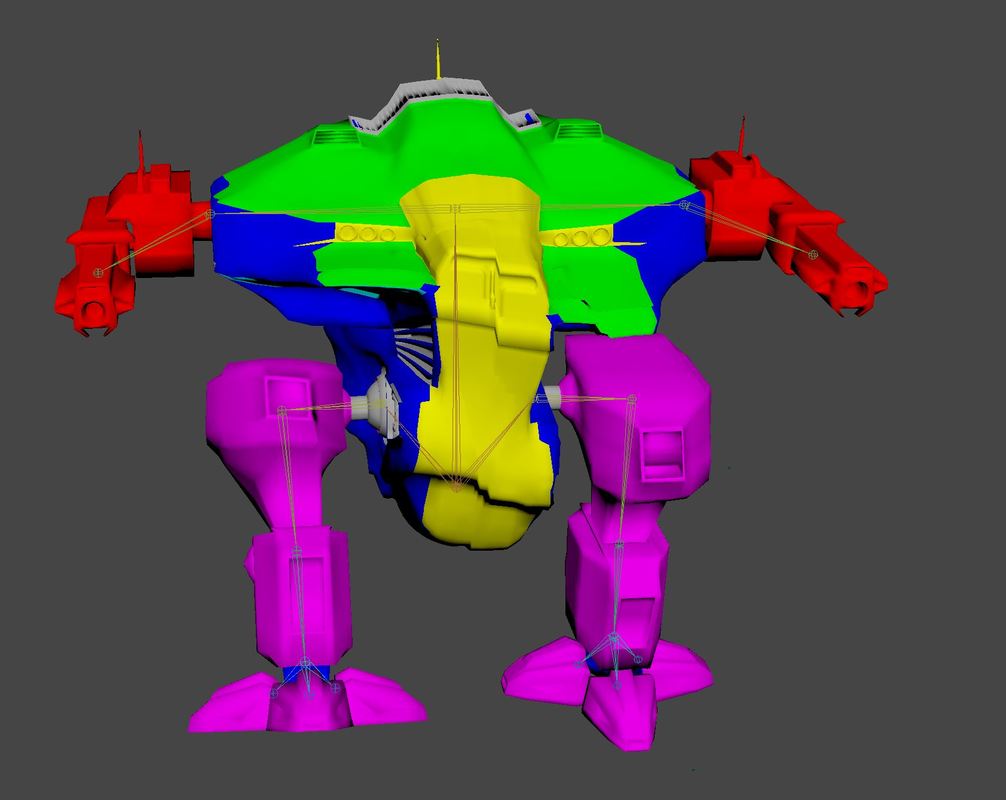
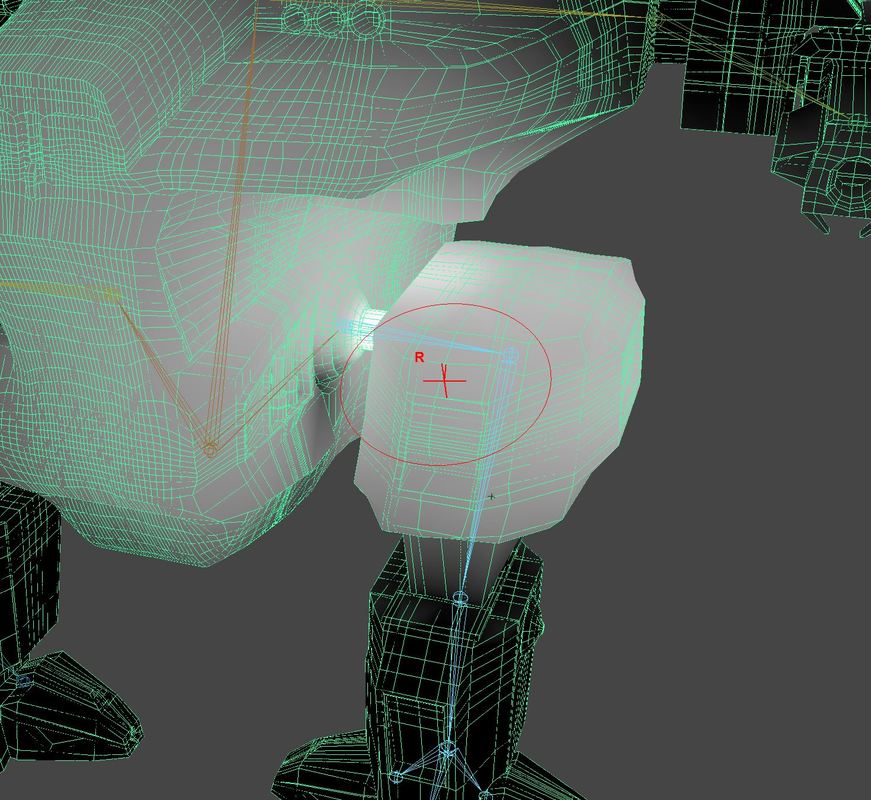
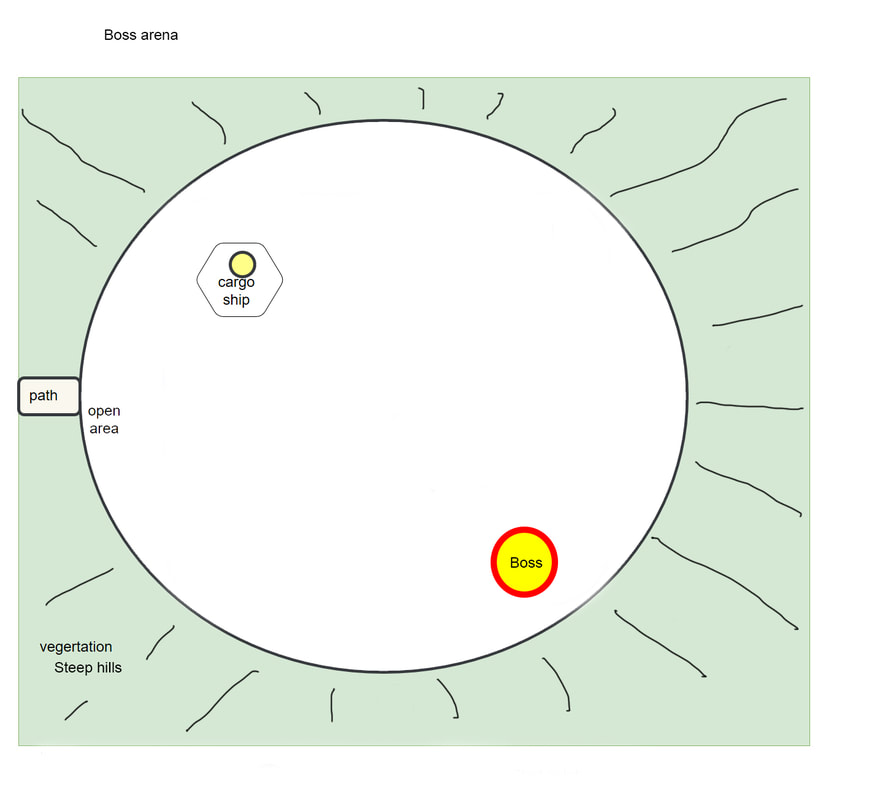
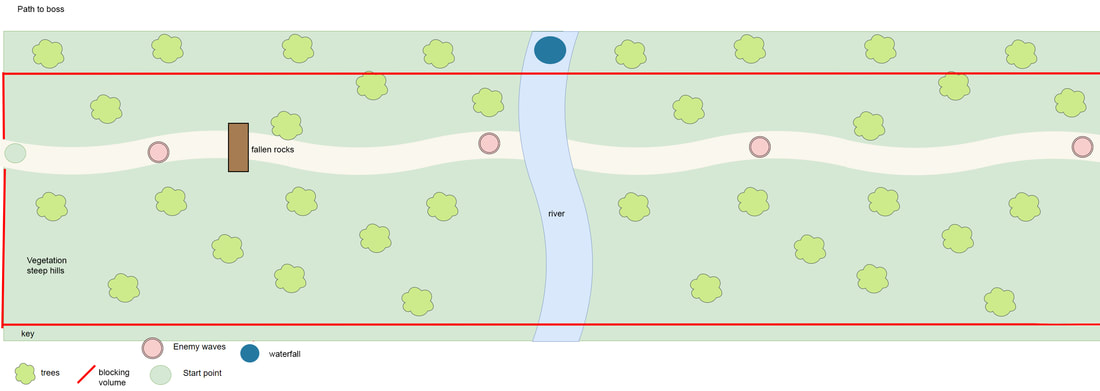
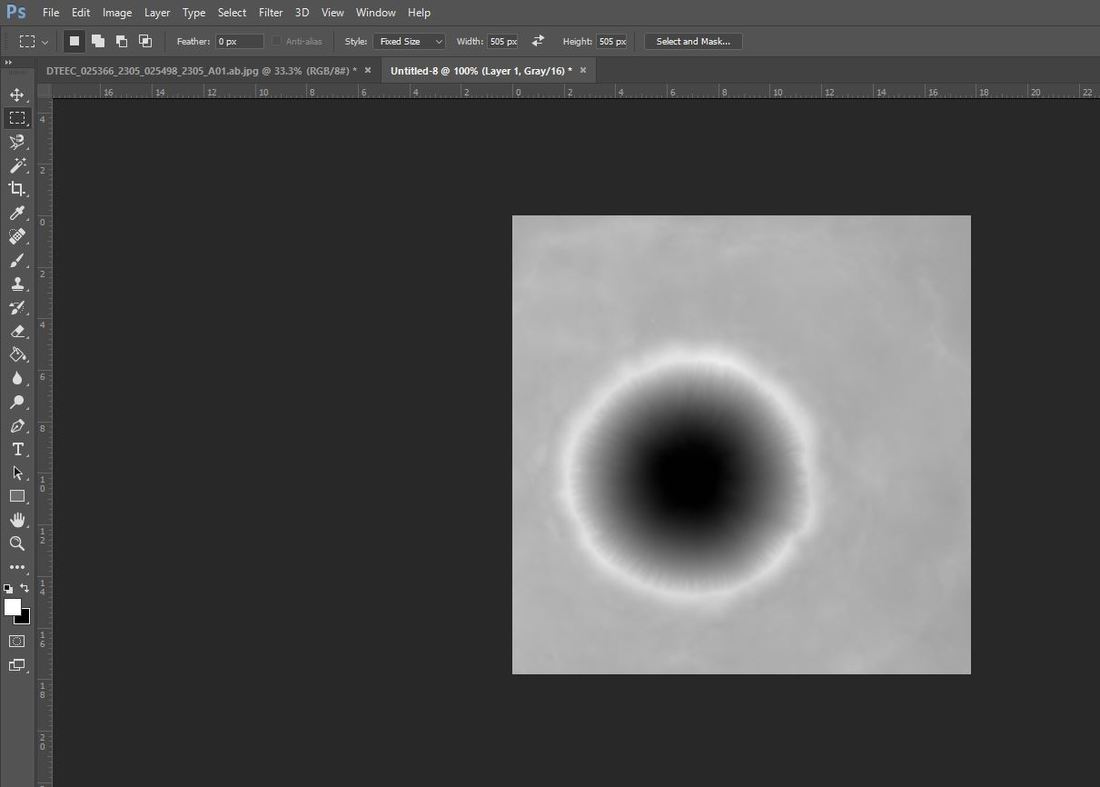
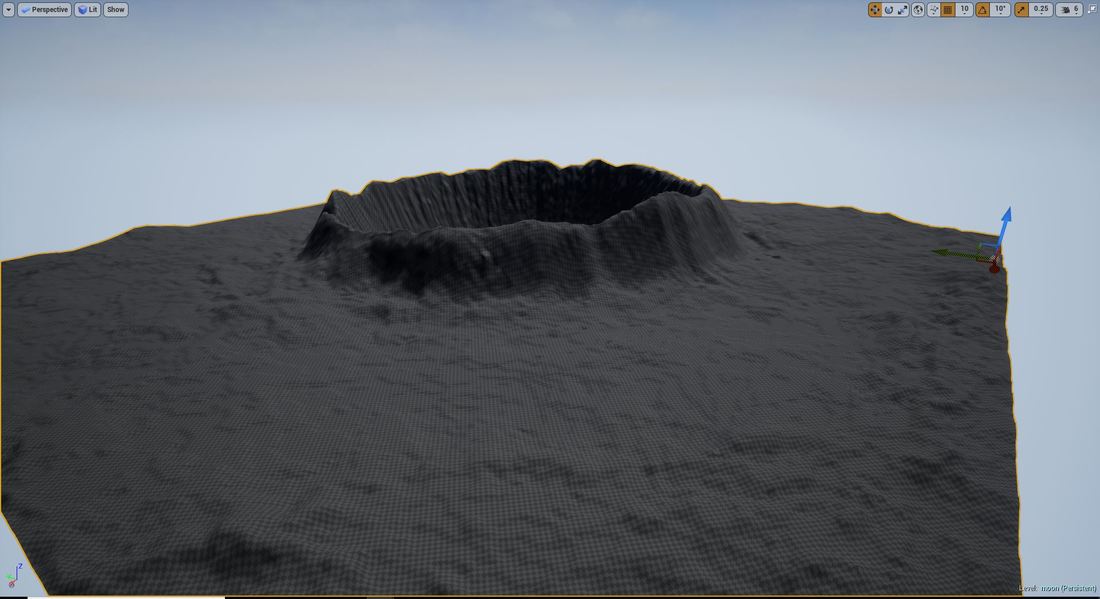
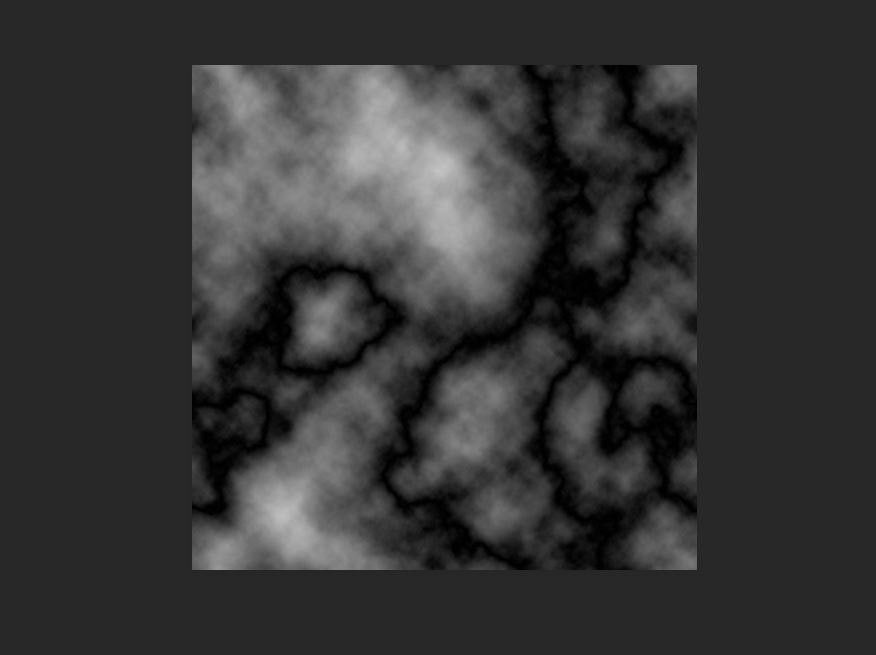
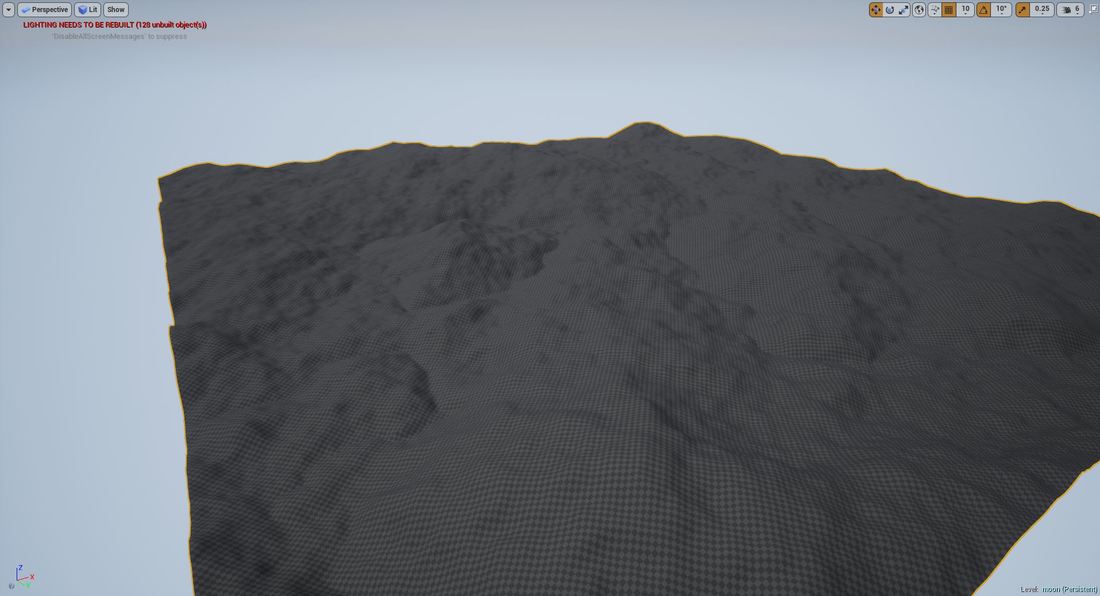
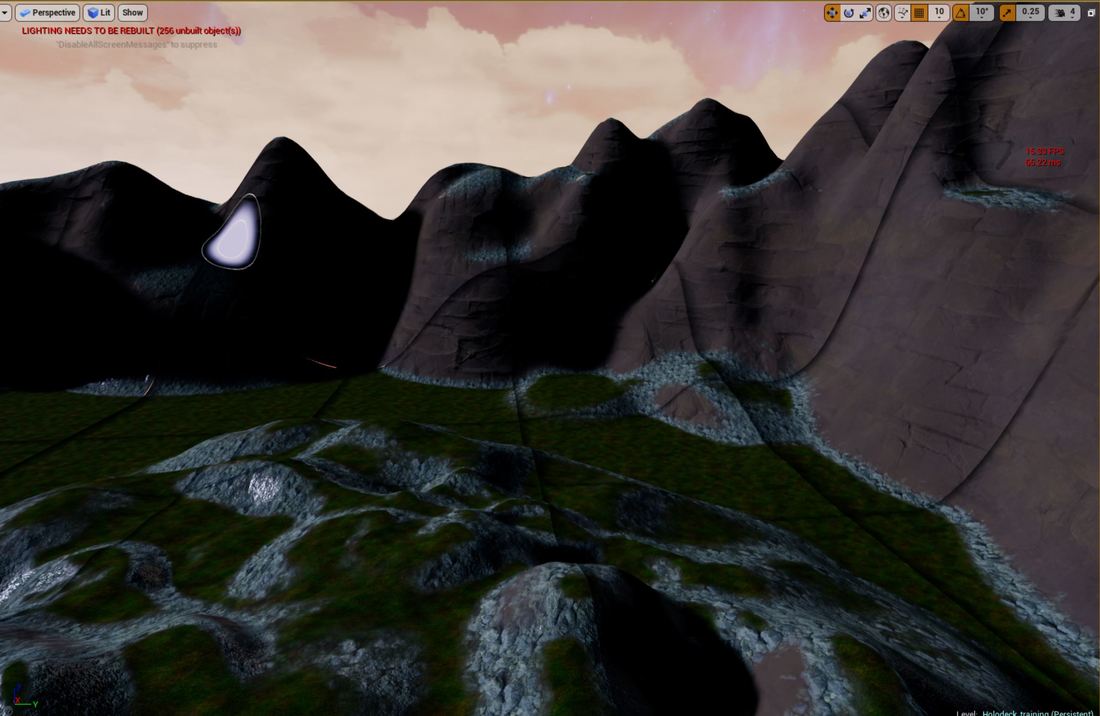
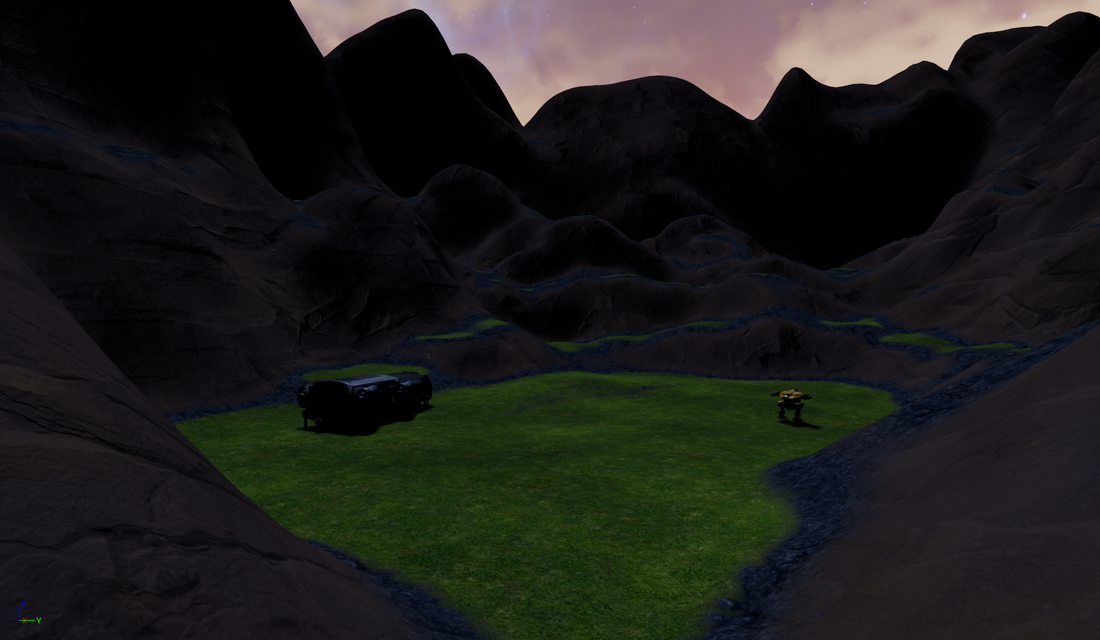
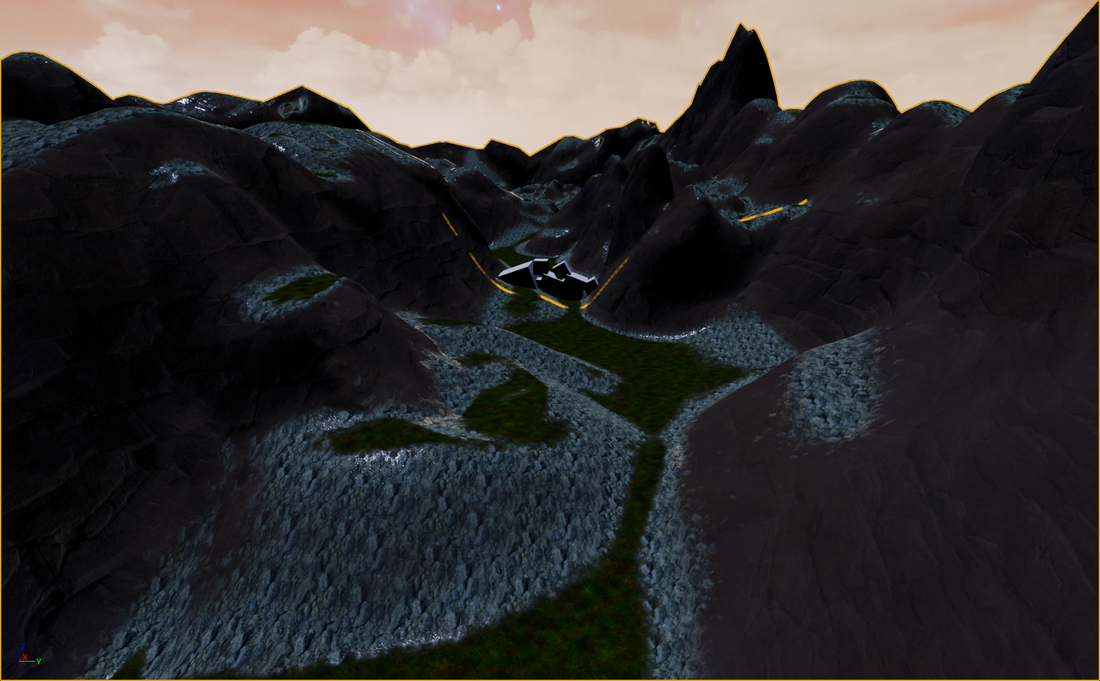
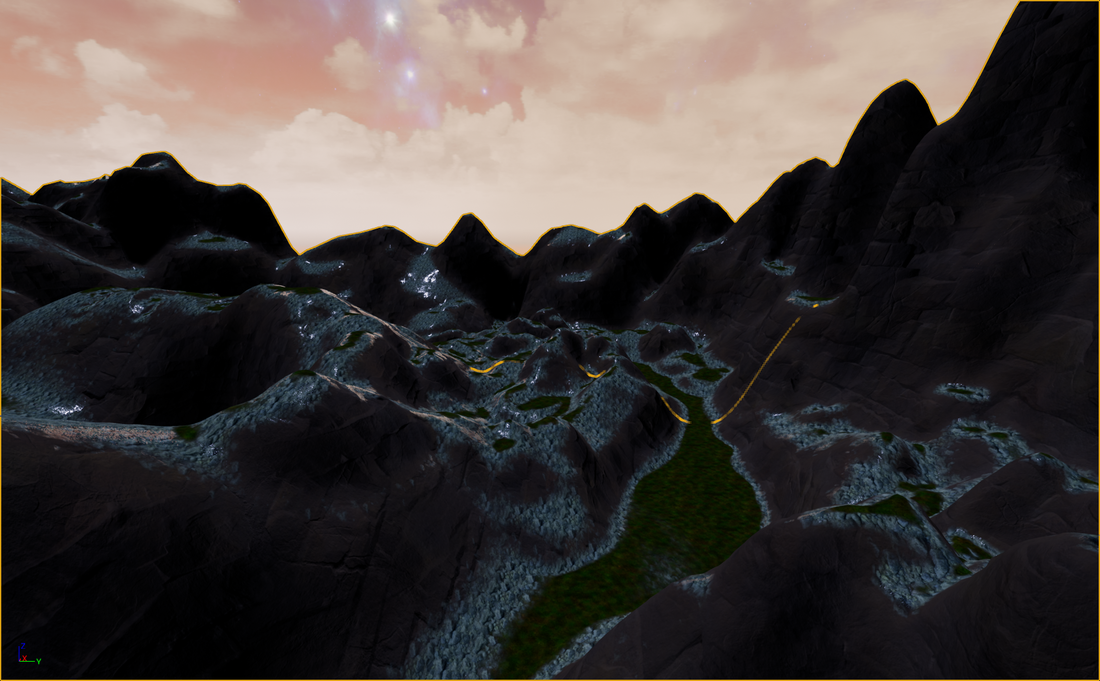
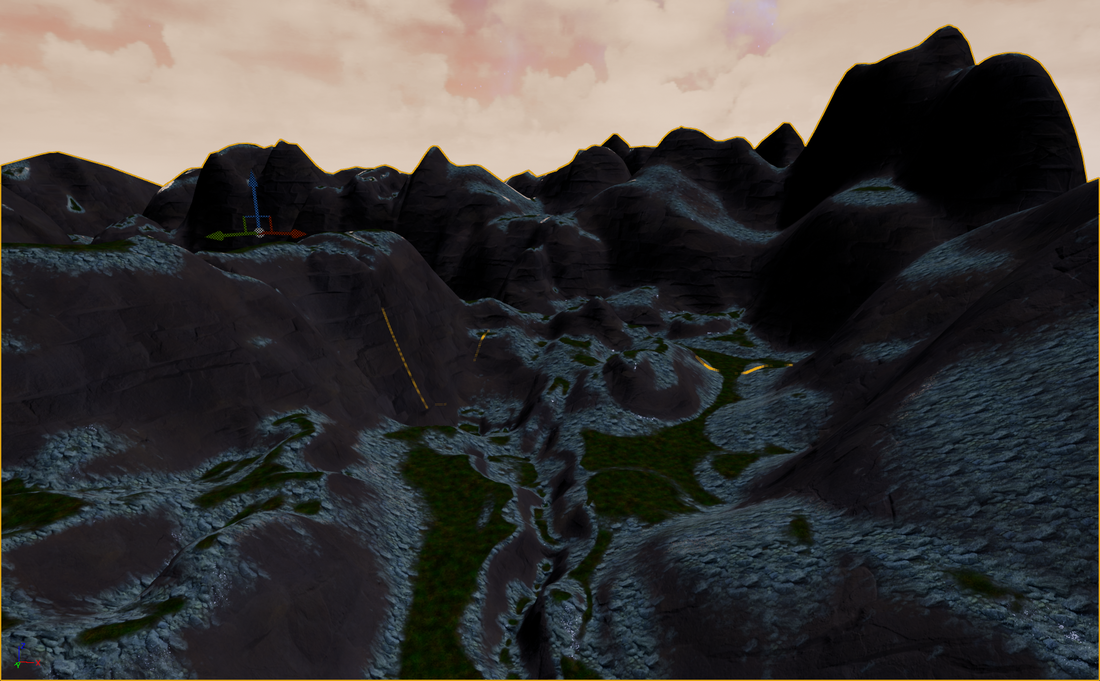

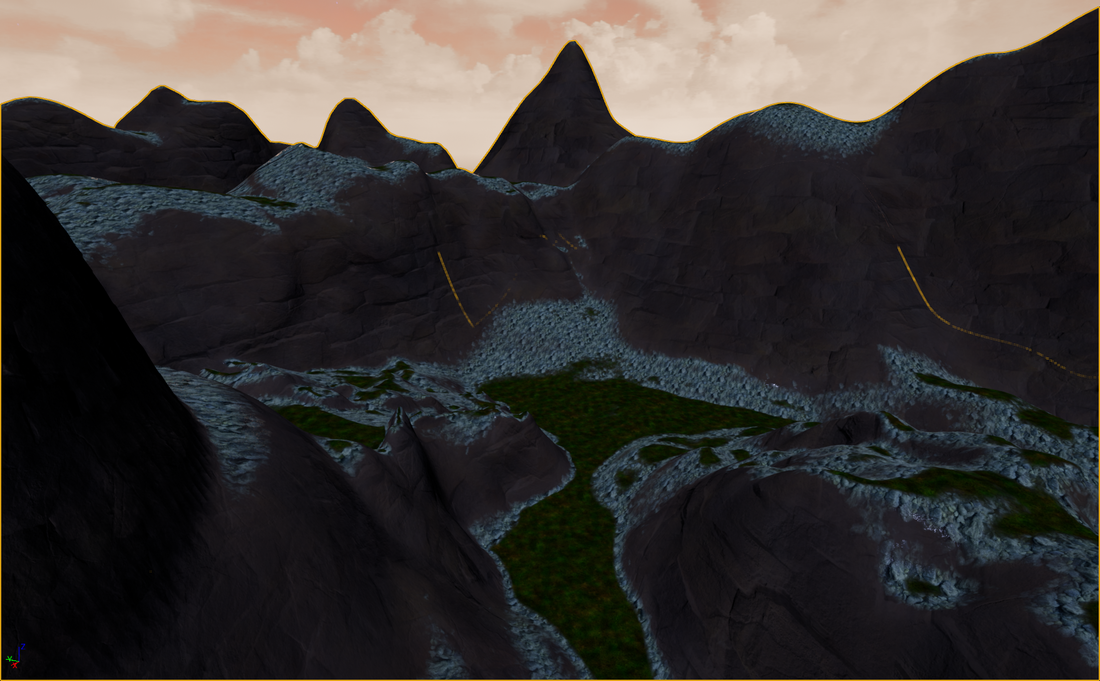

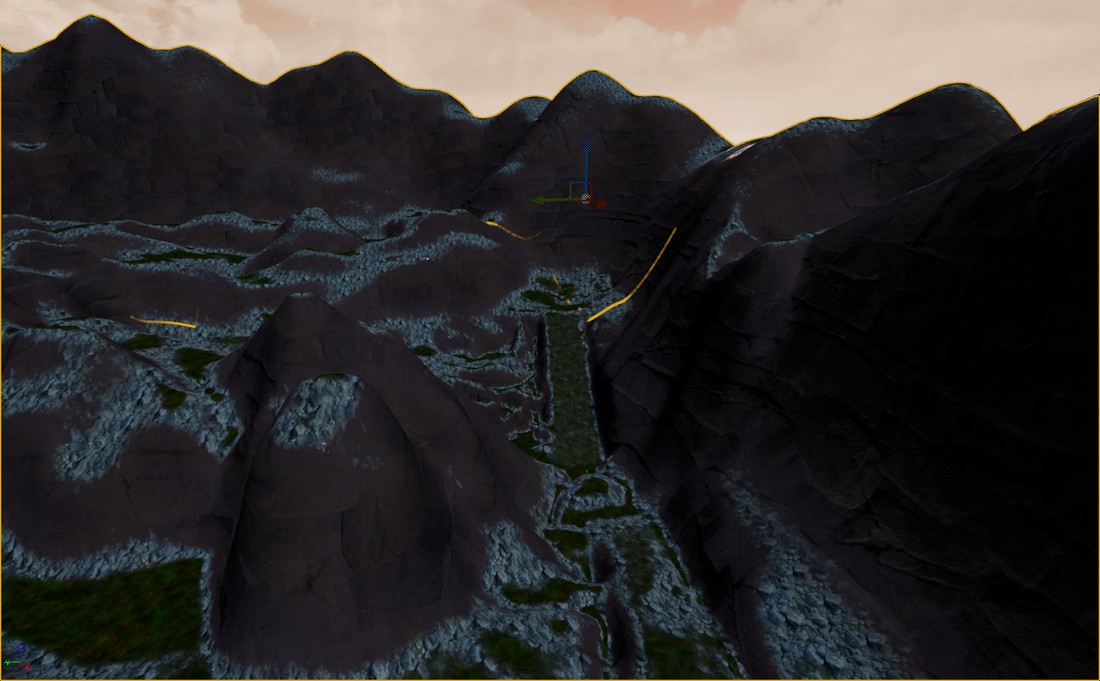
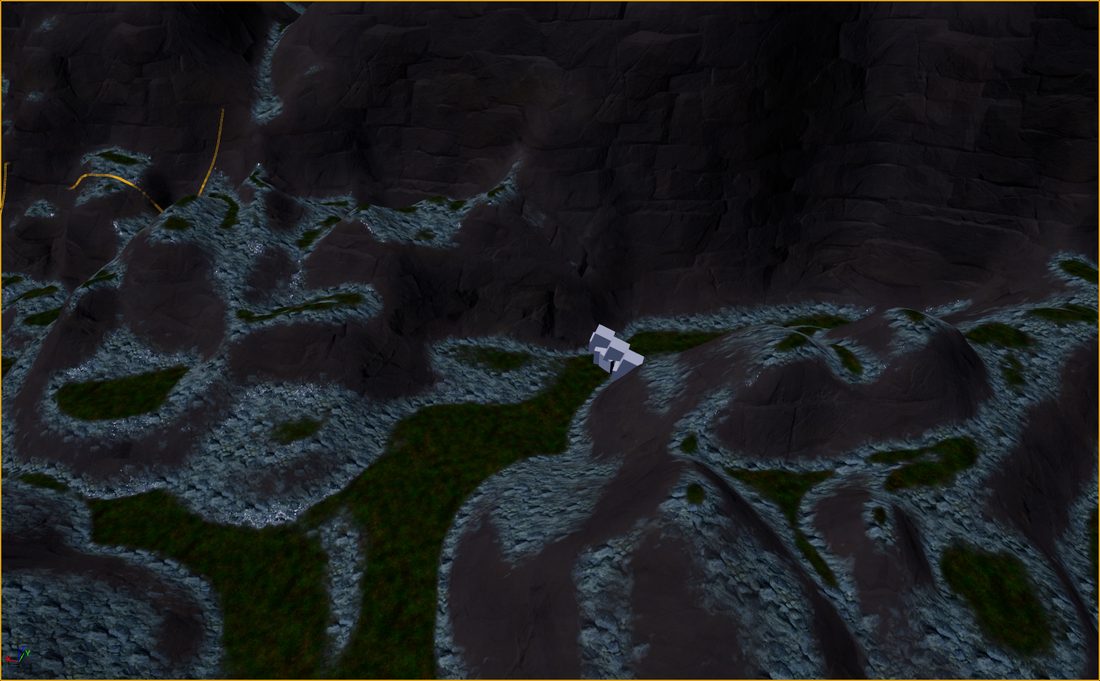
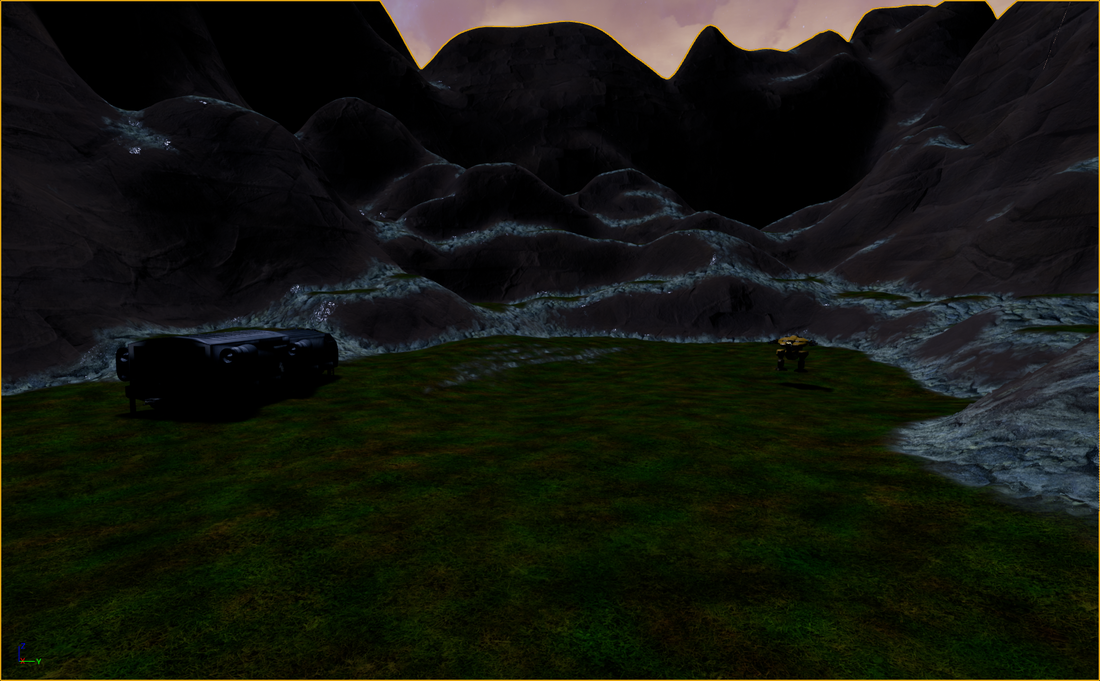
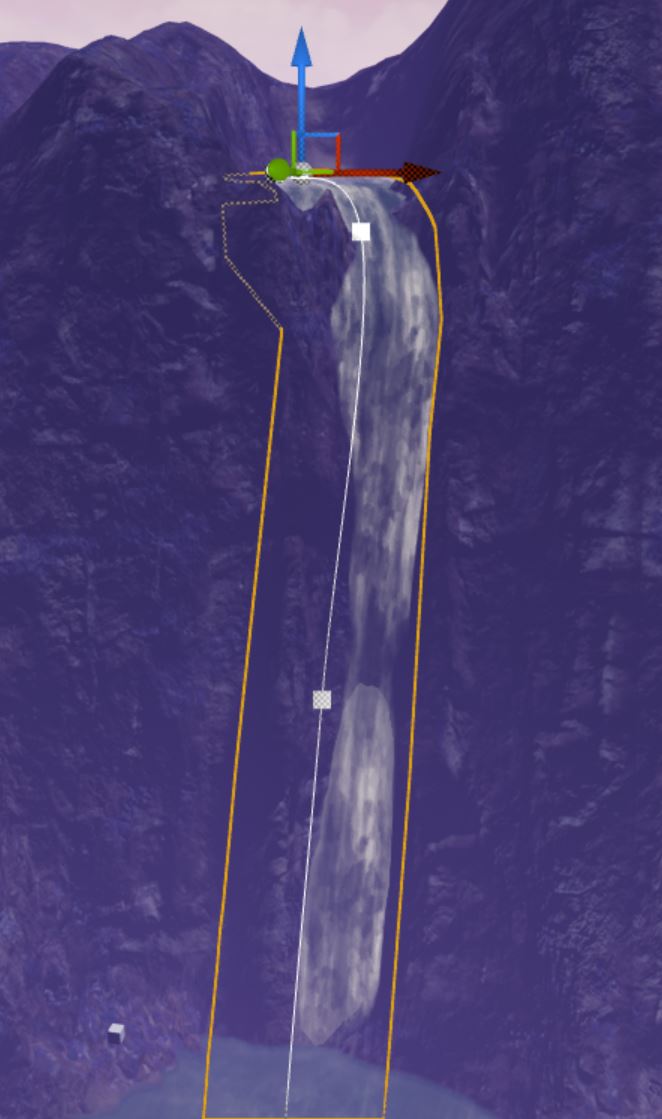
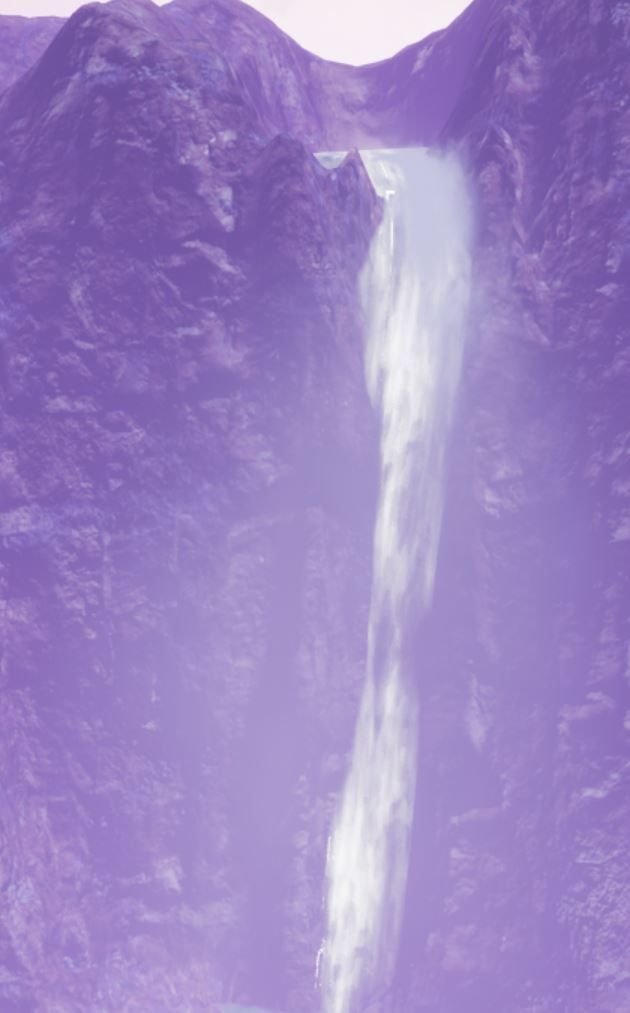
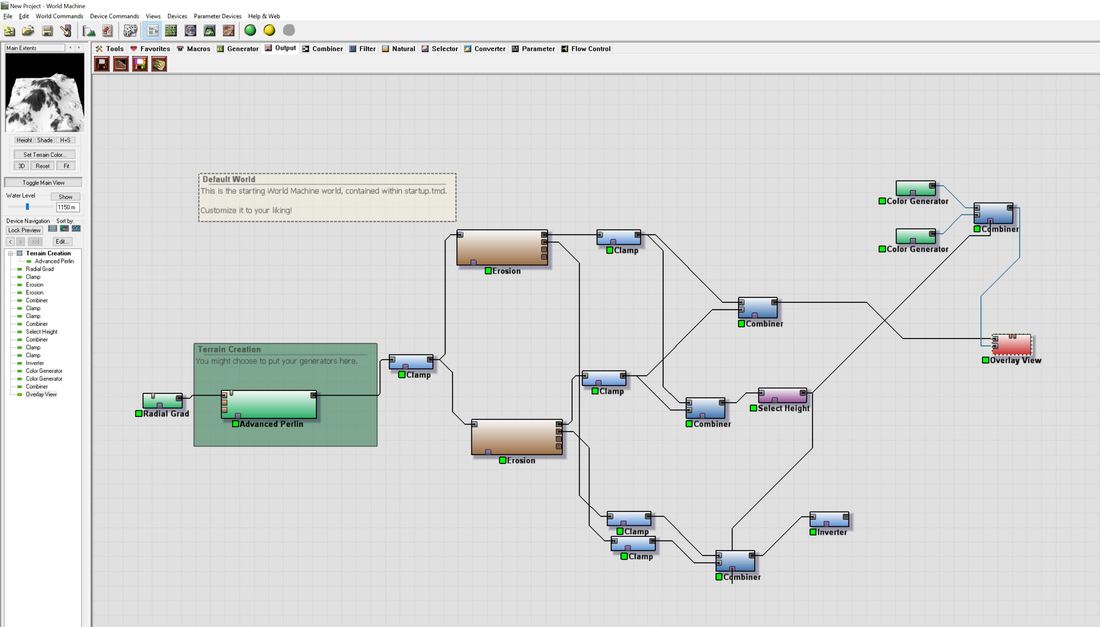
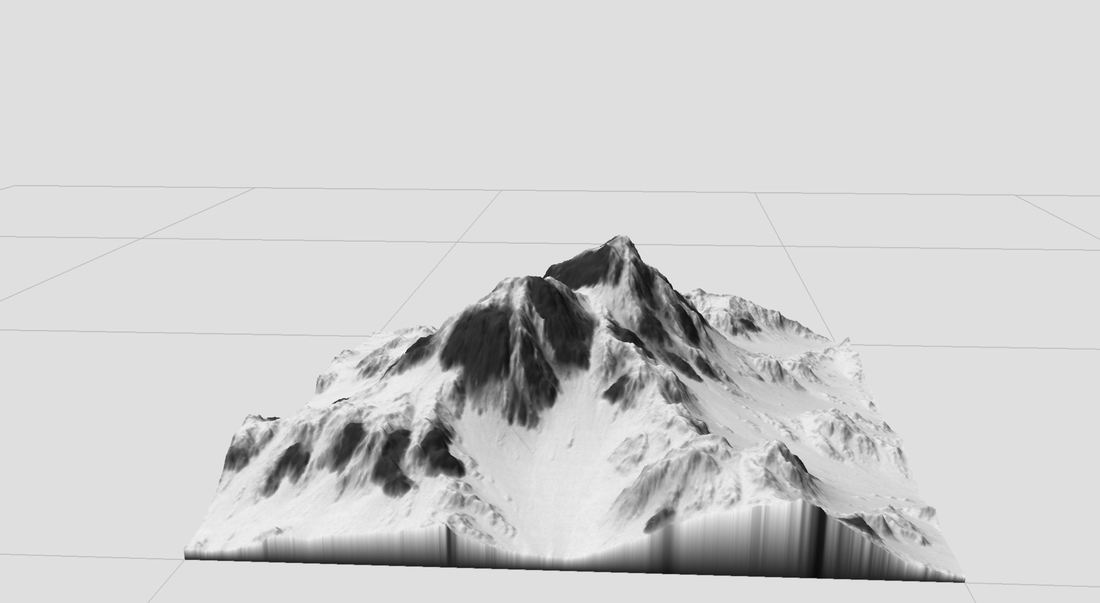
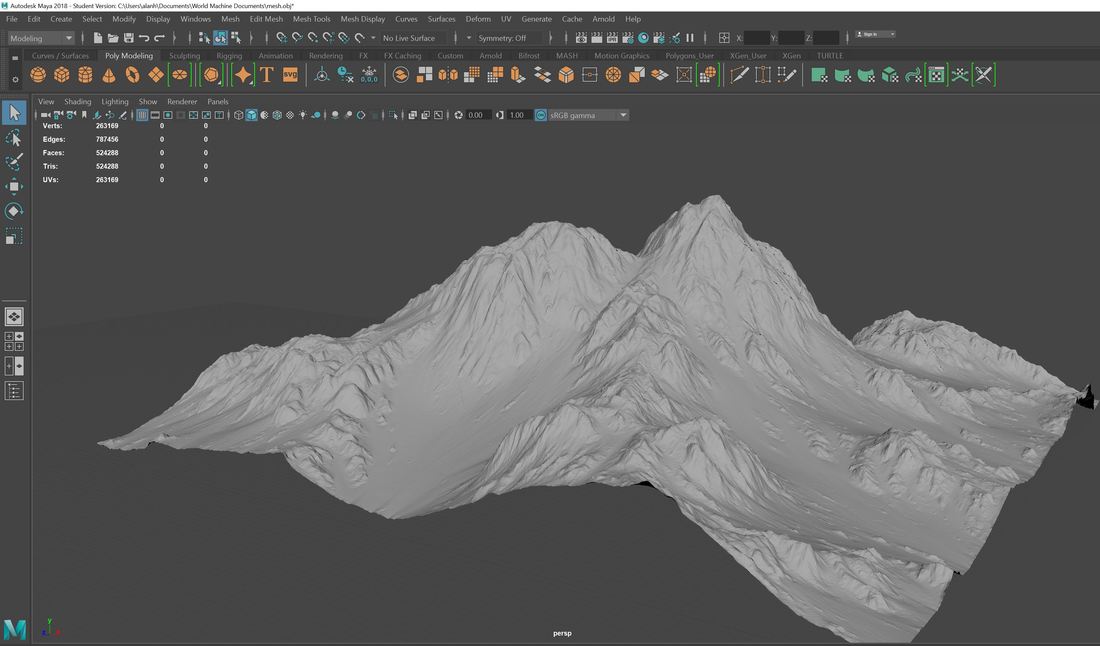
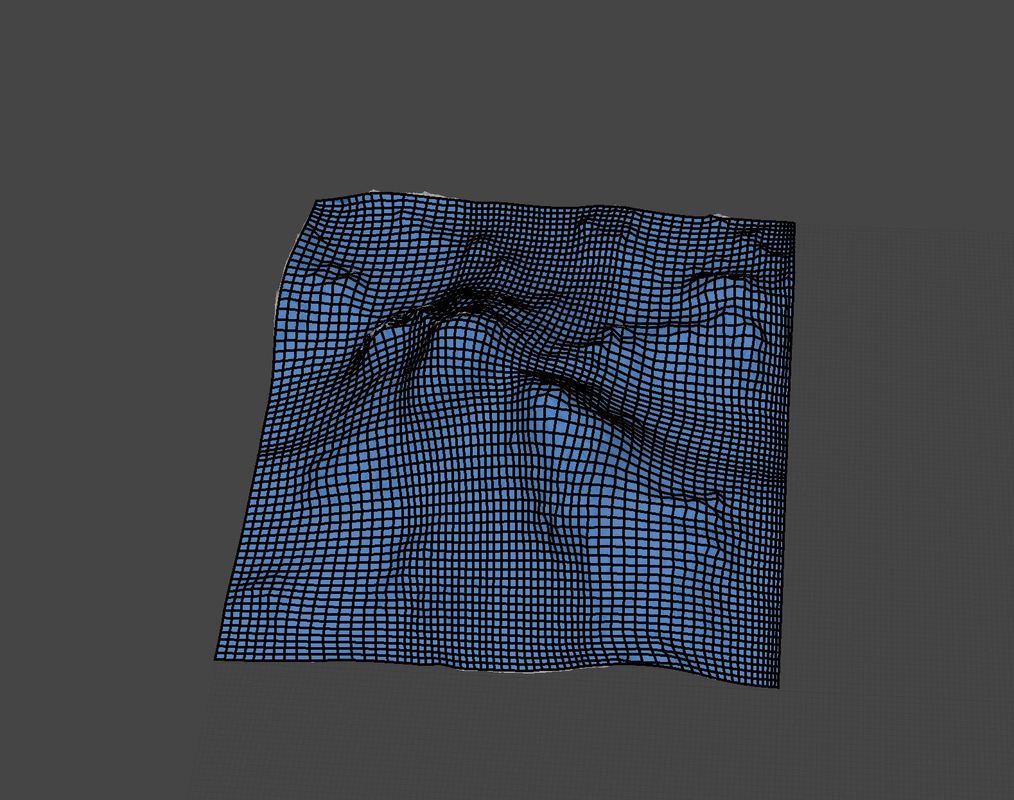

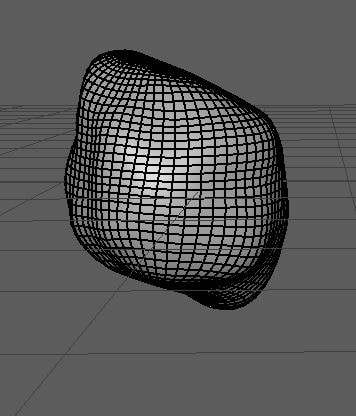
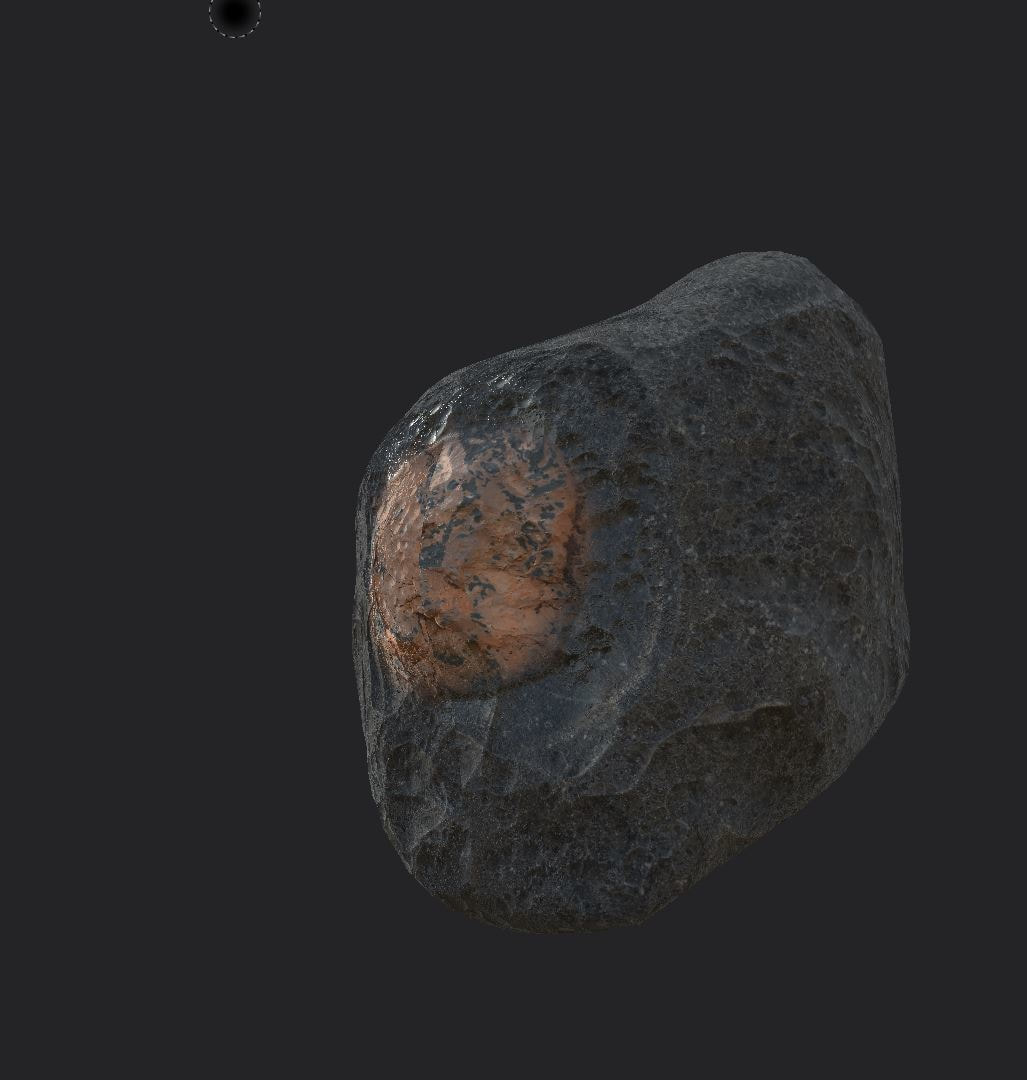
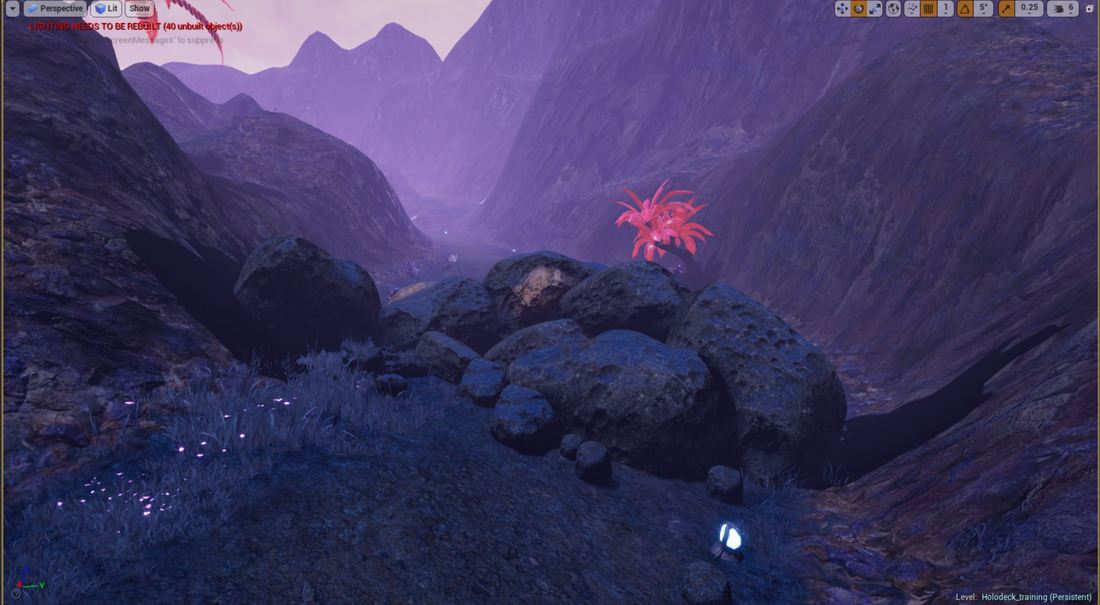
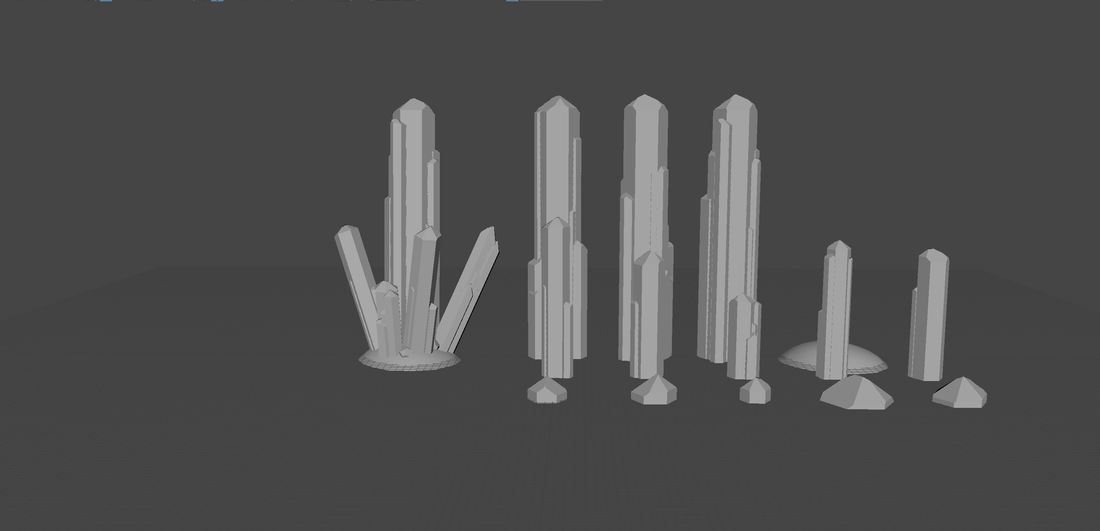
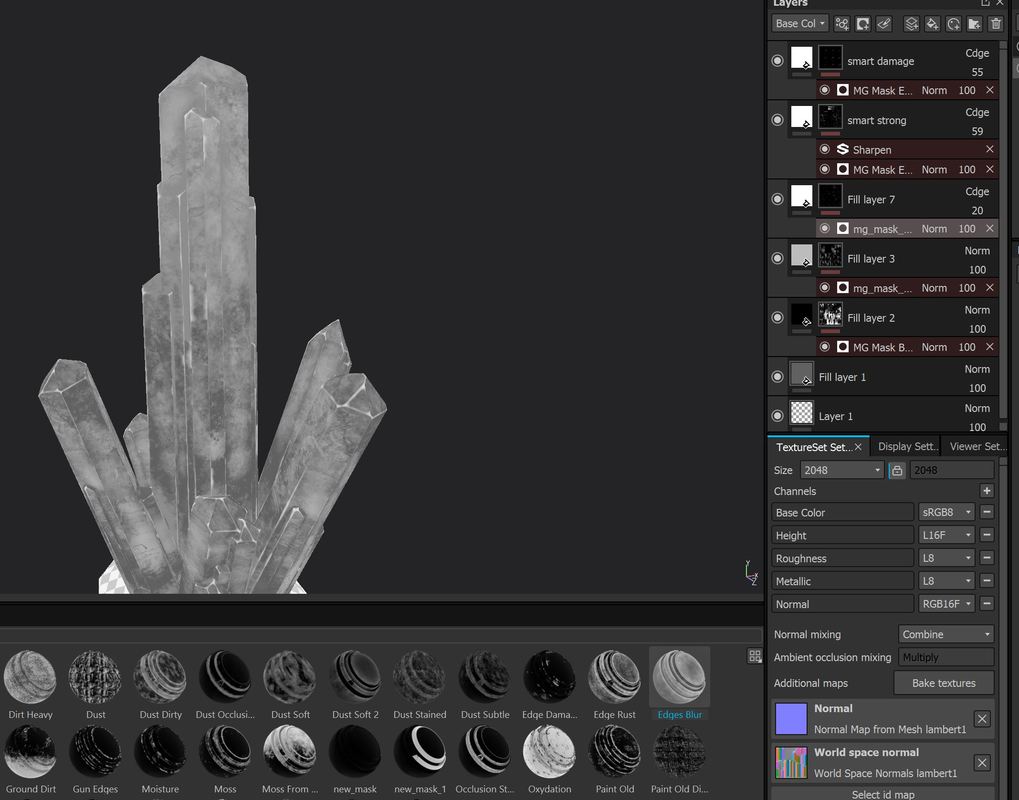
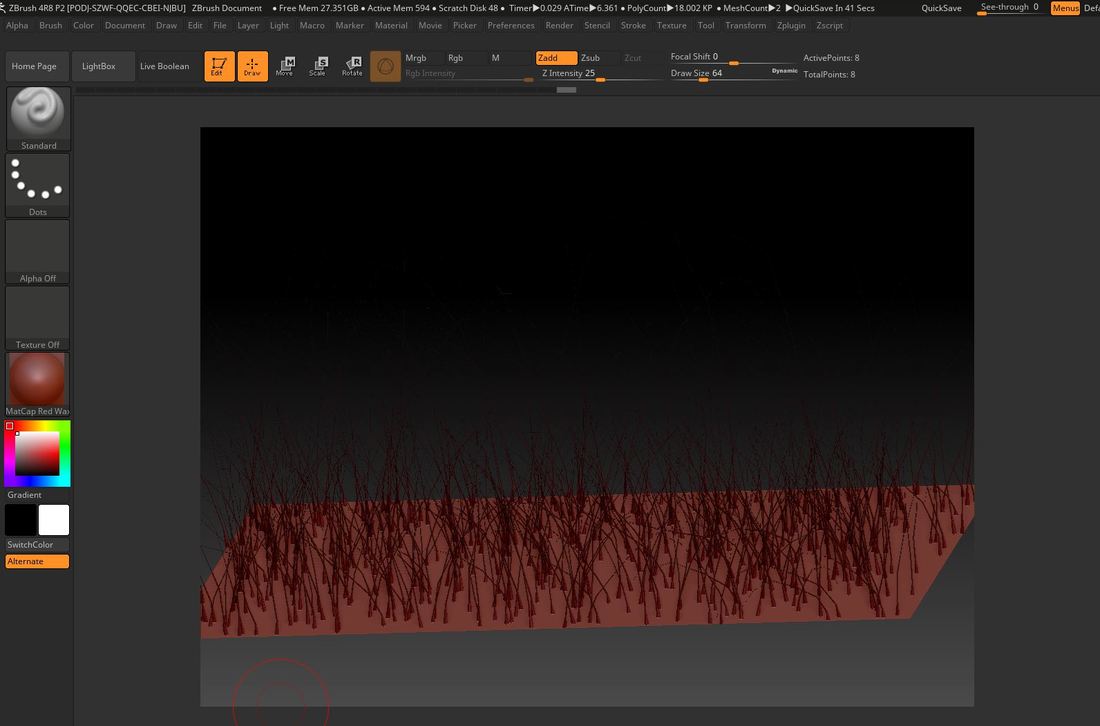
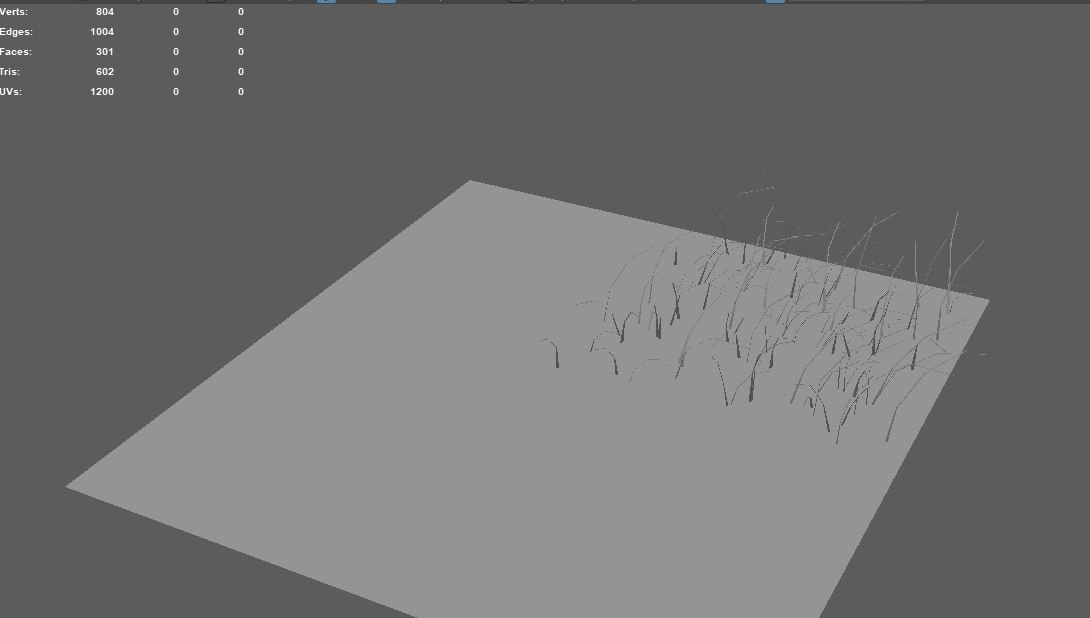
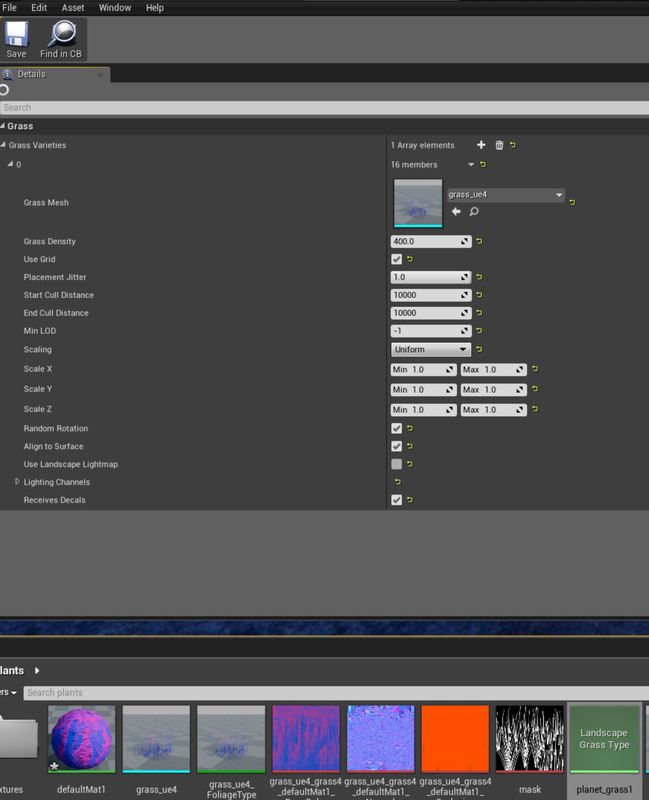
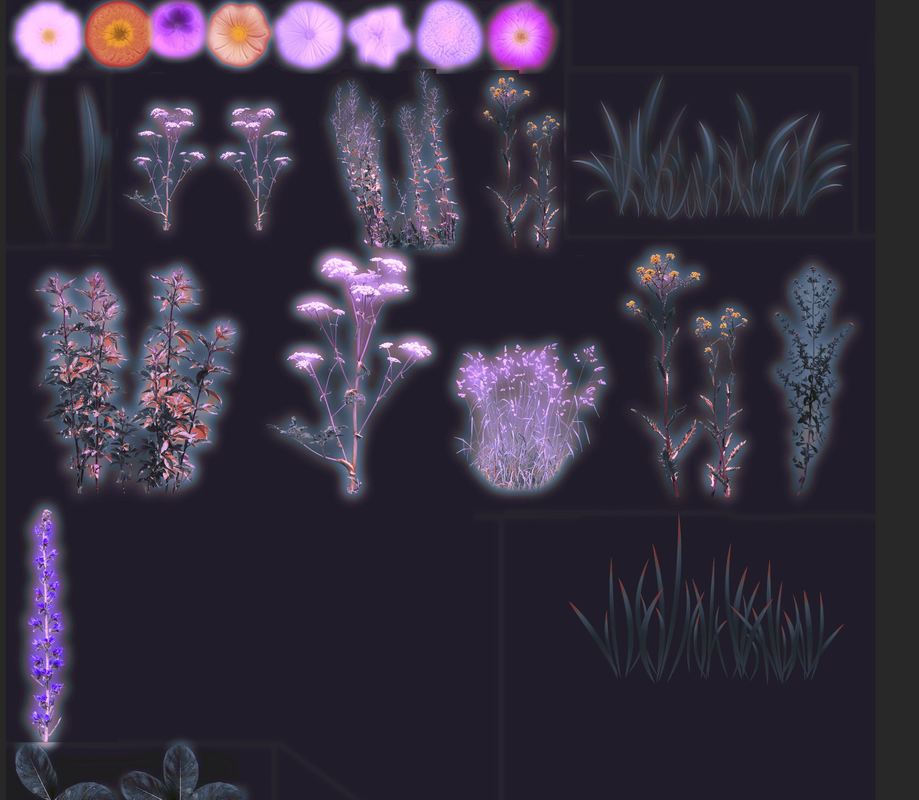
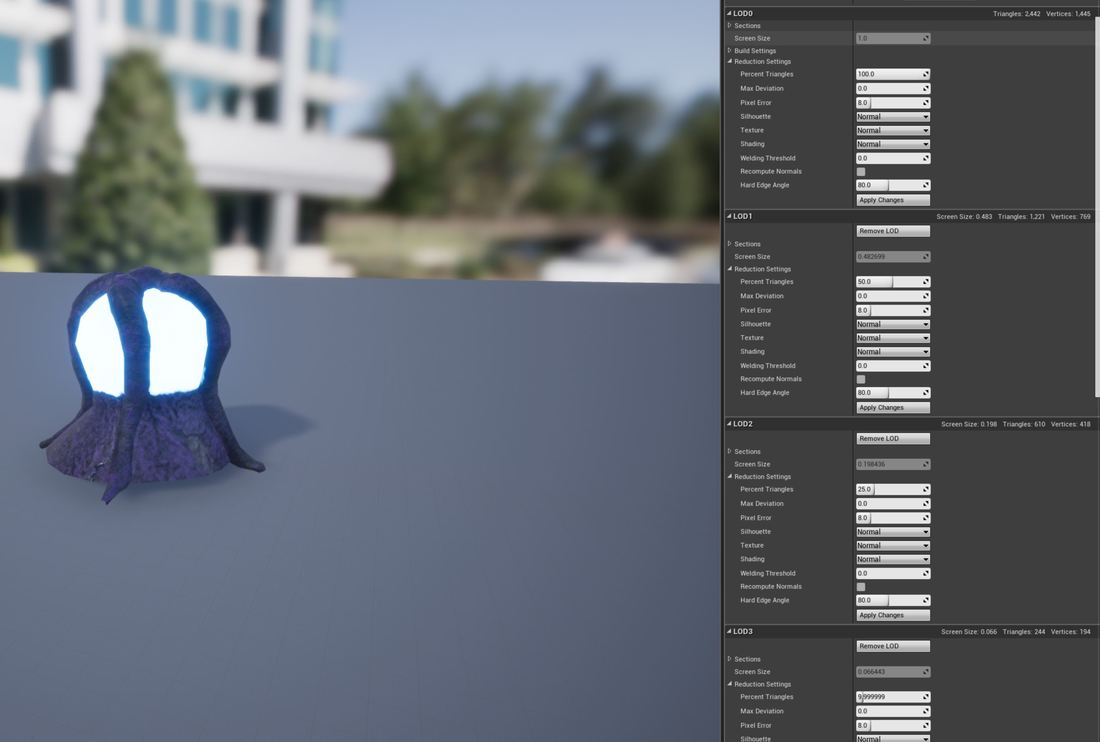
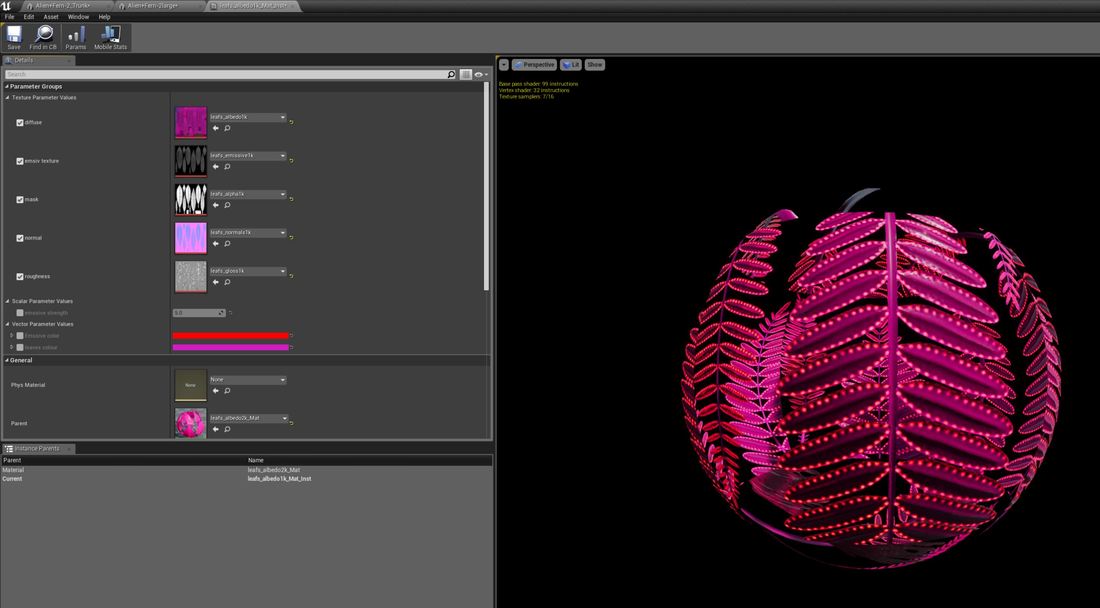
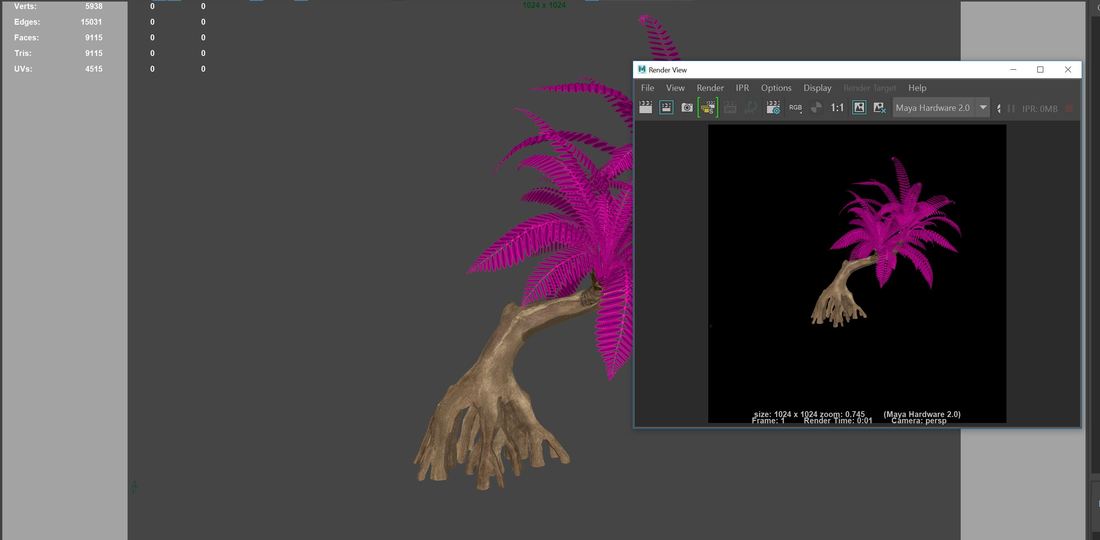
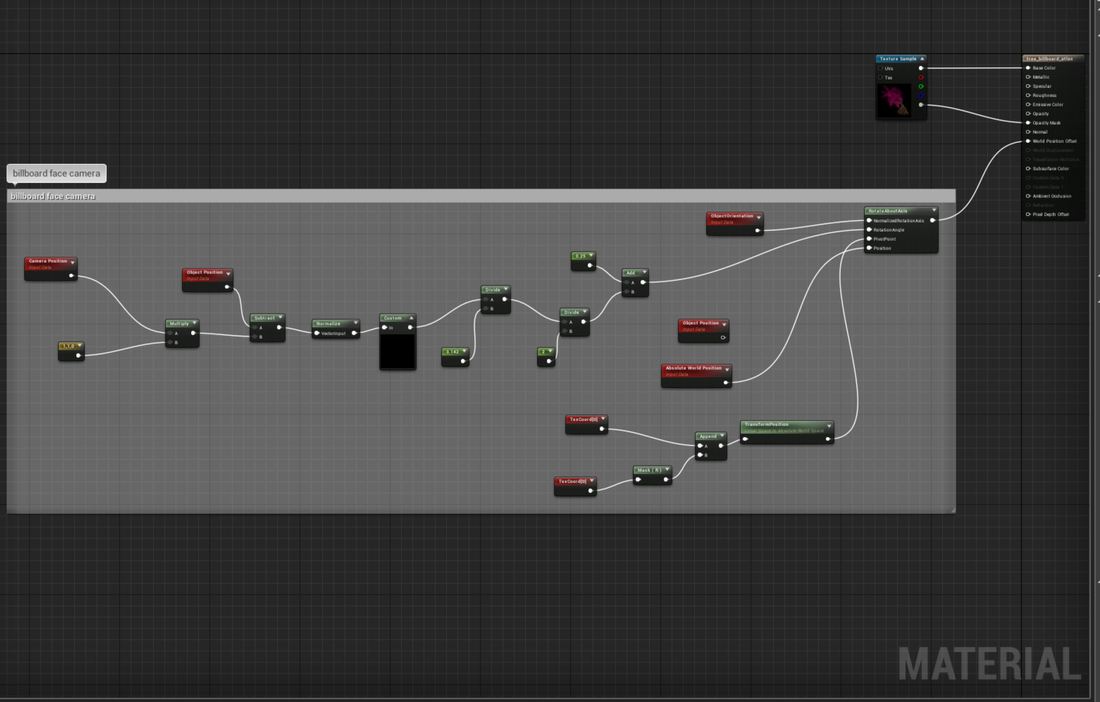
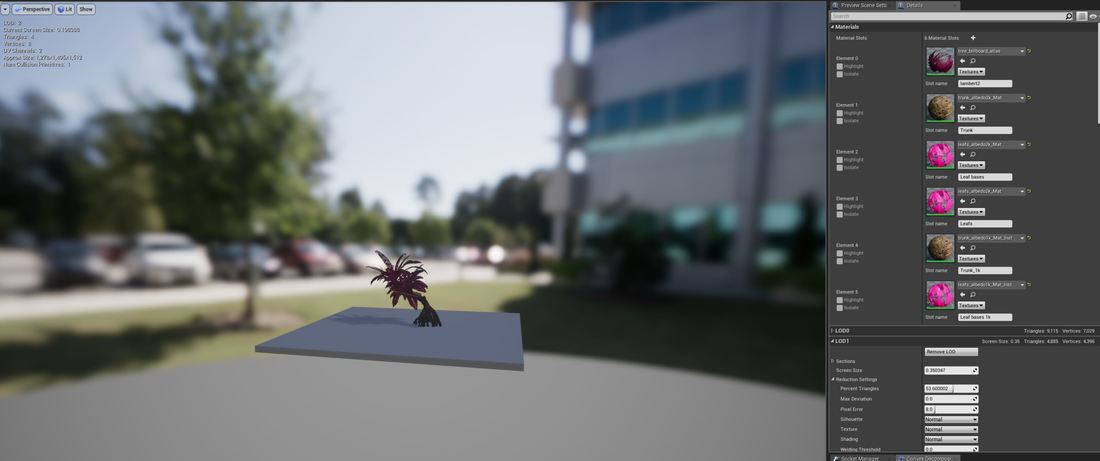
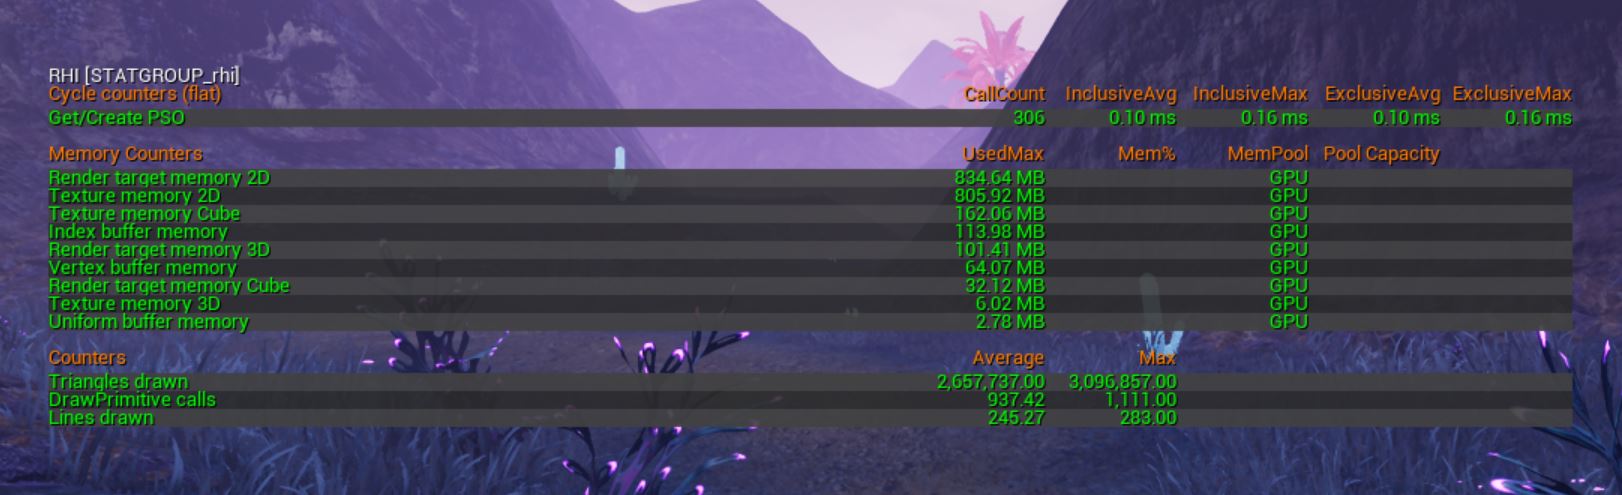
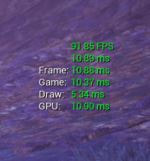
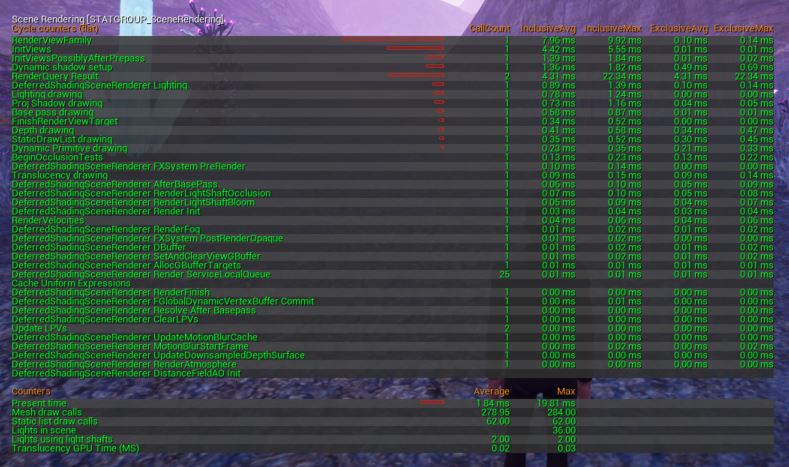
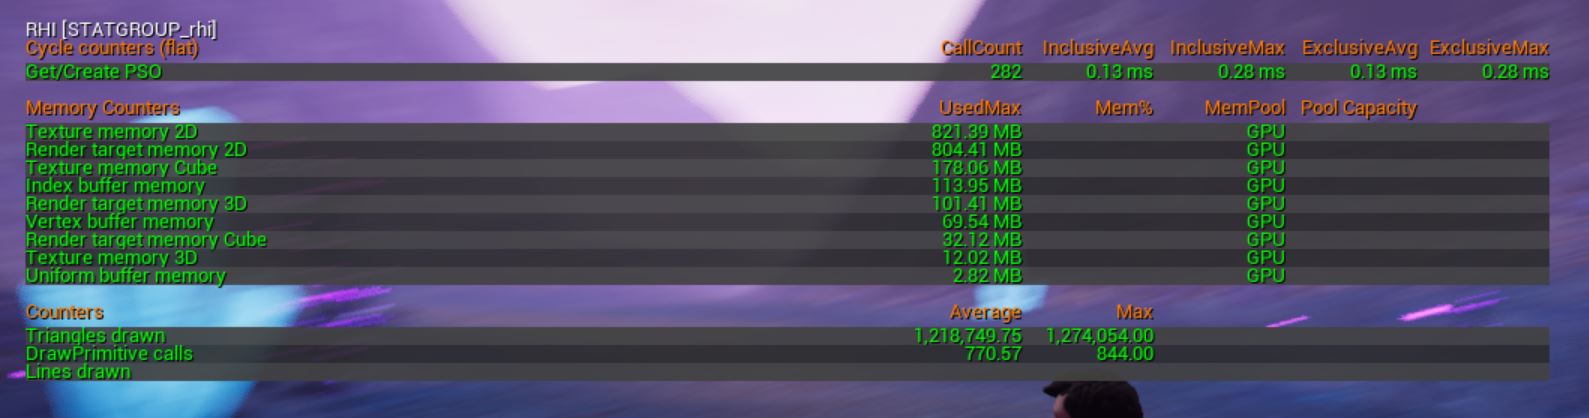
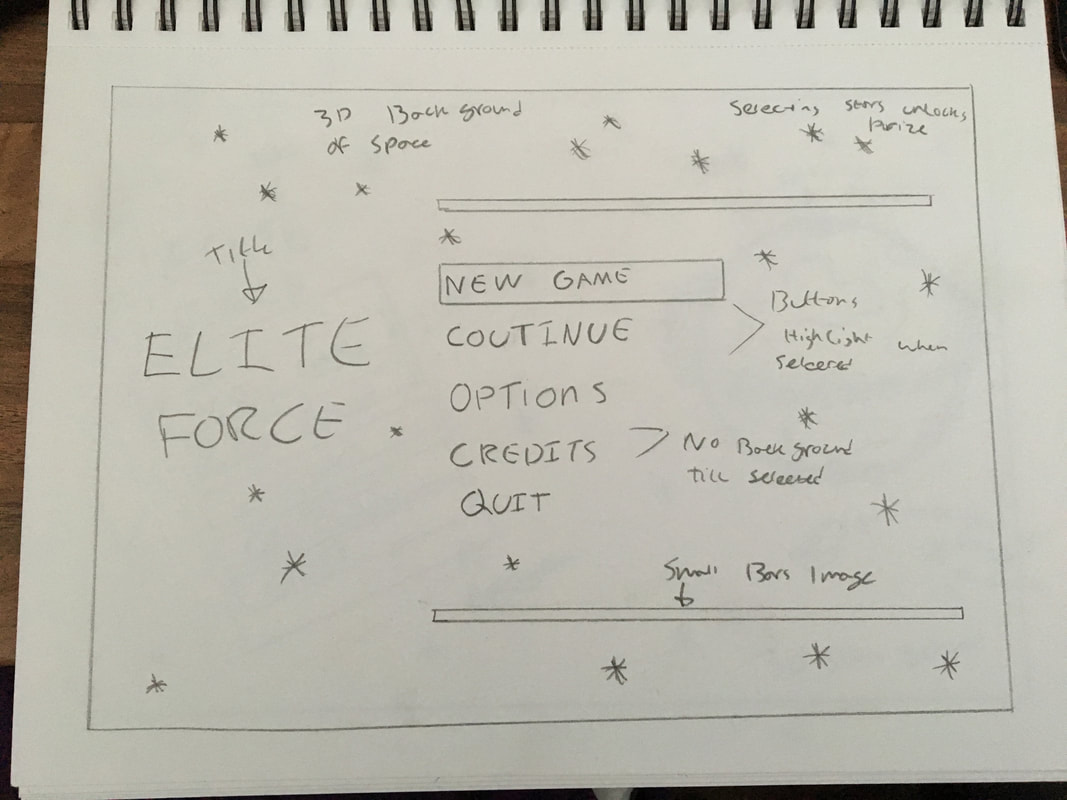
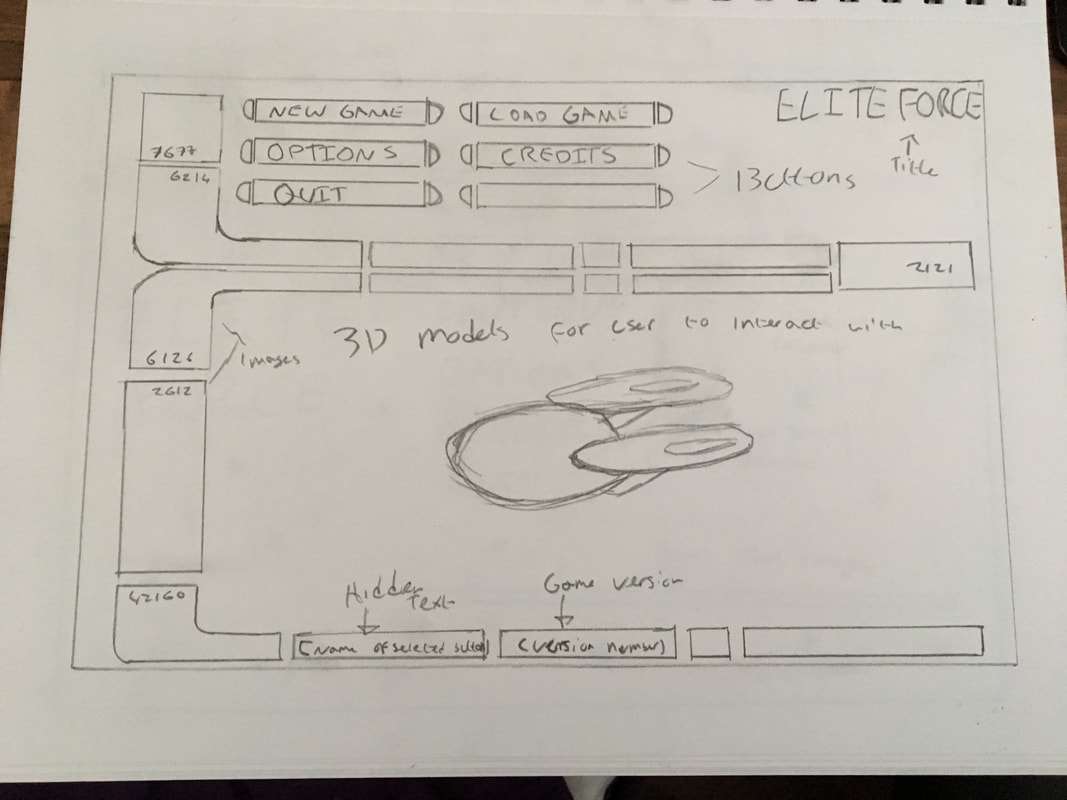
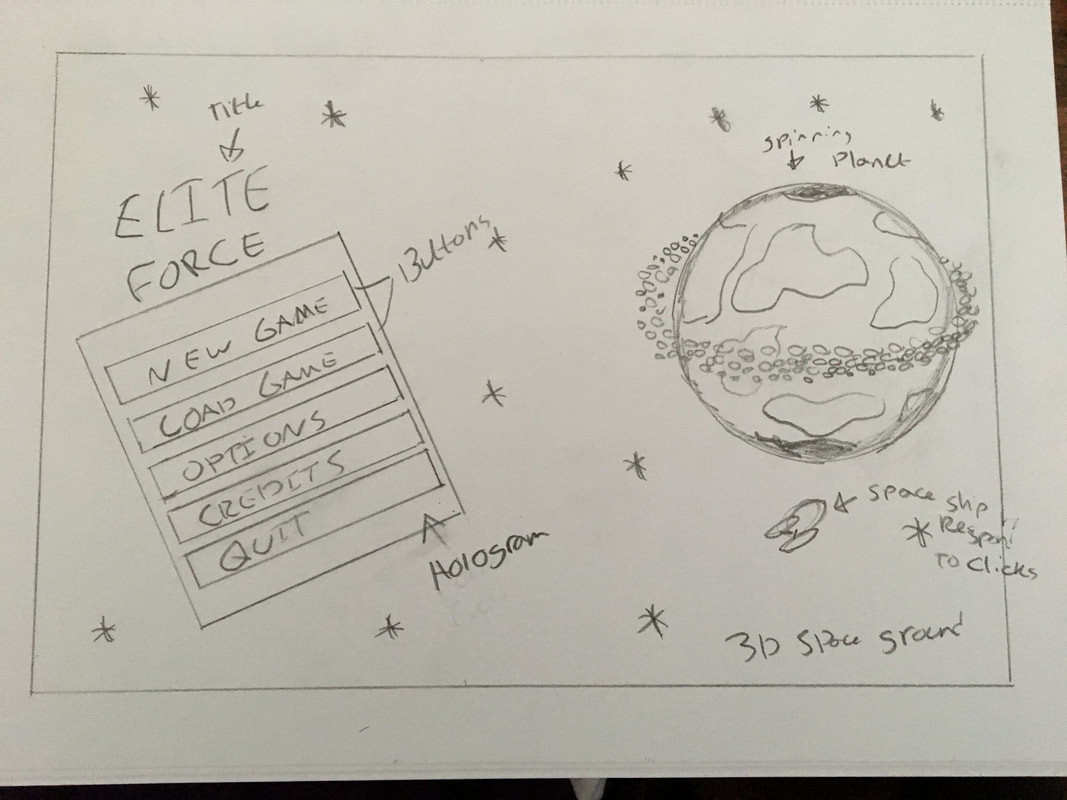
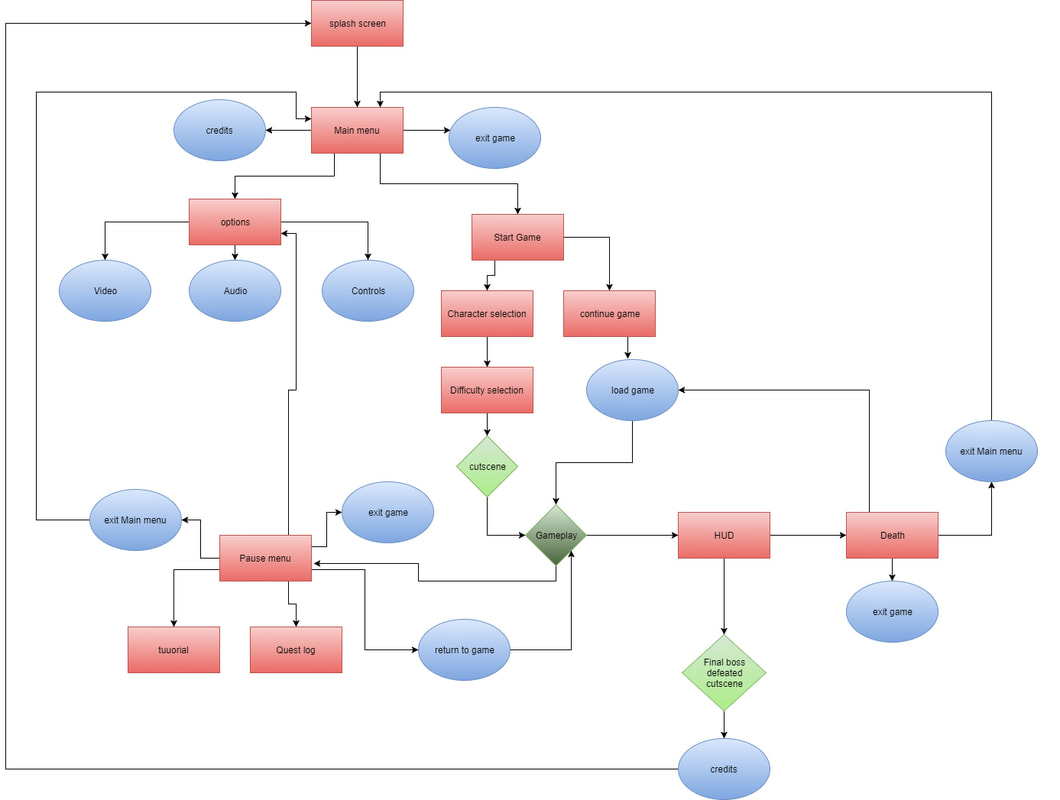
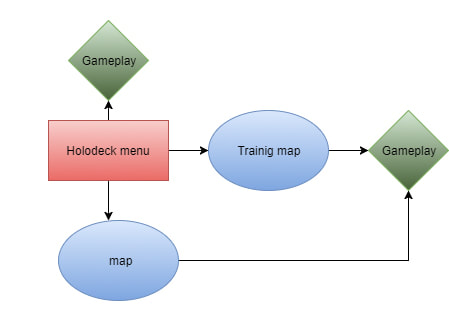
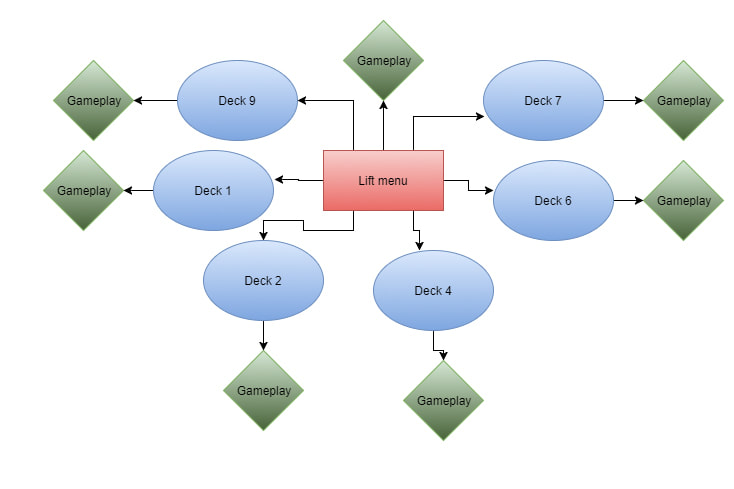


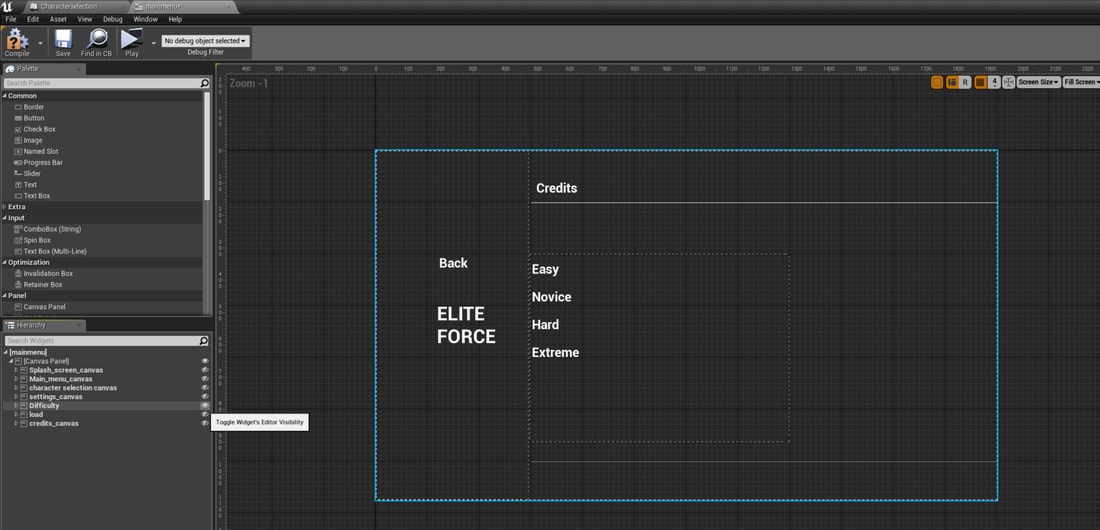
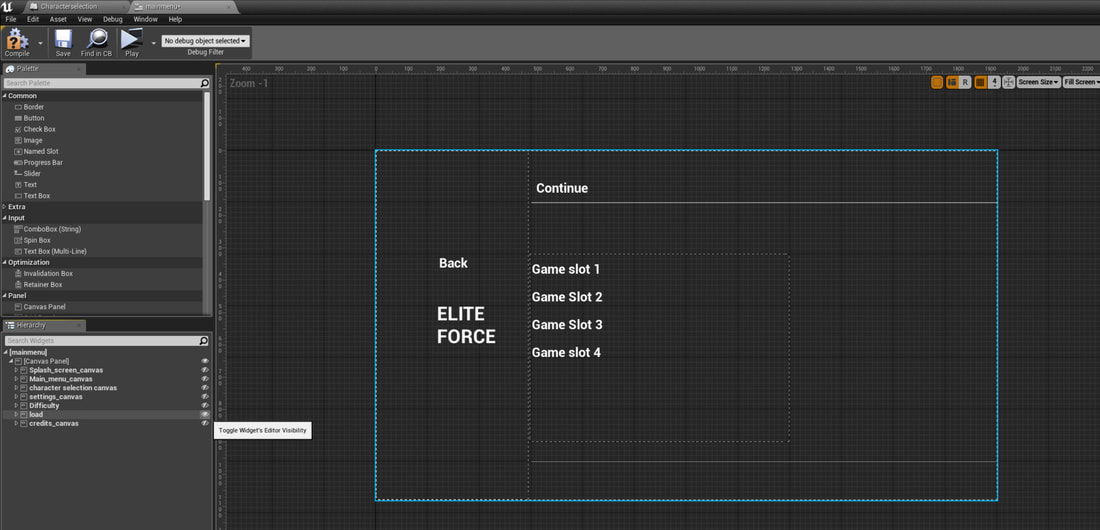
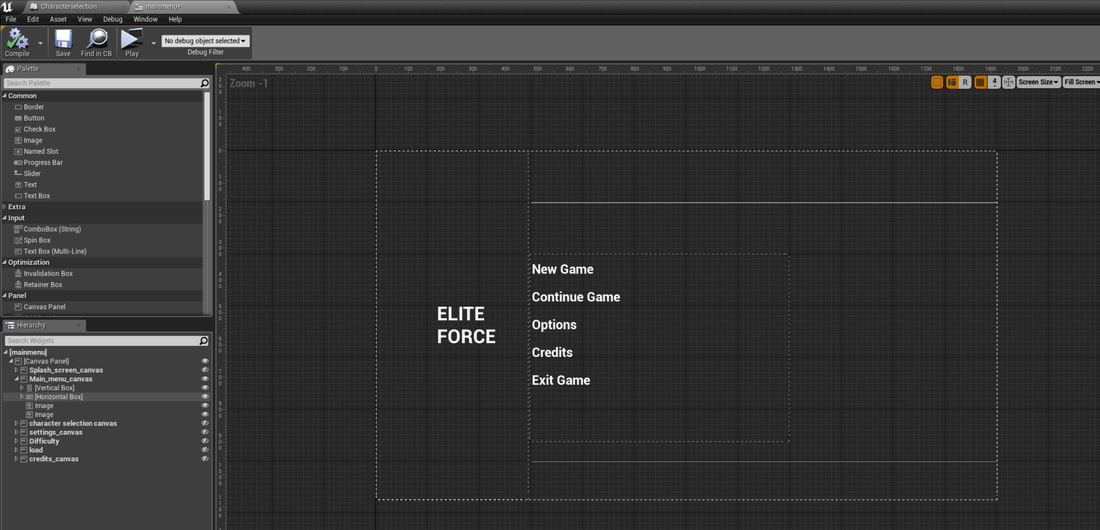
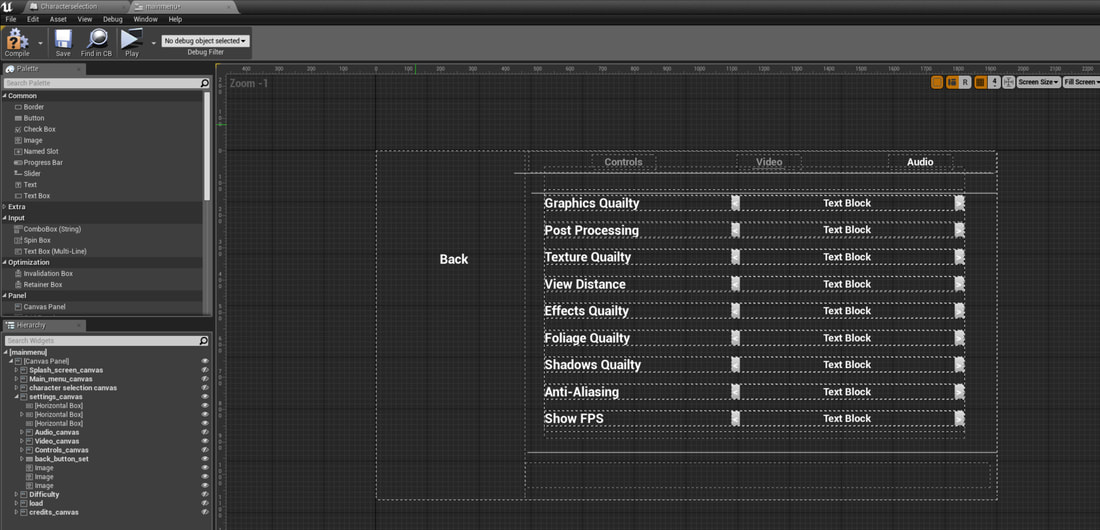


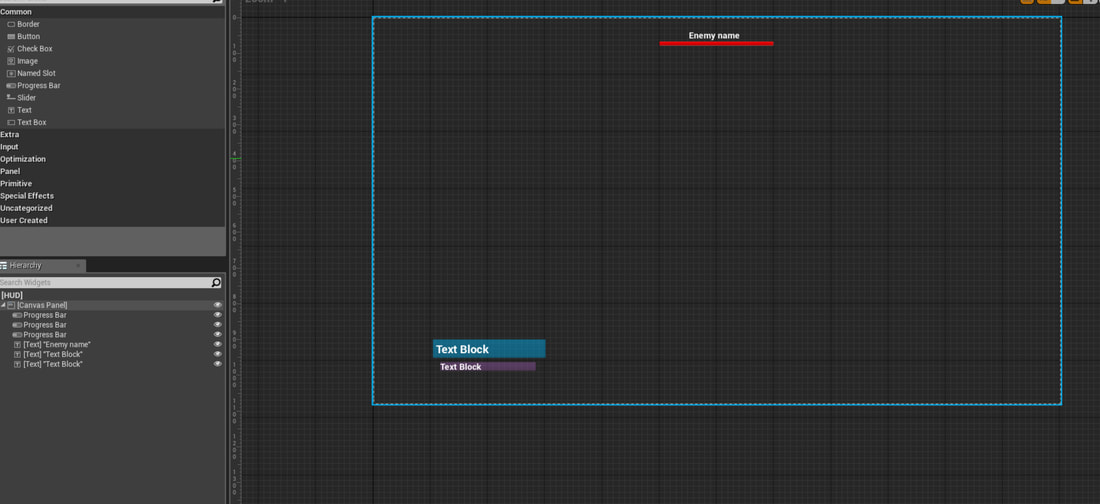
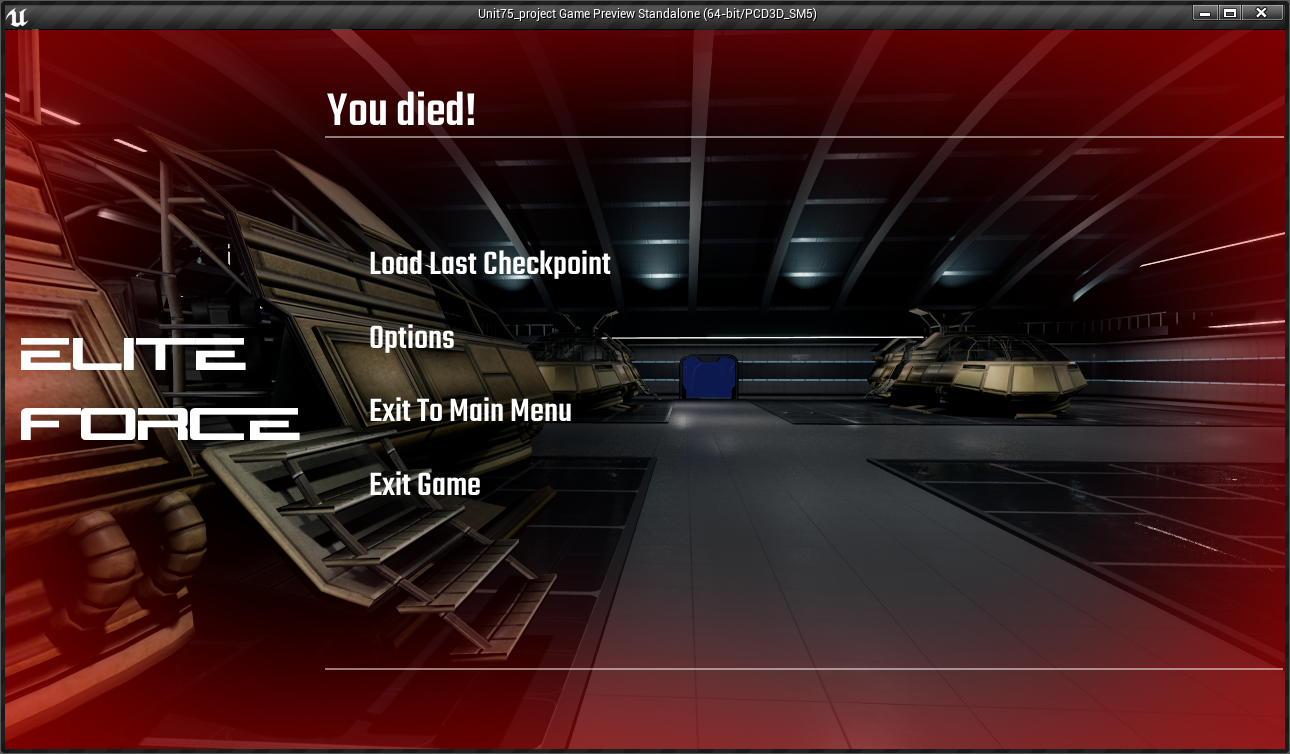
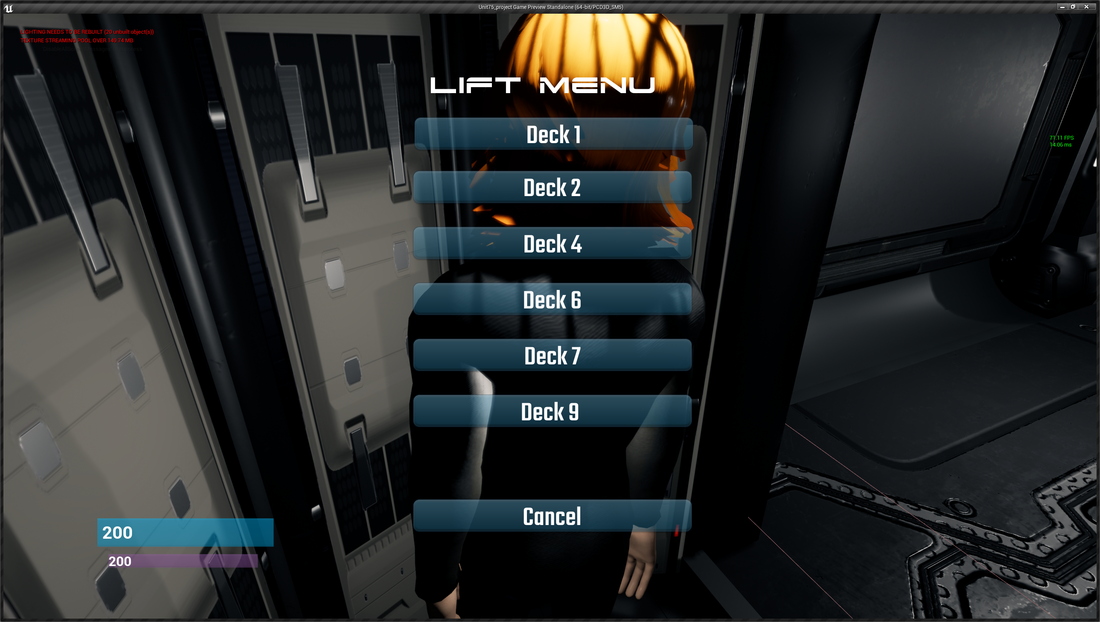
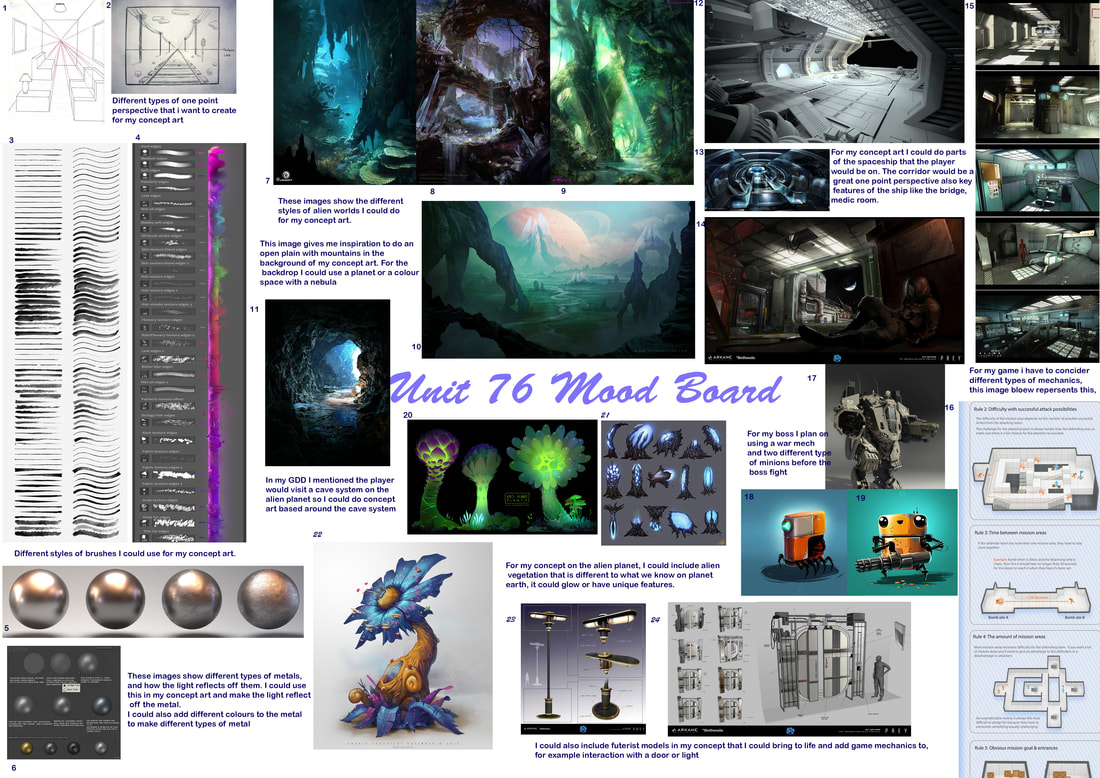
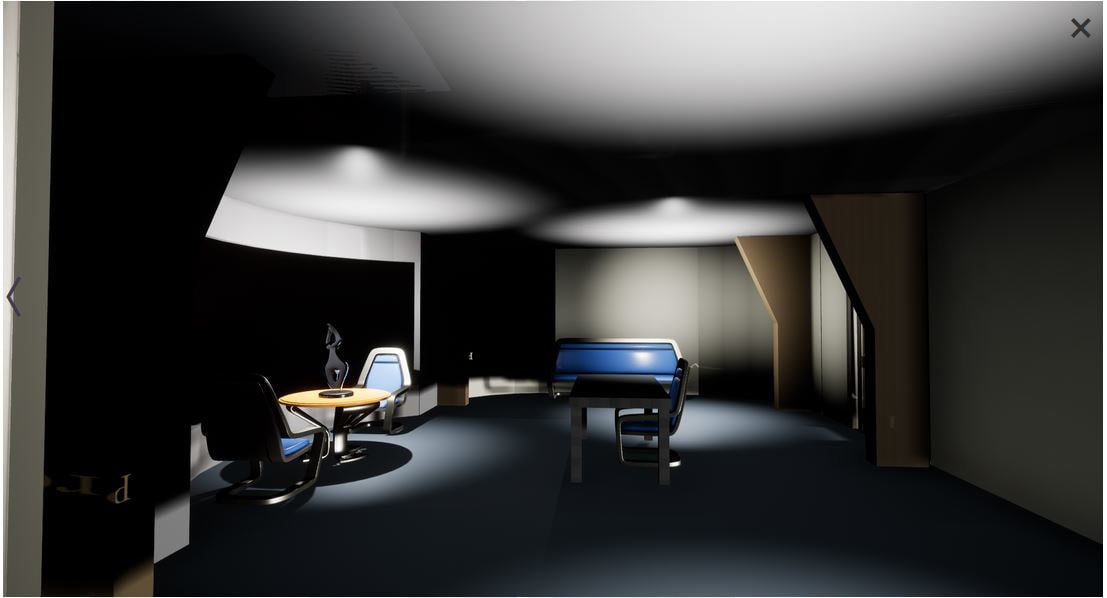
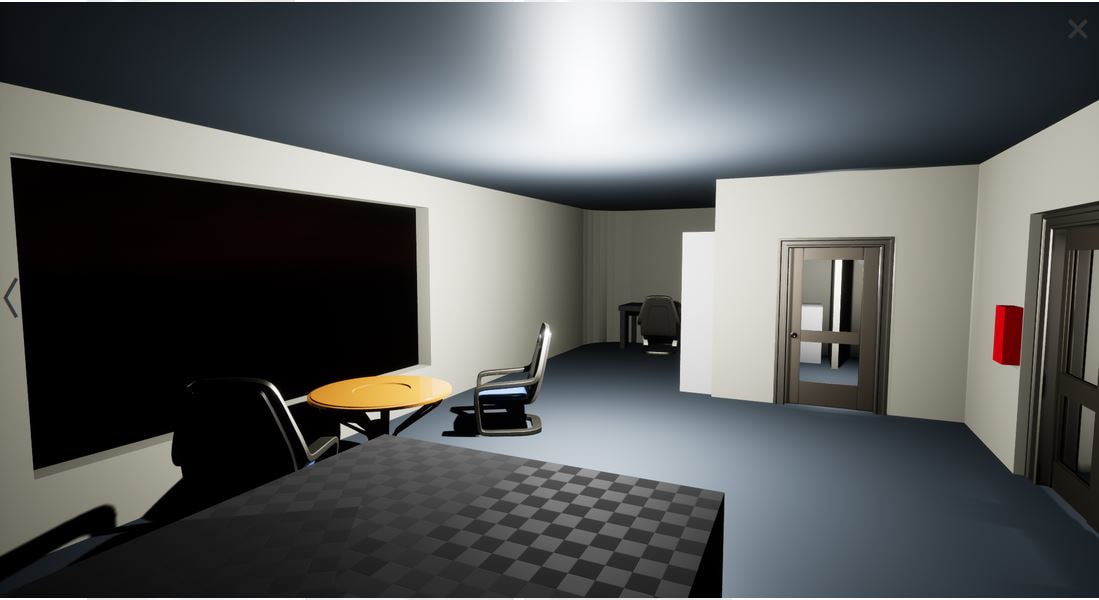
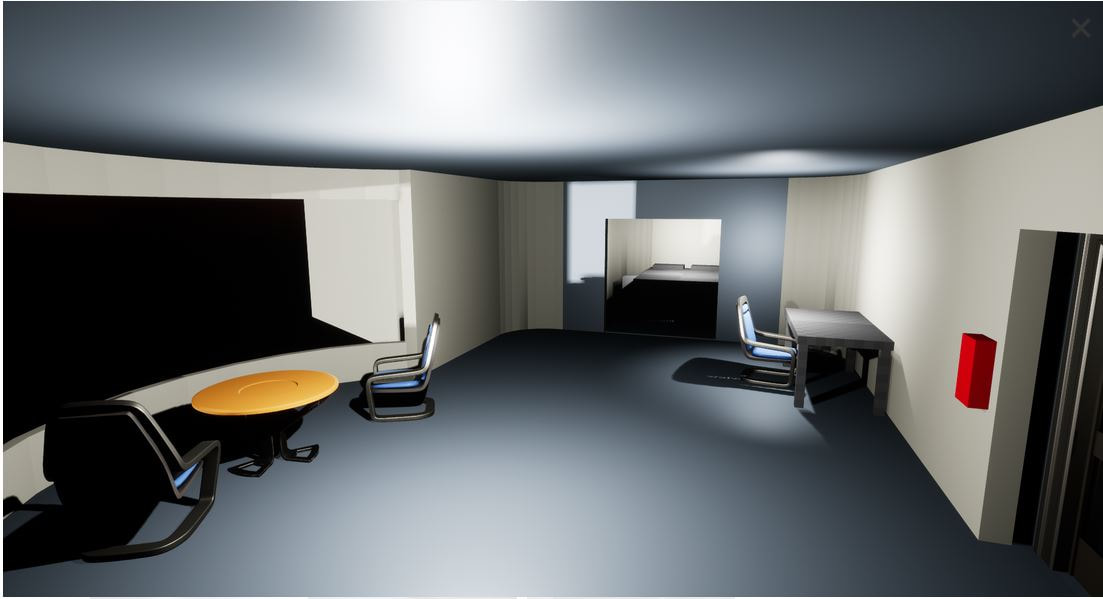

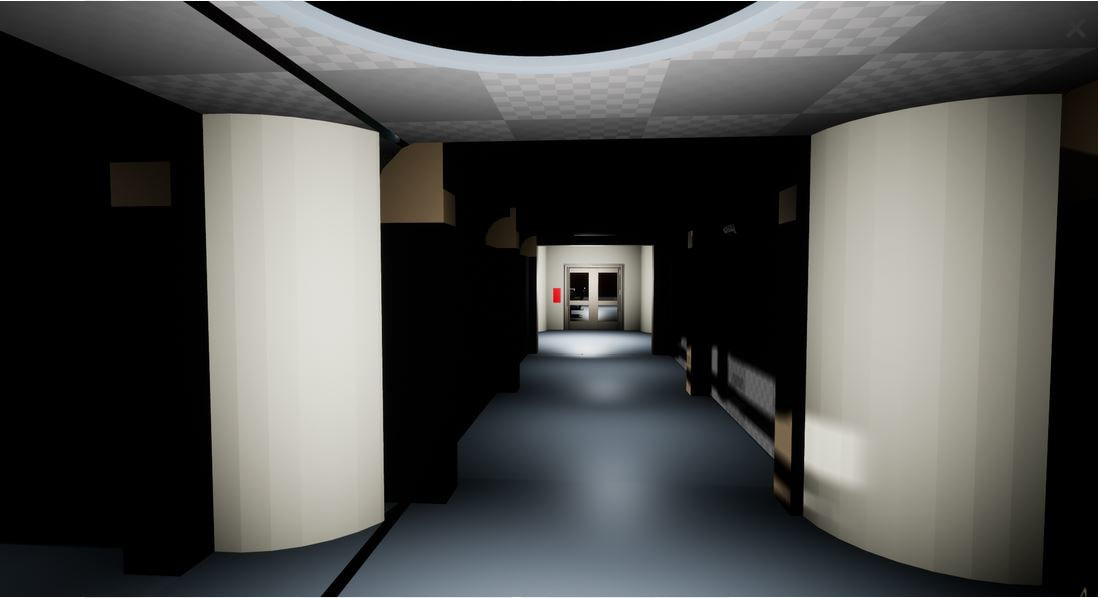

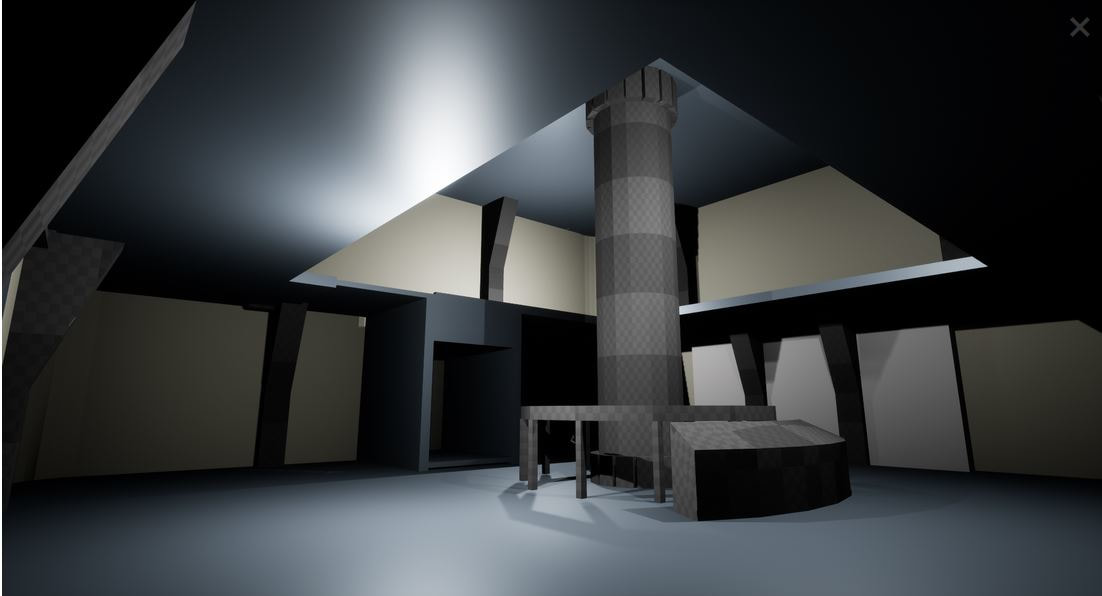
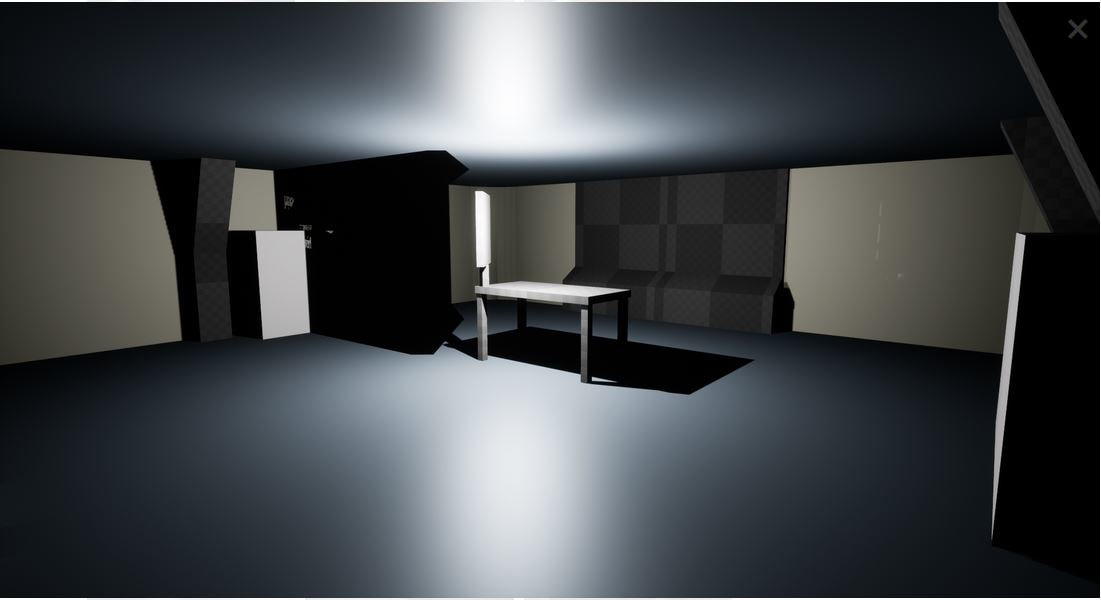
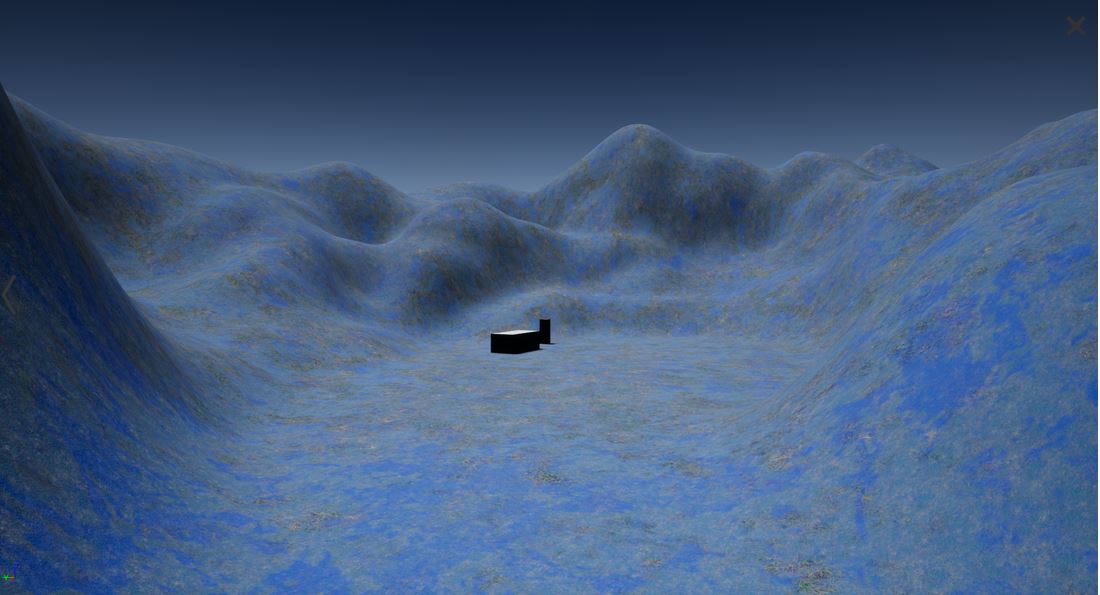
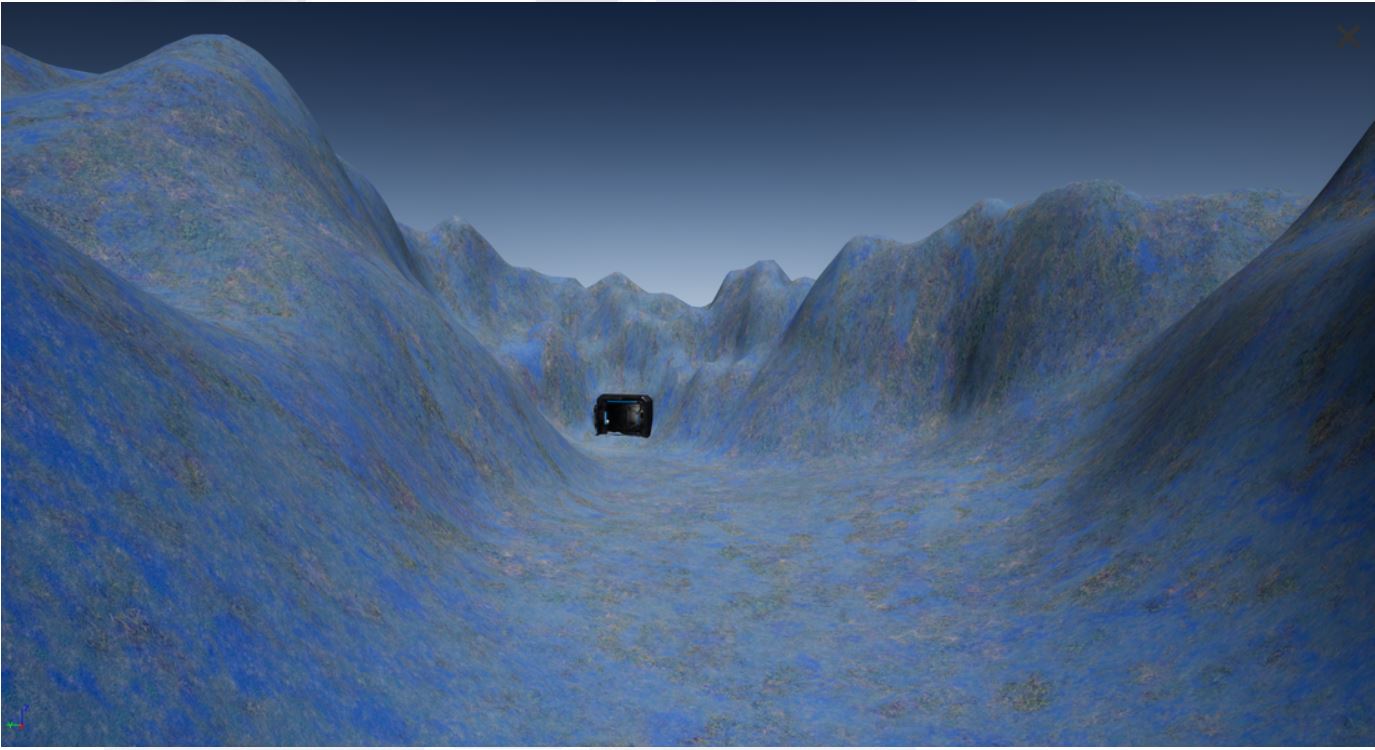

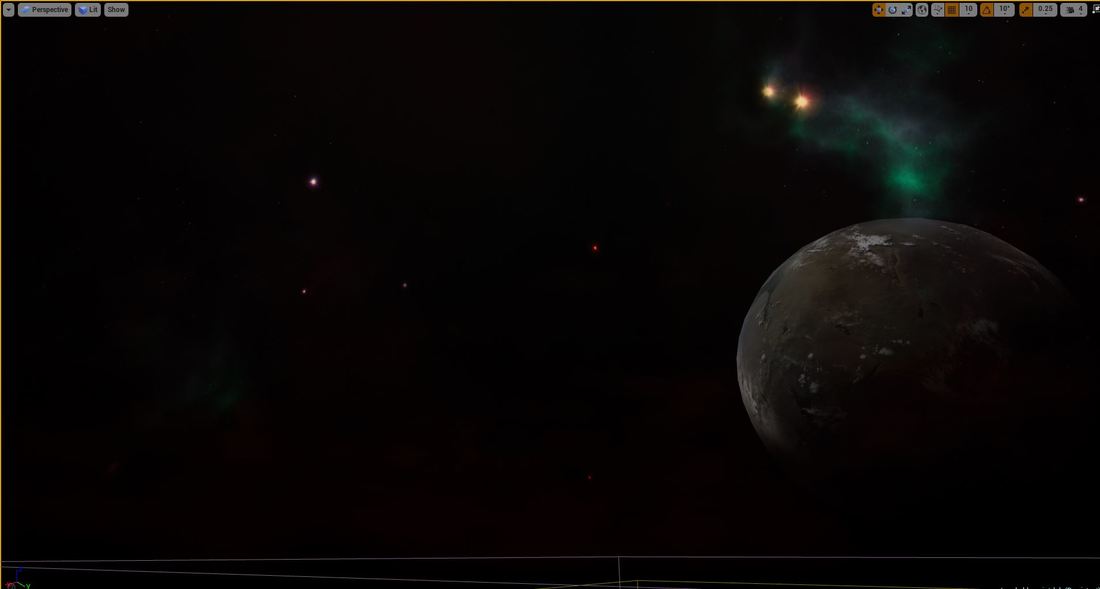
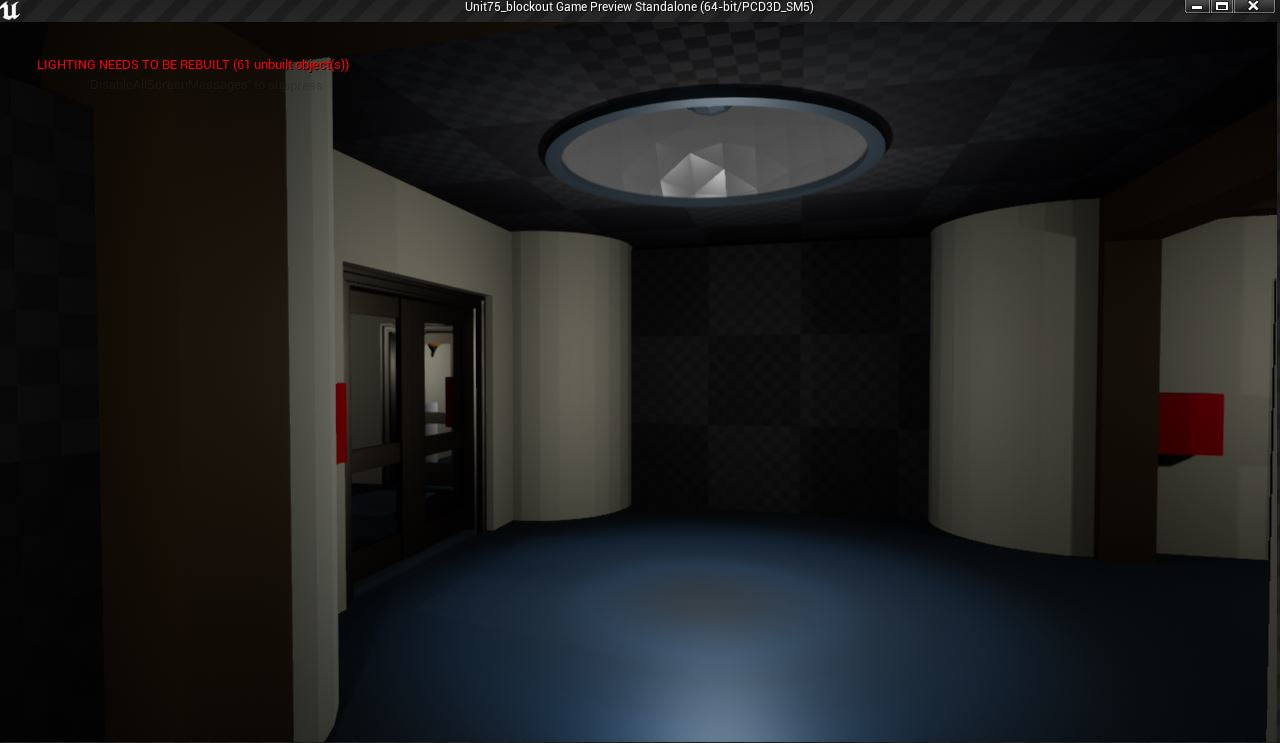
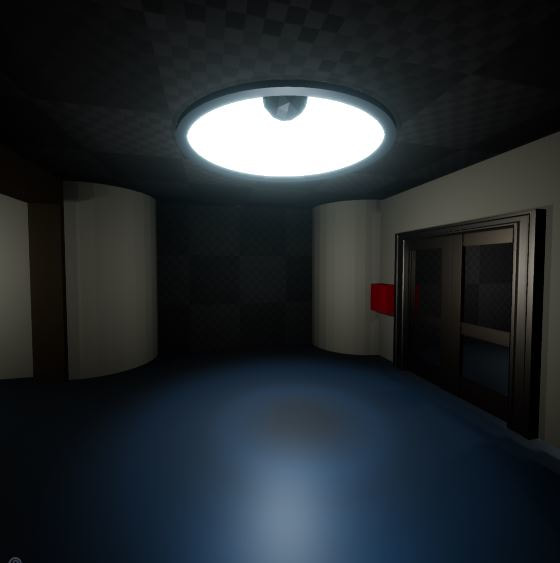
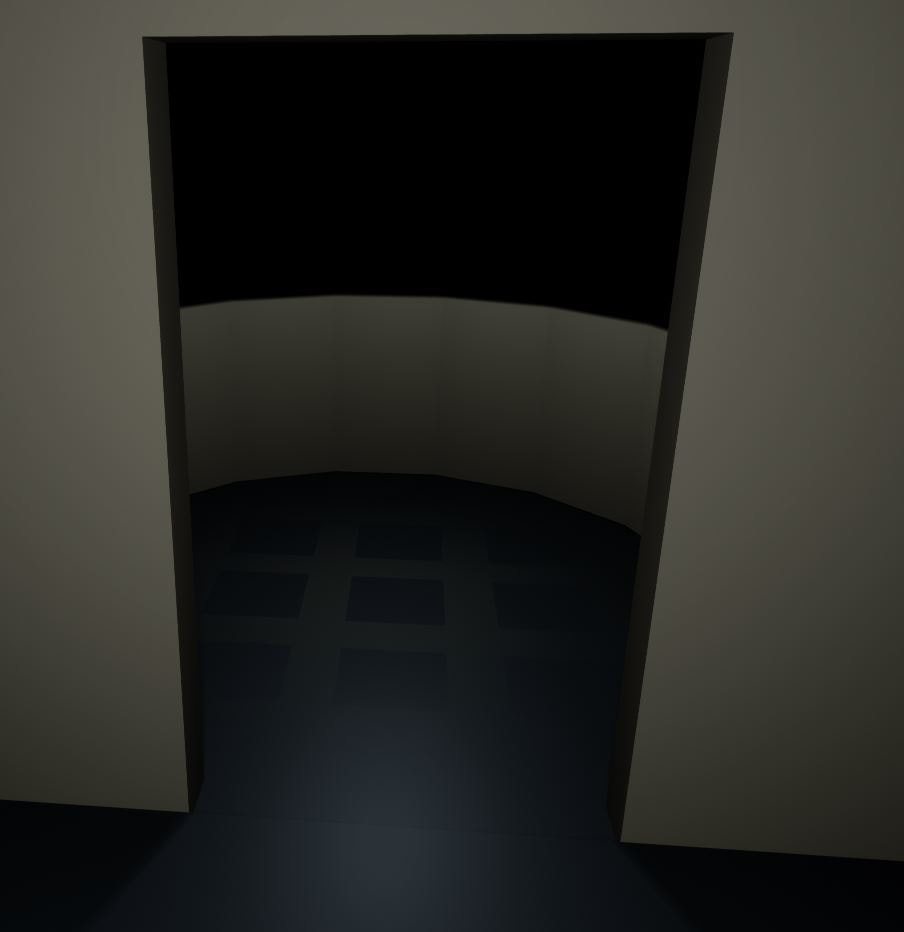

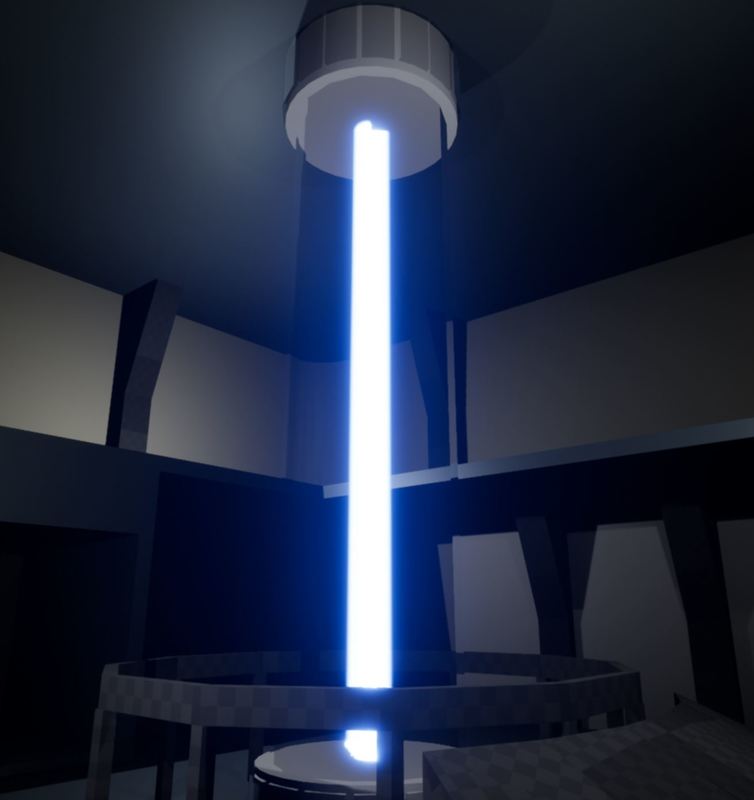
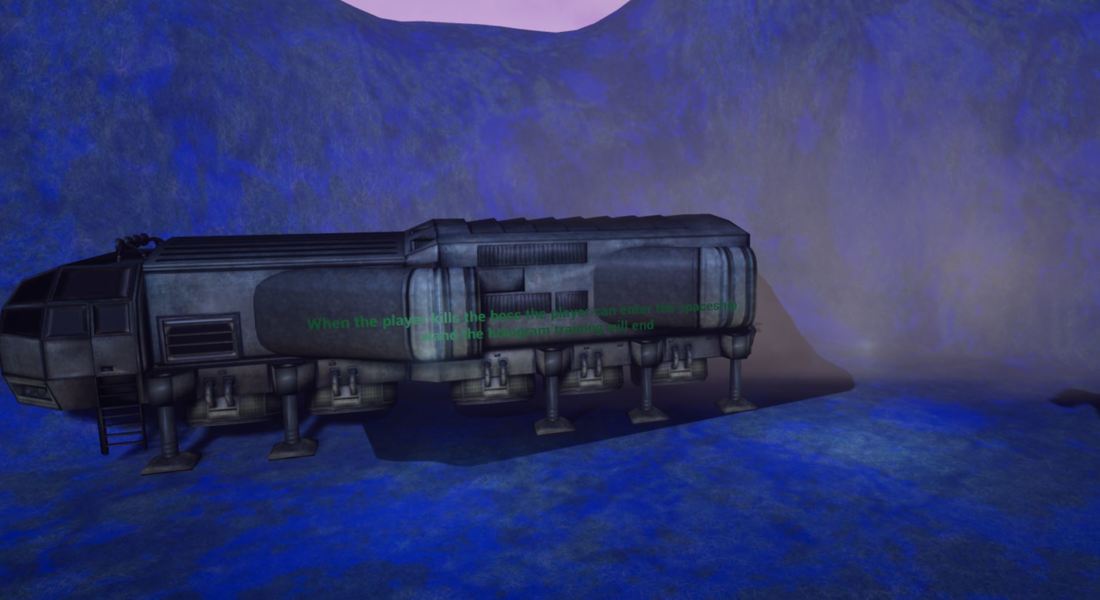
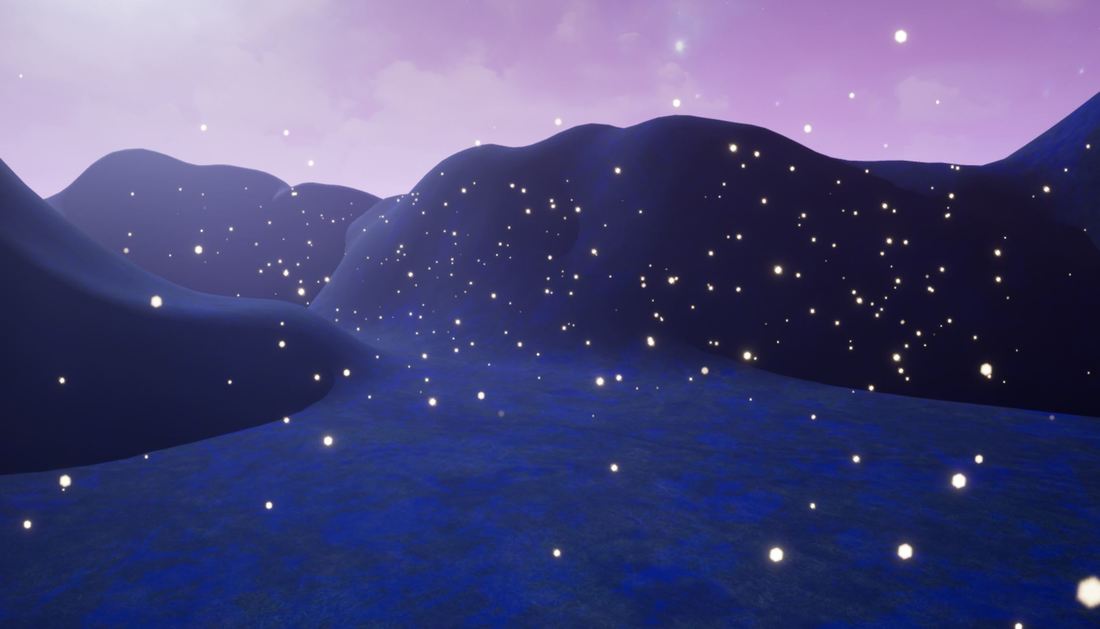
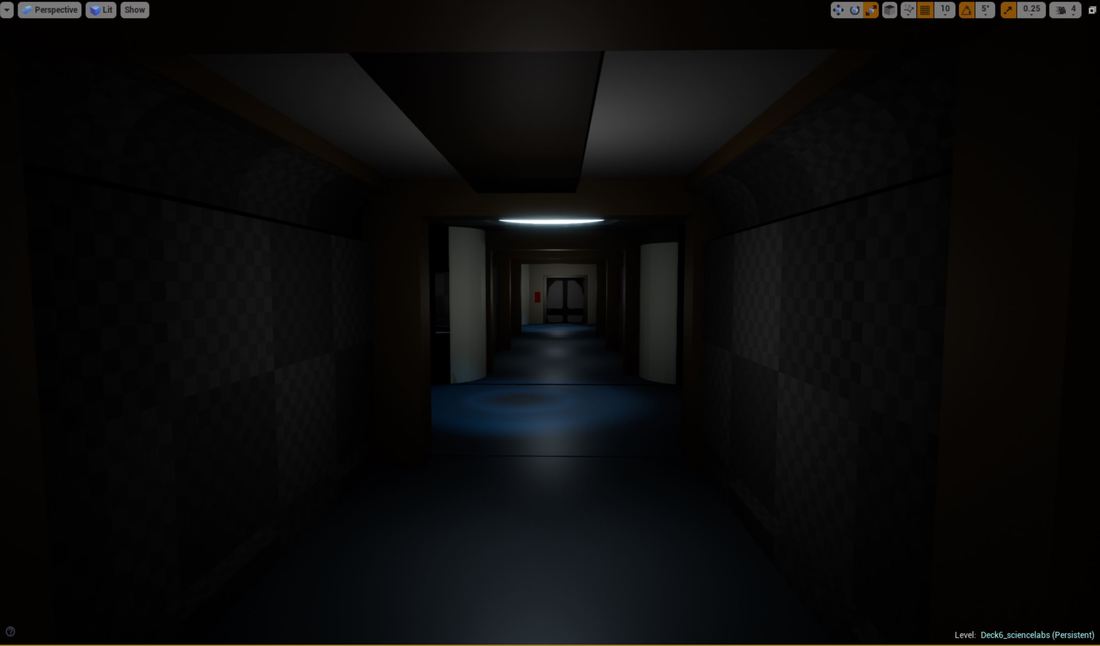
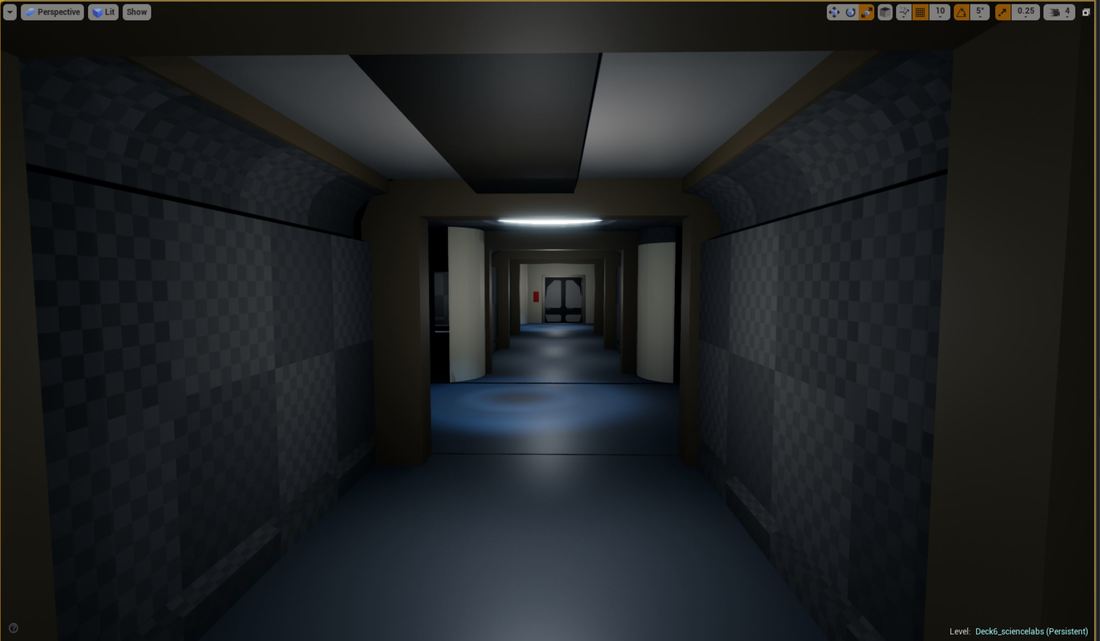
 RSS Feed
