|
In this blog post I am going to evaluate my task that I have done for this unit, I will break it down into four areas, positives points, negative points, issues along the way and a conclusion.
Task 1 positives points for task 1 I had to create concept art for a character I want to design for a horror survival, creating the back story was fun as it let my imagination go wild creating a story for the character to fit into my horror study of an asylum, creating the mind maps and mood board for this was straight forward and found it quite easy even thou it was my first time creating them for a project like this. The silhouettes for my character and NPC were fun to create and adding colour to these was fun as it helped me imagine how my character/NPC will look like. negative points I found creating the concept quite hard as my drawing skills are not the best and I feel this let me down a lot as I couldn’t draw high quality concept drawings for my character. It took me a few attempts to get my drawings better as well as the digital concept art but after trying I got better each time issues along the way The introduction to a new brief later on in the year made my change my character idea to fit into my new brief for next year it was easy enough writing a new backstory and coming up with a few ideas how the outfit would look like and keep the head the same would save time as well. Conclusion I need to work on my 2D art skills as I felt these are dropping behind the progression of my 3D skills and I need to work on them more both drawing and digital drawing. But overall the task went well and I it showed me my weakness and strengths and how I can better myself. Task 2 positives points Overall task 2 went amazing I produced two great models and started work on my third model, the work that went into both completed models can be seen and I tried different pipelines to see what suits me the best. Modelling side to both the character was quite easy took some time to make more organic look for the human but I found the process of modelling enjoyable. The texturing was a bonus as it wasn’t required for the unit but the final look of the war mech especially looks amazing and I got a lot of detail added onto the model. negative points The sculpting was the hardest part for me on the character as I found it hard to get the facial features looking normal but after trial and error I could make a human looking head, the UV for the war mech was hard and spent a lot of time getting them right and going back and forth between software’s was time consuming but in the end total worth it. issues along the way As mentioned above I found the sculpting of facial features hard. I practically found the mouth and lips hard to sculpt as well as the ears. But I found advice on the internet about using the grab tool to pull out basic features and take it back into Maya at the low level and physically move edges/vertex and delete faces for mouth/eye opening and move the edges around. Doing it this way helped me a lot and from this I used it as a base to sculpt from. Conclusion This task had its up and downs but after a lot of time and effort I was able to work though those downs and produce decent looking work. Overall, I am proud with the models I produced especially the war machine. It would have been nice if I could have finished the new model for the brief change but it is nearly complete and I plan to finish it off ready to be used for the next unit later in the year. Task 3 and 4 positives points Task 3 and 4 was straight forward I looked into the pipelines I used and the tools that helped me the most, making the presentation was easy as I used PowerPoint and used images I had taken along the way. negative points I had to record the video a few times as I kept over talking and making the presentation long winded, I ended up writing a small script for each slide and used this as a base to talk from keeping it short and sweet. issues along the way I didn’t come into many issues in this these two tasks only the time spent recording multiple version to make sure it wasn’t too long winded Conclusion Overall these two tasks went well, I have learned that I need to write a script for my video presentations to stop me from over talking and panicking during the recording. Overall Conclusion This whole unit has been an enjoyable, it has showed me my strengths and weakness and where I need to improve on, especially my drawing skills. I enjoyed the modelling and texturing and see how the final model will look even thou I found certain area difficult at times. I am extremely proud with the finished products and has helped me understand this part of the game development. At this moment I think it is something I won’t be interesting in going into as I currently find organic modelling/ sculpting extremely difficult but know it will become easier over time.
1 Comment
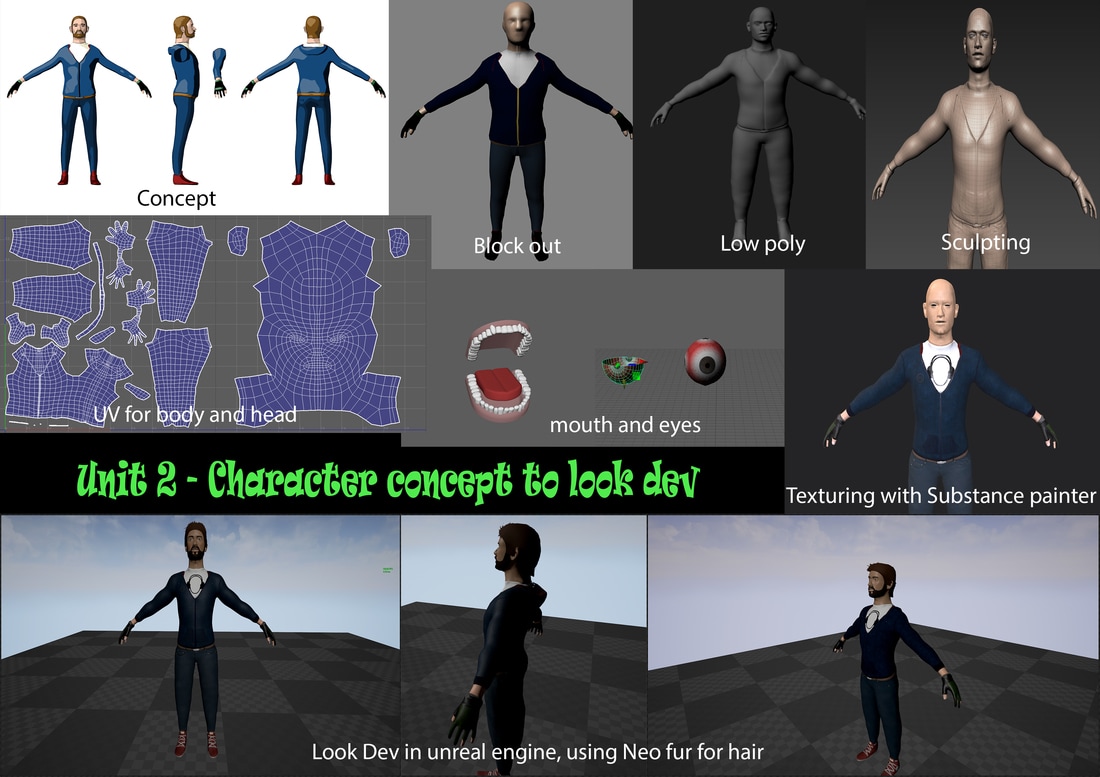
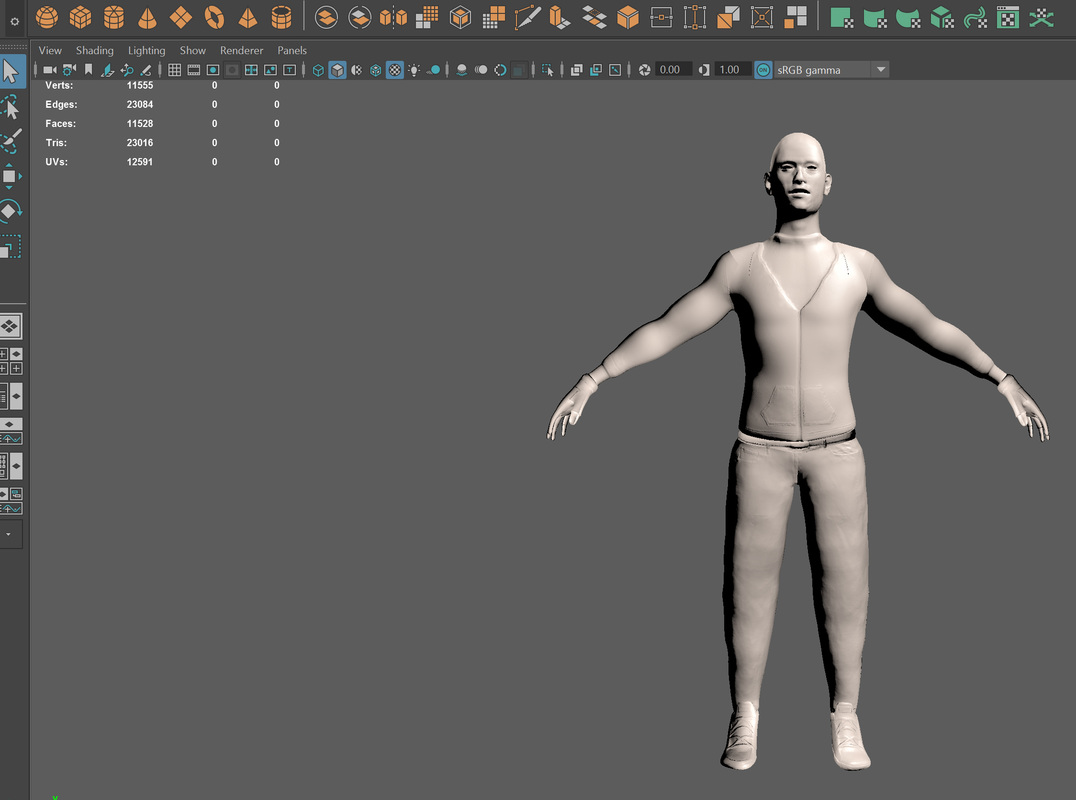
Here is my video Presentation for unit 2 looking into my character and NPC When creating my characters, I was unsure about what my pipeline would be, I knew Maya and substance painter would be involved in all the pipelines as I use these two softwares the most for modelling and feel comfortable with them.
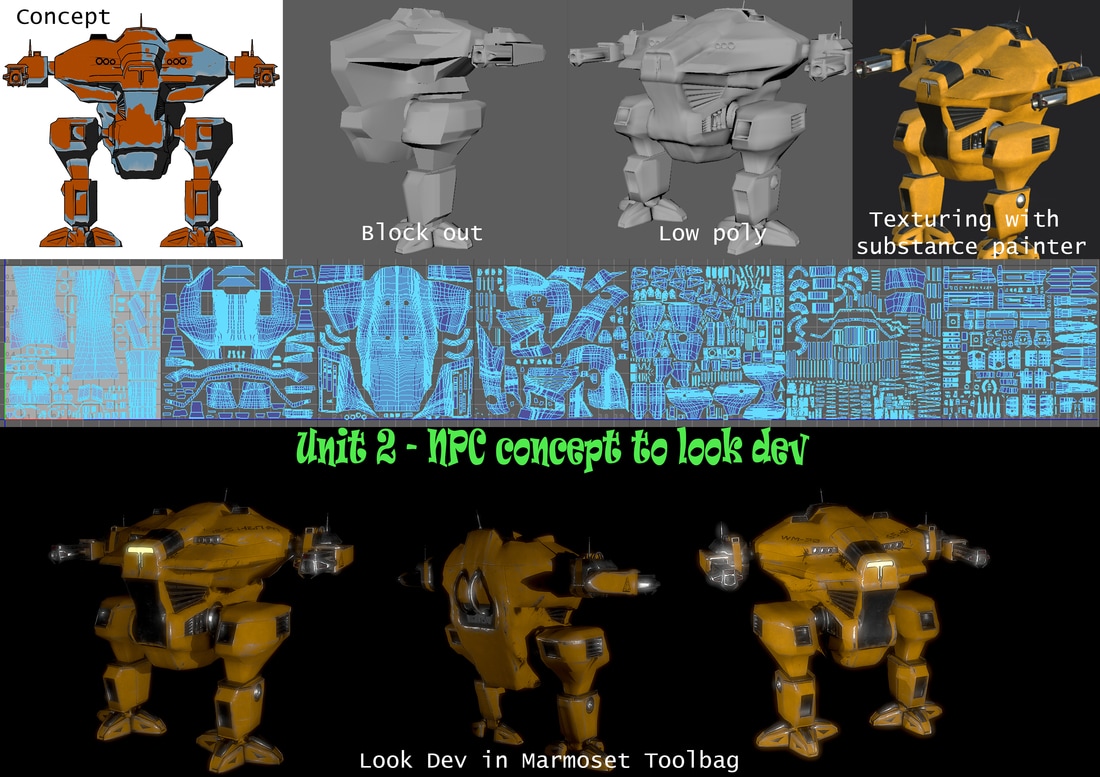
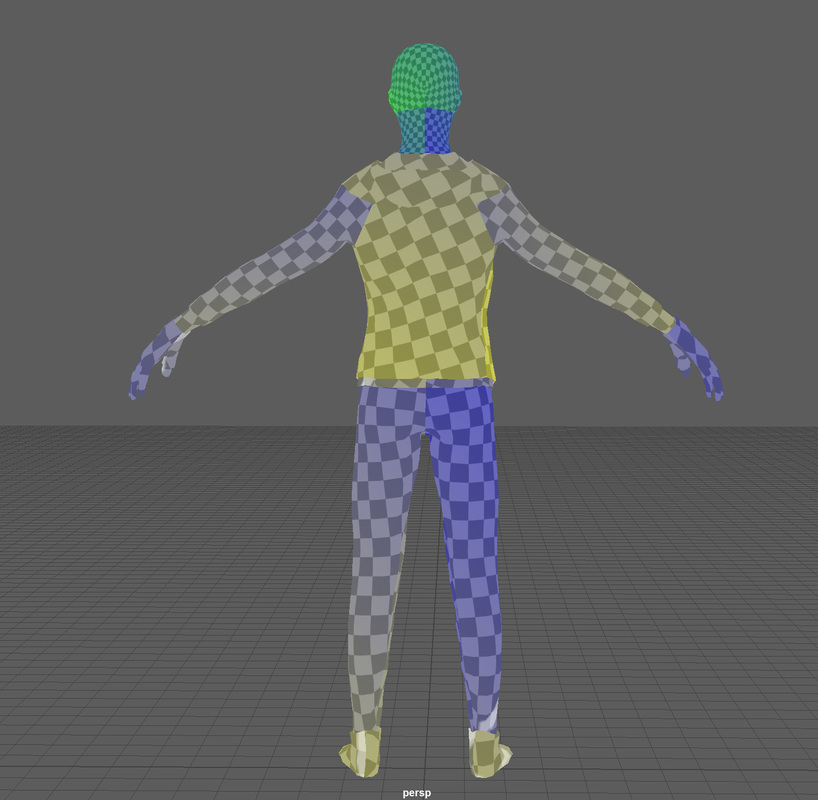
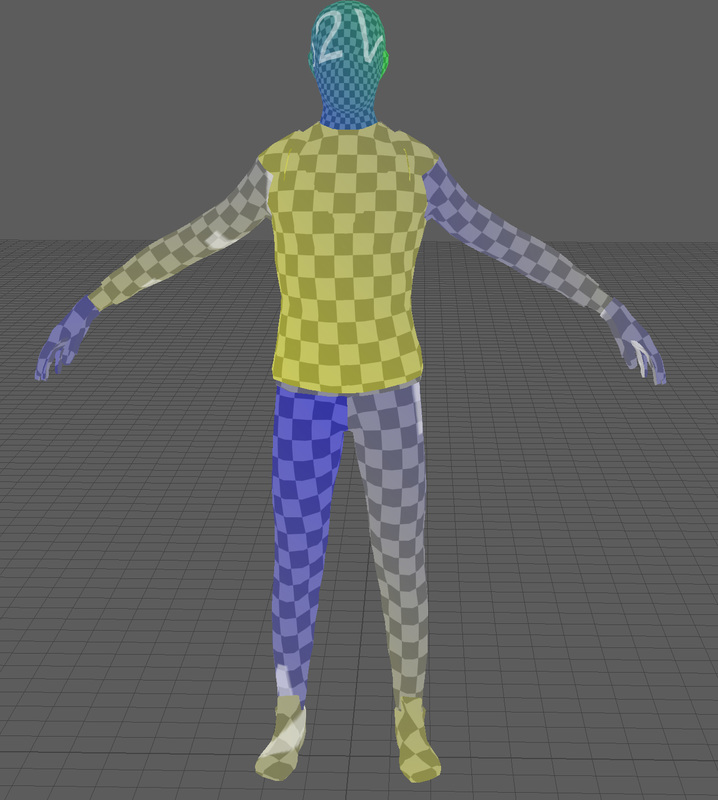
Pipeline 1 My first pipeline that I use to create the horror survival character started of using Maya for creating the block out and low poly, I found using the edge loop tool and extrude worked the best for me in Maya when creating the block out and low poly as it added more geometry to my model. I also used Maya to create the UV for this, the unfold and smooth tool helped me loads in this section as it made the UV flat and reduced overlapping. Also, the sew and move tool was extremely useful when combining the shells together. The next part of the pipeline for this character was to take it into Mudbox and sculpt the character once I made it high-poly, I chose this over ZBrush as I have used mudbox in the past. The grab and wax tool is what I used the most in mudbox, I used the grab tool to pull the geometry in the position I wanted and then I used the wax tool to add extra definition to the model. I also found that using displacement maps worked really well for me adding fine detail such as wrinkles and nails. After sculpting I used substance painter as my low to high poly baker and for projection texturing. I found this one of the most useful software I have used, I cuts out the need to make normal maps in mudbox or Maya and saves time transferring between the two as I just open my low poly in substance and bake all the texture sets with my high poly attached. It has a live preview window so I could see the results straight away and fix any bake issues if any came up. After the bake, I could texture straight away this was straight forward as it was similar to photoshop with layers and mask. I found mask extremely useful as well as the polygon selection for selecting certain parts of the model. I then took the textures into photoshop and made sure there was no problems and to slightly adjust colour balances as well. After this I applied the textures in Maya and used the render tools to get a quick look dev to see if the textures look right / normal maps were working and adjusted these in substance if they were off and reapplied. Then for the final part of the pipeline I took it into unreal engine and used its real time rendering and applied the materials and created hair using the Neofur plugin, as I was using unreal engine to use the models I wanted to use this as my look dev to see how they looked in the engine. The final pipeline for this character was Maya > Mudbox > Substance painter > Photoshop/Maya > Unreal engine Conclusion I found this pipeline quite easy to use and once I got up to the bake and texturing I found this process was extremely quick, I would use this pipeline again but maybe look at changing Mudbox to Zbrush I this is the most wildly used sculpting software at the moment. Pipeline 2 My second pipeline was very similar to the first one, I started of using Maya to create the block out of the war machine, which started from a cube and using extrude and edge loop to speed up the process of creating the block out after this I created the low poly by adding more edge loops and moving the edges and vertex to move the geometry, I also created the UV in Maya as well finding the tools previously stated really helpful. I also created a high poly in Maya by using the smooth tools as well as the sculpt tools to make more rounded edges/sharp edges. The next part of the pipeline was using substance painter, I used this like in the other pipeline to bake my high and low poly models and then create the textures for the model. I found adding extra texture channels useful as I could create emissive light maps in substance painter. After this I did a quick look dev check using the substance painter render and tidy up the errors either in Maya or photoshop and updating the model in substance painter. For the next part of my pipeline before I took it into unreal engine was to use Marmoset Toolbag 3 as my render to use as a look dev, I chose this as it was a real-time render and I could add light systems to optimize my textures and I could apply all my textures (such as roughness, emissive, etc) to my model and take renders in seconds making it extremely quick The final pipeline for this was Maya > Substance painter > photoshop/Maya (for errors) > Marmoset Toolbag 3 > unreal engine Conclusion I found this pipeline a little easier than the first pipeline as I mainly worked with two software and most of the work was done inside of Maya and then finished in substance painter before been tested in Marmoset Toolbag 3. Pipeline 3 For this pipeline, I wanted to try something different and try a new software that is slowly coming into the game industry. I wanted to create realistic cloths for my character as I felt this was my weakest point in my first model so I decided to use Marvelous Designer 6 to create my outfits for my character, I took some time to learn but once I got my head around the tools it was a quick and straight process for creating an outfit. The next part of my pipeline was to take the model into Maya from here I can to additional sculpting on the outfit if needed, I decided to smooth some of the creases with the smooth/relax tool as I felt they were to hard edge. Then after this I used the quaddraw tool to retopologize the outfit, this tool made it a quick process, I made the quads quite large and then used the smooth tool to add more geometry then back in the quad tool I used the relax tool to make it flush to the mesh. After this I reused the old had by importing the other character and combined the head to the body using the combine tool. I then used substance painter like I did in all my other characters and baked the high and low poly maps for the outfits and then applied textures, the next part of the pipeline was creating hair in photoshop, I used the brush tool and made wavy lines over the exported UV maps using assorted colours and built up the hair. I then created an opacity map using the magic wand tool and creating an alpha channel and filling in the selected in the alpha channel white and exported this. I then used Maya as a look dev by using the rendering tools to do quick renders. The final pipeline for this was: Marvelous Designer 6 > Maya > Substance painter > Photoshop > Maya Conclusion This pipeline seems easier but I need to take in the fact I left the sculpting out as I reused my head from previous character, so I need to take in account the time it would to create that as well. Creating the body was quick using Marvelous Designer 6 and yielded great results, a lot quicker than sculpting, creating the low poly version was also quick using the quad draw tools as well. Problems/issues Character 1 The main problem I had with this character was the sculpting of the face, I found sculpting the facial features extremely difficult and I spent a lot of time undo and redoing certain parts of the face till I got it looking kind of human. I practically found the mouth and lips hard to sculpt as well as the ears. But I found advice on the internet about using the grab tool to pull out basic features and take it back into Maya at the low level and physically move edges/vertex and delete faces for mouth/eye opening and move the edges around. Doing it this way helped me a lot and from this I used it as a base to sculpt from. NPC This was a straight forward process for me as it was modelling from scratch my biggest problem was the UV, the sheer amount of work that went into getting the UV correct and layout nicely took days and a lot of time was spent on doing this and I found during the texturing process I was doing a lot of doing back to the UV to correct them as I found more error with them along the way. Character 2 Getting use to using Marvelous Designer took some time but once I learned how to use it, it was a quick process the main problem was getting the hair to look natural and took a few attempts at doing it as it look thin on the first few tries and I had to add more planes to make it thicker. I wanted to get feedback on my characters and NPC I have created so far and see what people think about them and how I could improve from what I have created so far. I created two posters and also posted some renders of my work in process
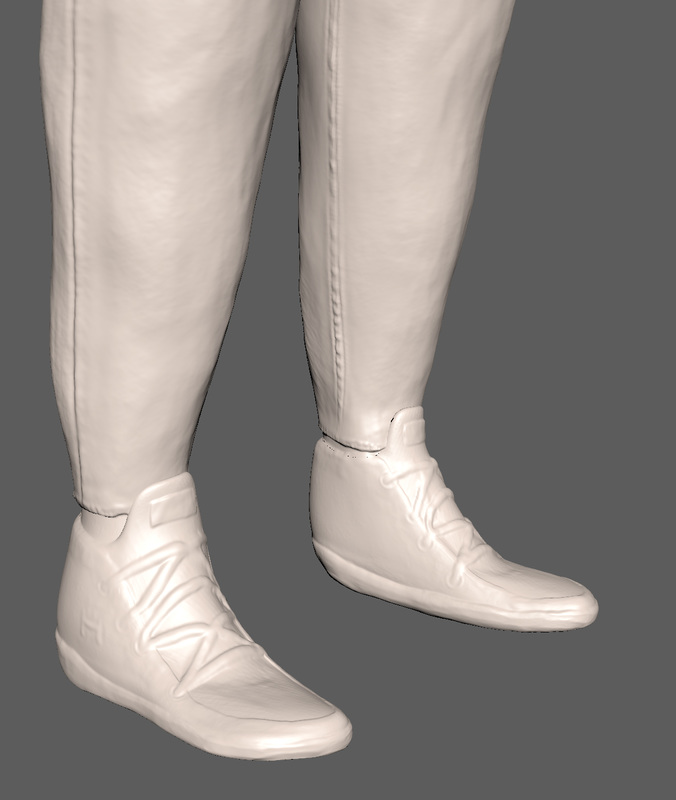
The Feedback I got was: 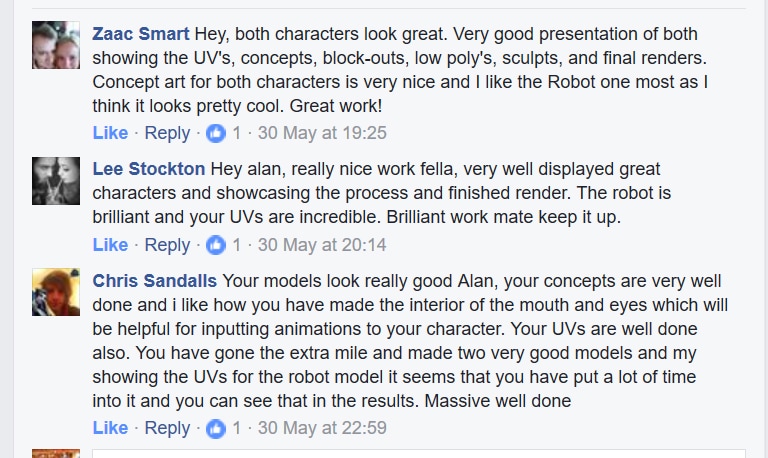 The overall feedback I got about my models were extremely positive, the amount of hard work that went into the war much has been noticed by all the people who left feedback, which is a great feeling knowing that all the hard work put into the making of it was noticed and people can see it. The other positive feedback was placing eyes and a mouth for the future, which was picked up, I did this thinking ahead of the animation unit next term, as I am planning on doing some speech animations.
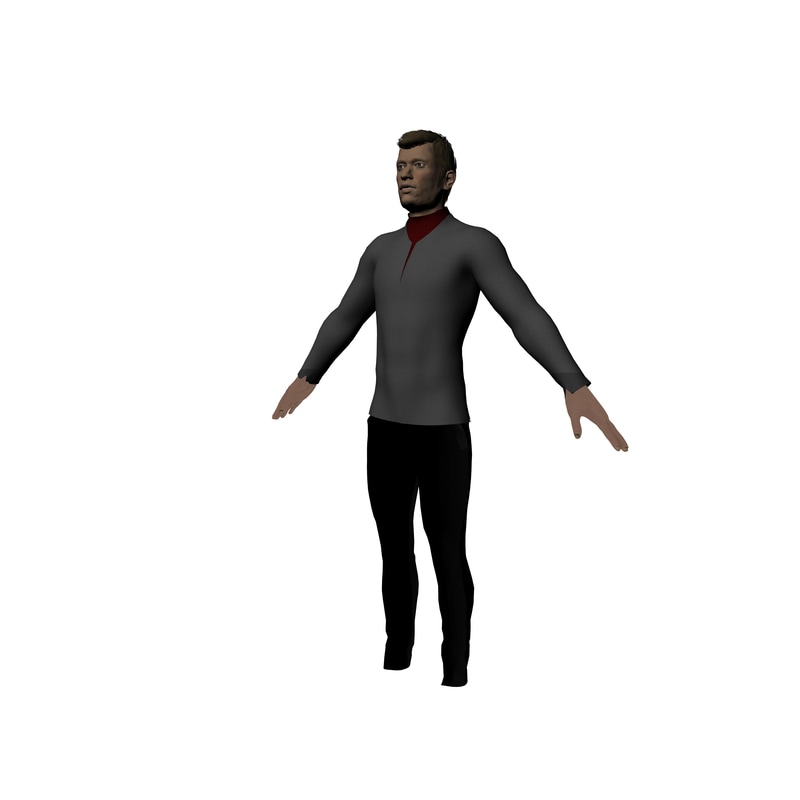
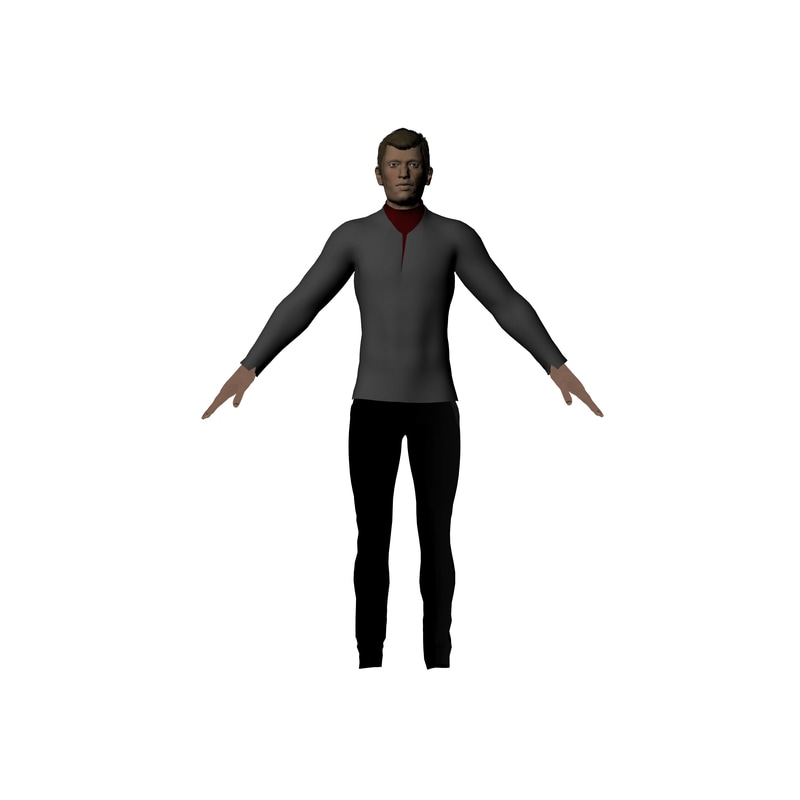
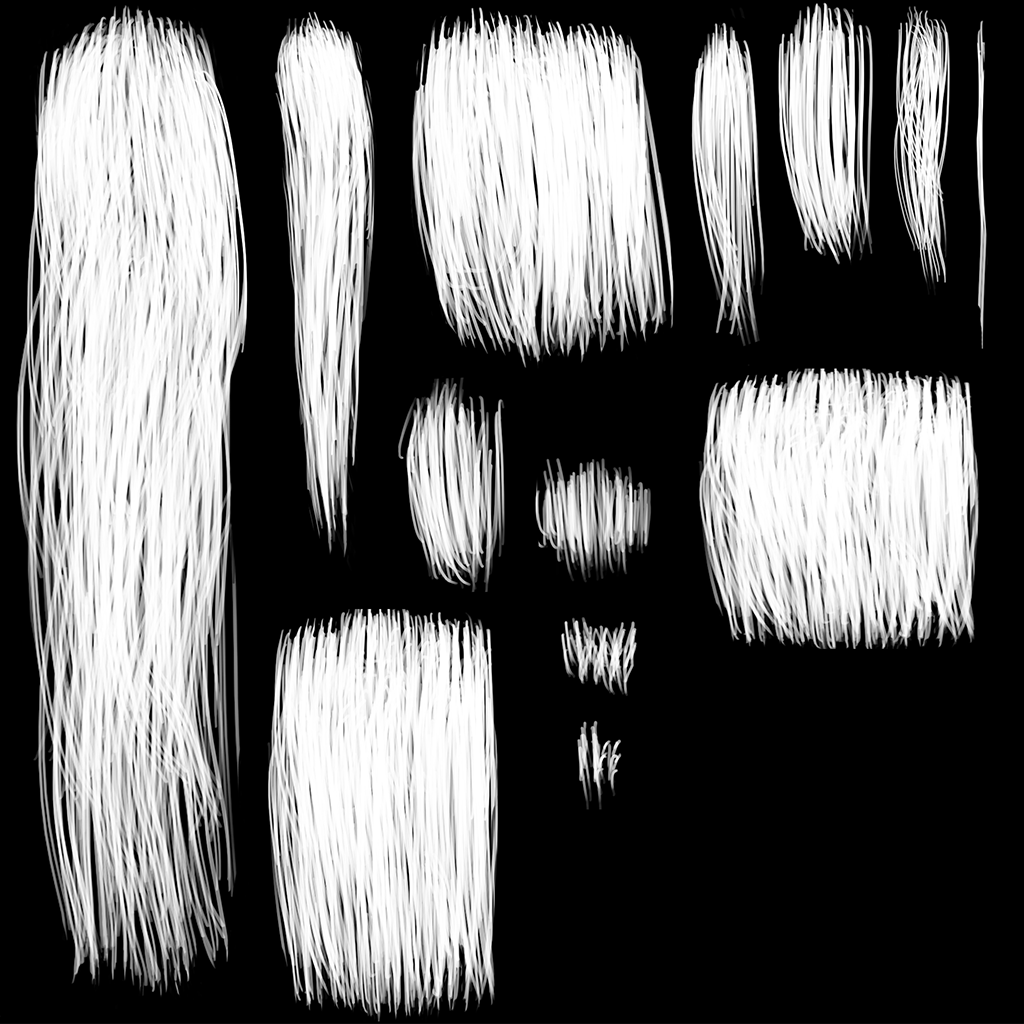
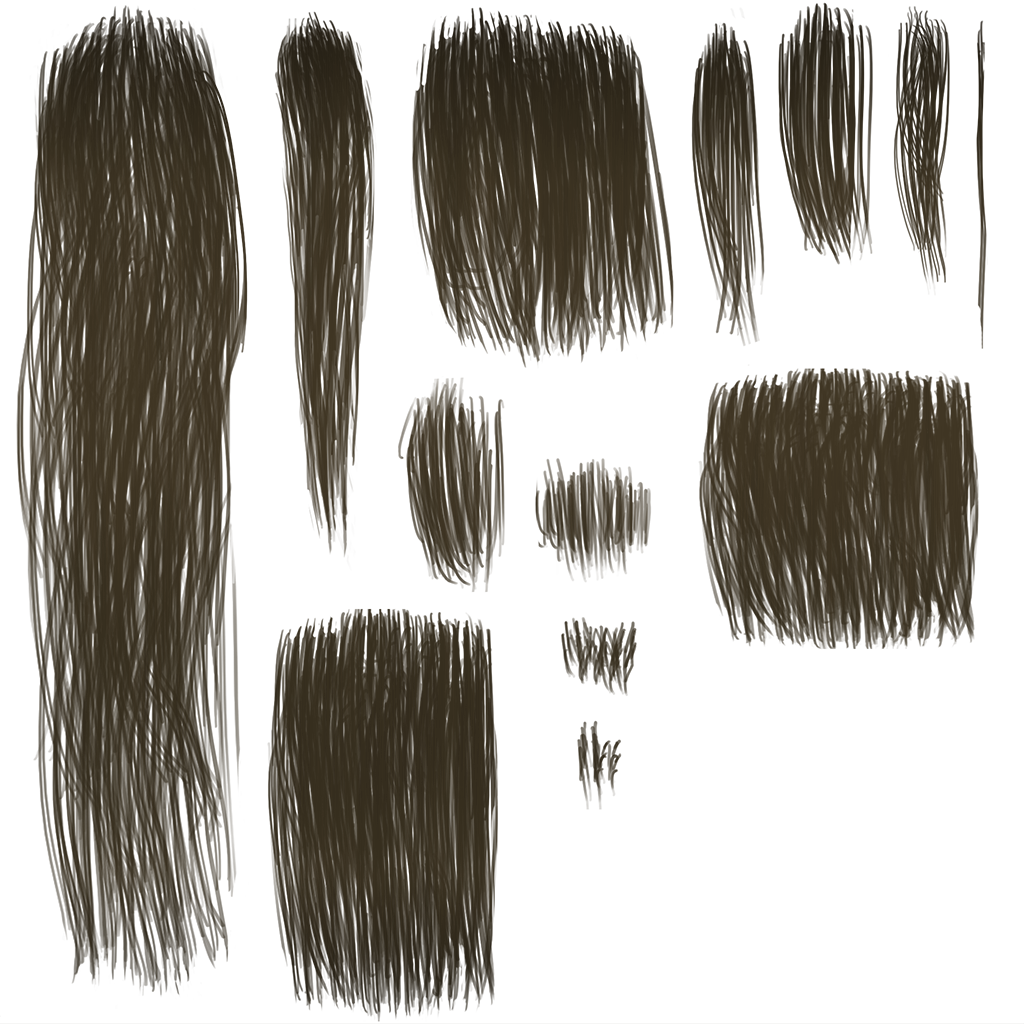
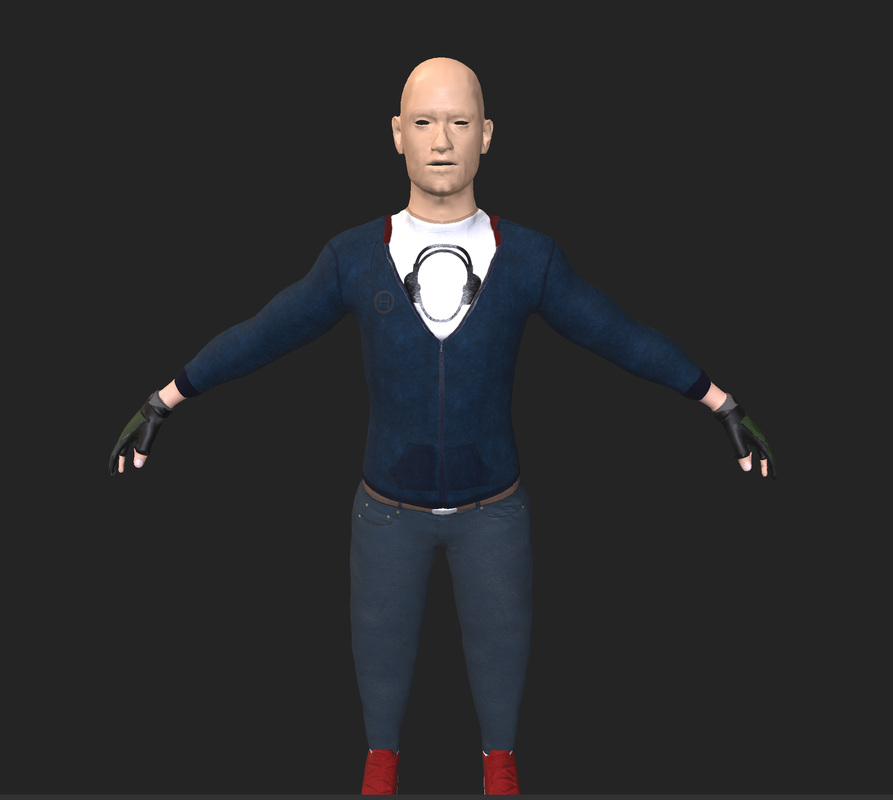
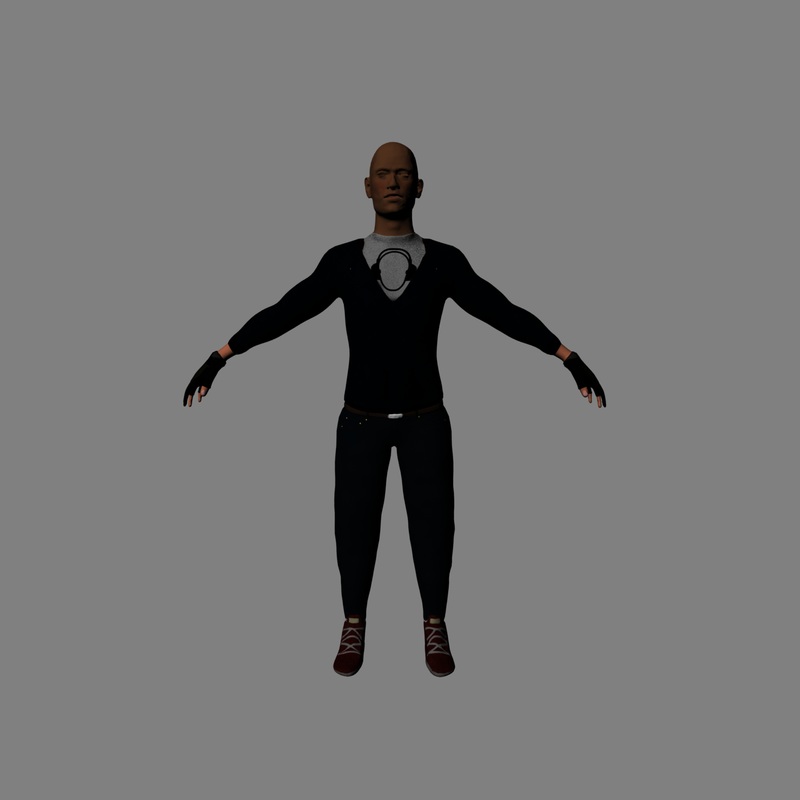
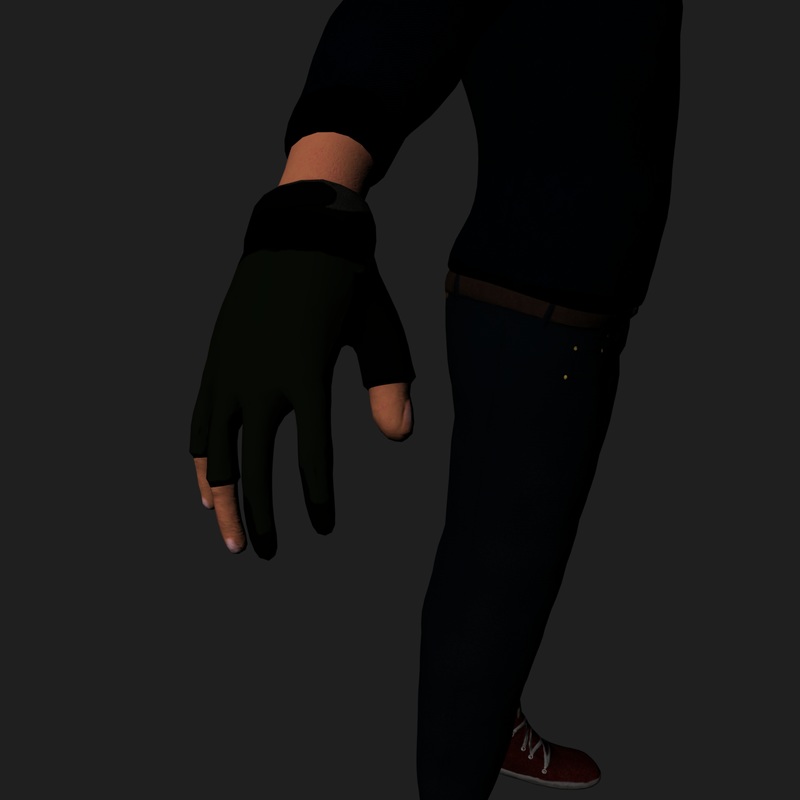
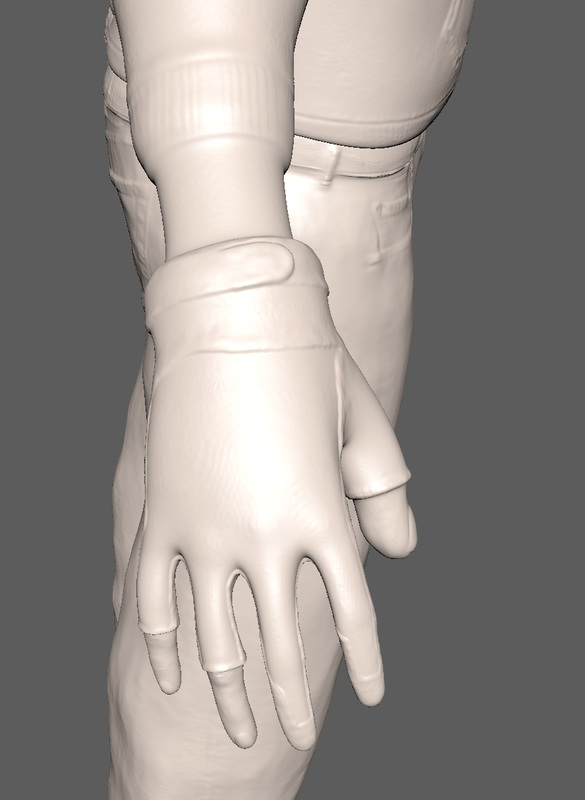
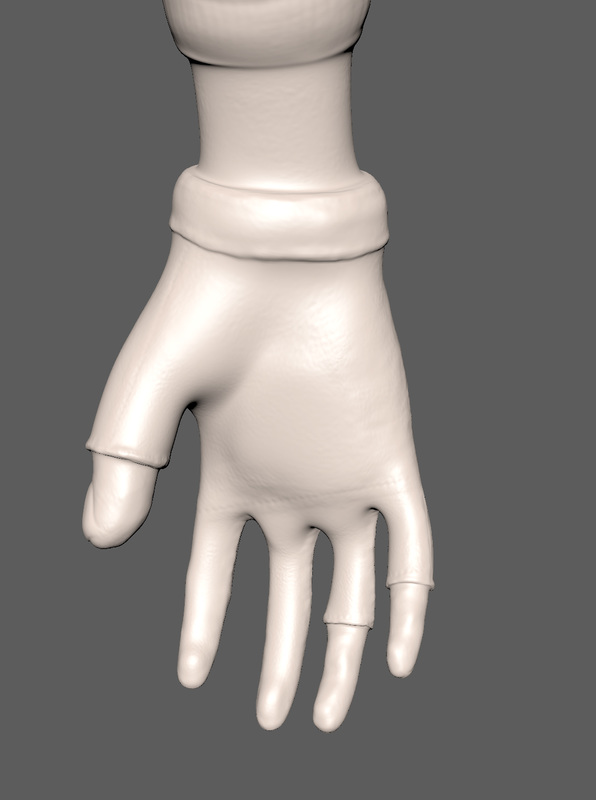
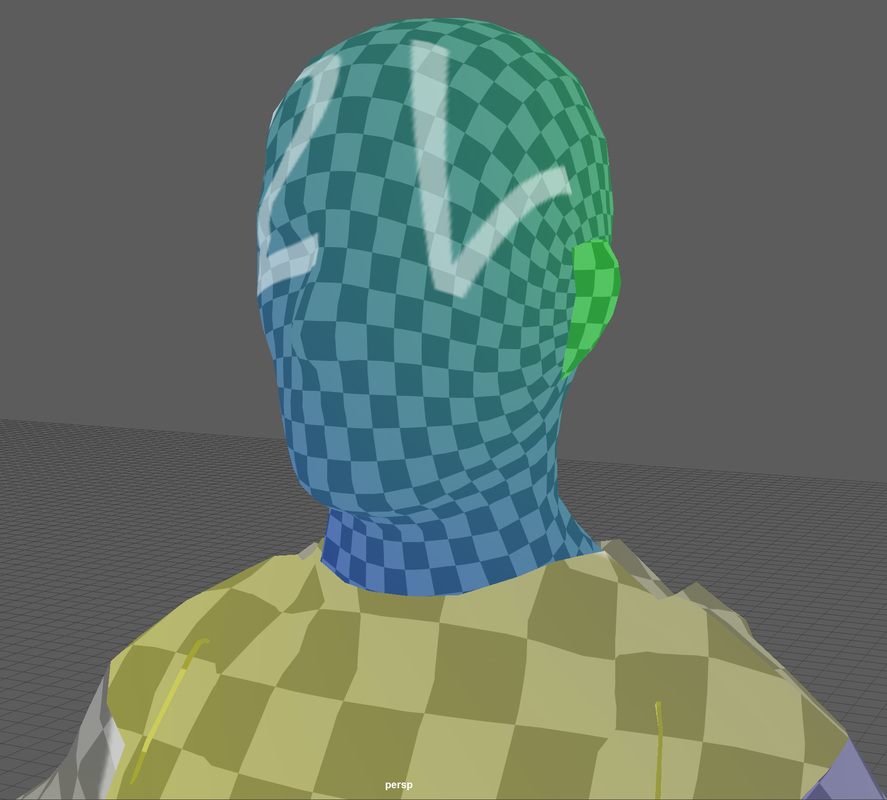
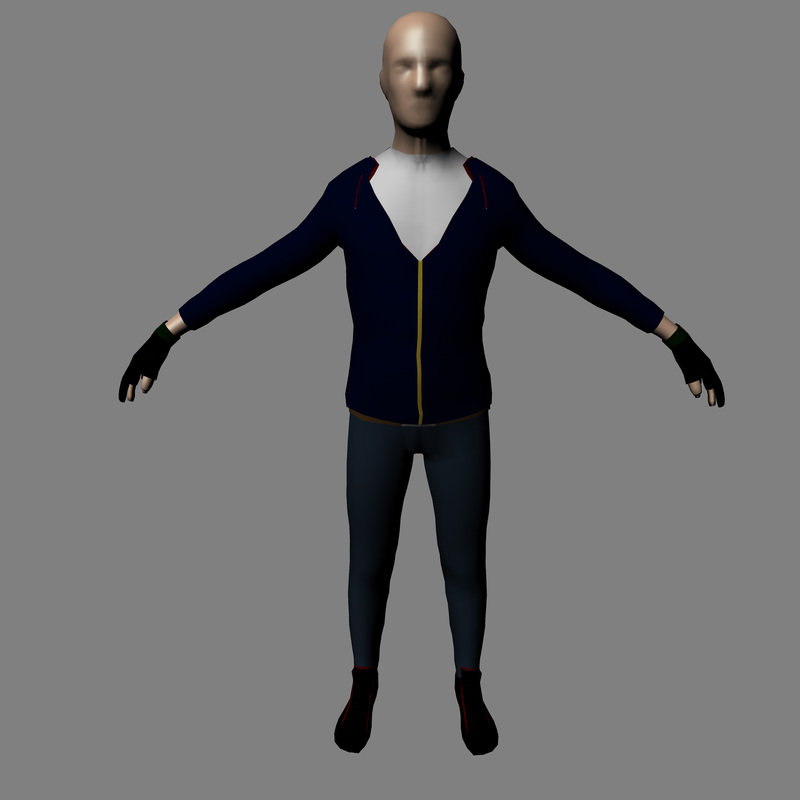
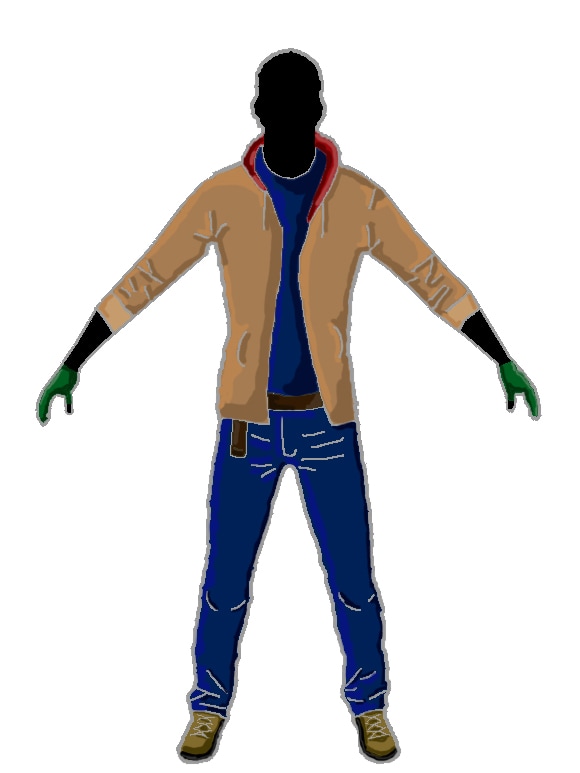
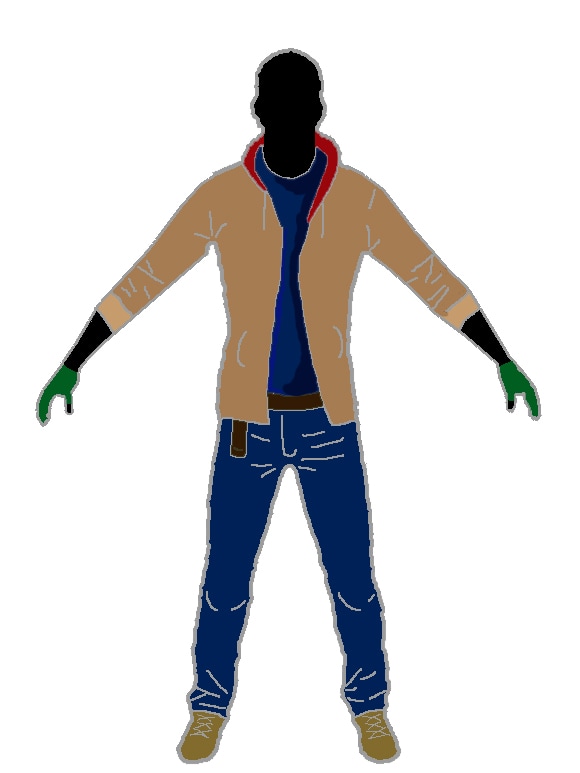
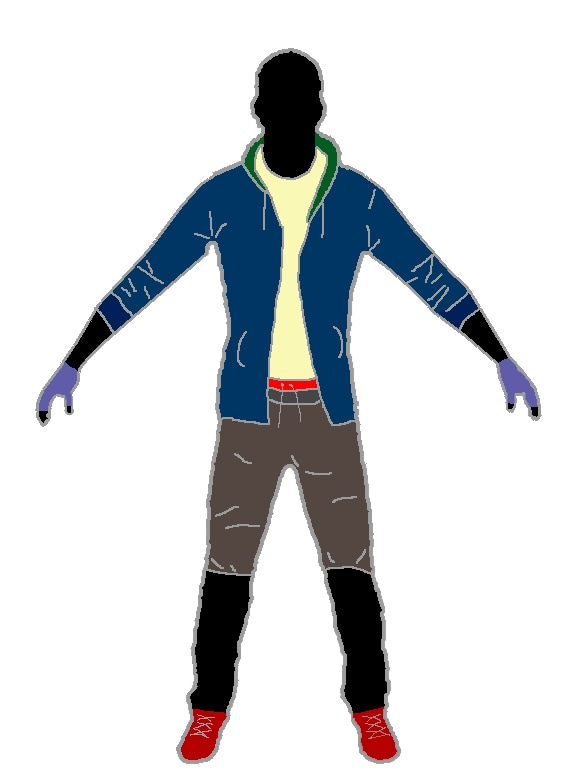
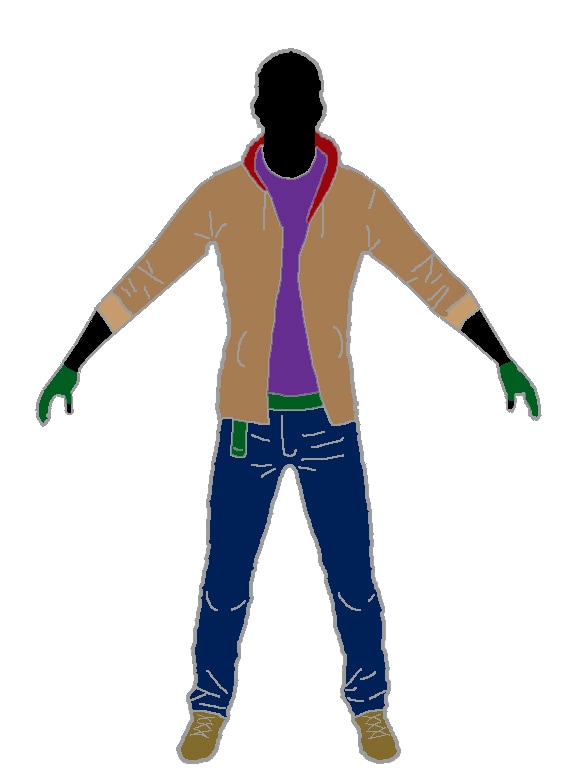
The only thing I am disappointed about from the feedback is that no one commented on my work in process and I felt this needed some feedback so that I knew I was heading in the right direction with the character, but overall great feedback and with no recommendation of change I have left the models how they are. I wanted to change the character so that I could use it for my unit 75 brief and continued to develop it next year, I started off by using marvelous designer, I wanted to get realistic clothes. I started off by using the default character in marvelous designer and then I created an outfit for the model, making it look sci-fi. Below are photos from marvelous designer 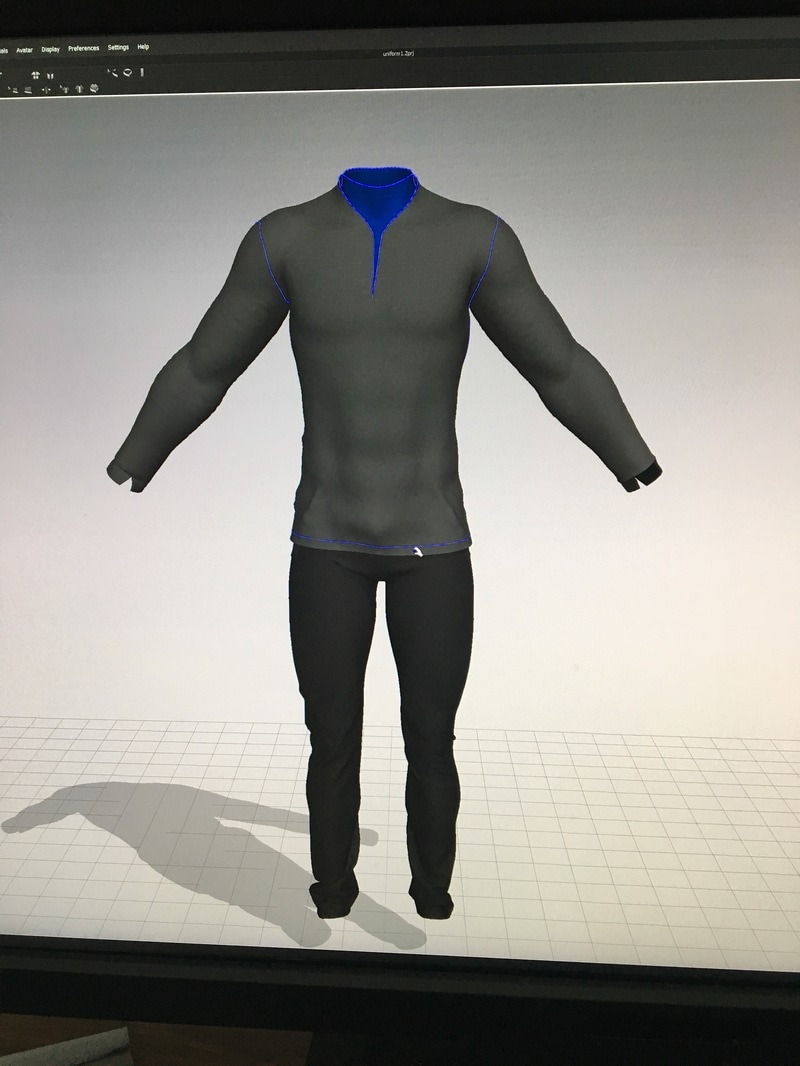  After this I took it into Maya and used the quad draw tool to turn it from high poly to a low poly asset. 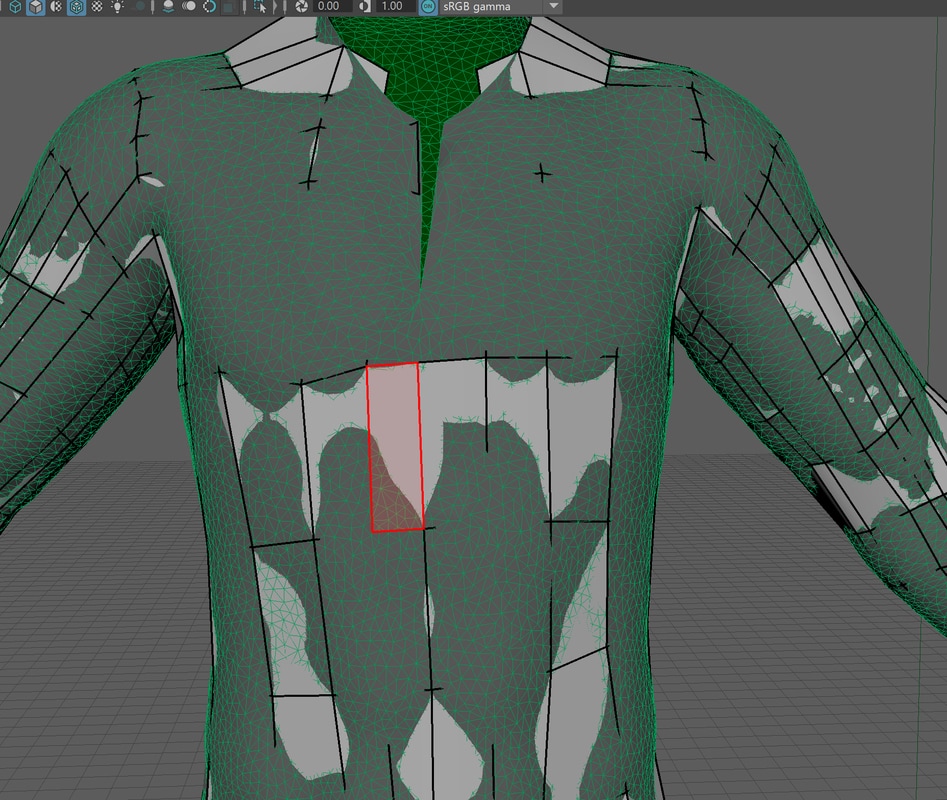 After I finished the quadrawing of the highest asset I then had a very low poly asset that was not sitting flush to the live mesh so I smoothed the mesh and relaxed it with the quadtool so it lay flush on top of the live mesh. After that I imported the head of the model of the old character and placed it into the neck hole. 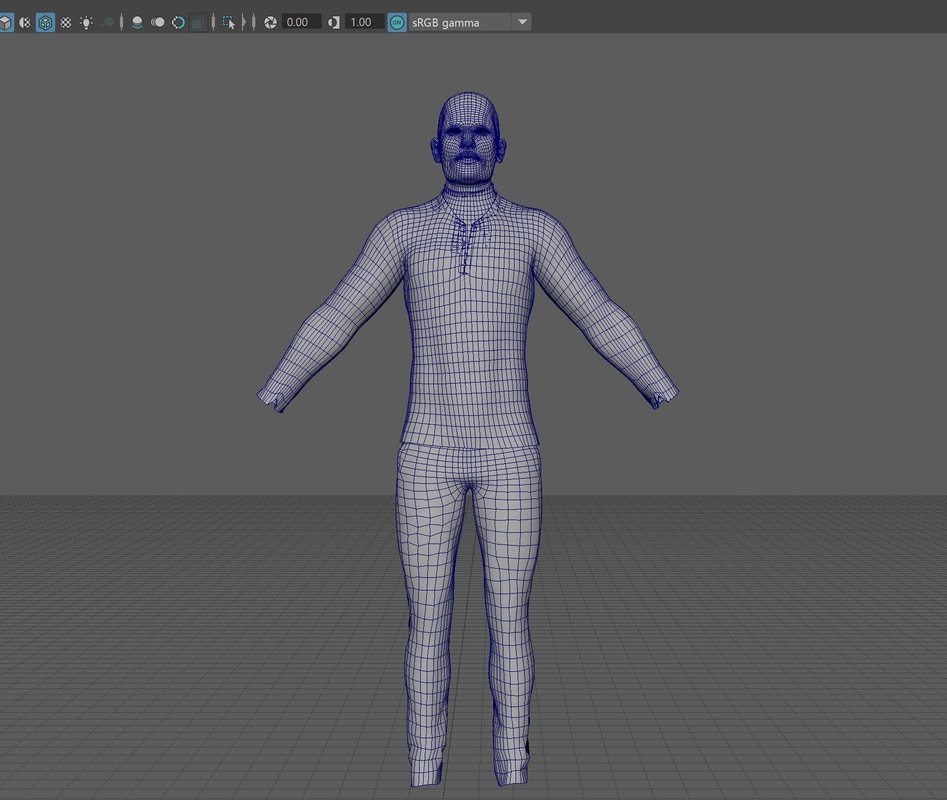 I then took each part of the outfit and went into substance painter and baked the high and low poly so I got some of the clothes wrinkle details and then I applied a texture to the outfit and I applied the defuse and normals inside of Maya and did the same with the head as well.  Hair For the hair I started off by using a square plane and then I added extra edges to the plane and moved its vertex about, and I then made sure the UV's were made smaller and placed to one side  I then started to place it on my character head, I used different sizes, when I created a bigger or smaller size I would move the UV to a new space in the UV square as I wanted to have a different hair pattern to this part, I then exported a UV snapshot of the hair UV to photoshop and used a brush to draw lines in different angles to crate hair patten and added different colour tones as well. From this I made a black and white version for opacity and found a hair sample on the internet and made a normal map from this 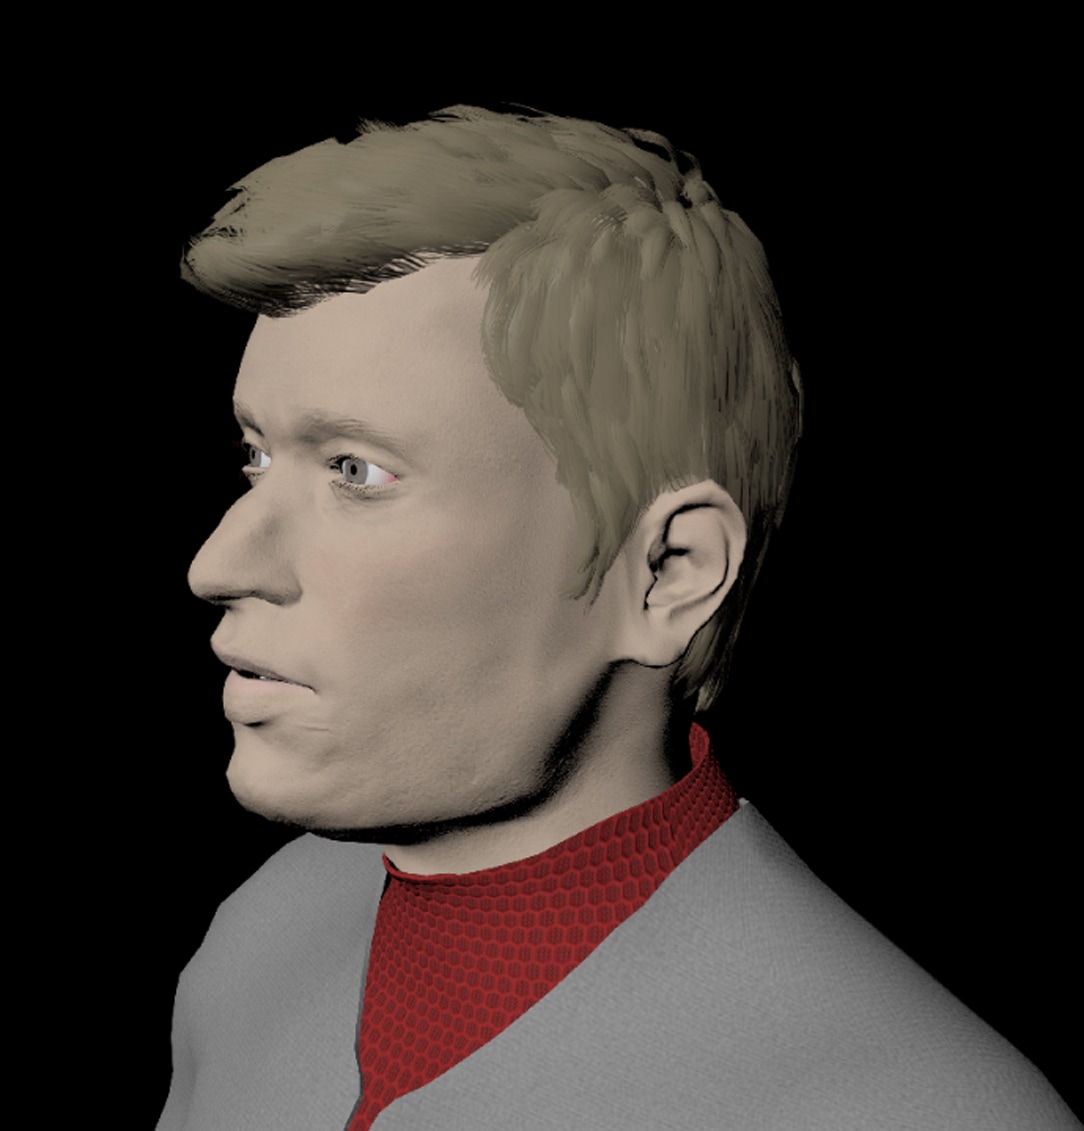 Hands I started off by creating the hands from a square and adding extra lines using the edge loop tool, I then extruded from the ends to create the upper hand, then the fingers and thumb 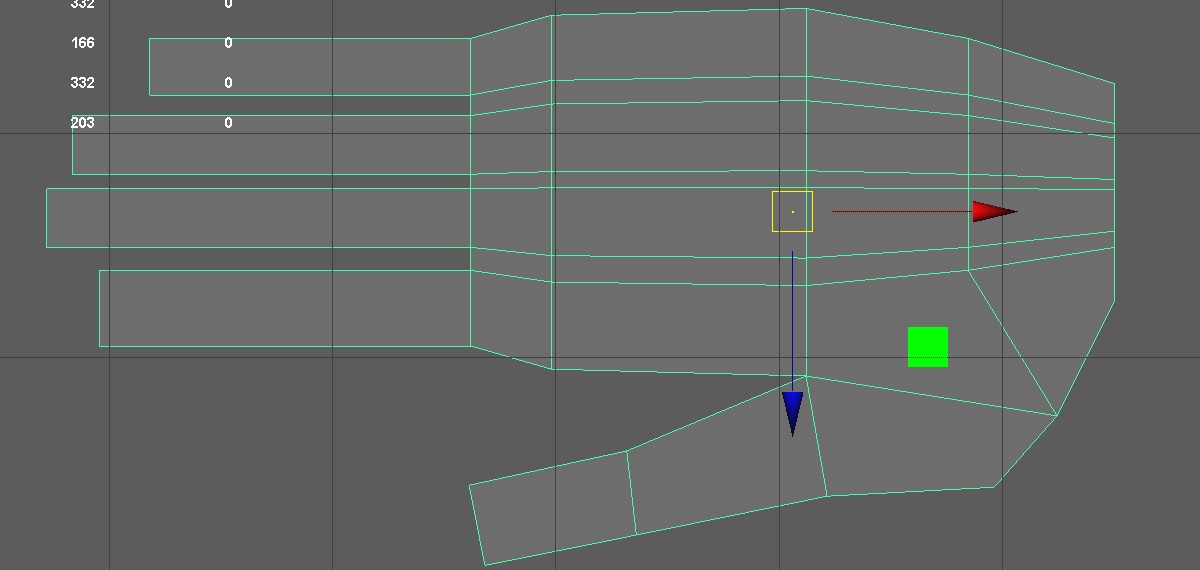 After this I started adding extra edge loops to the hand and moving the edges and vertex to create a more rounded hand 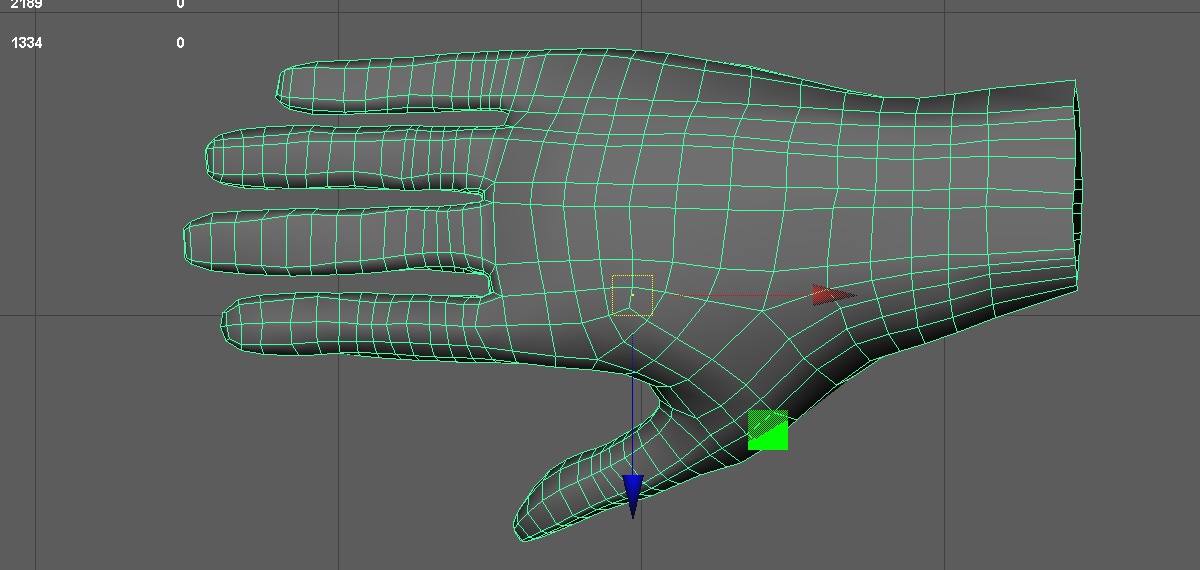 I then duplicated this and created a high poly version and took it into substance painter, and did a quick bake on the hand and applied a quick texture with nails. I then went back into Maya placed the hands on the shirt and used the mirror geometry tool to copy over to the other side. 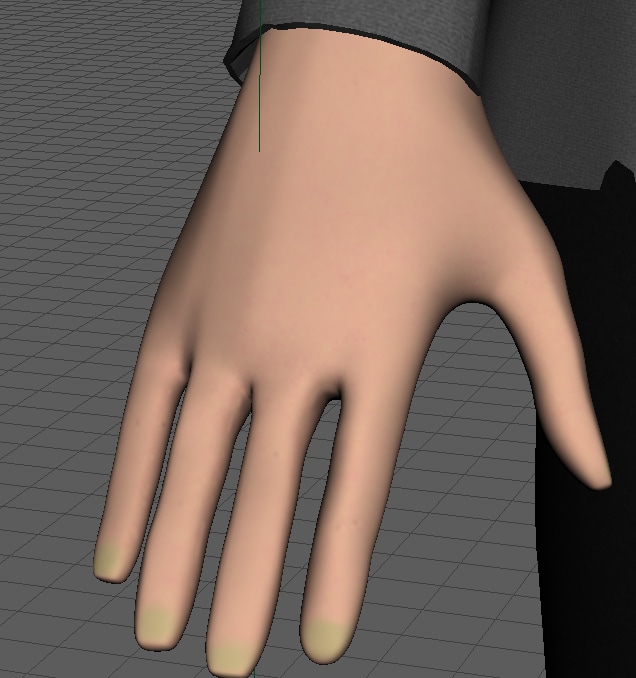 Quick Look Dev renders My new character is nowhere close to complete it still has a lot of work to be done, but I thought I would do some quick renders to see how it is looking. from the look dev renders I was not happy with the hands and it will be something I am going to work on to improve Conclusion
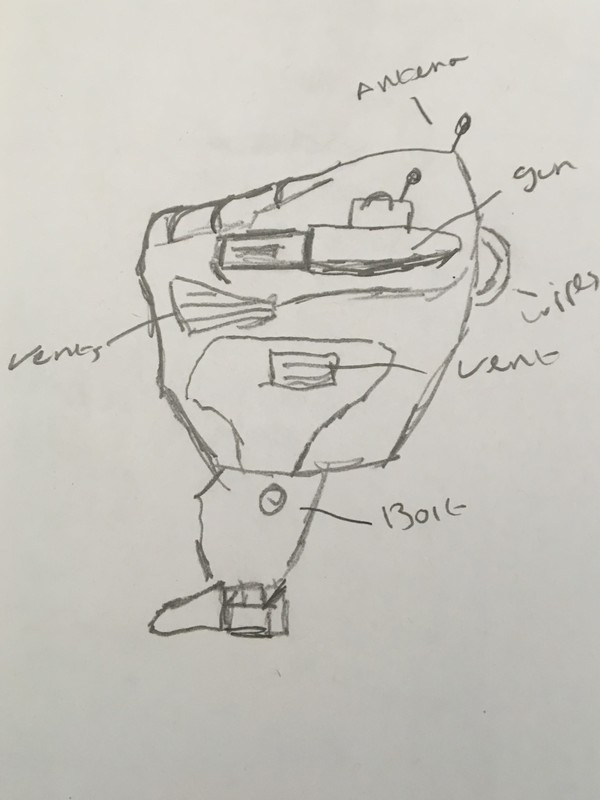
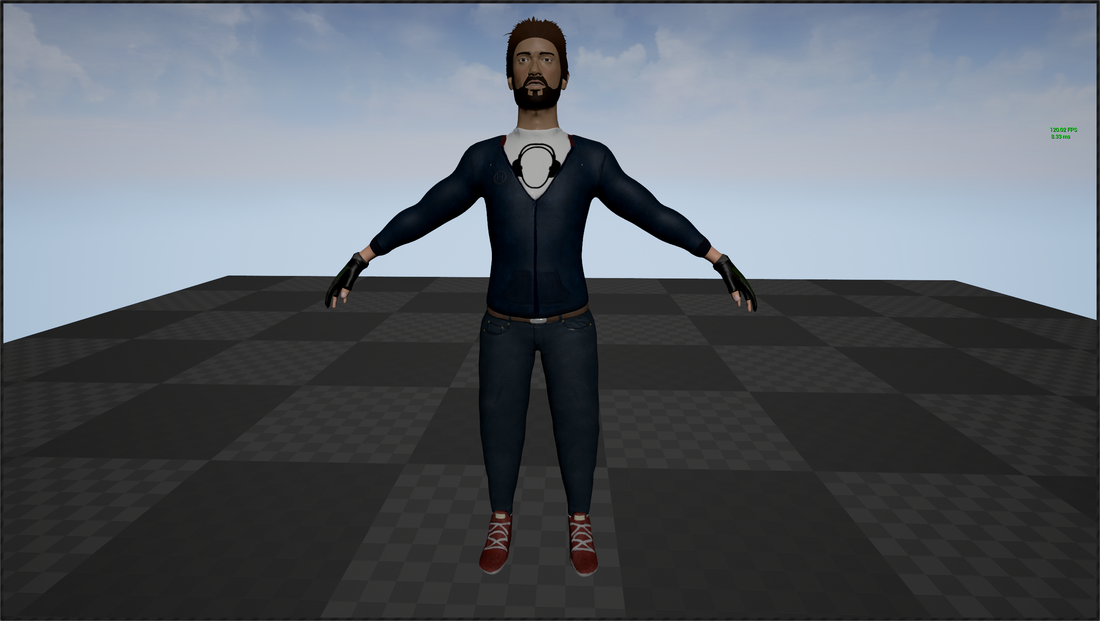
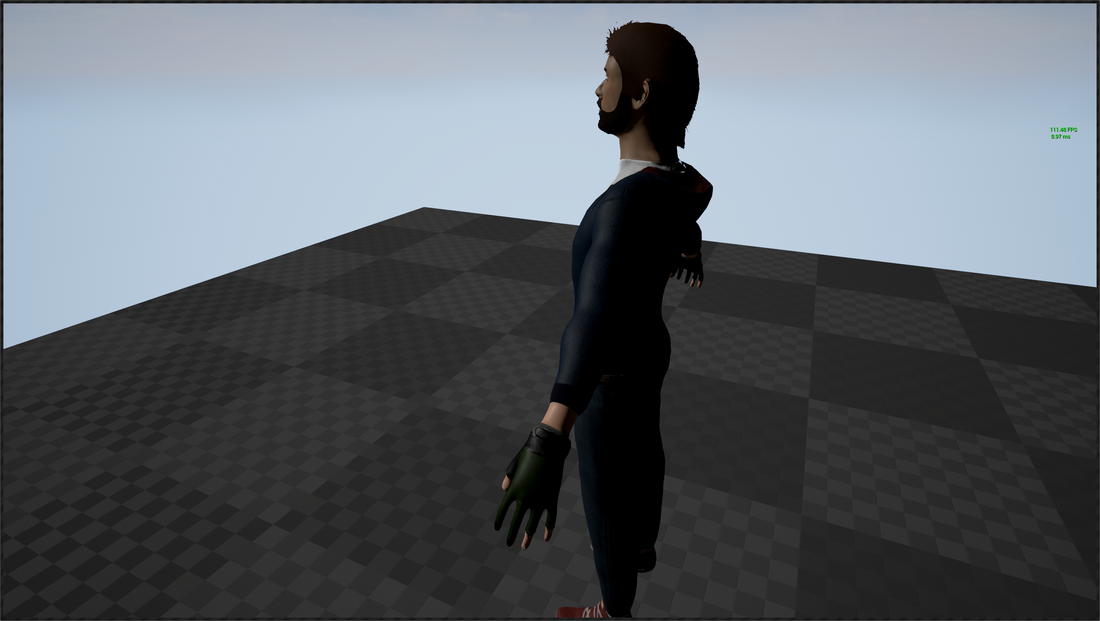
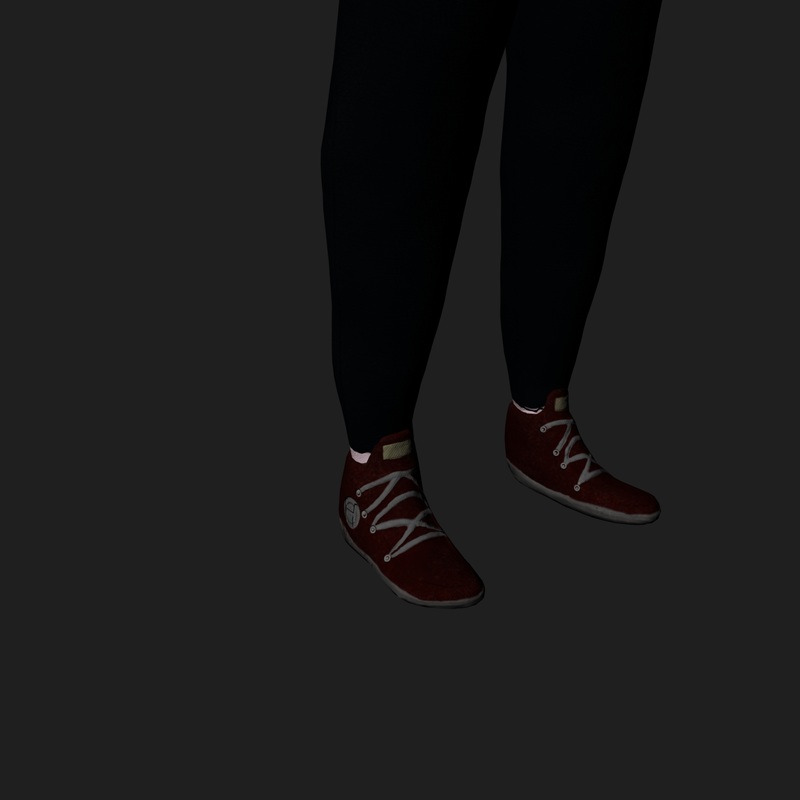
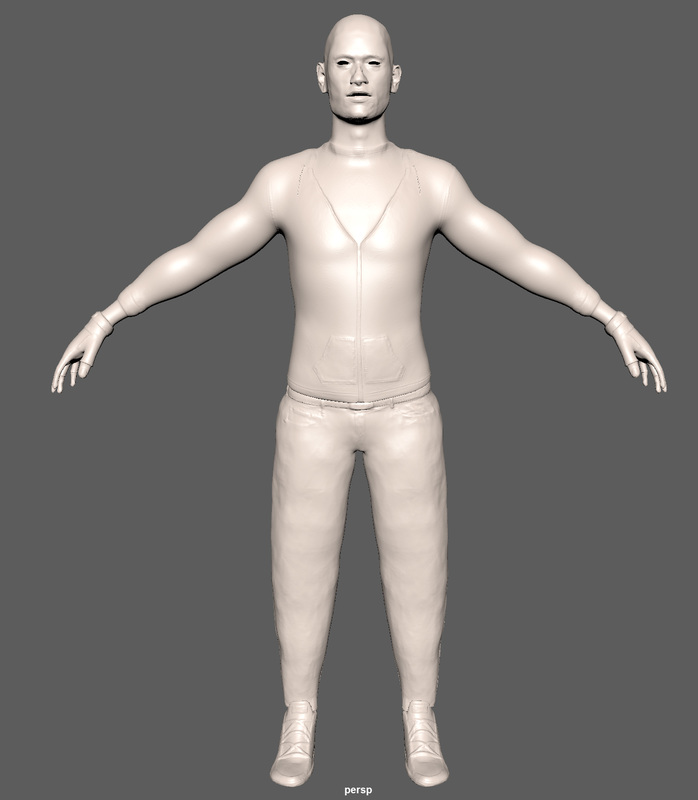
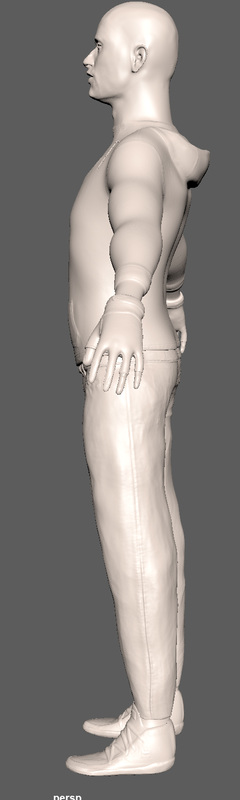
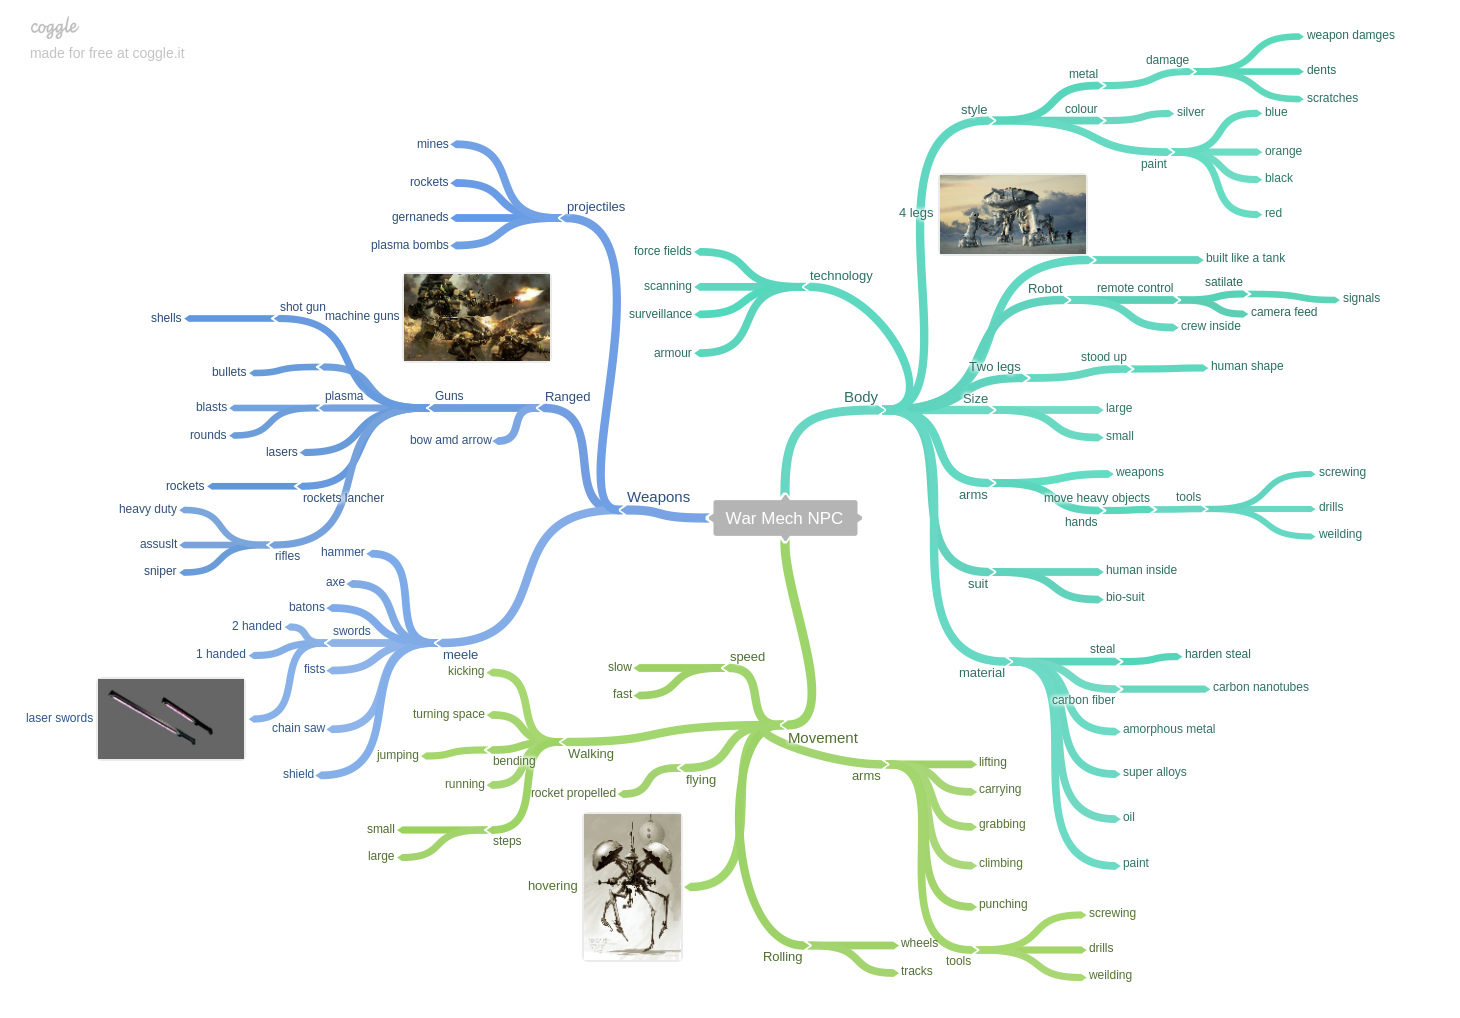
I have ran out of time to complete the new model before task 2 deadline, so it is something I am going to work on over the summer holidays so I will have a complete character to start animating with next year. I wasn't happy with the hands and I will be able to improve on them as I will have more time to improve the models, I will also create boots for the character as this is the only major modeling left and the rest of the time will be improving the model and textures as I still don't think it is up to my standards of my previous work. Brief Update Since developing my original character, he was based on a horror survival brief theme and I think I met the brief description for making my character. After under taking unit 75 I wanted to create a futurist / sci-fi game for the second year of my course and move away from the horror survival. I plan on updating my character to meet these needs, I will change the body so the outfit has a more futurist look, but I will keep the head as the time spent on creating and sculpting I don't want to change the look of his facial features. I will also be removing the neofur as a hair feature and going back to using a more traditional way. The plugin was a great learning experience but I found it over complicated to use and found it quite unstable with in the game engine and feel going back to using planes will suit me better. As well as rebuilding the body I will remake the hands as these have gloves on and will need changing. NPC For the NPC I decided to change this as well as I wanted to keep away from the horror survival brief and not create a zombie or something similar. I decided to make something futurist for the NPC to fit in with my unit 75 brief. I look at many ideas and came up with making a robot of some sorts that can be a friendly NPC and an enemy as well. I started of by making a mind map to come up with some ideas around robots. 
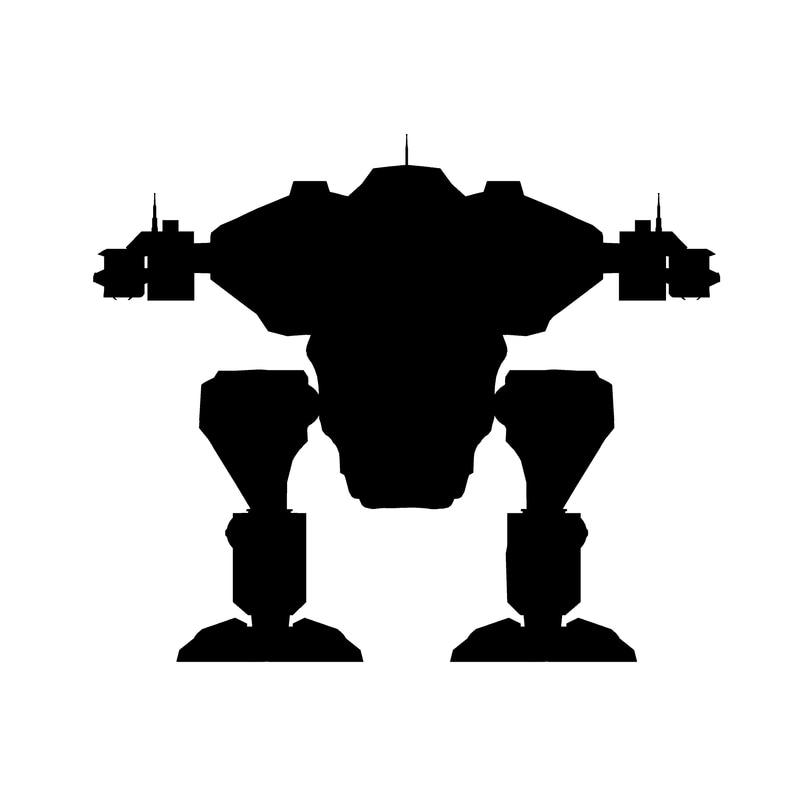
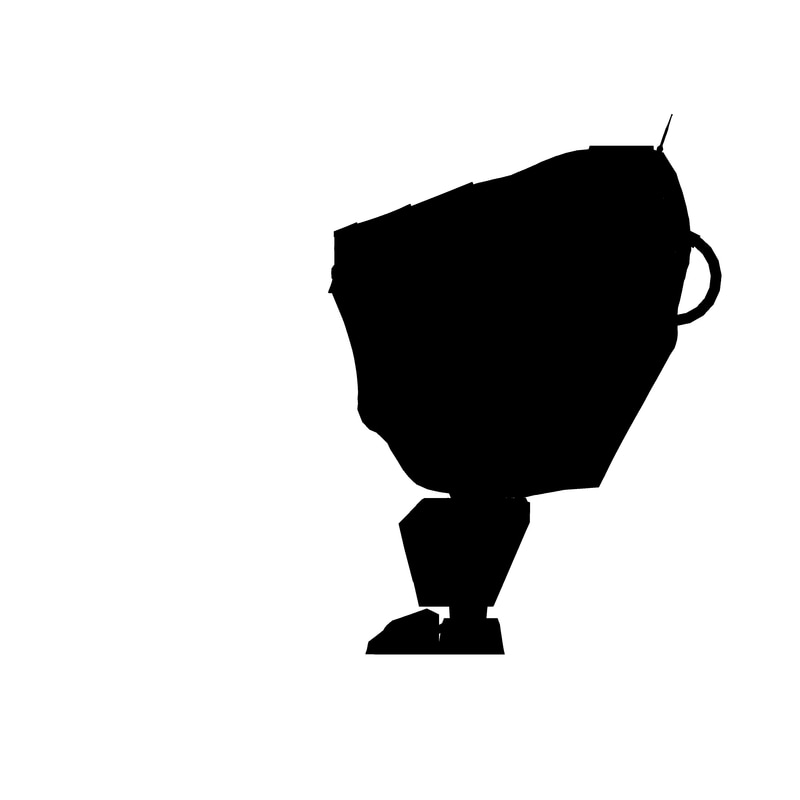
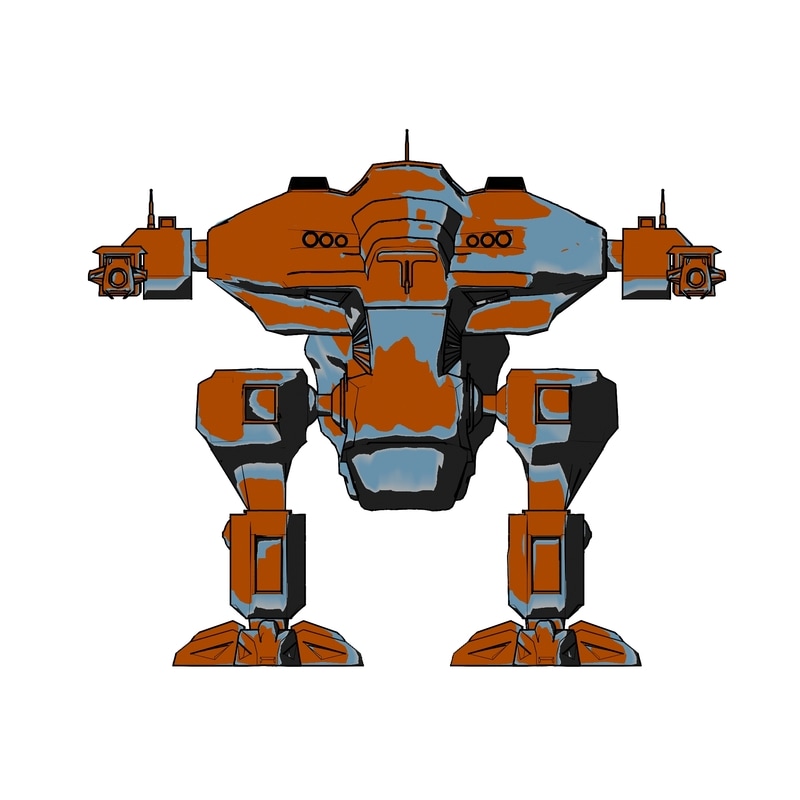
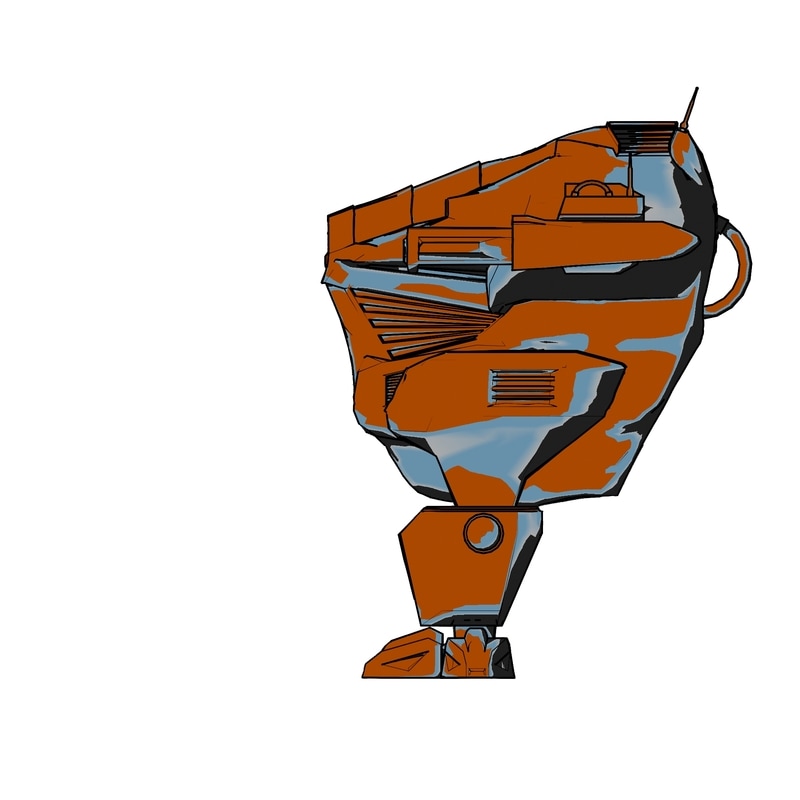
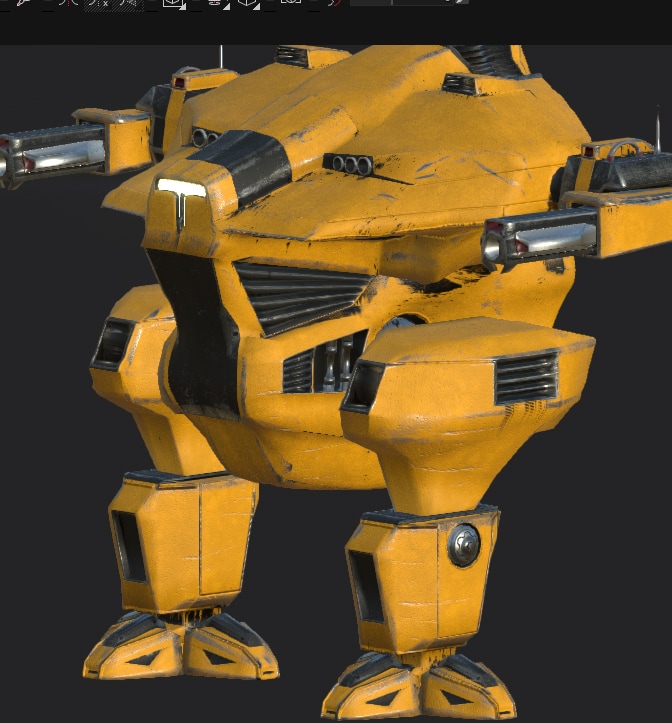
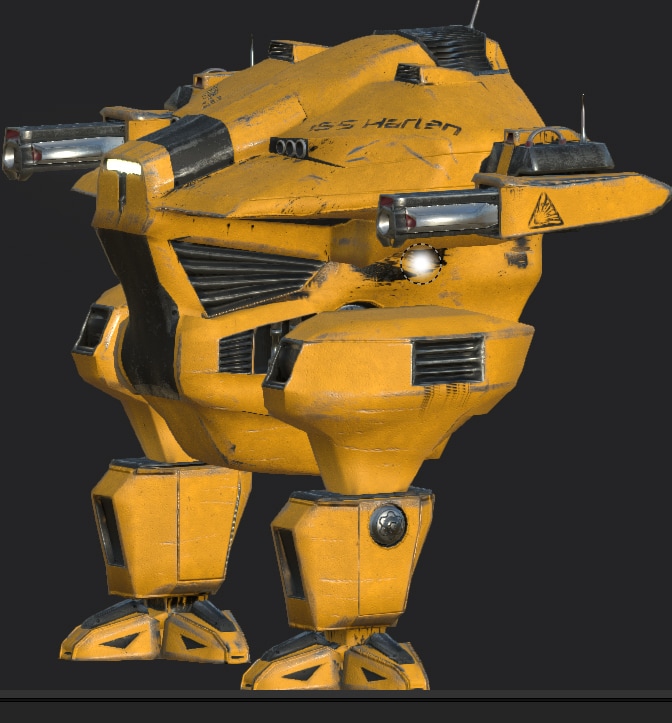
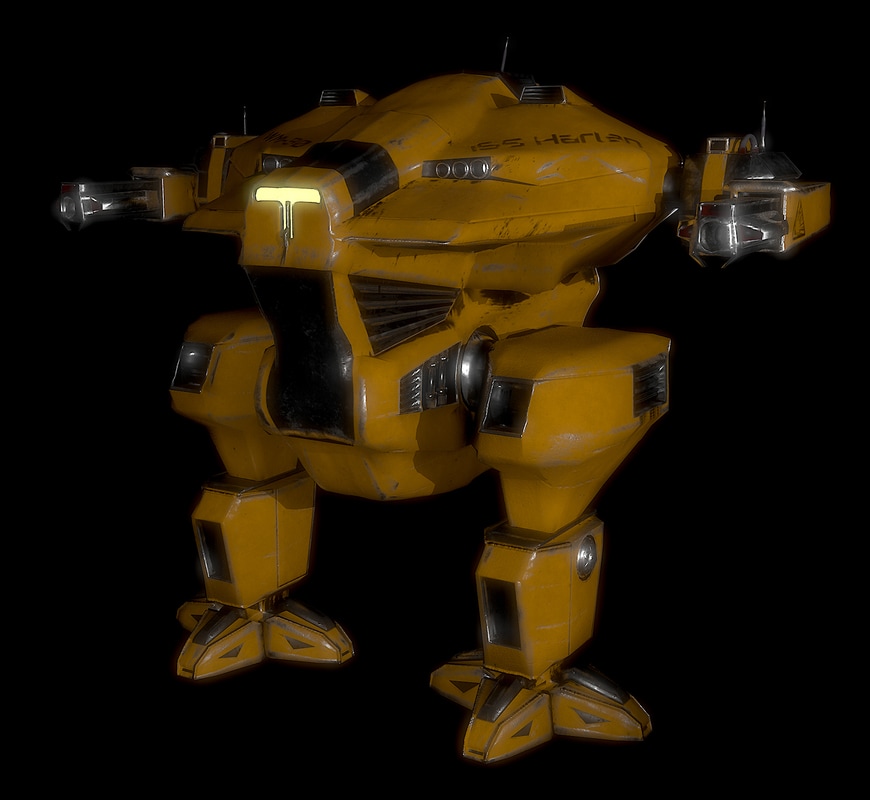
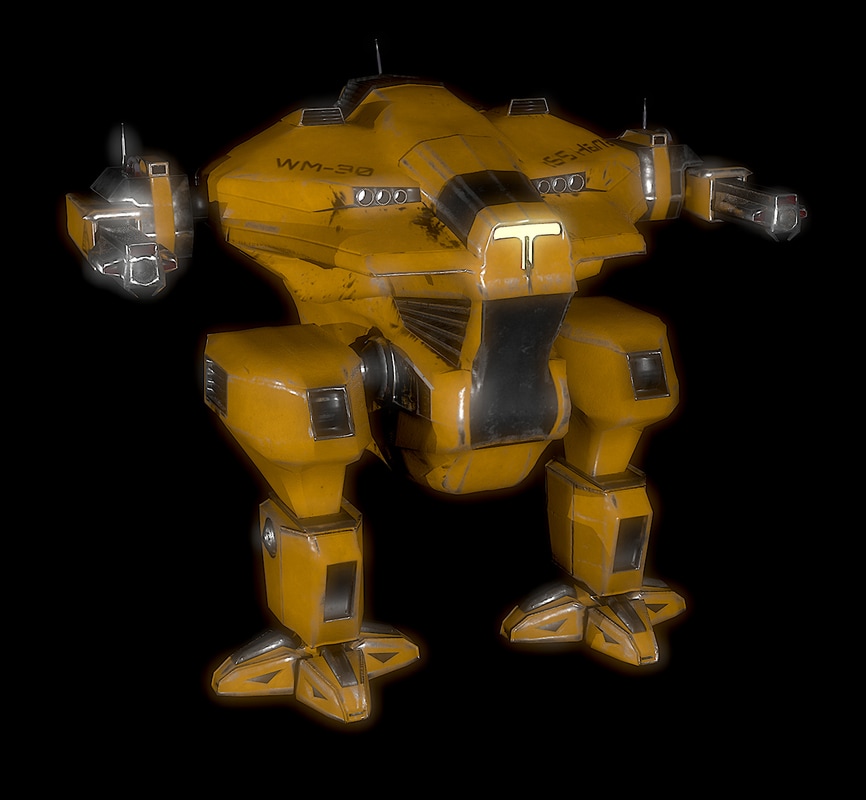
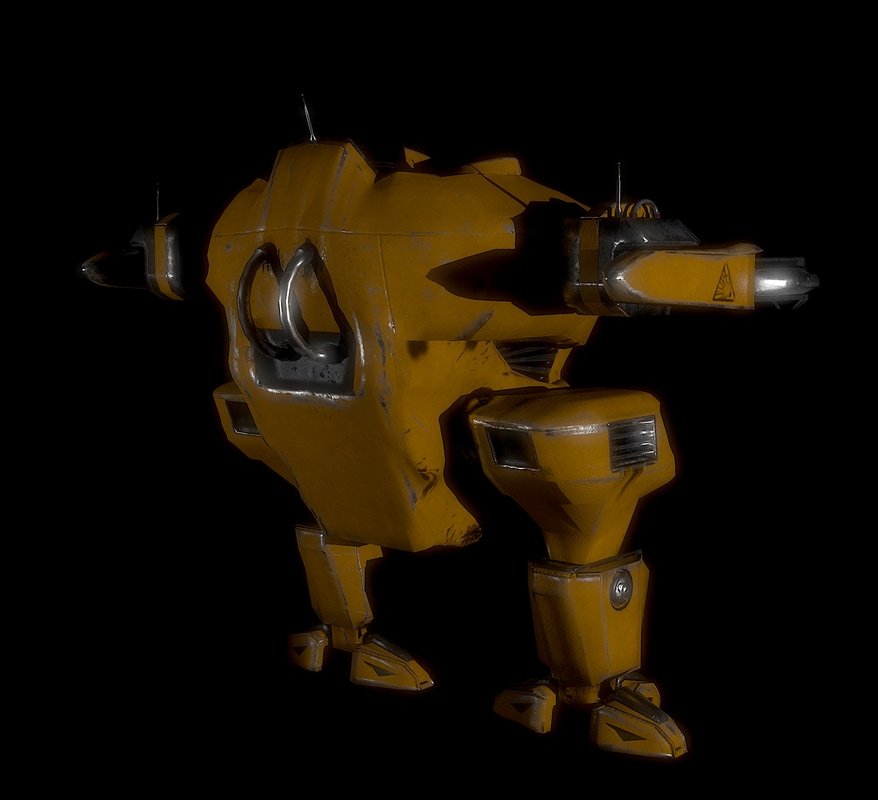
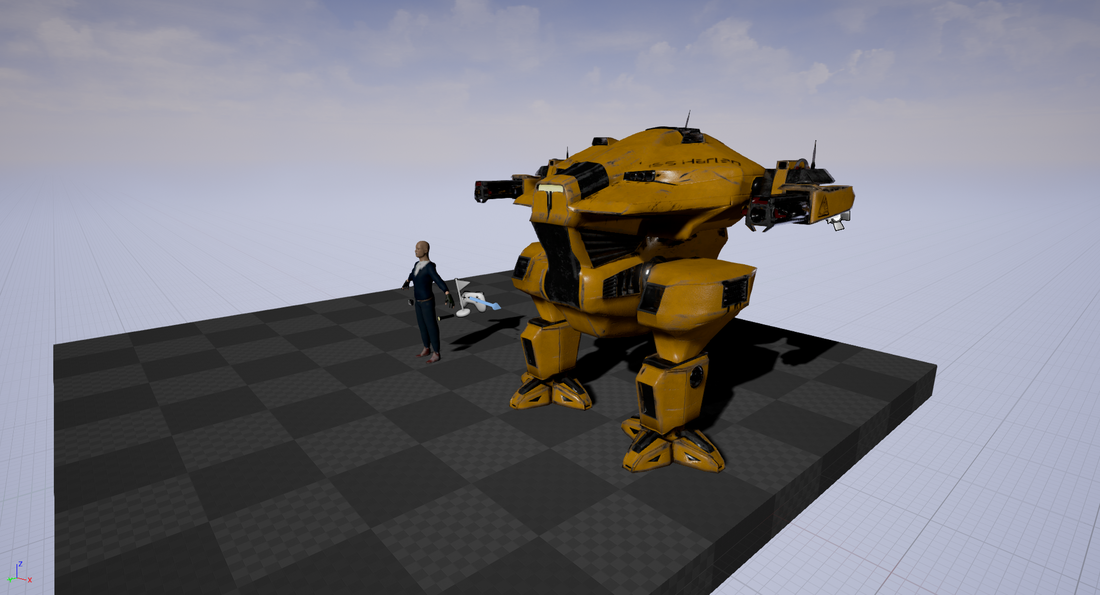
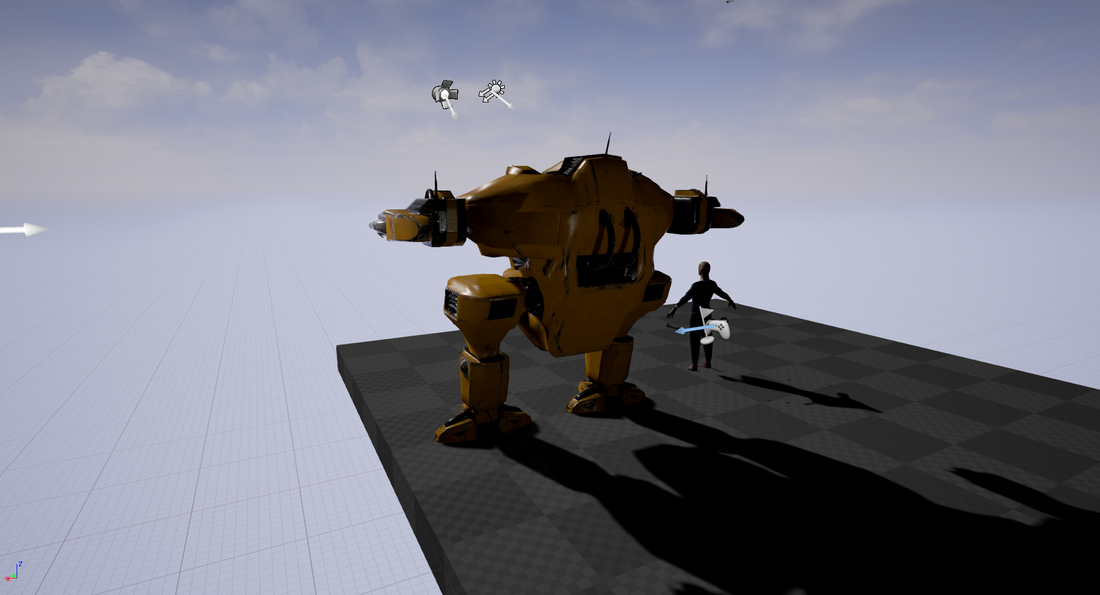
Then after this i created a mood-board after this. 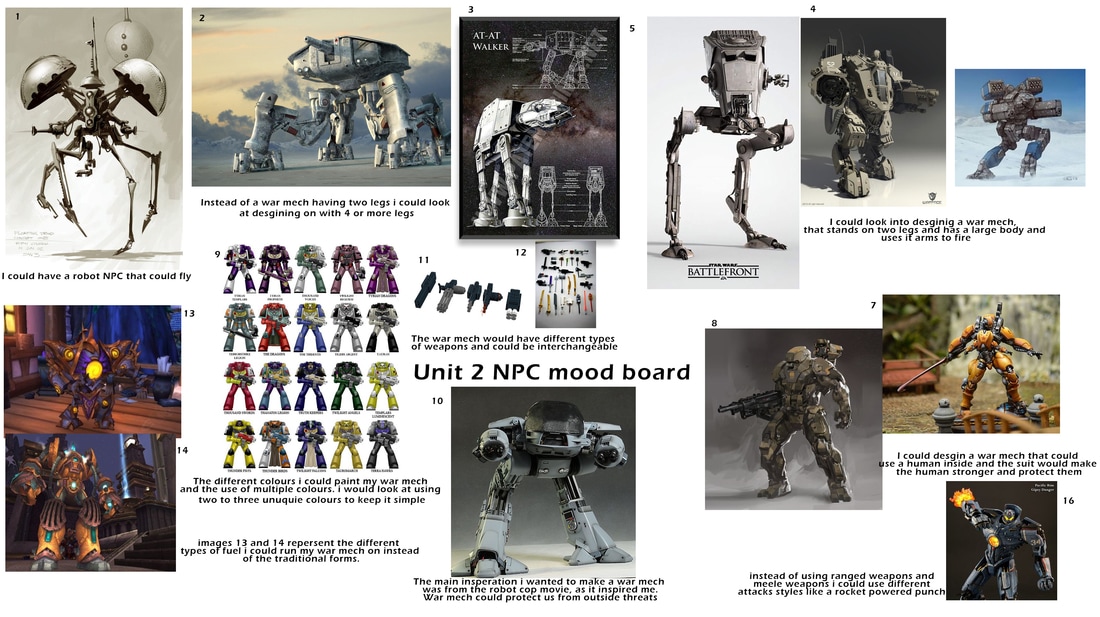 After doing some research I decided I wanted to create a war mech like the one found in the original robot cop. where the war mech has two legs, a large body and two arms as weapons. I then drew some concept images to get my idea on to paper. Then i created some silhouettes of the front and side of the NPC Then i made a colour version of the silhouettes Blockout I started of creating the war mech in maya by using a cube and extruding and moving the edges, then adding cubes where the vents and lights would go to make a rough idea of the body and then i started to combined all the geometry together to get a rough block of the body, and cut circles out using spheres so i know where the arms and legs would go and then i cut it in half as i plan to mirror it over later on. 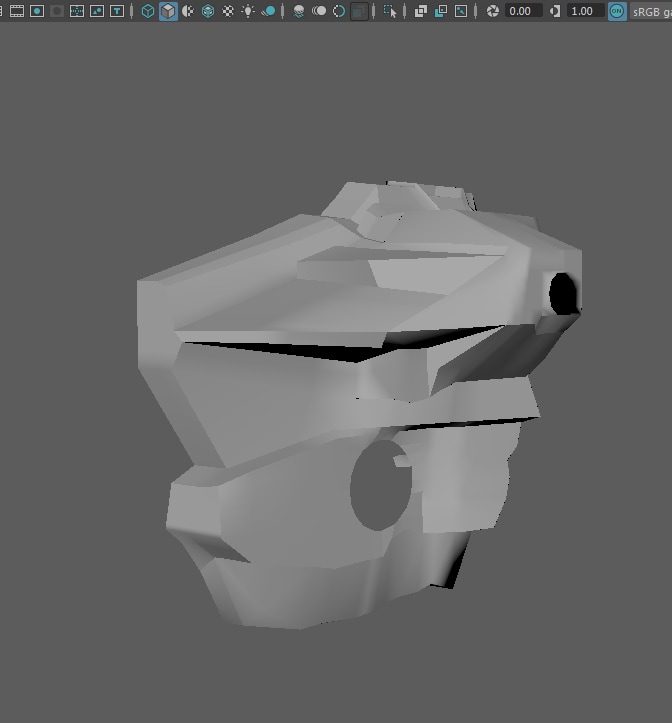 After creating the body I created the arms and legs using cubes, extruding them and adding edge loops to add more geometry. 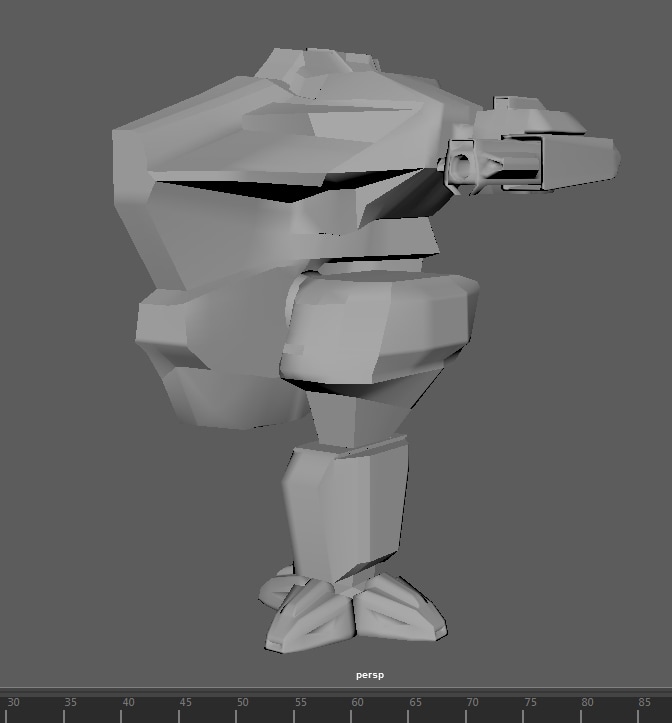 i Made sure the line down the middle was flush to the centre line and then i mirrored the mesh over and placed symmetry on the x axis so it copies what i did to the other side. Modeling I created a low poly model from the blockout by adding details in such as vents, joints, light sockets, pistons, pipes and other details such as large panels. I made sure the model was all connected as one model, the downside to this it increased the poly count quite dramatically. 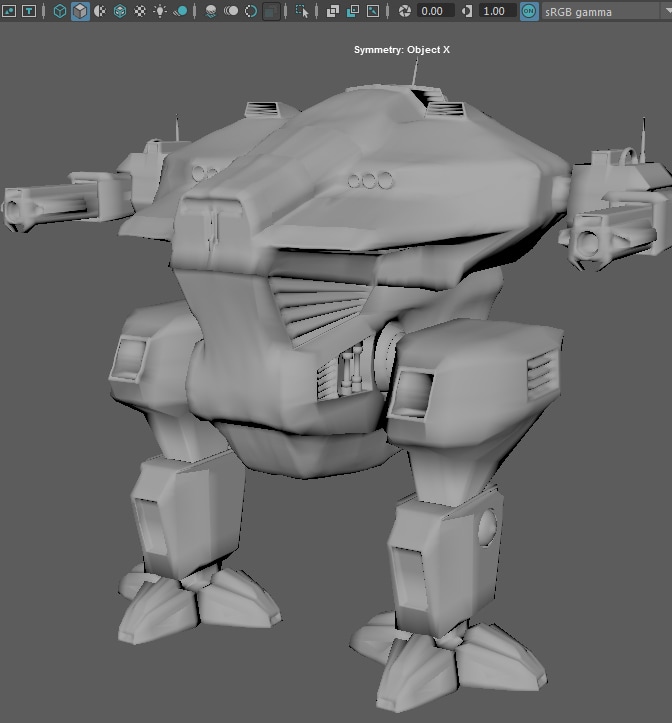 I tried to make a high poly to back down onto the low poly of the model, but after creating the high poly and backed down it got a few errors that I tried to fix, but was becoming time wasting so I decided to add the fine detail that I wanted in the high poly to add it in substance painter instead. UV The UV process for the war mech was a long process, because it is a complicated mesh with a lot of hard edges and lots of organic edges and curves trying to get large UV shells quite hard and ended up with lots of little UV. Because there was so many UV shells i had to use more than one UV tile. The whole model ended up using 7 titles. as i was taking it into substance painter i had arrange the tiles next to each other as substance painter will process these as UDIM tiles and place each UV tile into its own texture set. 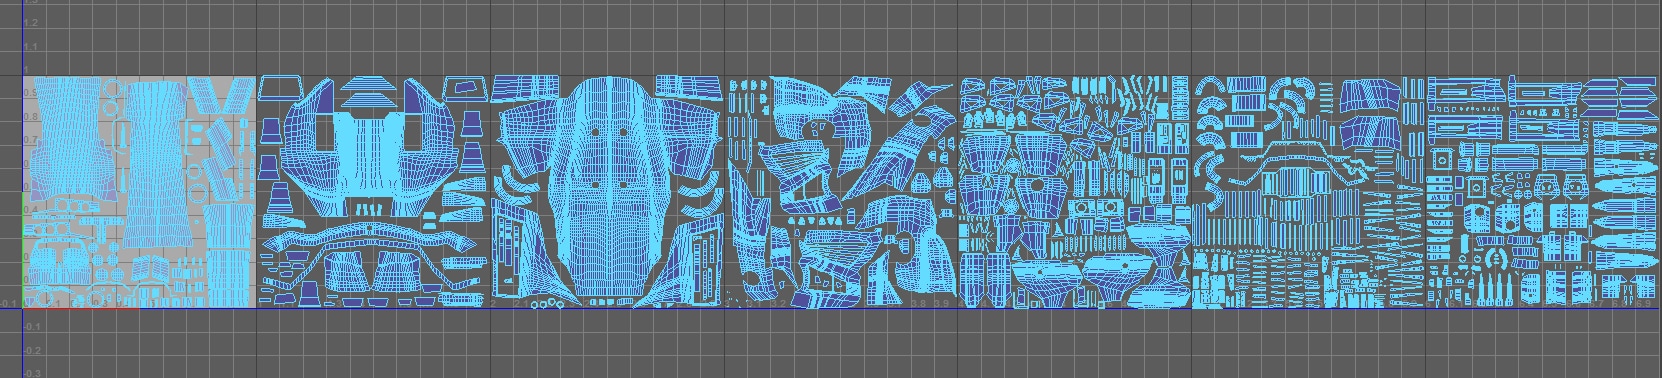 Then so i can use the uv's in unreal engine i copied each tile into its own map 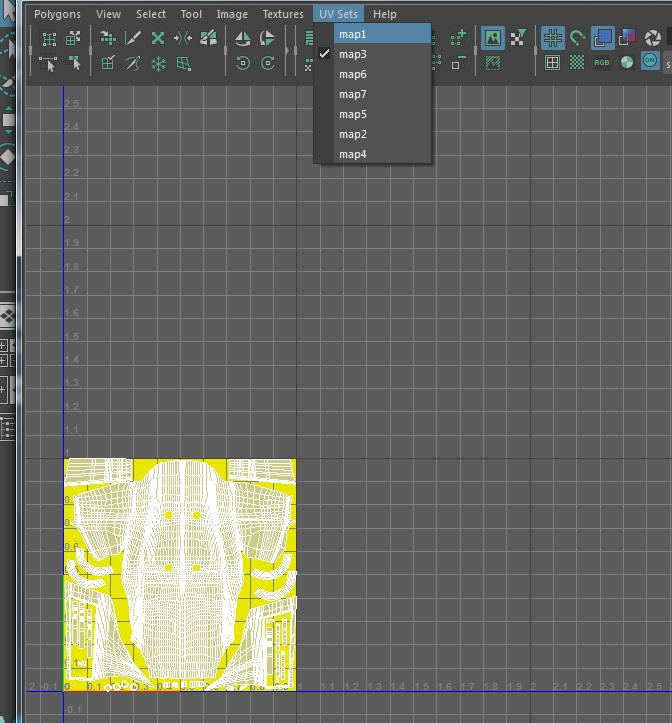 Texturing Before I took it into substance painter, I assigned each UV map its own colour ID I did this for two reasons, one for a visual reference guide for myself so I know which UV map is where and when I import it to unreal engine I can apply to right texture maps to the right UV maps. 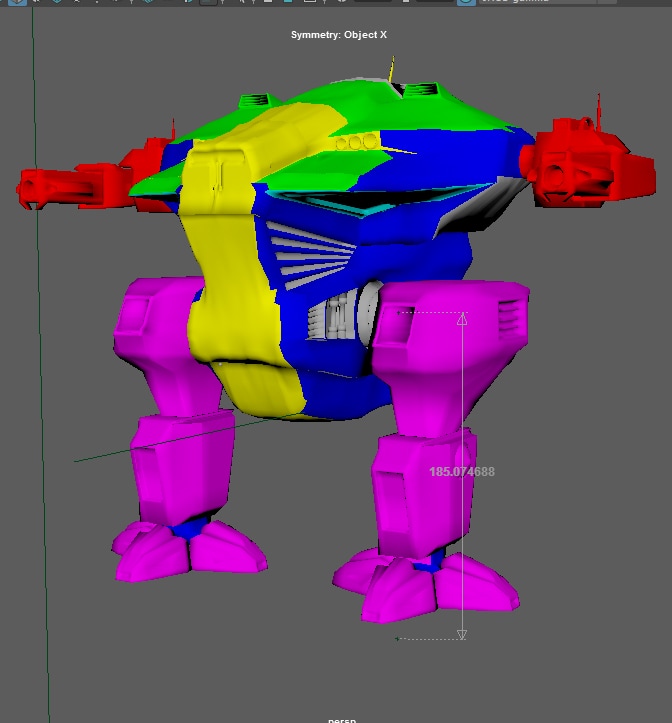 I imported the model into substance painter and made sure the UDIM box was ticked to create a texture map list based on the UV tiles. 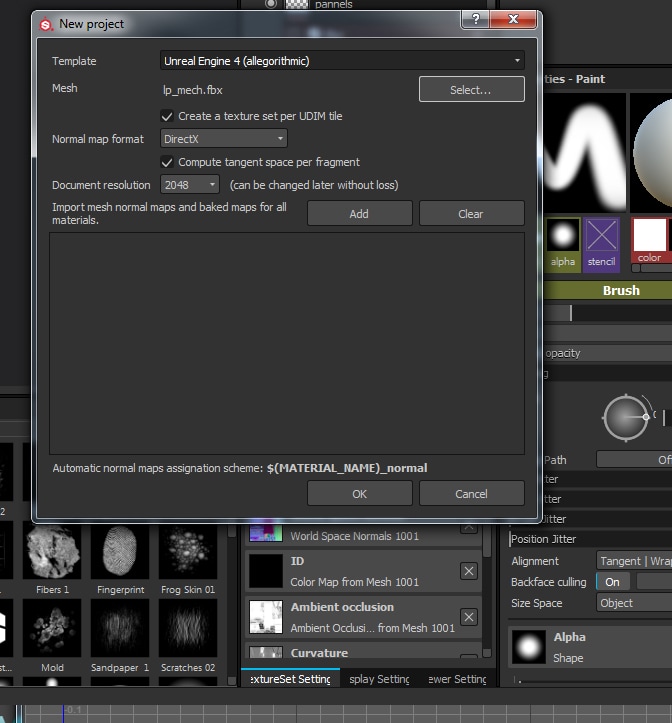 Then I went onto each tile and made it solo so I could see the area I am working on, used a fill material and applied a black mask on the fill layer and selected the areas I want that colour by using the polygon fill tool. 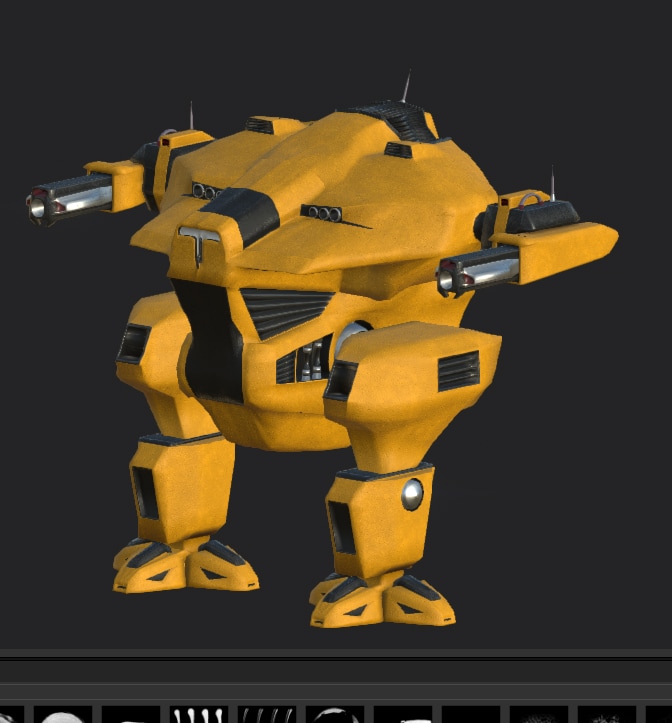 After i applied the basic colours i added fine details such as bolts, welding and panel dent details. 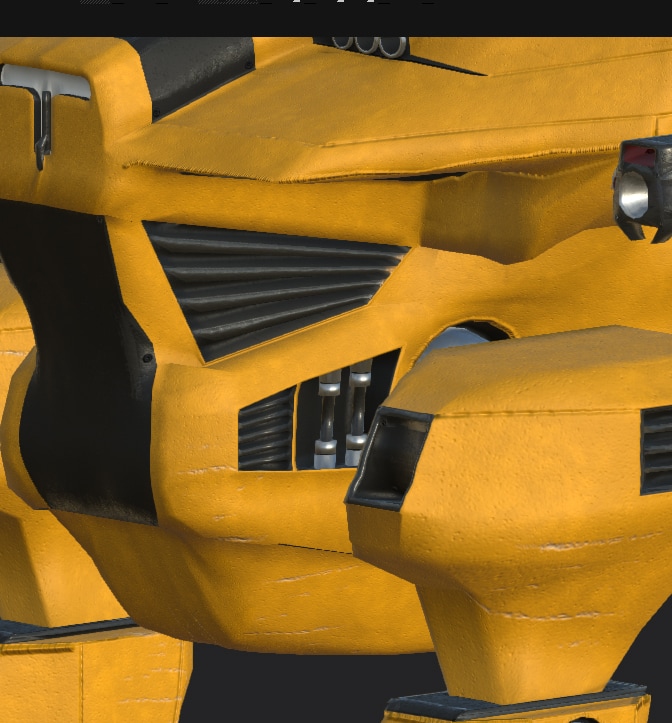 After this i added new fill layers and used generators to add oil and edge damage and then i added a paint layer to this and i could choose where i wanted these. After i added these i placed emessive light map onto the lights on the model and then added decals as well. After this i looked at the model for any visible seams and created a layer when i found one and set it to pass though and used the smudge tool to blur the lines so it wasn't as obvious. Look Dev and Unreal engine I started off by doing my look dev in substance painter to see if there are any obvious problems as shown below. 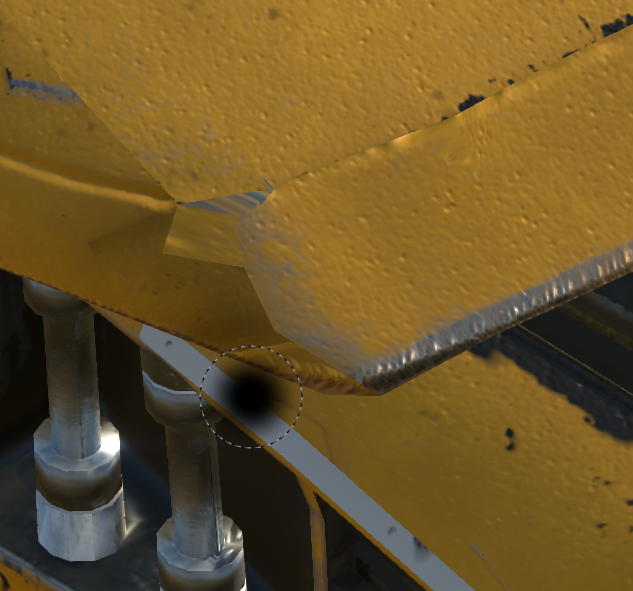 This was an easy fix by just fixing the UV maps in maya and then updating the model in substance painter to remove the UV problem. After that I took the war march into marmoset toolbag 3 and added the materials to the model. in the scene I added three different types of lights Back light - to bring out the silhouette shape fill light - to bring out the highlights full light - to light the front of the model this is a basic technique used in modern photography and its a good way to look at the model in look dev as it shows me how the light will bounce of the model. 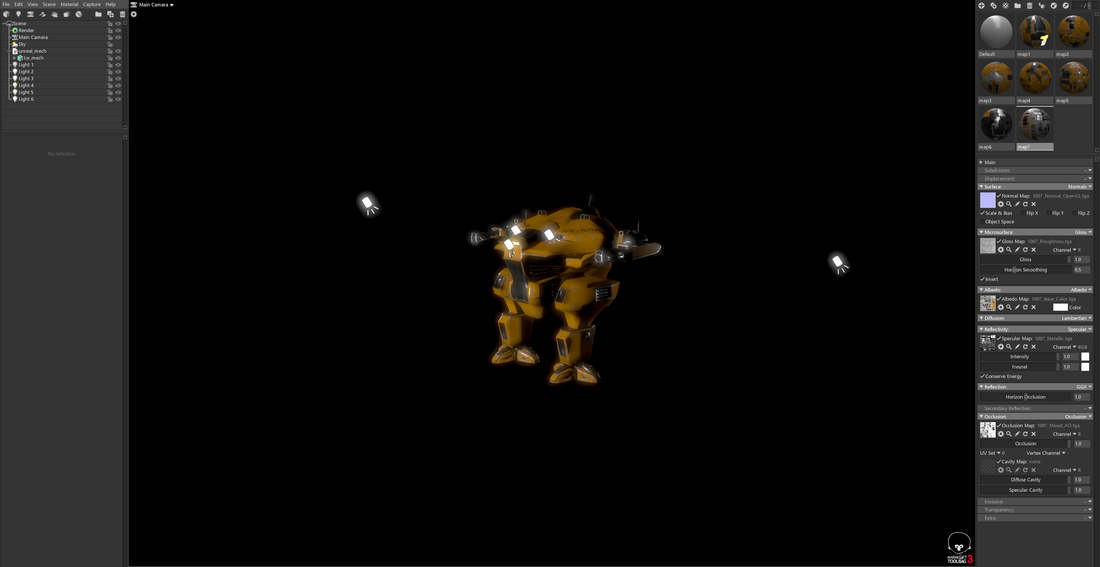 Here are a few renders from the look dev After this I imported it into unreal engine and created the materials for the model and then placed the same light set up around the model to check for seams and how the light works with the model. Blockout As I only had a short time to build a character, I couldn't build one from scratch in Maya as first planned. So what I did was use the pre-made character that comes with Mudbox, I used the pose tool to move the arms into more a T-shape position. Then I exported the model I have edited into Maya which gave me a basic base to add the cloths and other features on top. Instead of designing each clothes separate I decided to extrude of the body on the faces that would be the edge of the cloths then my target welded the top of the face that was extruded back to the body and the bottom part would give me an edge as shown in the photo below 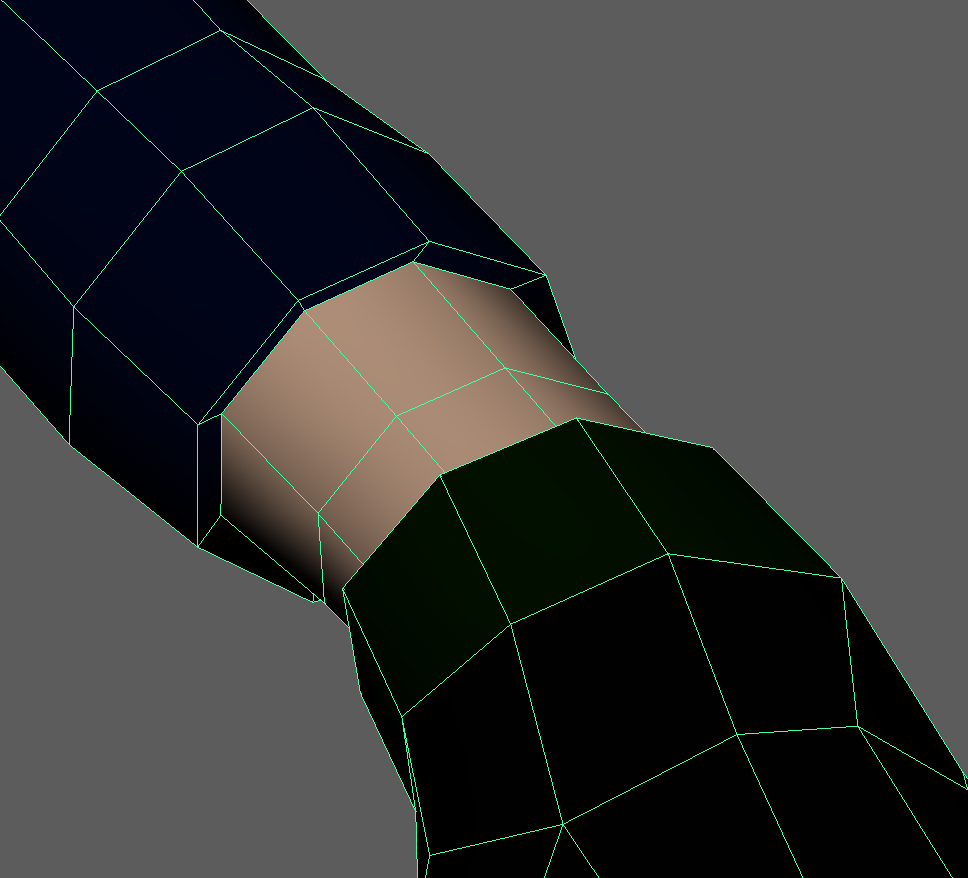 I used this method on all the edges of cloth items to give the illusion that the model has cloths on the mesh. using the smooth tool helped me a lot after I extruded faces to make the hood of the hoodie instead of using vertex and edges and lining up each one to make the mesh less bumpy the smooth tool help do this twice as face to take out the dump and make the mesh more flat, combining this with soften edges under mesh display so helped take away the sharp edges after extruding
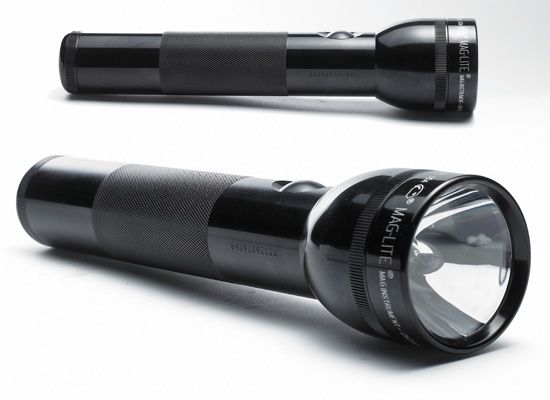
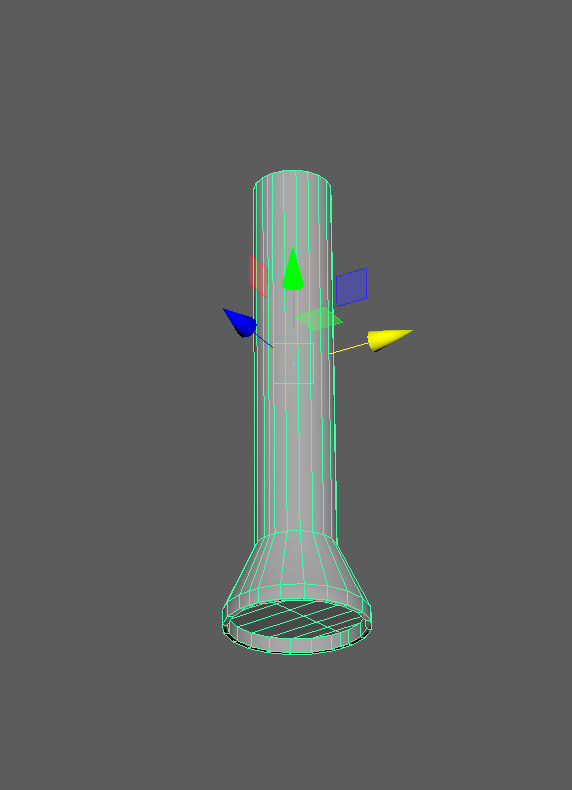
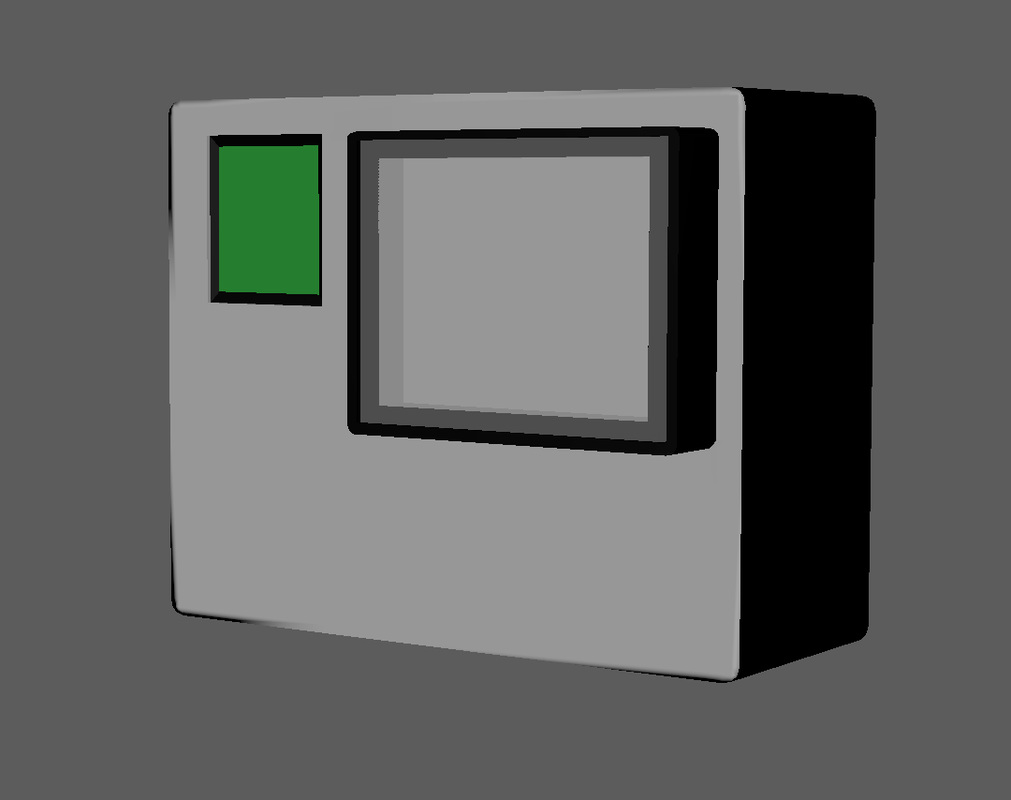
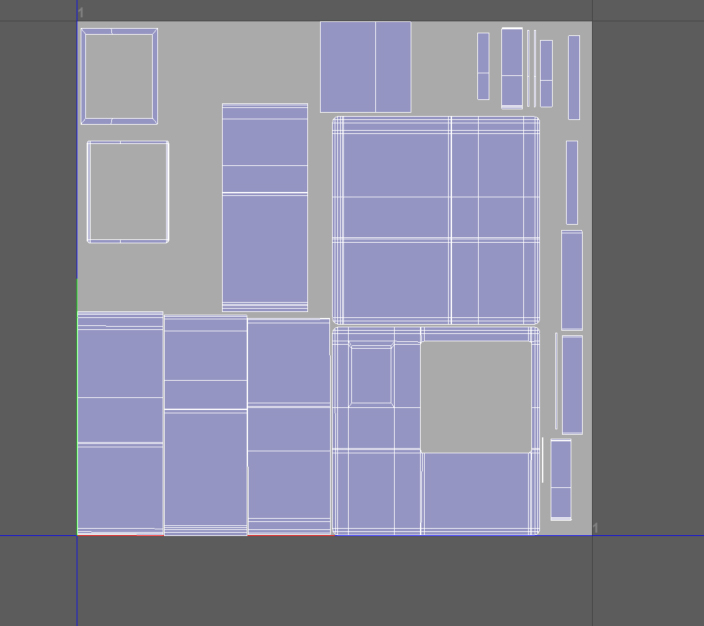
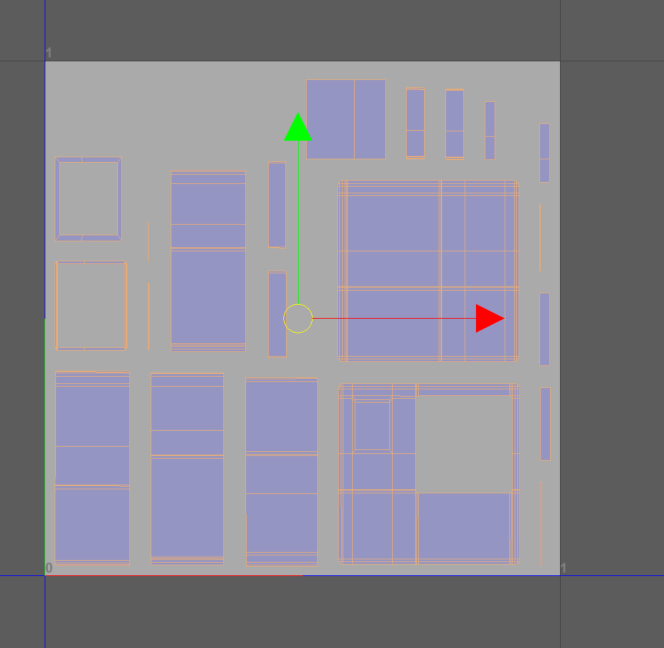
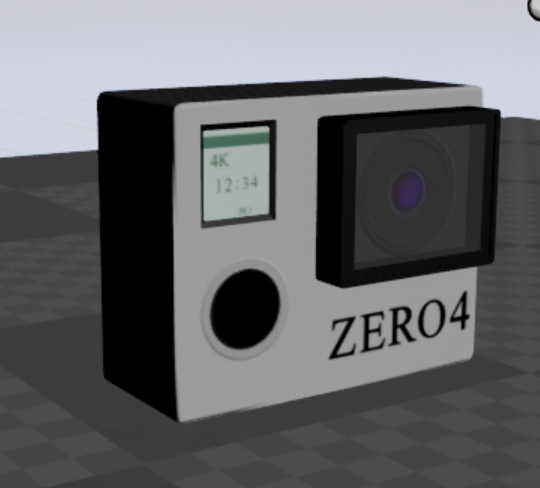
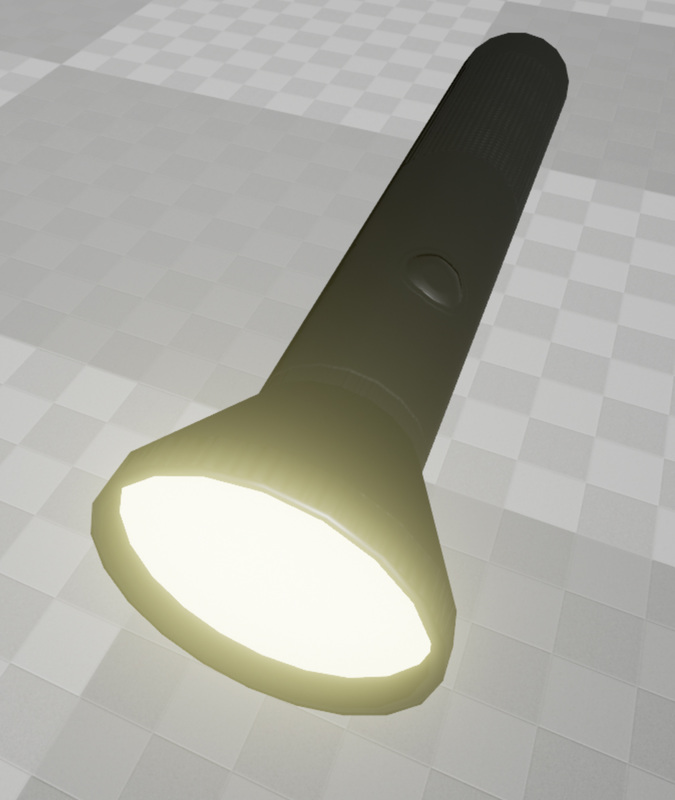
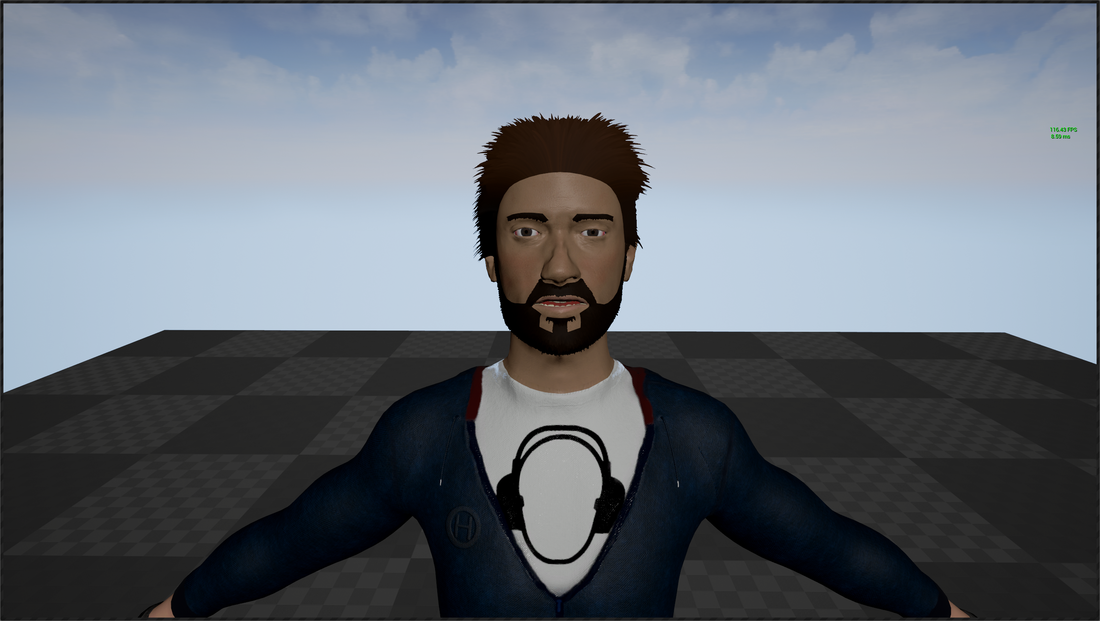
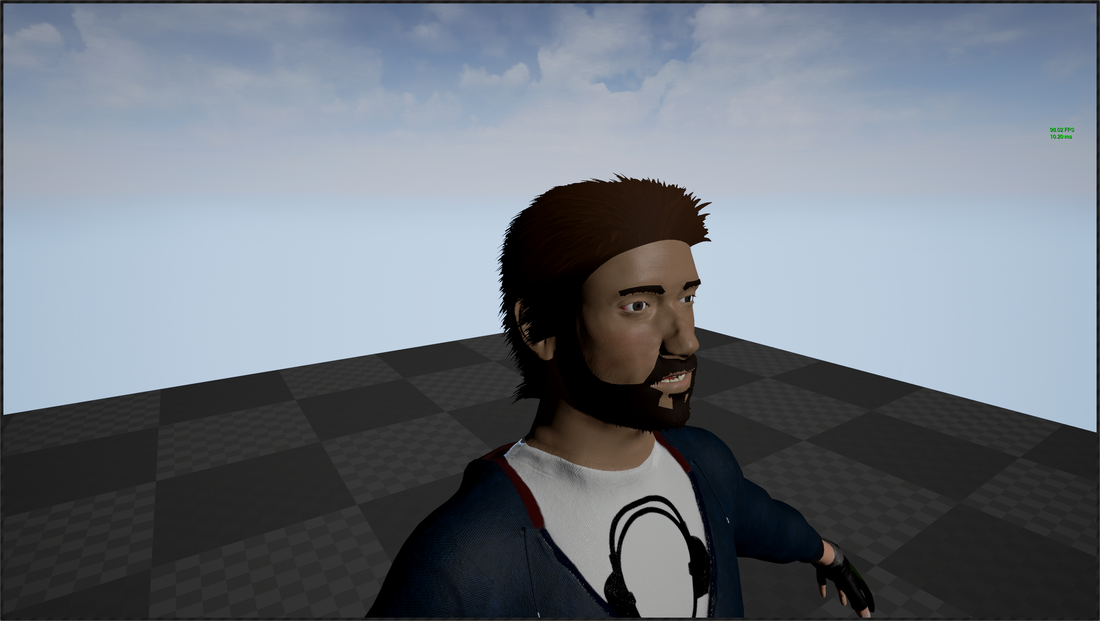
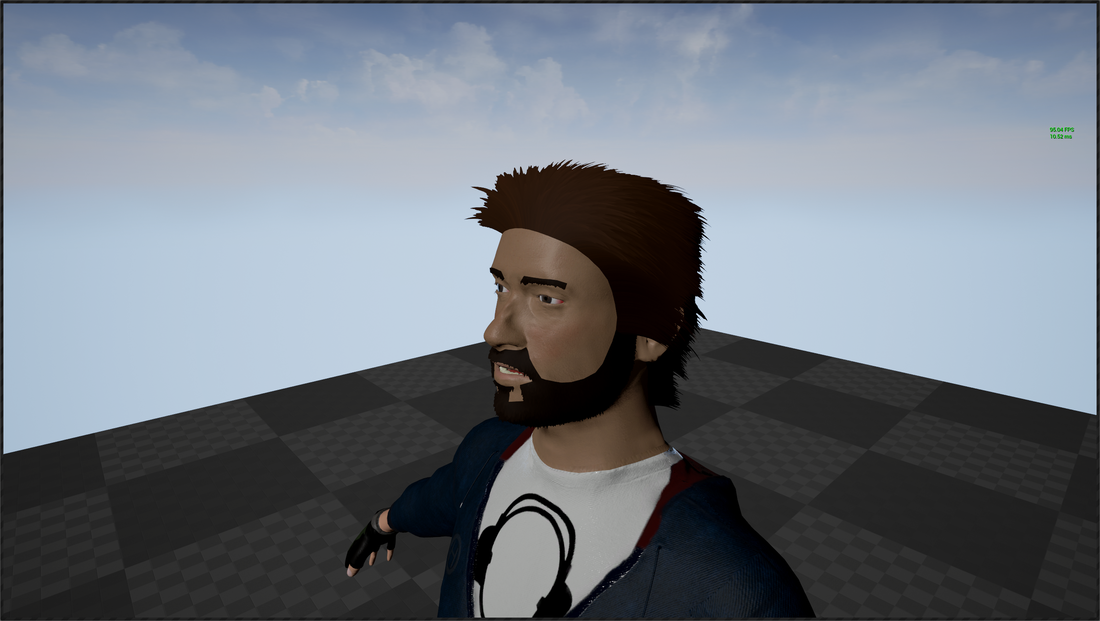
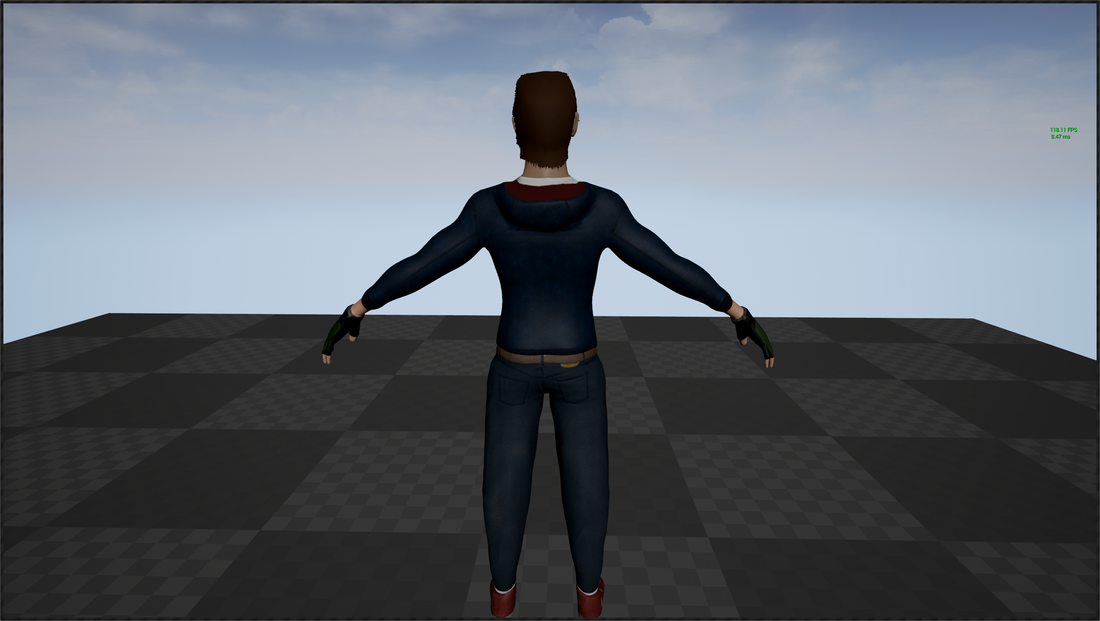
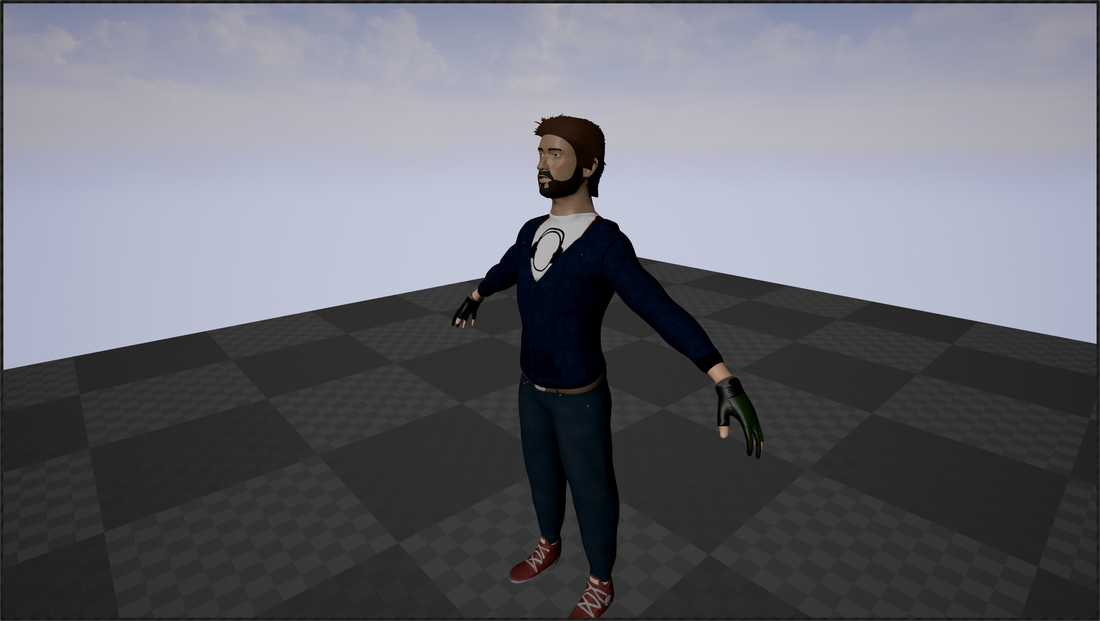
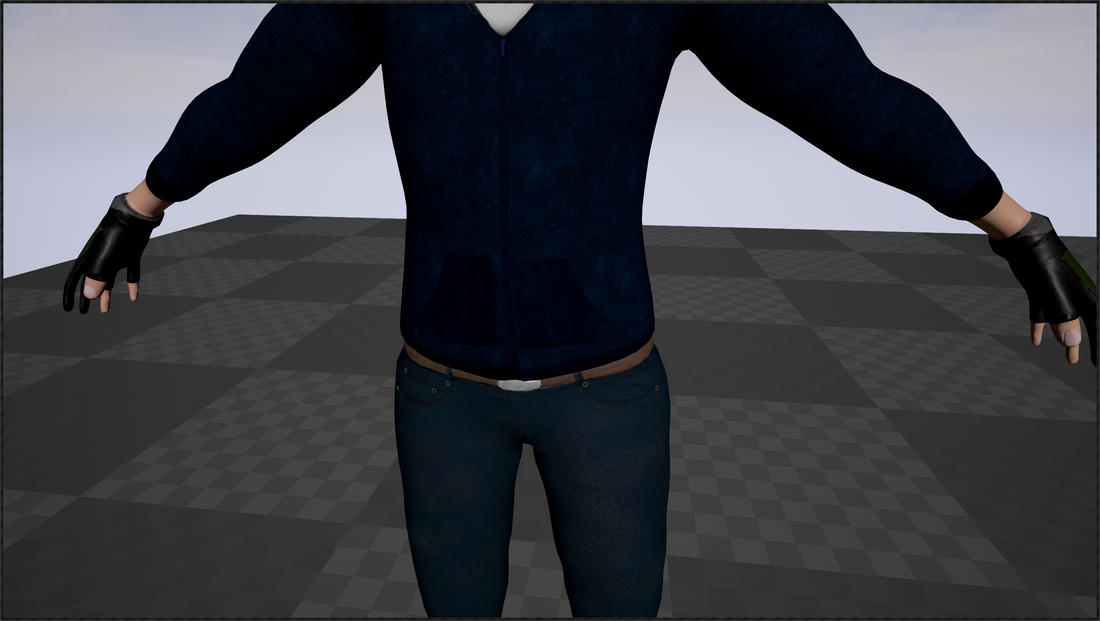
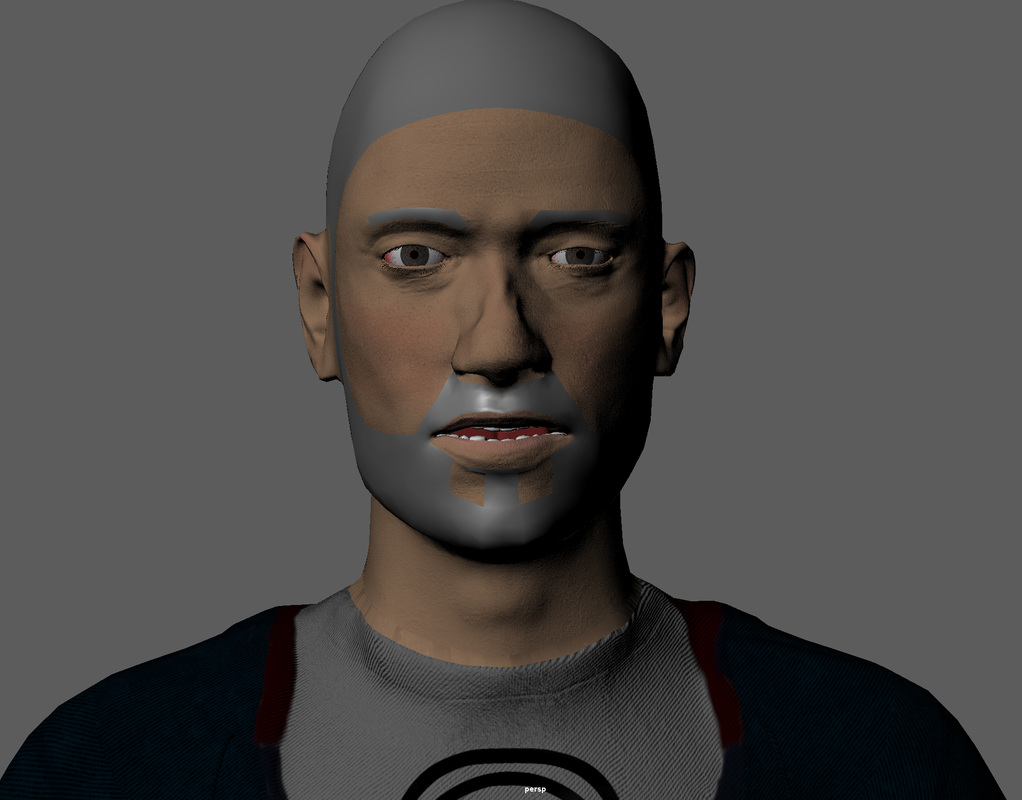
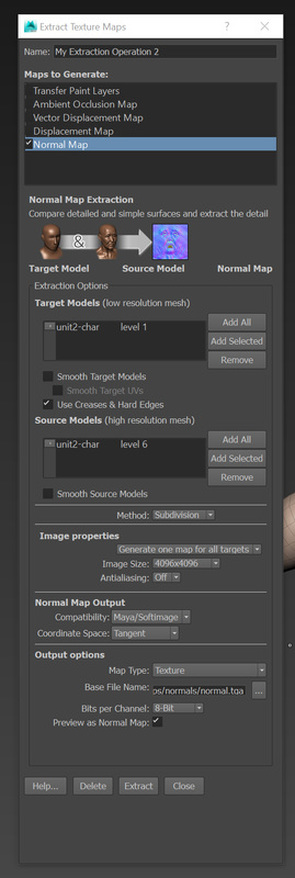
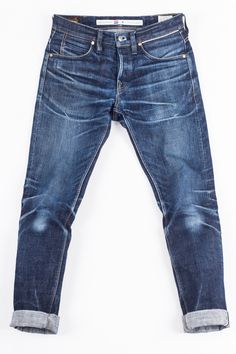
Uvs Using the model for me was quite straight forward, even for a novice in this area Maya has some tools to help speed up this process. Creating a plane for the whole model and then using split UV on the edges I wanted to separate from the main planar. Once I had all the UV separated i used the unfold on the shells, realigned them so they were in the correct position and then I used the smooth tool on selected UV to relax or unfold them if they were overlapping. having the UV made early one meant I didn't need to quad draw over my model at a later stage cutting out the time of quad drawing and just using a low level poly mesh and a high poly mesh to do a bake as the UV are already in place Sculpting This is the area that slowed me down the most and where I spent the most time on my model, using tools like bulge and grab helped me get the basic shape quiet, quick, using the wax tool to fill large areas was quick to get more definition into the model. with the symmetry turned on the x axis this helps massively and sped up the this process very quickly as I didn't have to do each side separately. Once I had the basic sculpting complete and I wanted to add finer detail I found vector displacement maps and stencils were very helpful as I didn't have to create the parts from scratch, I could just sculpt on top of these displacement maps and stencils on to my high poly mesh and the detail would transfer though with made this process a lot quicker High to low poly bake Once I exported my character back to Maya on a lower sub division I needed to create a normal map to get all the high poly details onto my low poly mesh, this is a straight forward process now with Mudbox by selecting my highest sub division and using the tool extract texture maps from the sub menu UV and maps. In this window I just selected normal map and exported it. Back in maya I created a lambert texture and added a node that connects to the normal map and it placed all the details of the high poly mesh onto my low poly mesh. Texturing my original plan what texture my model inside Mudbox and paint texture, straight onto the model, but I would have to resource all the textures and edit them in photoshop first. In the end, I decided to use a program called substance painter 2, which comes with a library of textures already and smart materials that are a combination of materials in one and you can change the setting inside, the material, this was very help for the skin as I could just fill the skin areas with this smart material and customise how I wanted it to look. I could also paint alphas onto the mesh e.g buttons that I missed out in the sculpting process. I found this program was extremely quick to the method I was originally going to use and only took a matter of a few hours to texture my whole model and export different maps (new normals, height, roughness, AO maps) of the model which it created for me in the program which saved me more time as I would of had to manually make these in Mudbox and export each one After I completed my character I made some accessories for him, following the brief of being an unbroken explorer I made a touch and go-pro style camera. So I found some reference material and used this for guidance. I made these inside of Maya using basic geometric shapes and extruding, beveling and scaling into shape. Once I got the basic outline I made UVs and lightmaps for each asset. Then I took each asset into substance painter and baked each one so it had a normal and ambient occlusion maps. The normal map so I can do a high to low poly bake by combining it with the height map inside of substance when I used brushes with height enabled e.g. buttons and grip and the AO map create soft shadowing around the edges when a light shines on them. For the touch I created a massive light map so when the camera sees the texture it has a slight glow where the bulb should be. I should be able to connect this emissive light to a lighting function in unreal and give it the illusion that the batteries are going flat and flashes when its about to run out till the user finds and replaces the batteries. After I tried the textures out in maya and unreal I then added them with my character in unreal and did a quick look dev on them. After I did this I realised my models looked a bit flat and that it need a specular map for certain parts to add a little shine. It doesnt look like there is much difference between the two but when the light catches the models it gets a slight shine on them. At this stage I would create a scene in Maya with an HDRI environment map and lighting, import the model and do some render to see how the character looks and if it needs implements on the textures. Since I haven't got much time for this in my deadline and I'm using never plugging in unreal engine for the hair I decided to create a small environment in unreal instead, use a directional light and take screenshots while rotating the light around the asset. From the first photos of the look development I can see that his jacket is very shiny and I will need to amend this as cotton isn't that reflective. Other than that I am quite pleased with how my character has turned out after Texturing and adding all the final bits. How I removed the shine from the jacket and the jeans was I went into the materials of each and had a look neither of them had a secular map, without this the game can't decide if it is shiny or not. Specular maps, add shine to materials or make them look dull. To remove the shine I added a simple vector node and left it in 0 and connected it to the secular pin Now there is no shine, I could do the same with the face, but I want to leave a little shine as most humans have oily skin which does reflect light and leave a shine.
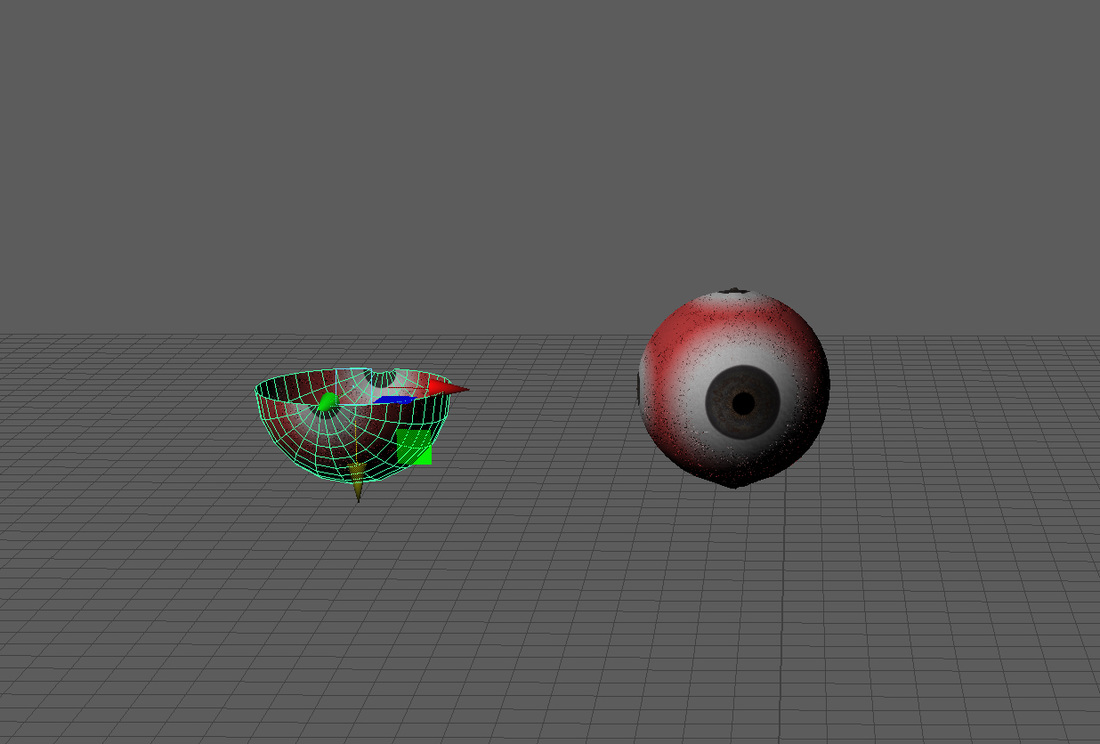
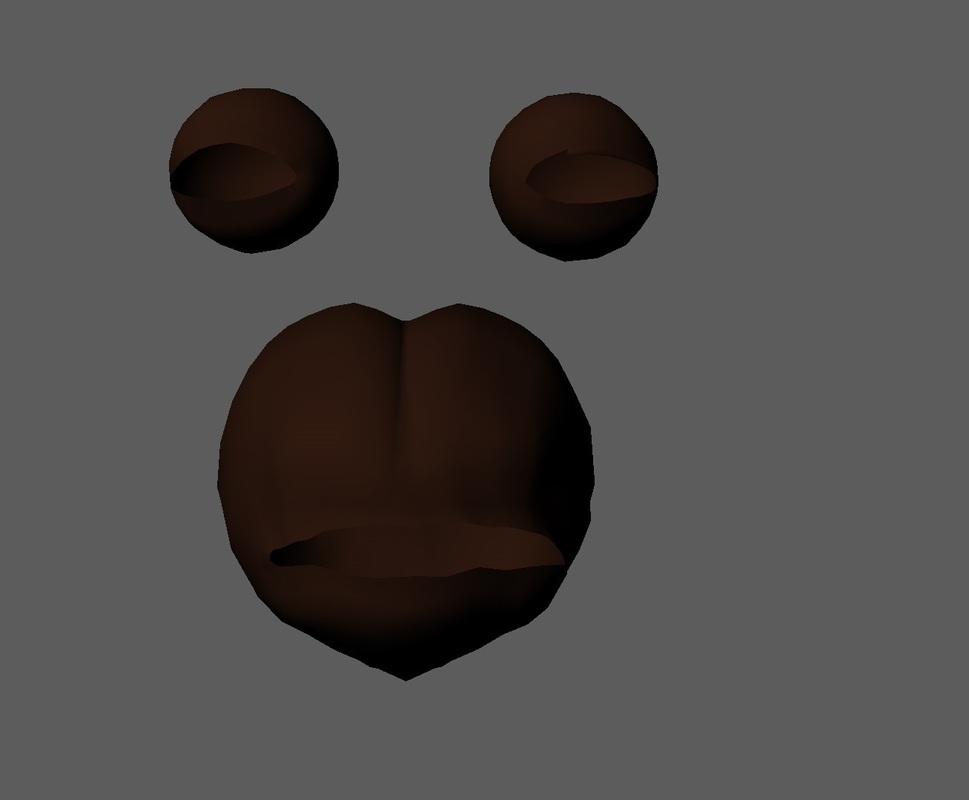
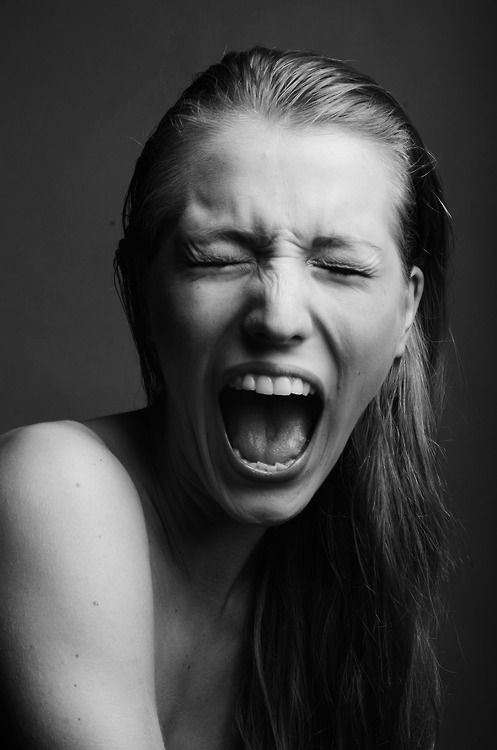
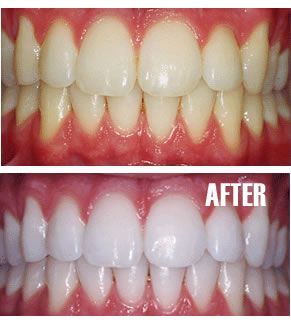
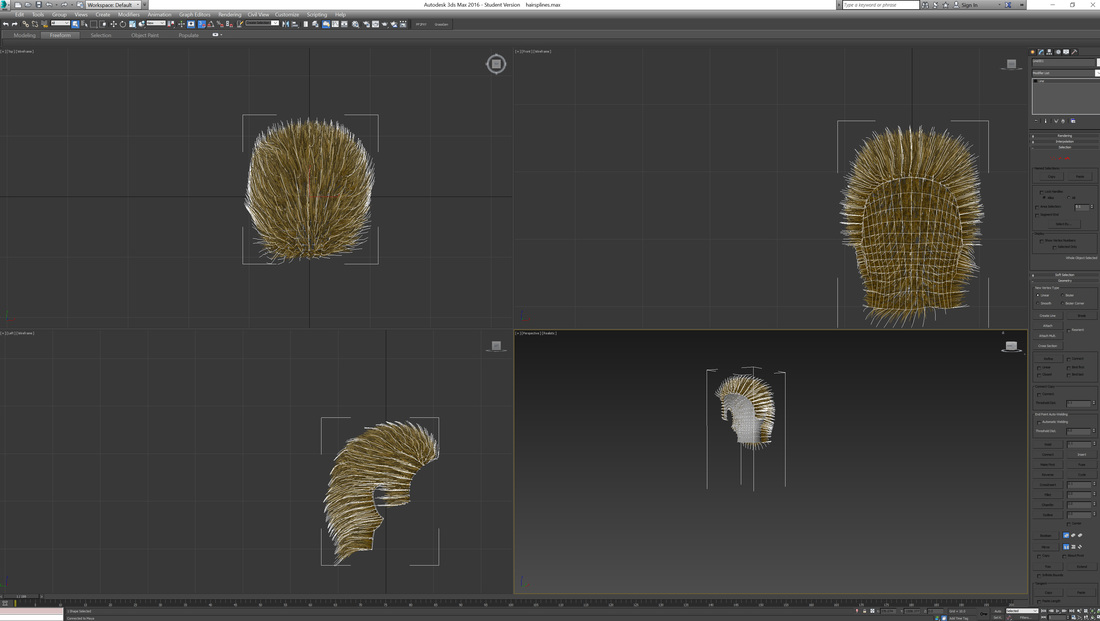
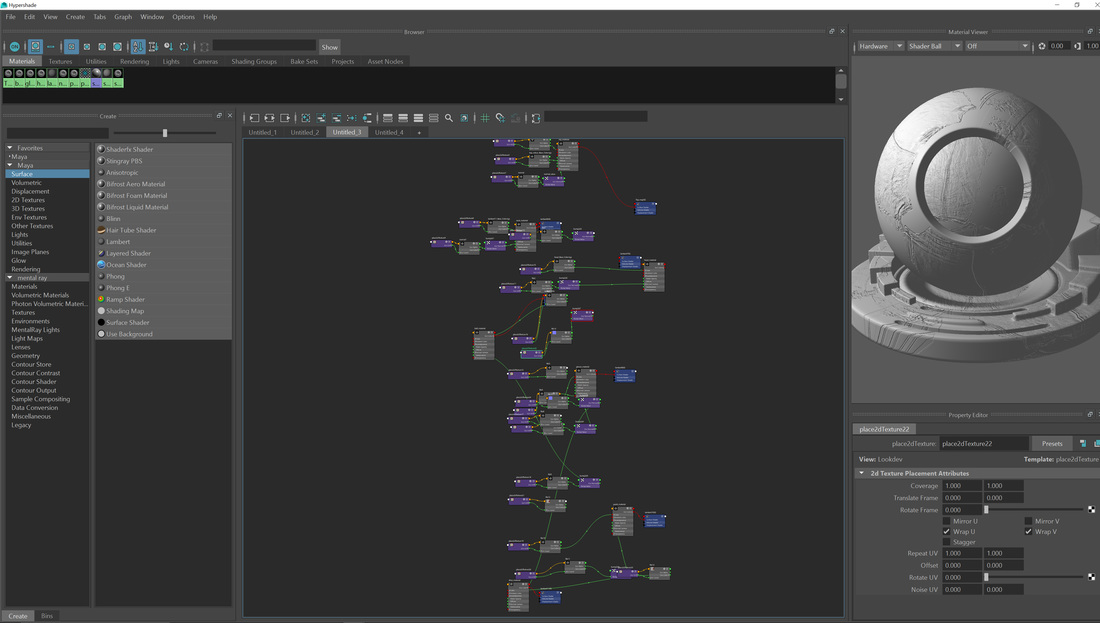
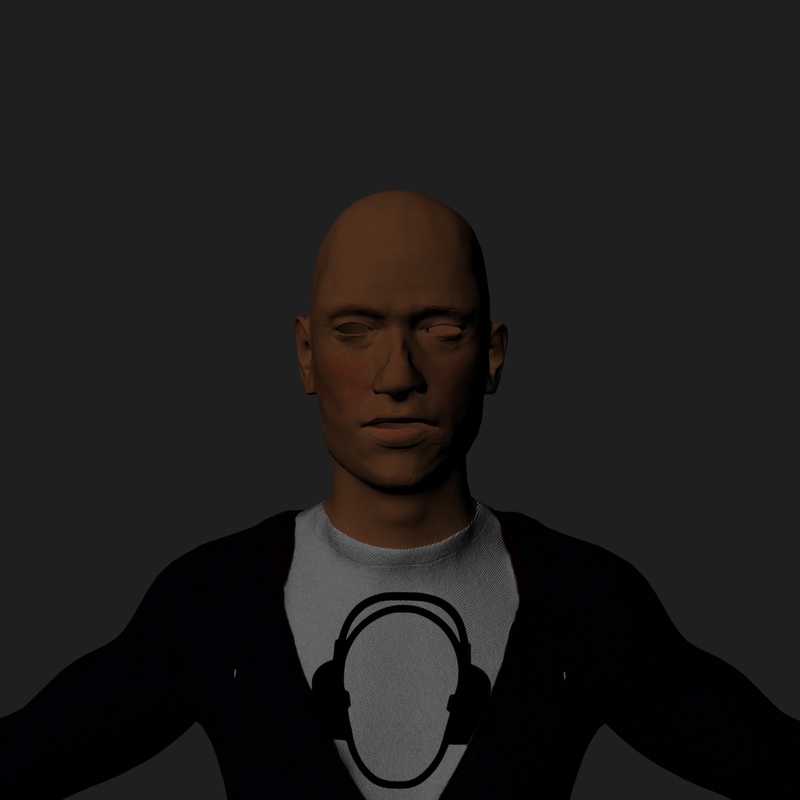
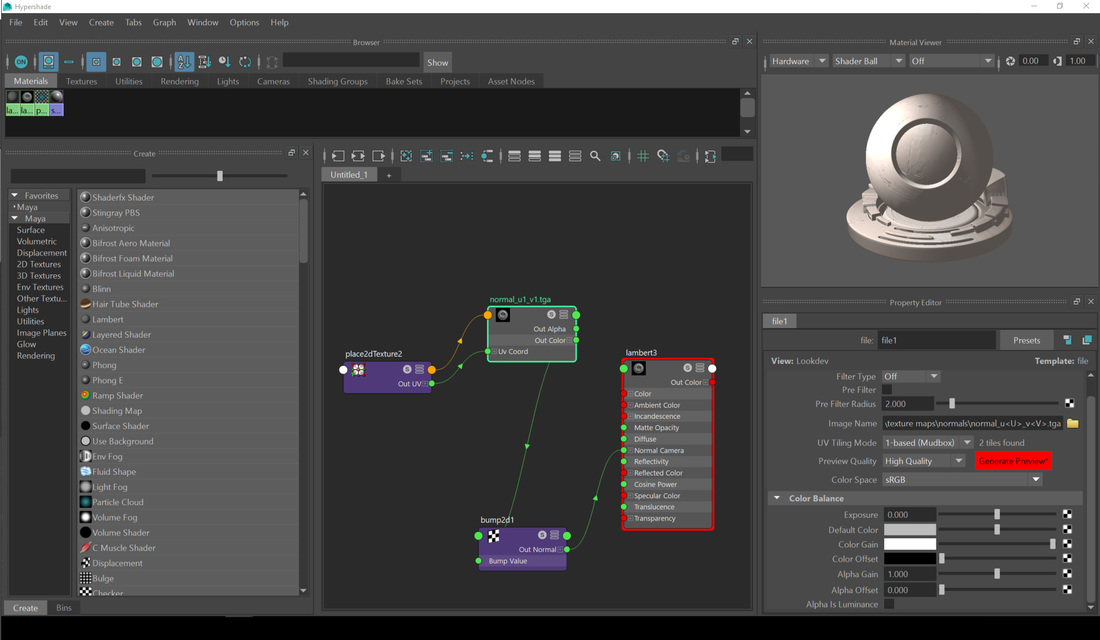
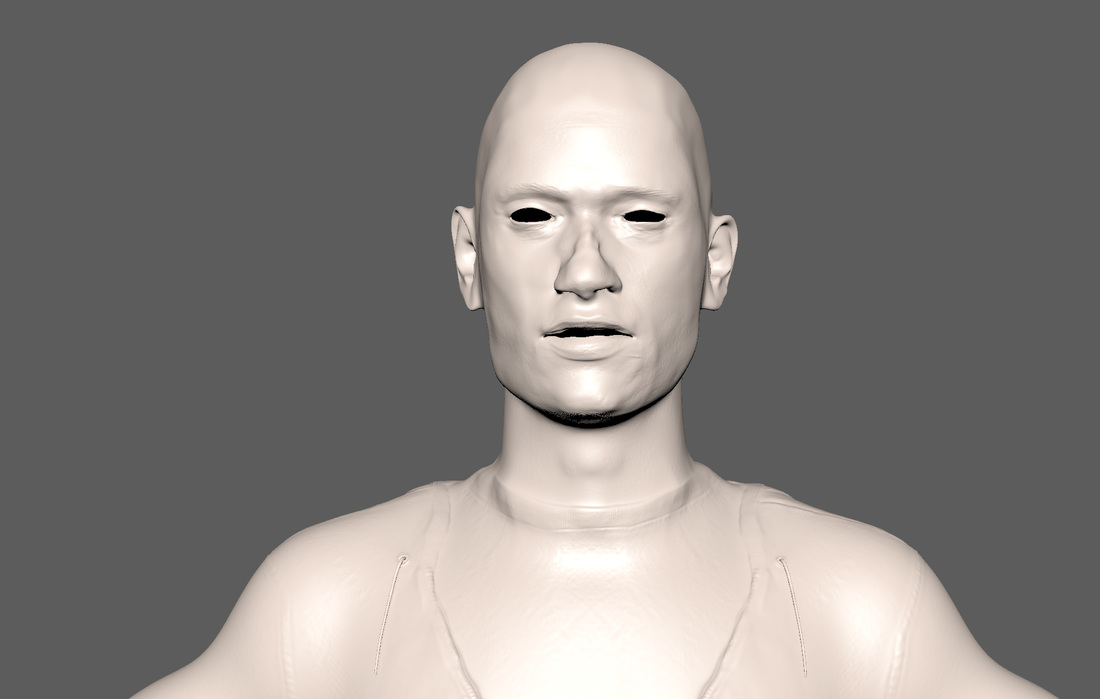
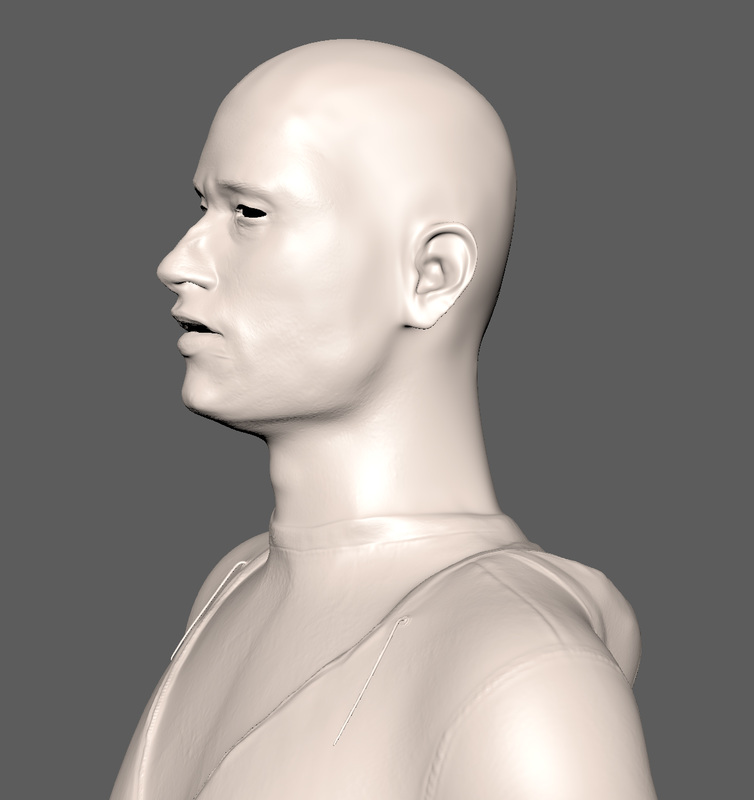
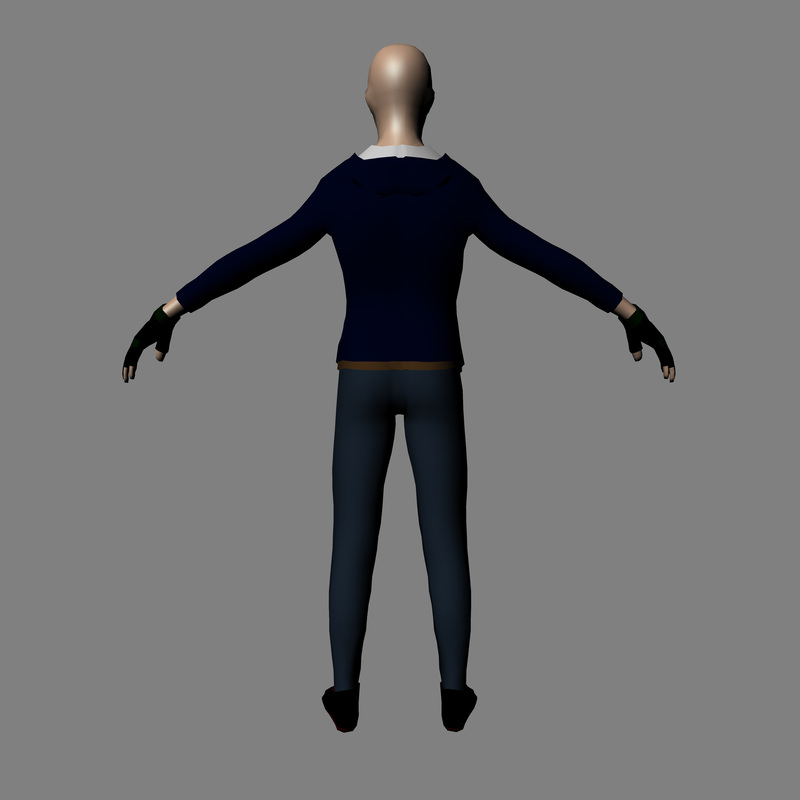
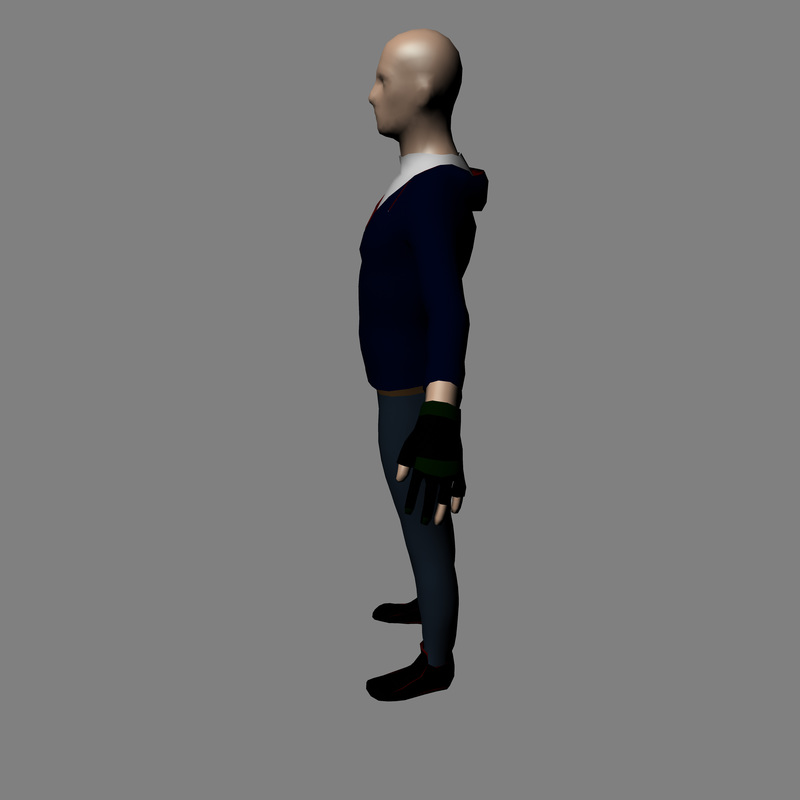
After I created all the textures for the character I needed to add some finishing touches before I could import into unreal to do a lookdev (look development), I started off by extruding from the edges that created the lips to make the inside of the mouth, I then used the smooth tool to remove any unnecessary sharp edges and bumps, for the eyes I used a spare cut out some of the faces and combined and targeted weld it to the eye holes. For the eyes, I created two spheres and cut them in half as the backside would not be seen and then I applied a diffuse and normal map (which I made using substance from a premade smart material) to them and placed them into position inside the head I found some reference on pintrest so I could get the mouth and teeth as realistic as possible. For the mouth I created an upper and lower jaw with teeth and a tongue, which is just a simple pipe that being cut in half of the jaw and extruded to be made longer and the teeth are cubes that I smoothed to make more round and placed each one into its own position. The tongue is the same token as the jaw by cutting a pipe in half and extruding and then bridging the gap in between. 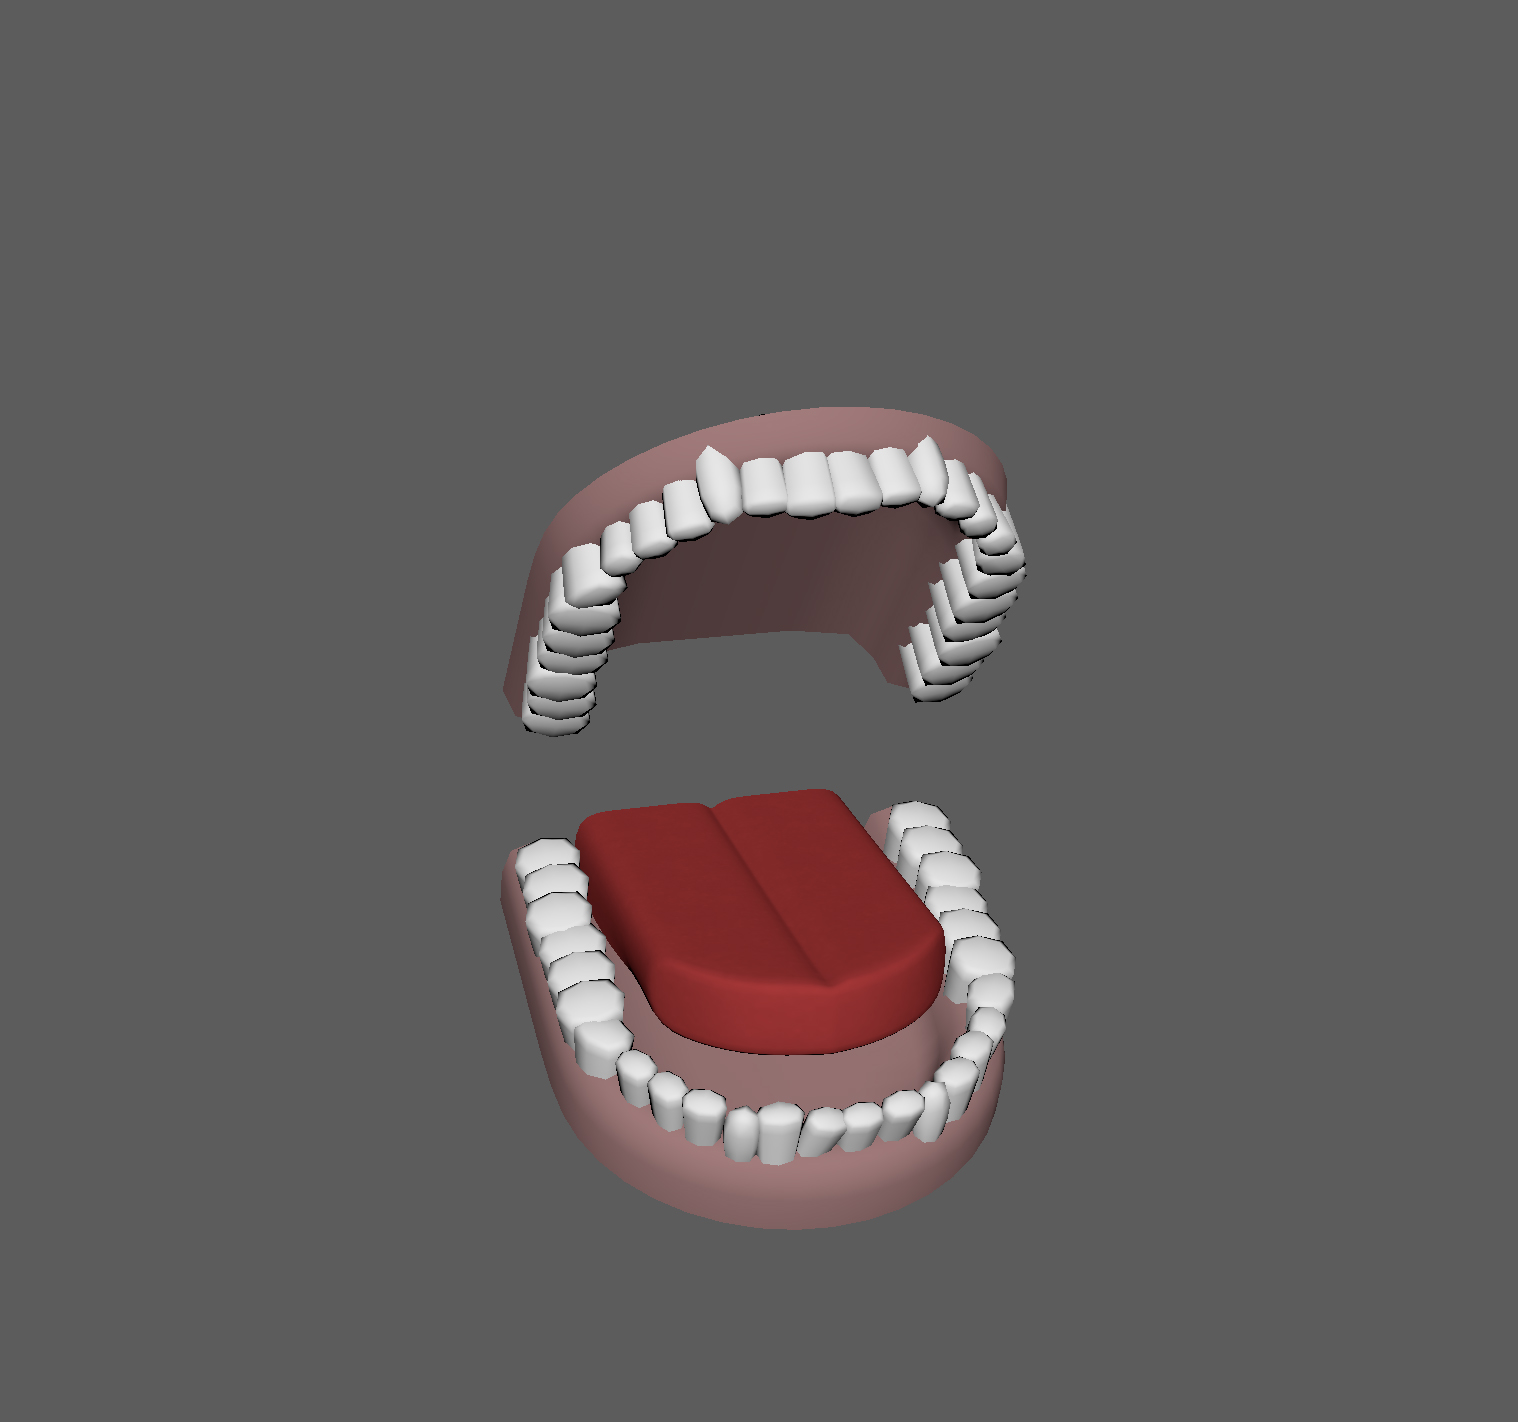 The eye lashes I created individual ones by using a cube and extruding 3 - 4 times to make a curve and placed each one into position For the hair I decided to use a plugin for unreal engine called neofur which lets you create hair like material for your assets, I started of by colour mapping the areas I wanted the hair to be, which were, the head, eyebrows and a beard. The beard and eyebrows can use the default settings of the material as I plan to keep this short. For the head, I wanted some sort of style so I exported the area of the head, I plan on creating hair for into 3D Max and click the 'hair and fur' and then I placed them into position for a reference image I found and turned them into splines which then I could export into unreal and use as guidelines for my hair material to follow lines for my hair material to follow I broke my character down into colour id by using the UV and giving that area its own material, areas like the fingers and wrist that share its UV I selected those faces and gave them its own material took. The idea of colour id is so i can keep all the areas that share the same material so i chose colours for the following: skin: pale pink T-shirt: White Top outside : dark blue Top Inside: Red Zip: Gold Gloves: Black Gloves Trim: Green Belt: Brown Belt Buckle: silver Jeans: Light blue Shoes: purple  Then I took my character into substance painter which is a UV painter software. because I imported the model with different colour ids, substance painter turned them in to texture sets and I then baked the normal maps from Mudbox onto my character and then added basic materials to each of the texture sets and then added new layers to add details such as skin blemishes, buttons, logos and seams. Once I was complete I exported different types of texture maps these were: the base colour (diffuse) map, height, map, normal map, ambient occlusion map, metallic map and the roughness map. For the moment I only plan on using the diffuse map and the new new normal maps in maya. I went back to Maya and selected each material I applied to my mesh and started to edit the material in 'hypershade' I clicked on 'colour' and pointed this to my diffuse maps and then I pointed the bump section of the material to the new normal maps, I repeated this process for every material I assigned to my character, making sure each material was named accordingly. After I sorted out all the materials I did some quick renders too low for any deformations or any other problems. Now that I have got the textures sorted I can start work on the eyes and mouth and look at putting hair on my character and then look at doing a few lookdev (look development) renders. After I finished my sculpting on my character I lowered the subdivision to level 1 and then I exported the current level mesh to Maya as I wanted this to be my low poly model to work off. I went back into Mudbox and selected the model and went to 'UV and maps' tab and selected in the menu 'extract texture map' and then I a new window appeared and selected 'normal map'
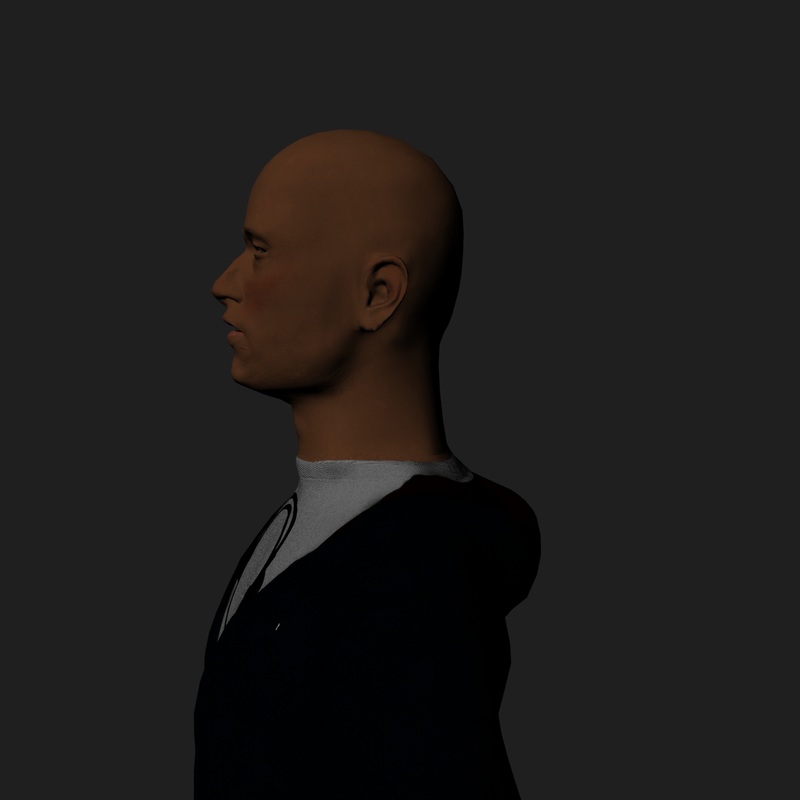
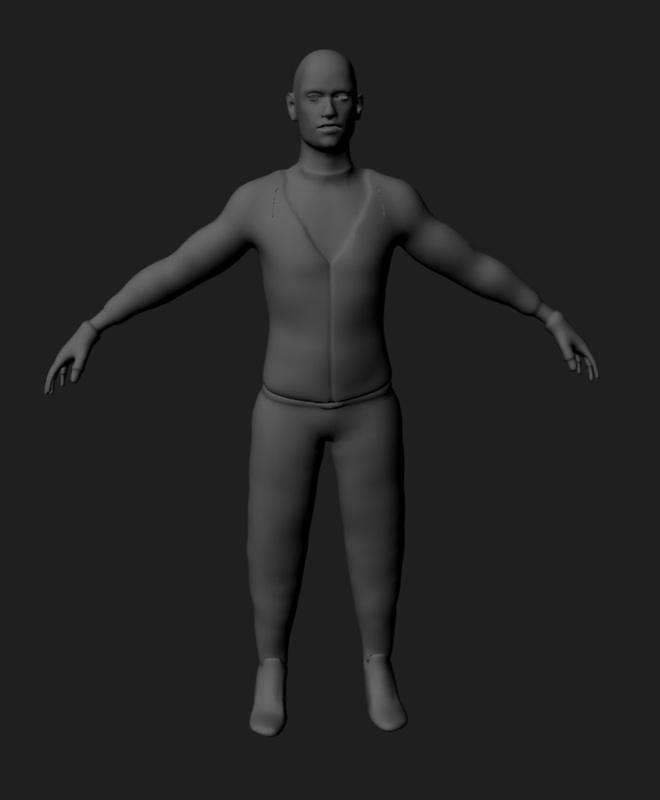
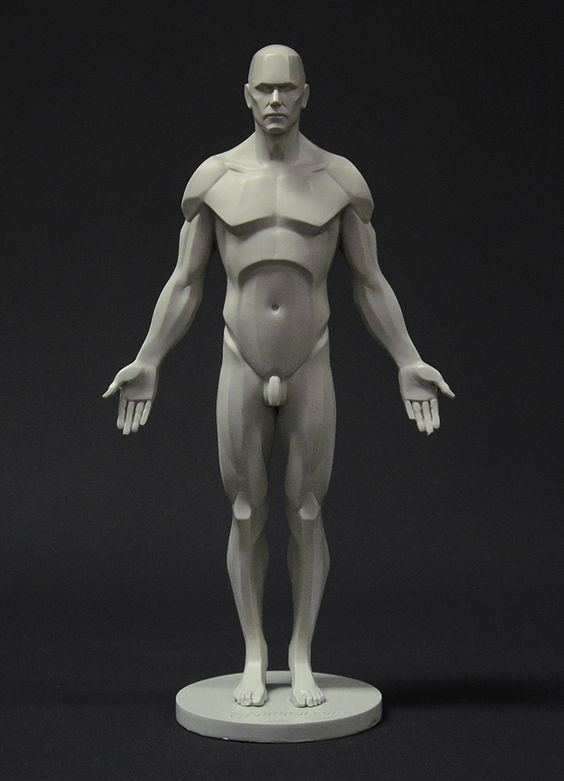
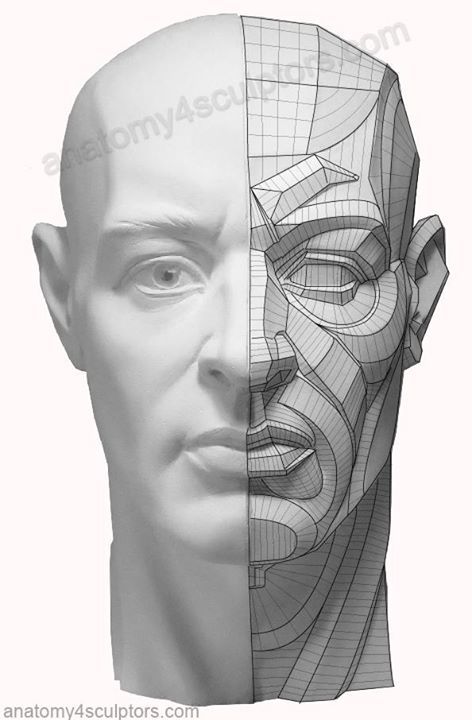
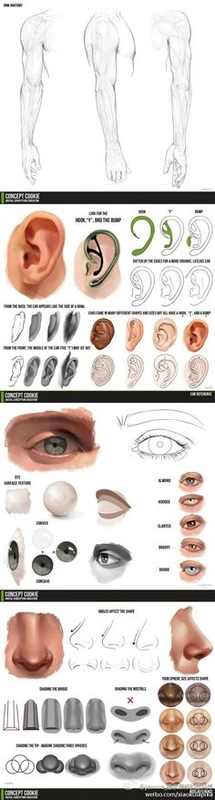
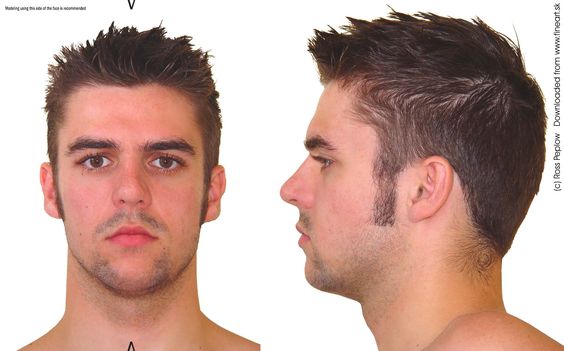
I created a basic lambert material in Maya and applied it to my mesh, I opened up the 'hypershader' selected my lambert material and where it said 'bump map' I applied the file that was created by Mudbox here and made sure I changed the 'bump' to tangent space normals' so it will display correctly on my mesh as I exported it an tangent space text. Changed my viewport render to high quality and was able to see my normal projected onto my low poly mesh. After I made the block out of my character I sent it to Mudbox to be turned into a high polygon model so that I can add more shape and fine detail to the model of the character. I got some reference images for sculptures that help you sculpt the basic definition and a planar of the human body from 3Dtotal that shows you the muscle and bone positions and I also used drawing references of mouths and noses along with stock photos of people. For the head I started off on a low subdivision level and used the 'grab' tool to get the basic shapes and then used the 'wax' tool to build up areas that needed building up. I sent the character back to Maya and removed the faces where the eyes were going to go and the gap between the lips and then used the soft select to reposition the vertex so the lips and eyes edges were inside the head. Then I used the soft select to give the lips and eyes more shape by moving the verts around and then using the 'smooth/relax' tool to smooth out the lips and eyes. Then I sent back to Mudbox increased the subdivision layers, built up around the eye and nose with the 'wax' tool and used the 'smooth' tool to make it smooth again and used the 'erase' tool with a low strength setting to add light lines on the nose to cheek. After that I used a vector displacement map for the ears, then I used displacement maps for detailed textures on the face e.g. skin, wrinkles, lips and eyebrows. Once I had my shape I increased the subdivision levels and used the wax tool to build up the edges and finer detailed areas and used the 'sculpt' tool with displacement maps to add fine textured detail. After I finished the head as I worked my way down to the body, I found some reference images to guide me when sculpting the cloths After I completed the head, I moved onto the body, all I did with the body was used the 'bulge' tool to add muscle definition in the arms and make the legs more bulky. then I used the 'wax' tool the define the edges and add volume so areas that needed it and then used to 'smooth' tool after that smooth the wax out. Then I increased the sub-divisional level and added fine texture details using displacement maps to add seams, pockets, zips and fabric details. For the heads and feet I used the same process as I did for the body, built up the edges with the 'wax' tool and smoothed it out with the smooth tool, increased the sub-divisional levels and added finer details the 'wax' tool and then used displacement maps and sculpt on the mesh to add texture details for seams, leather and fabric. Uv maps Research UVs are two-dimensional texture coordinates that use the vertex information from the model geometry. UVs are important to the model because it tells the model how to apply the texture onto the surface. The XYZ axis are already used in the 3D space, we have to use U and V for the axis in the 2D space. So when these two are applied together U and V axis of the 2D texture it projects its coordinates onto the 3D models axis of XYZ. In the image below you can see 10 vertex selected in the model and in the UV map you can see where it corresponds to the 2D texture  The UV map needs to unfold and flattened out and have no overlapping UV coordinates to stop texture deformations. Also, using a checked texture is ideal so that you can see where the texture would be stretched and if it has even squares. As shown in the image below, is bad UVs, stretched and distorted and not perfect squares  In the image show how correct UV unfolding looks like as there is no stretching or distorting. This is shown by even squares throughout the model 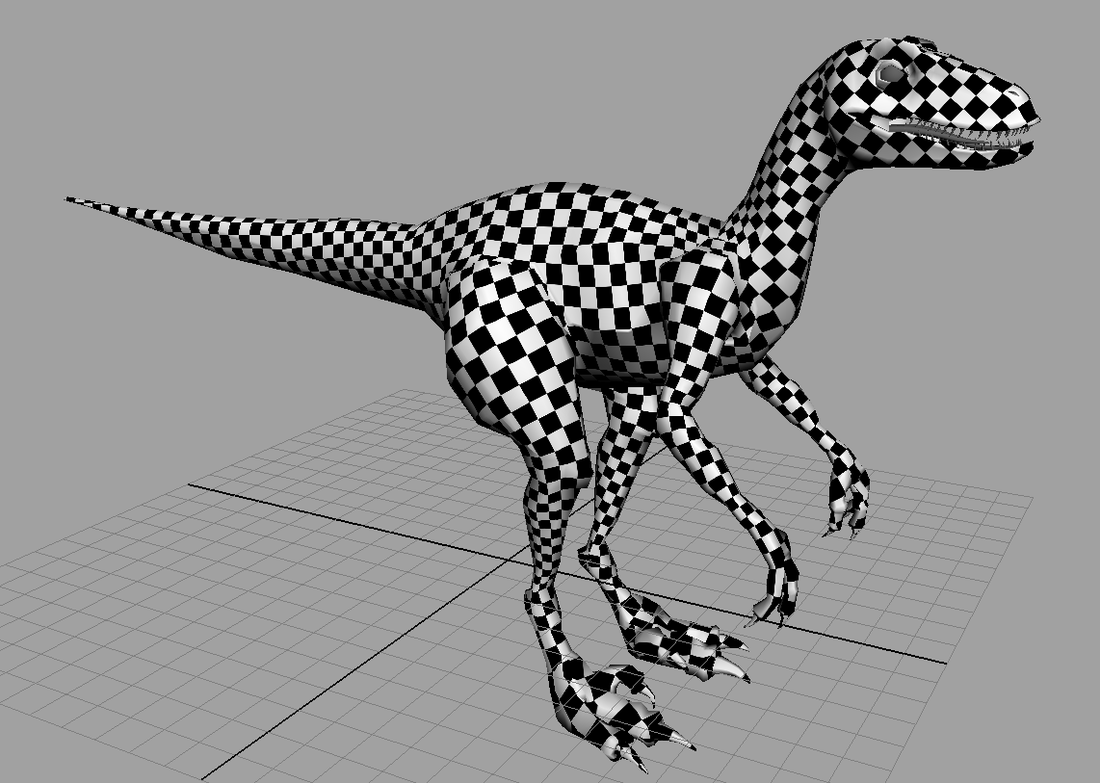 References https://biocinematics.blogspot.co.uk/2010_04_01_archive.html http://blog.digitaltutors.com/understanding-uvs-love-them-or-hate-them-theyre-essential-to-know/ As I wasn't 100% sure how to UV a character I did some research on the best way to UV a character and where to hide the seam lines. I found this video very helpful: In the video it shows you how doing it a manual way which takes time and a quick way using plugins. I decided I wanted to follow the manual way as I thought it would help me in the long run and make UV mapping a lot easier in the future. For my character I decided to use two UV maps, One for the head so I can get more detail onto the face when it comes to texturing the character and one for the rest of the body. 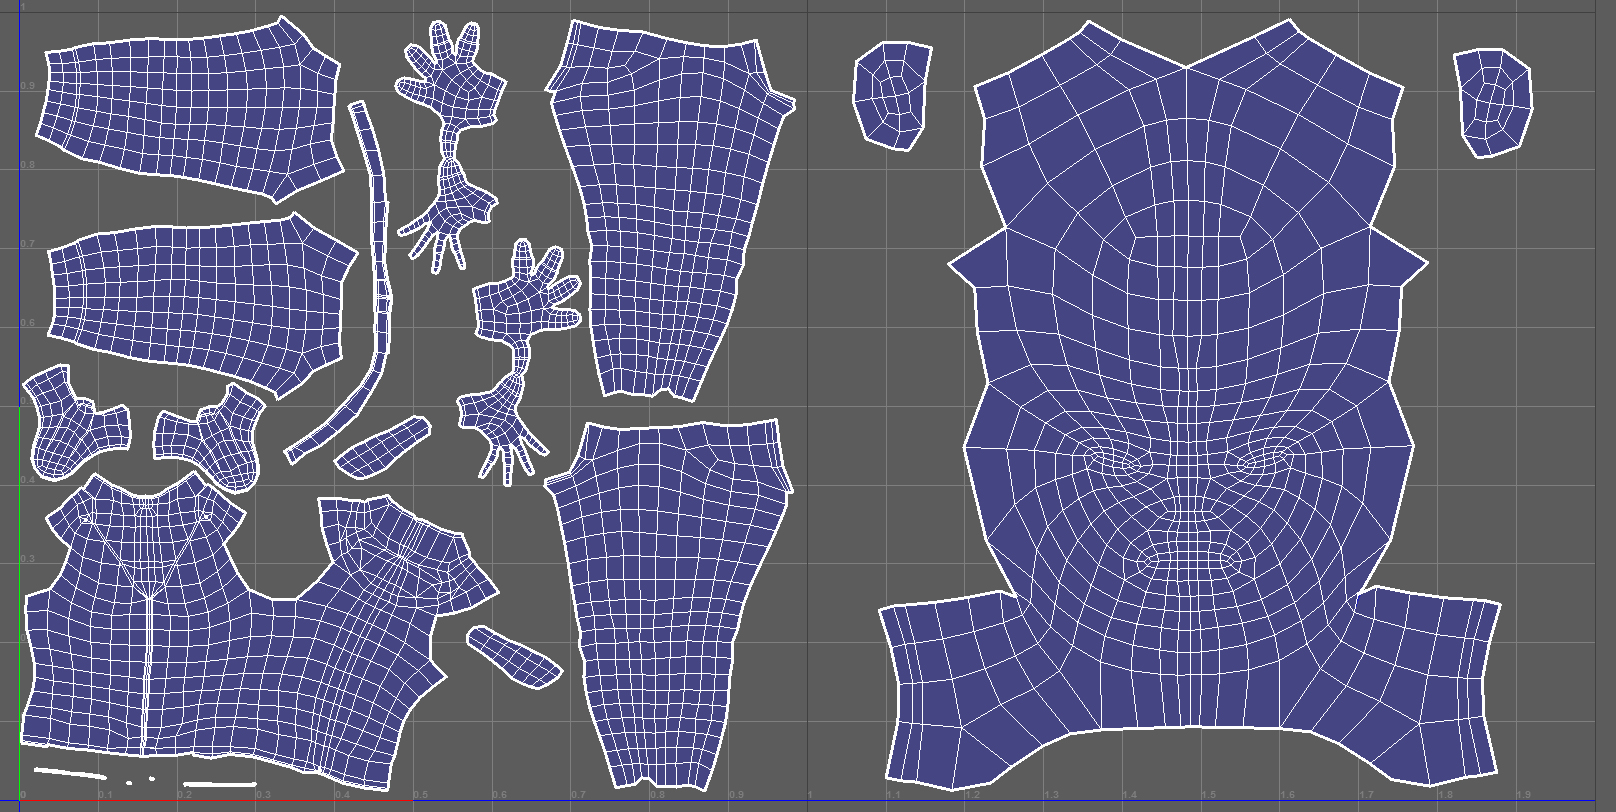 After I did the UV I put a chequer tiled overlay on my character because if I use the UV distortion Maya will highlight the body in red for distortion because the head has bigger UV even know there is no distortion of the body. With the chequer overlay I can make sure all the squares lined up and flowed in the same direction and the body had the same size squares. After I created the Block out for my character I wanted to make sure the geometry of the mesh was still quads as I plan on not retopologizeing my mesh. With a solid base mesh and UV I can avoid doing this, as this will save me time in the long run as I can use my Block out mesh and subdivided on this to make the model have more details and then add a high to low poly bake to add finer details to the model. I started off by reading a chapter in the book: Beginner's guide to character creation in Maya by Jahirul Amin about good and bad geometry is in the mesh. My goal is to be able to subdivide my model so I want to stay away from the following: N-gons and triangles.  N-gons are shapes with more than four edges, these cannot be subdivided and would break the model when tried to be generated. N-Gons are also bad for games as well when put into a game engine as the engine tries to process the n-gon and puts more strain onto the graphics card and computer. The engine turns a quad into two triangles that it can render a N-gon will require more tingles and the more triangles the more time it takes for the engine to render causing a bottle neck known as lag or fps drops. Triangles are bad when trying to subdivide as it would not be able to subdivide the triangle and causes more errors. If I don't check my mesh for these latter down the line I will encounter deformations with my model, either at: subdividing, high to low poly backing, rigging and animation and rendering the model. How I checked for these errors was using a clean up tool inside of Maya this is extremely helpful for finding the N-gons 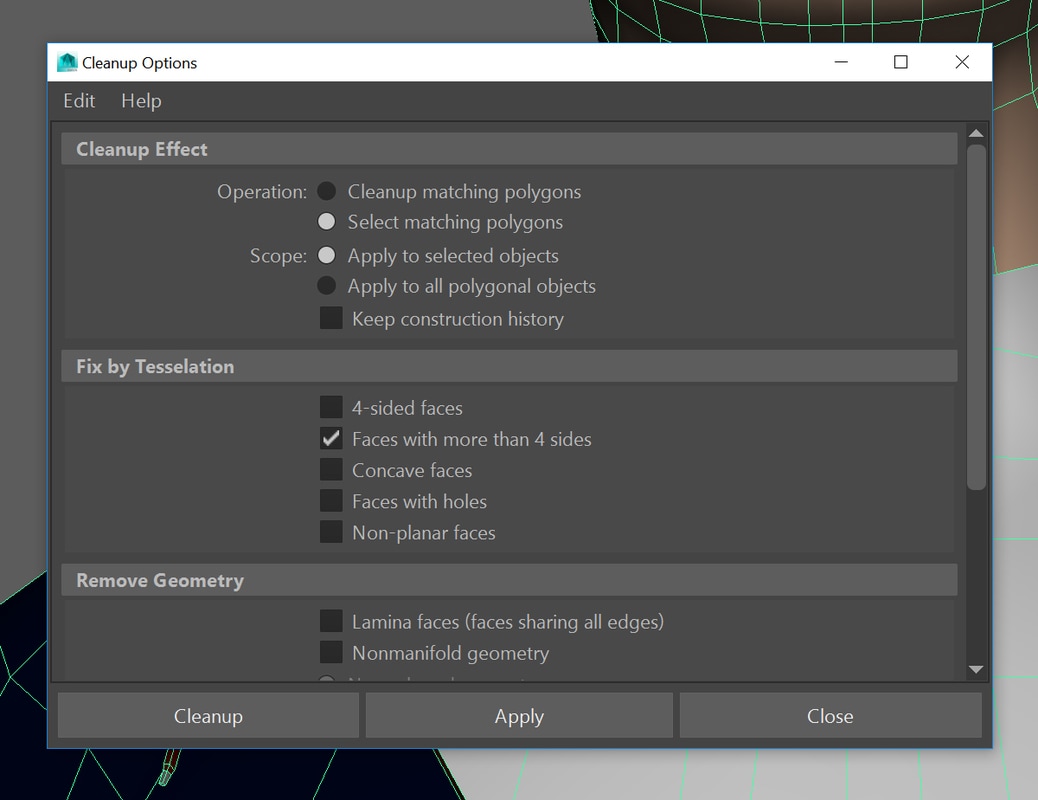 I went to Mesh > cleanup and I selected the options 'select matching polygons' and 'faces with more than 4 sides'. what this does is highlight any faces with more than four edges. 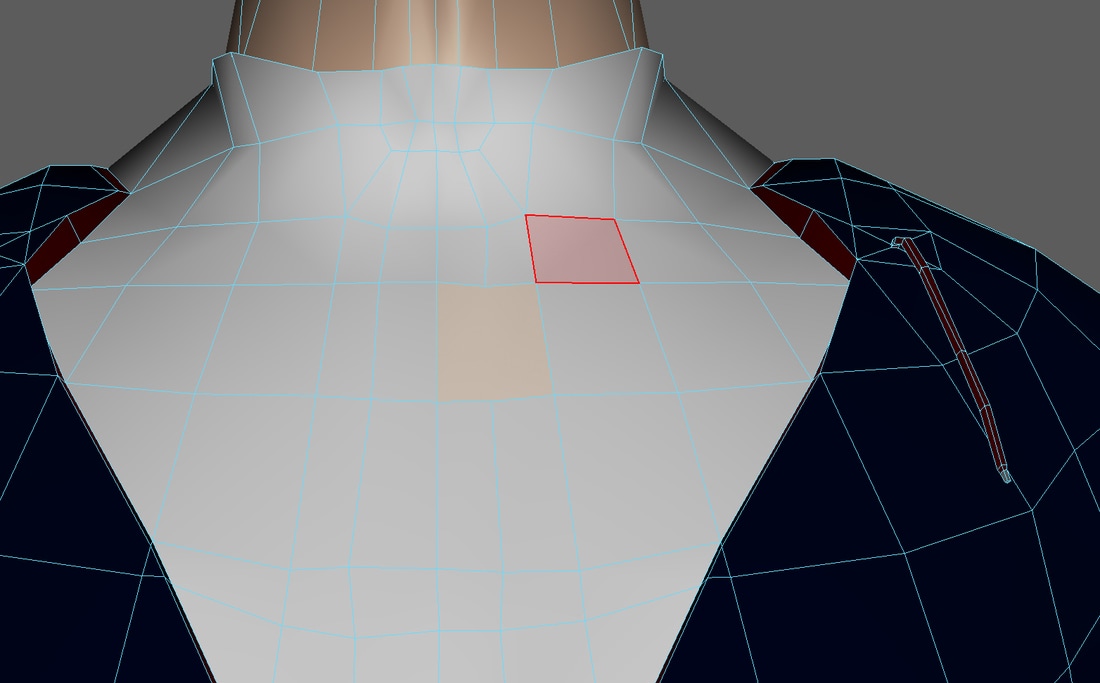 As you can see it highlighted areas where there are more than 4 sides. I fixed the issues that were highlighted.  I then ran the clean up again and because I had no n-gons it dissected the model. For triangles i can use the same process but by using a different option in the clean up. 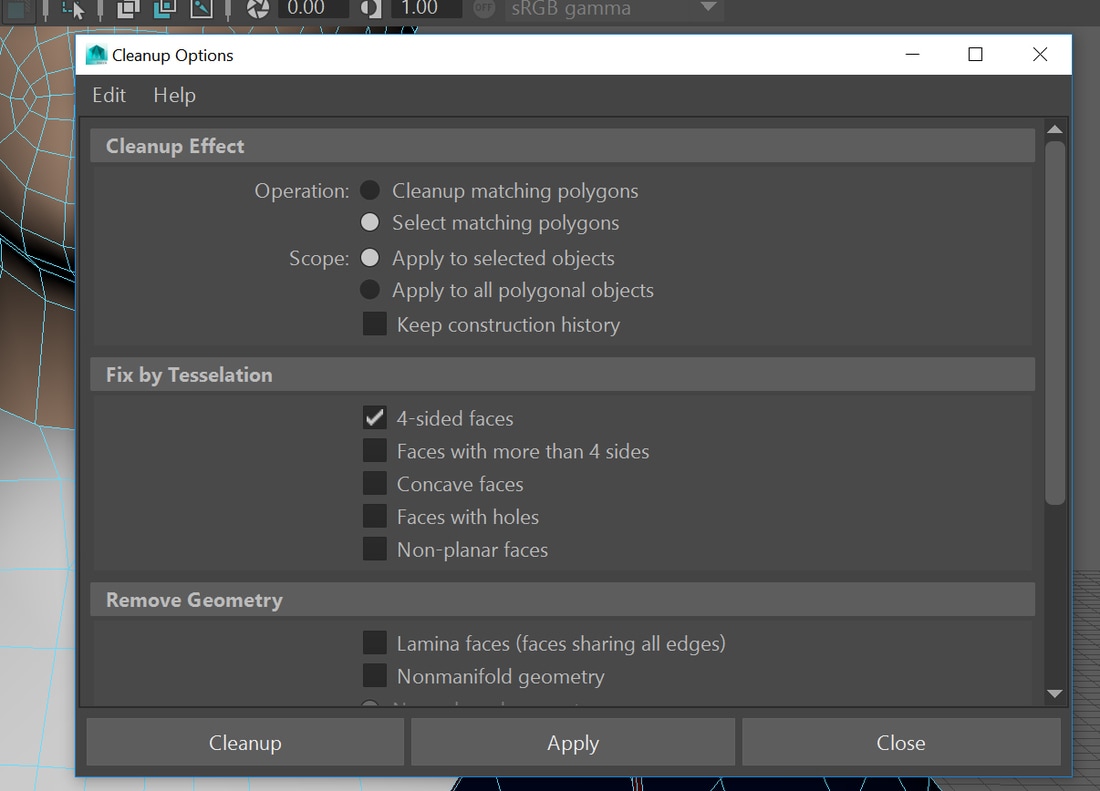 I deselected the other checked options and checked the the option '4-sides faces' and ran the clean up 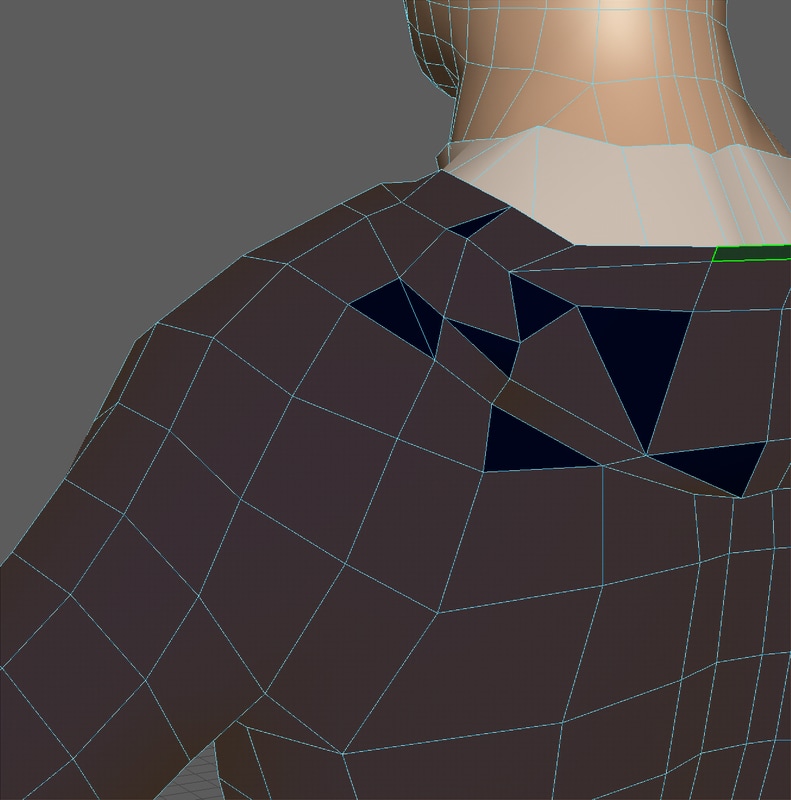 Once I ran the clean up it highlight all the 4 sides shapes and I could see where the triangles are that needed to be fixed 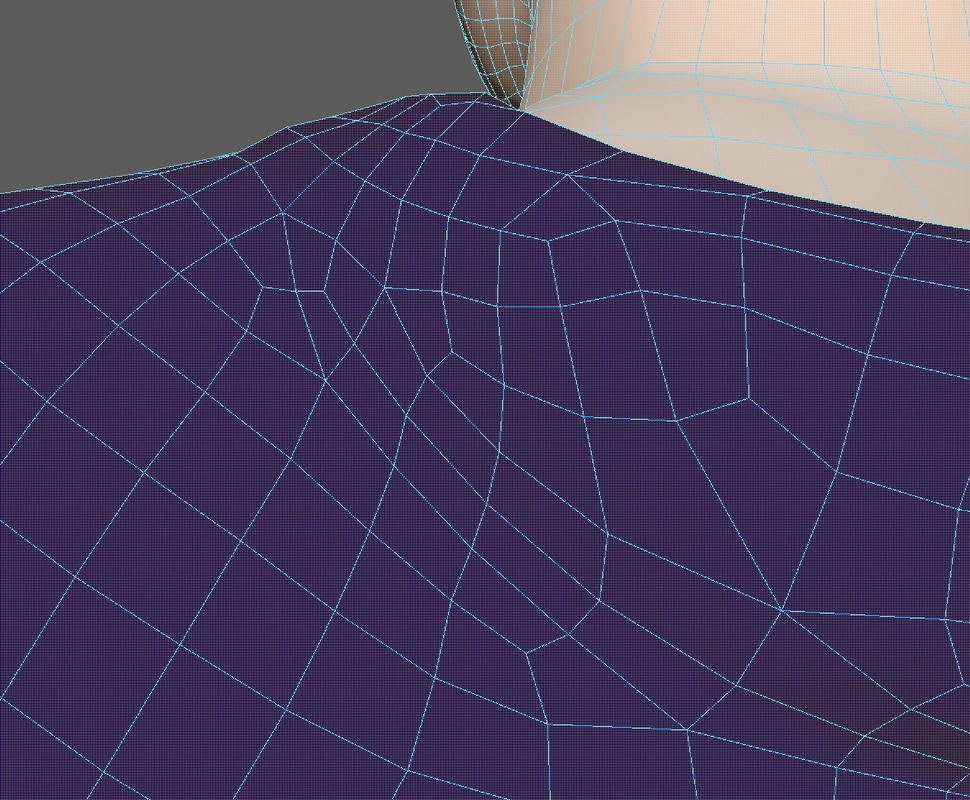 After I fixed the triangles I ran the clean up again and it highlighted all my faces. I then did one more check and went to mesh > smooth and subdivided the model to see if it would subdivide correctly and it did as shown in the photo above.
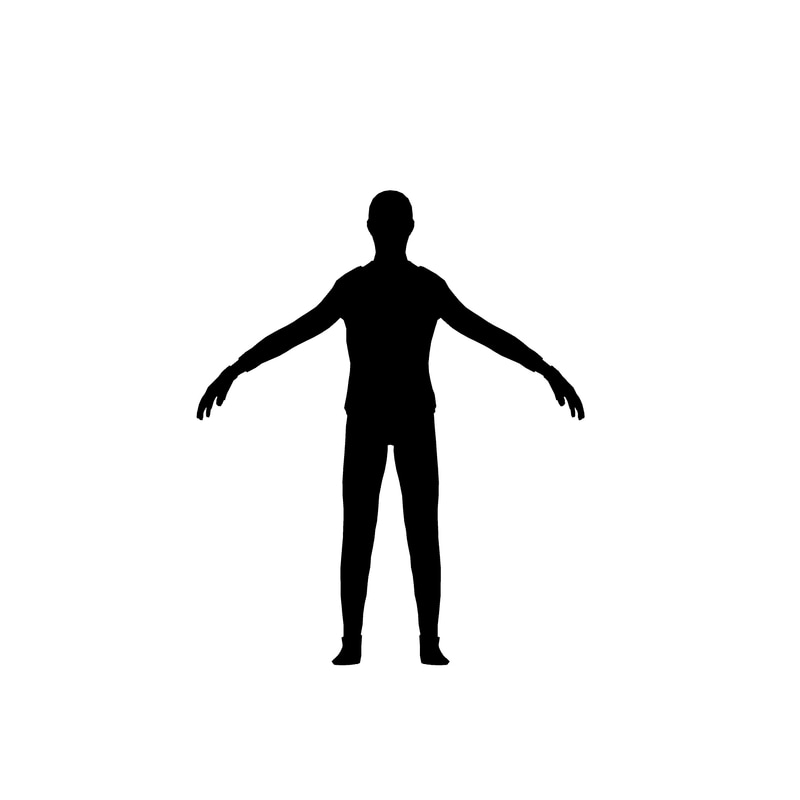
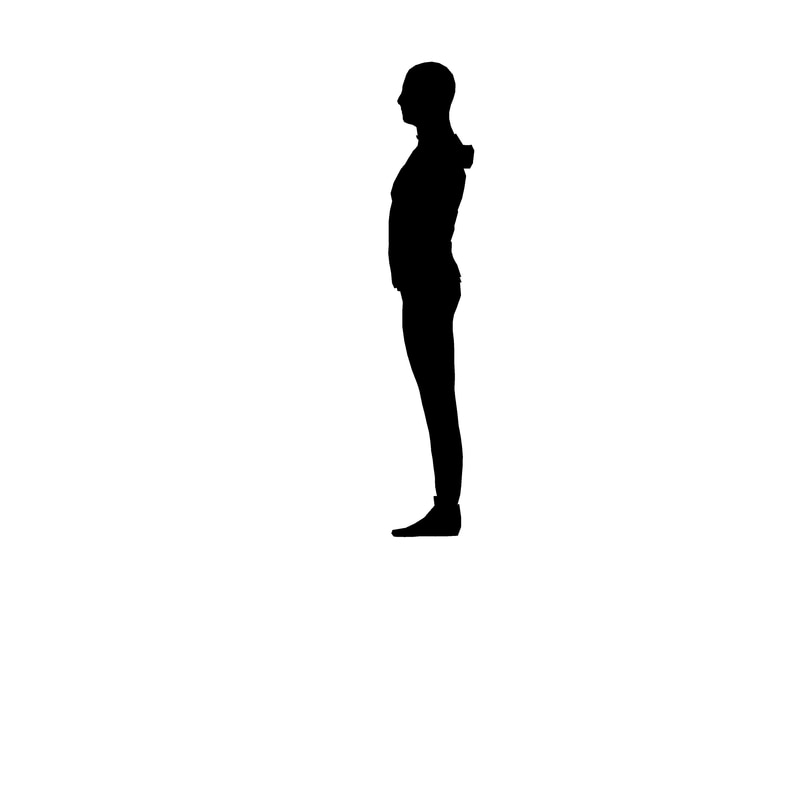
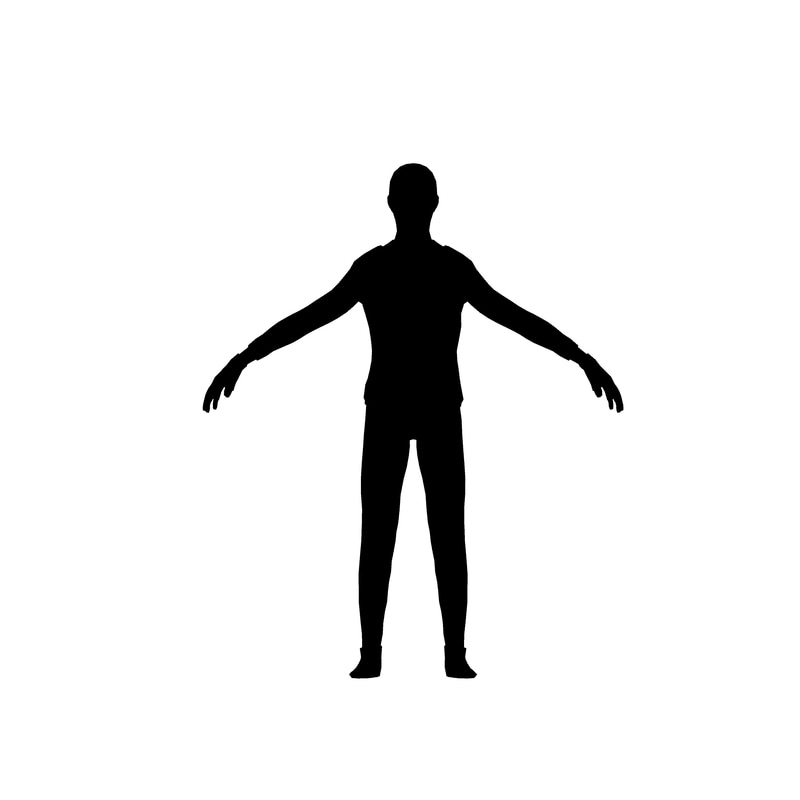
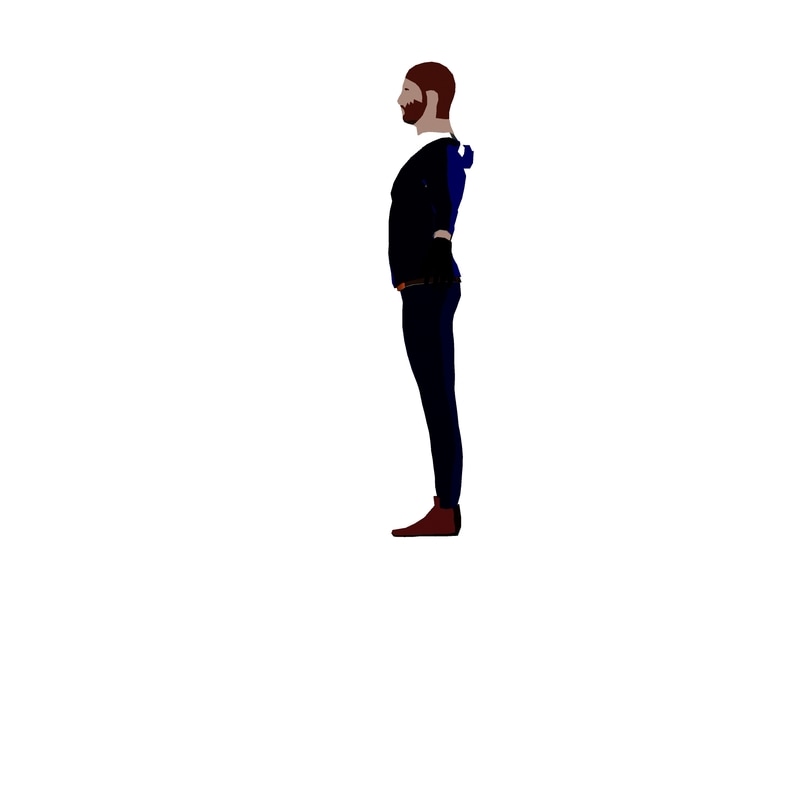
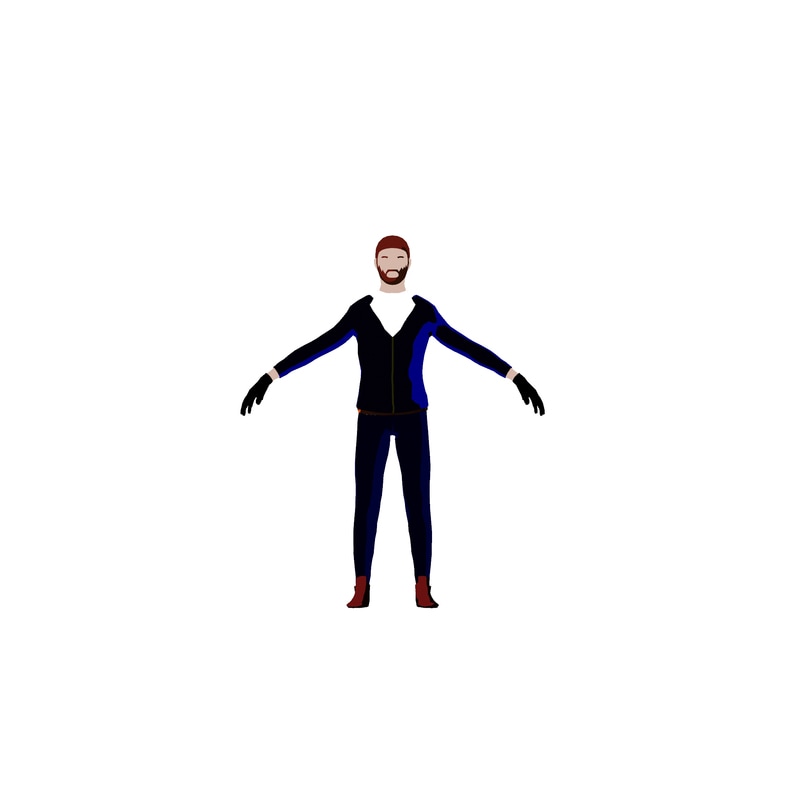
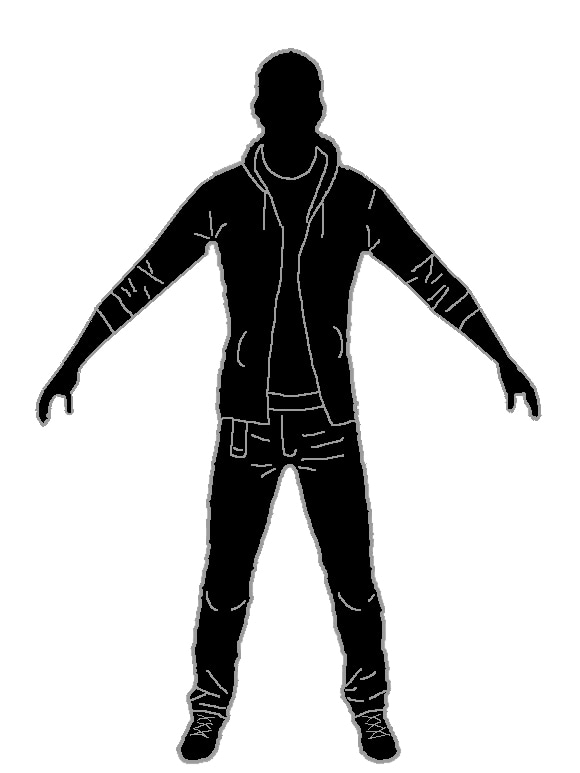
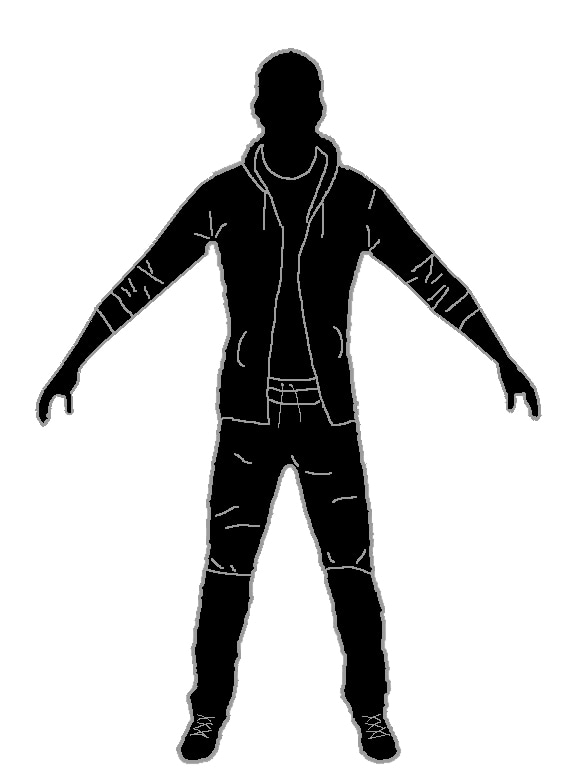
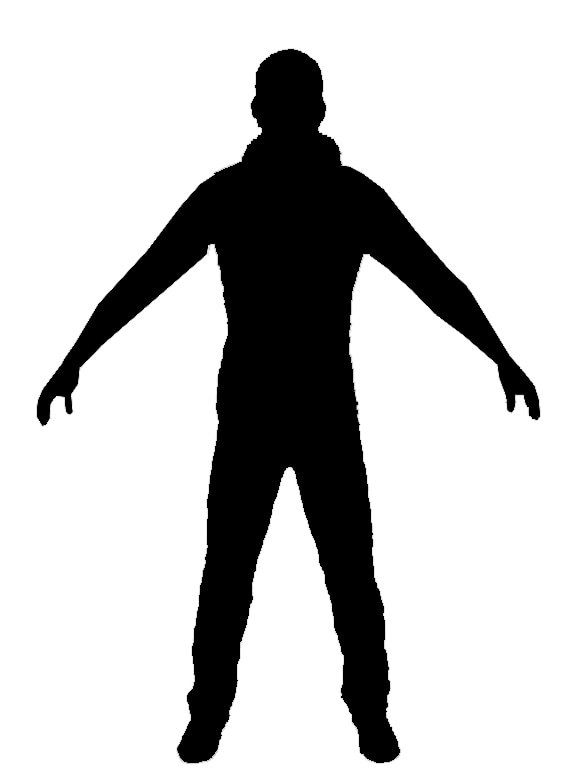
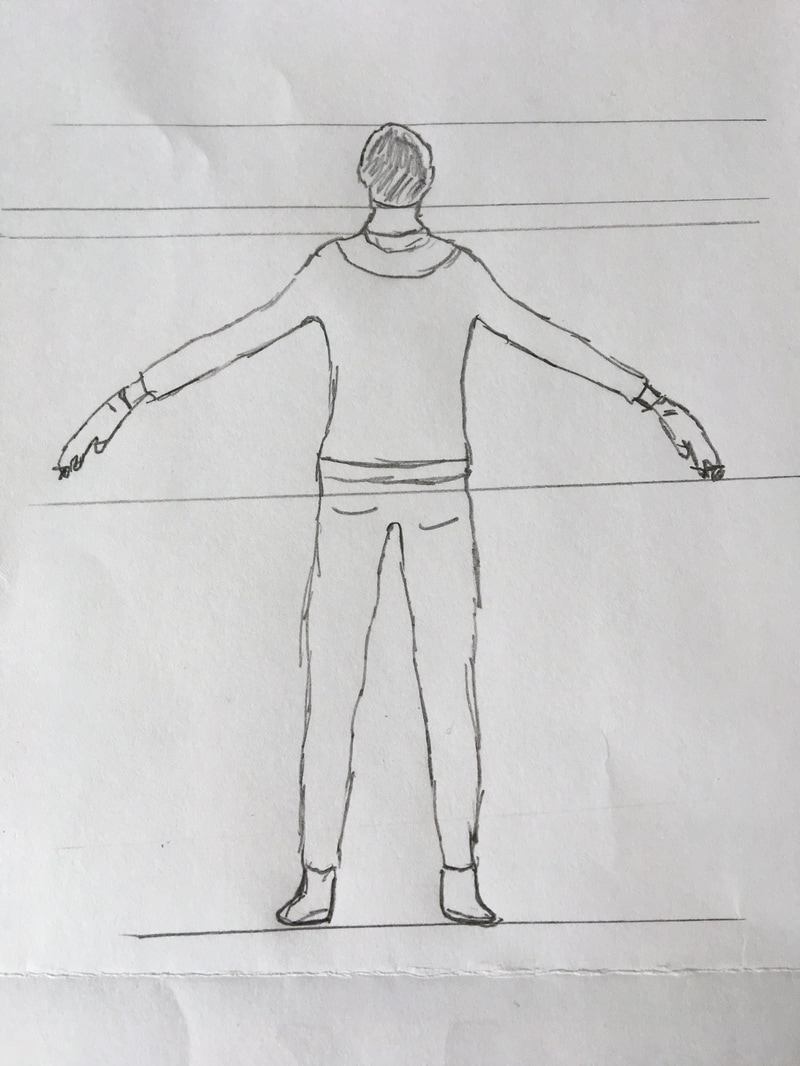
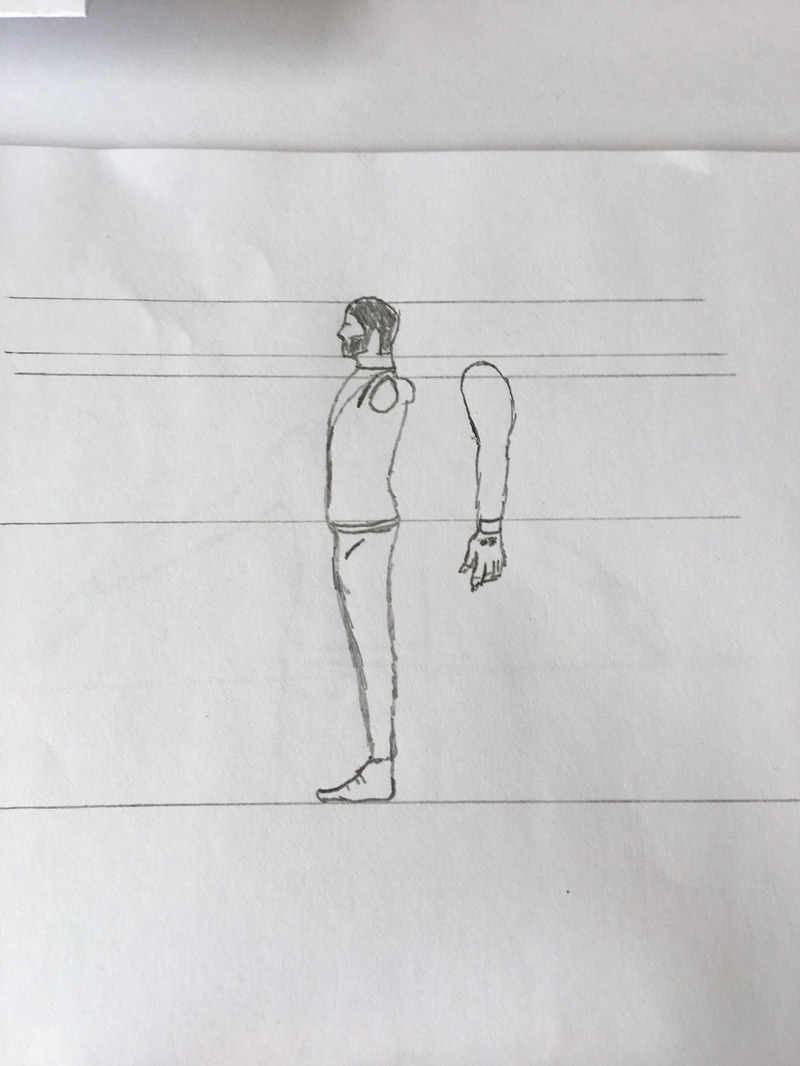
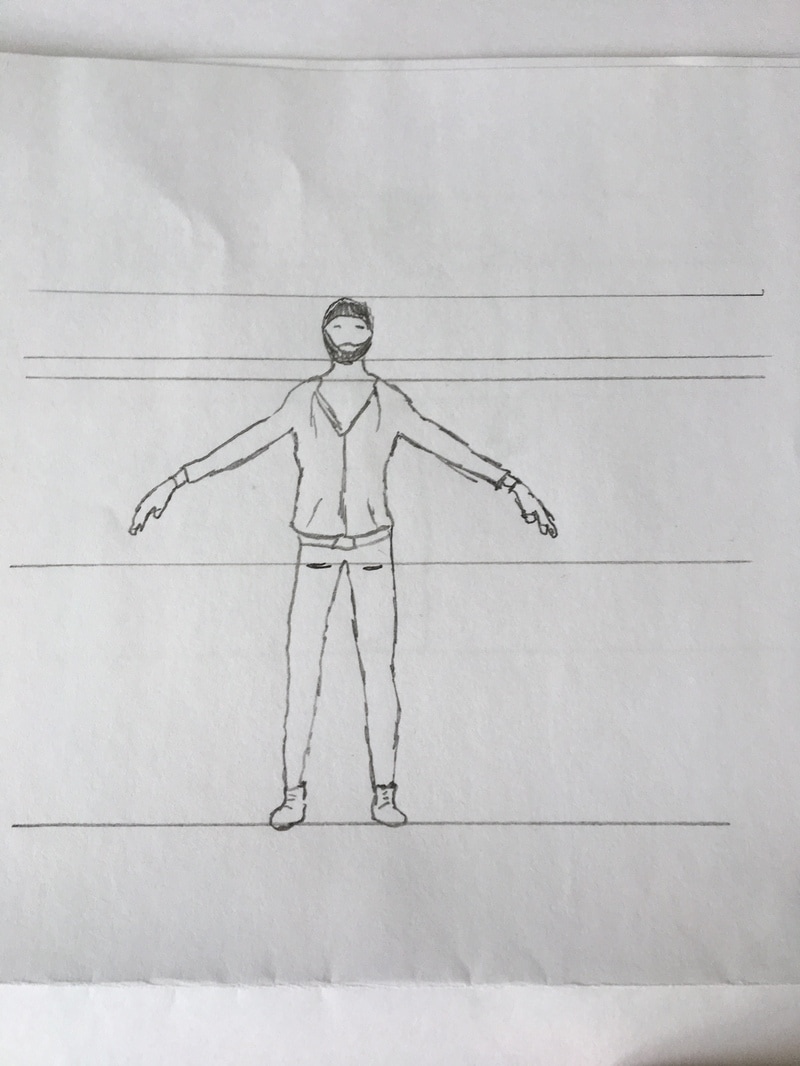
After I did all the research for my character Kobi, I wanted to do a simple Blockout of the outfit he would be wearing. What I did was use the template from Mudbox and move the arms so that they were more in a T-pose, after I did that I imported the edited template into Maya and started extruding on the template to make an outline of the items of cloths he would be wearing. After this is I added a little bit more of blocked out detail like the hood of the jacket and where the strings, zips and shoe laces would go, so when I take it back into Mudbox I have reference points of where to add these bits of detail. After I finished my Blockout I decided to apply simple lambert colours to the cloths so I could visually see how it would look and if I needed to rearrange any of the cloth outlines. I made character silhouettes to concept my character and to get an idea of how he will look and the type of cloths he will have. I started off by turning a generic photo into a black silhouette, then i created an grey outline that went around the silhouette and drew in more lines to give the silhouette finer details like clothes. After I did the outline I added block colouring and then added highlights and shadows to add more depth to the silhouettes. The silhouettes are my second attempted at making concept art for this character, i decided to do a new one with a new style, without using lines and just use colours to determinant shapes and edges. I Didn't think my old concept art work wasn't up to standards and looked at other ways and styles of producing concept artwork. I also decided not to give the character a face as i wanted it not to have a personality and use the concept artwork just for the body shape and clothes. These below are my original concept art, which i used to get the style of clothes i wanted and tried out different colour styles. Afterr that i added the final colour image to my concept drawings. 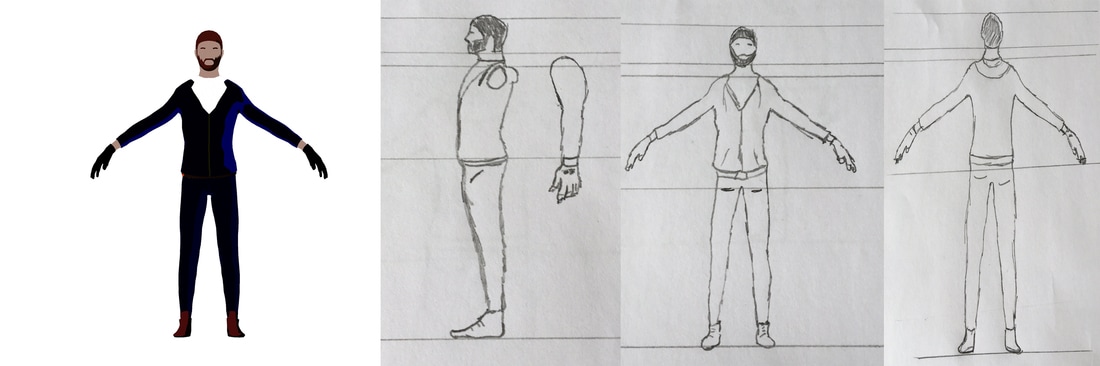 Conclusion This is the final concept drawing with the turnaround drawings. I think i have a lot to prove in this area as my drawings are not up to standard but it helped me get my idea of the character down on to paper and produce concept art off that image. From this concept art i am able to move forward and produce a 3D model off it. Update 12/5/17 After reviewing my work I decided that the final colour renders were not up to scratch, so I took the slides and gave it another go, this time I decided to go for more of a cell shaded look keeping to two - three colours in the pallet per area. I also added a roof line to give the clothes more definition. After I got the block colours onto the character I then used the smudge tool to add a blend line between the colour. Also, I decided to add facial details this time by adding nose and mouth by using darker colours to add more depth and shadow, and also placed some eyes as well. Conclusion From this I know if I put my mind to it, I can create decent concept art using an arts program, I can take away from doing this task is that I need to improve on my art skills both drawing and on the computer. This would help me in the future when applying for jobs. 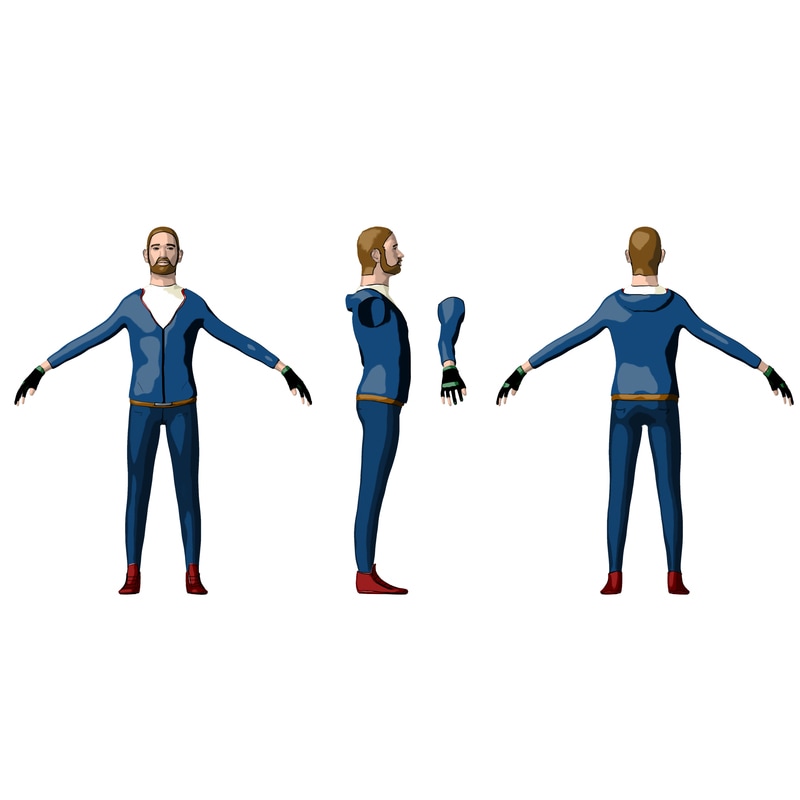 After my mind map I created a couple of thumbnail sketches of my character to get a rought idea of how i wanted him to look, i did a front, back and side on drawings After researching photos for my character on Pintrest, I took my silhouette and placed images from Pintrest next to it. The photos resemble, the type of cloths he will wear, items he will carry, his facial/hair style and body modifications. 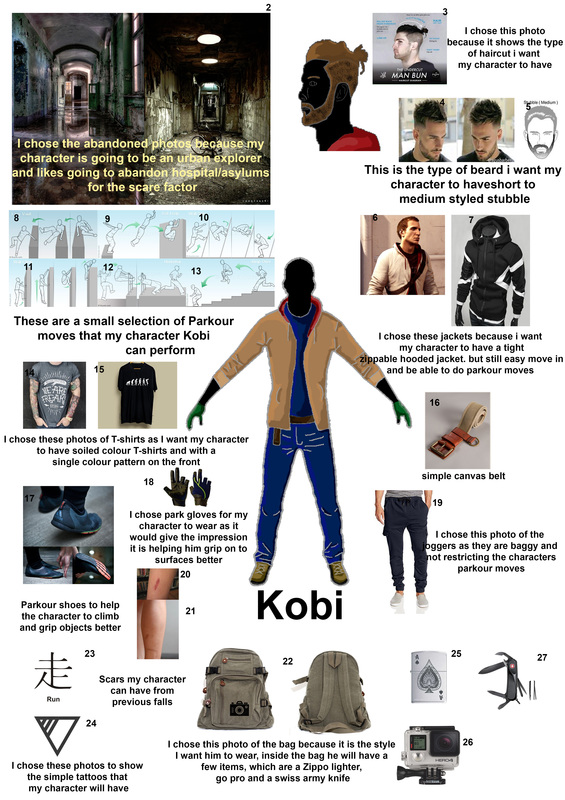 Here are my references for the used images:
In this unit I have to make a character from scratch. I started off with a mind map of the type of character and npc I wanted to make for this unit. In this mind map I thought about what facial feature and body type I wanted it to have, the type of appearance/style of clothes, accessories the character would have.
In the photo below you can see the draft mind map I created 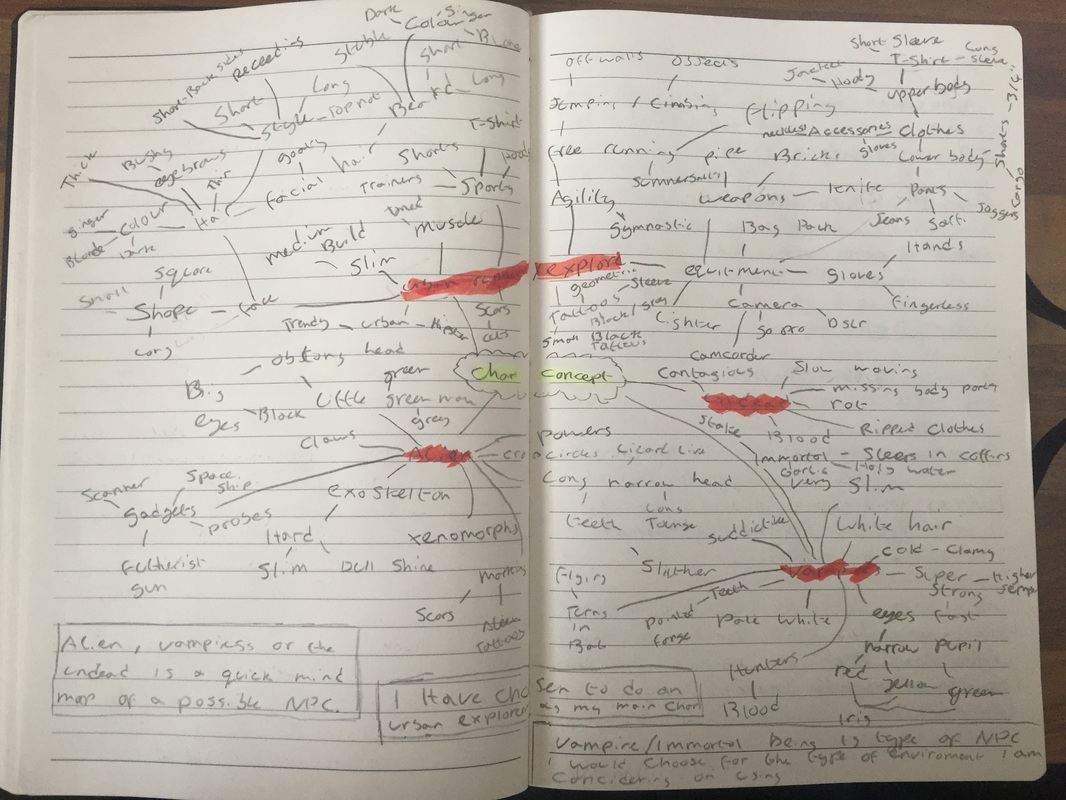
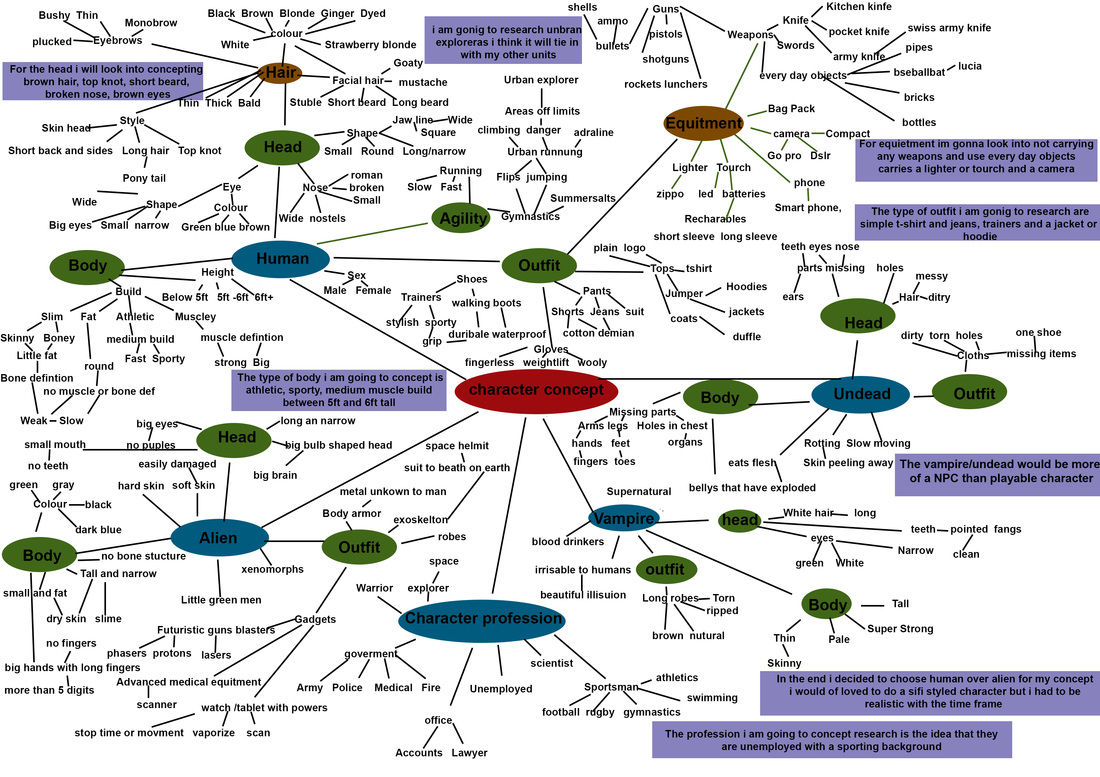
below is the digital version of the mindmap
Conclusion
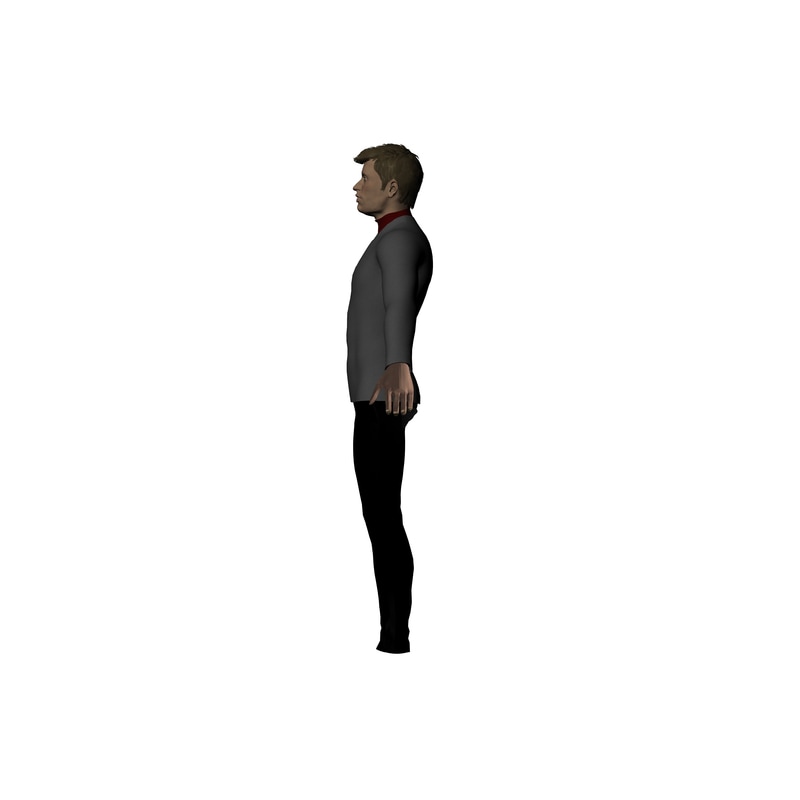
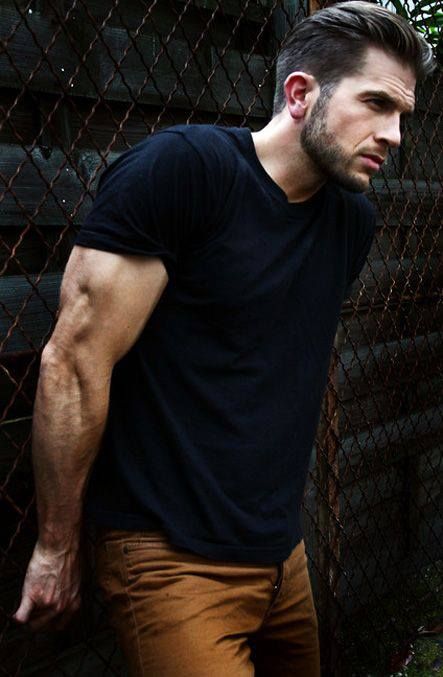
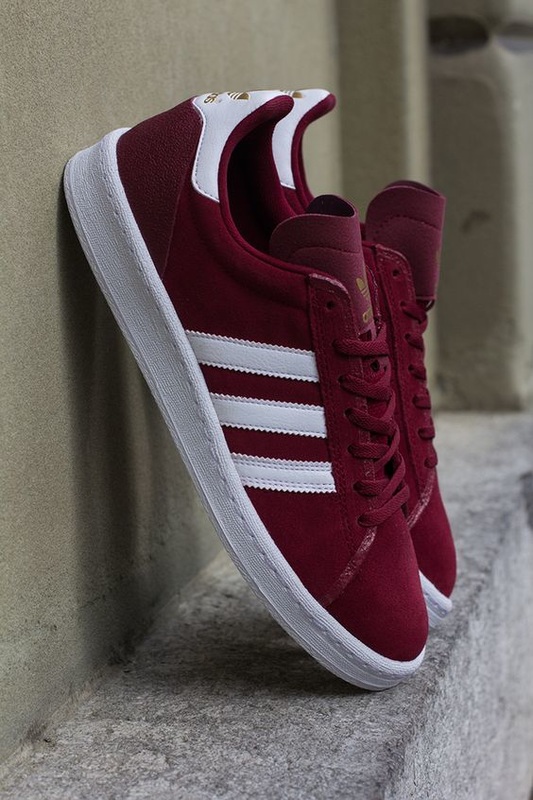
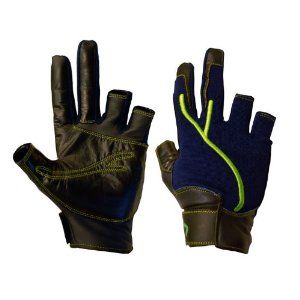
I decided to base my character on an urban explorer/ free runner, he would be early 20's around 5'9" in height, medium build, toned muscle build, a few tattoos, short styled beard, top knot hair style. His clothes would be baggy urban style, shorts, fingerless gloves, trainers and a hoodie jacket. He would also be carrying a back pack that will have a few items in, such as; Gopro or camera, lighter, Swiss Army knife. The scene I am going to be setting him in is an abandoned hospital/asylum. After I did the mind map and figured out what my character is going to be, I started doing research on Pinterest and made a board with photos I found relevant to the description which be viewed here: Name: Kobi Paxton
Age: 23, D.O.B: 14/6/1993 Sex: Male Born: Manchester, United kingdom Education: Collage educated. A-levels in Sport, multimedia, photography Orientation & relationship status: Straight and single Height and build: 5,9" medium build, quite toned, 75kg in weight Characteristics: Dark drown hair, quite long, has sides shaved. brown beard, short. hazel eyes, Few tattoos, scars, piercing holes/scars Social Characterisitcs: Can be stubborn when wants to be, but most of the time quite chilled and relaxed, can handle pressure the only thing to get to him is his parents' opinions. Has a good sense of humour, sarcastic and very witty with come backs. likes banter. Quite popular, known more for his Parkour moves and has a following on social media. Job status: unemployed - volunteer at local gymnastic club Hobbies and interests: Photography, shooting and editing videos for YouTube, gymnastics, Parkour, urban exploring Abilities: Run, Jump, crouch, slide, flip, somersault, climb, bunny hop, wall spin, vault. Kobi is looking for his path in life, he is trying to become a YouTube star by releasing videos of his parkour moves, he is trying to be different from the rest by combining this with urban exploration by going into abandoned places. He sees himself as a free spirit that hates common society rules. e.g. full time job, mortgage etc. Kobi was brought up in an upper middle class family. When Kobi was growing up, his parents were quite strict with him and by the time he got to his mid teens, he rebelled and by his 20th birthday he left home and is currently coach surfing between friends houses. His parents were quite pushy when he was a young child making him try various activities and sports to get him out the house, they did this till he found a sport that he enjoyed which was gymnastics which developed into Parkour. He would sneak out of the house at night to practice in the streets and parks, but repeatedly got caught by his dad waiting in his room and was always grounded. Kobi is still intouch with his parents freqently seeing his mother for coffee at least once a week but is always overcasted by his fathers views about kobi sorting his life out. Kobi mother Michelle, always makes sure she brings money for Kobi out of her bank account so Michelle husband wont find out she is still surporting him. Kobi is into his urban hip hop style wearing hoodies and jacket, hoodies, baggy pants and shorts with a bold coloured belt, styled trainers, T-shirts that are simple, with one colour and a big design on the front. He always has a backpack with him that has a go pro at it, Zippo lighter and a swiss army knife. Kobi is into his trendy hair and beard styles, currently has a top knot and a stubble beard that is sculpted. Kobi also has a few tattoos, small in design, in solid black ink and of a geometric style. Kobi use to have piercings, but long removed them only now has the scars where they use to be, in his ears and eyebrow. Kobi also has some scars on his legs, hand, arms from where he has hurt himself from doing Parkour. |
AuthorWelcome to my blog about my game design and 3D modelling work Archives
June 2017
Categories
All
|
||||||||


 RSS Feed
