|
Blockout As I only had a short time to build a character, I couldn't build one from scratch in Maya as first planned. So what I did was use the pre-made character that comes with Mudbox, I used the pose tool to move the arms into more a T-shape position. Then I exported the model I have edited into Maya which gave me a basic base to add the cloths and other features on top. Instead of designing each clothes separate I decided to extrude of the body on the faces that would be the edge of the cloths then my target welded the top of the face that was extruded back to the body and the bottom part would give me an edge as shown in the photo below 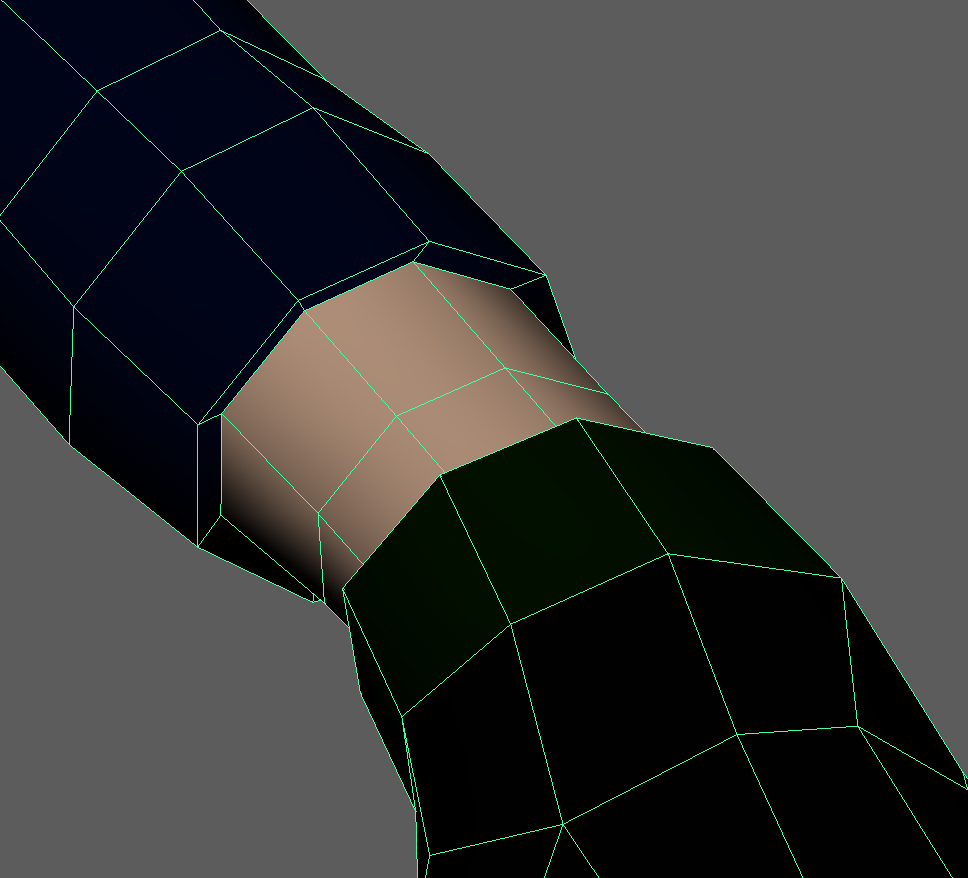 I used this method on all the edges of cloth items to give the illusion that the model has cloths on the mesh. using the smooth tool helped me a lot after I extruded faces to make the hood of the hoodie instead of using vertex and edges and lining up each one to make the mesh less bumpy the smooth tool help do this twice as face to take out the dump and make the mesh more flat, combining this with soften edges under mesh display so helped take away the sharp edges after extruding
Uvs Using the model for me was quite straight forward, even for a novice in this area Maya has some tools to help speed up this process. Creating a plane for the whole model and then using split UV on the edges I wanted to separate from the main planar. Once I had all the UV separated i used the unfold on the shells, realigned them so they were in the correct position and then I used the smooth tool on selected UV to relax or unfold them if they were overlapping. having the UV made early one meant I didn't need to quad draw over my model at a later stage cutting out the time of quad drawing and just using a low level poly mesh and a high poly mesh to do a bake as the UV are already in place Sculpting This is the area that slowed me down the most and where I spent the most time on my model, using tools like bulge and grab helped me get the basic shape quiet, quick, using the wax tool to fill large areas was quick to get more definition into the model. with the symmetry turned on the x axis this helps massively and sped up the this process very quickly as I didn't have to do each side separately. Once I had the basic sculpting complete and I wanted to add finer detail I found vector displacement maps and stencils were very helpful as I didn't have to create the parts from scratch, I could just sculpt on top of these displacement maps and stencils on to my high poly mesh and the detail would transfer though with made this process a lot quicker High to low poly bake Once I exported my character back to Maya on a lower sub division I needed to create a normal map to get all the high poly details onto my low poly mesh, this is a straight forward process now with Mudbox by selecting my highest sub division and using the tool extract texture maps from the sub menu UV and maps. In this window I just selected normal map and exported it. Back in maya I created a lambert texture and added a node that connects to the normal map and it placed all the details of the high poly mesh onto my low poly mesh. Texturing my original plan what texture my model inside Mudbox and paint texture, straight onto the model, but I would have to resource all the textures and edit them in photoshop first. In the end, I decided to use a program called substance painter 2, which comes with a library of textures already and smart materials that are a combination of materials in one and you can change the setting inside, the material, this was very help for the skin as I could just fill the skin areas with this smart material and customise how I wanted it to look. I could also paint alphas onto the mesh e.g buttons that I missed out in the sculpting process. I found this program was extremely quick to the method I was originally going to use and only took a matter of a few hours to texture my whole model and export different maps (new normals, height, roughness, AO maps) of the model which it created for me in the program which saved me more time as I would of had to manually make these in Mudbox and export each one
1 Comment
1/16/2024 08:28:36 am
Leave a Reply. |
AuthorWelcome to my blog about my game design and 3D modelling work Archives
June 2017
Categories
All
|
 RSS Feed
