Unit 69
For this unit I have to create one asset that is going to be a main feature of the game I am building for unit 18, it has to be below 8,000 trails, fully textured and have a high to low poly bake as well.
|
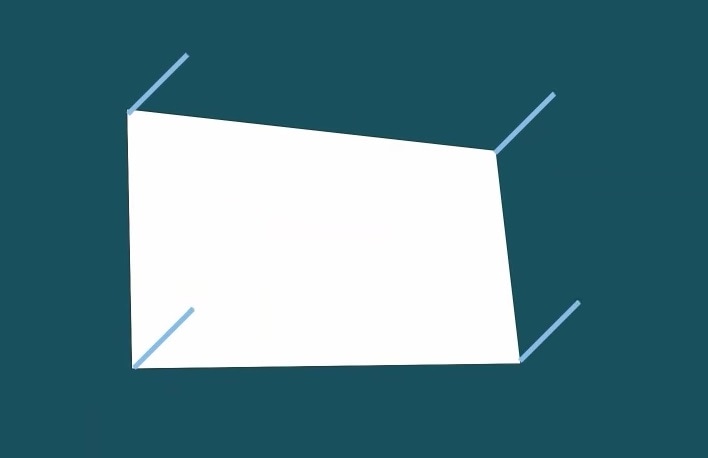
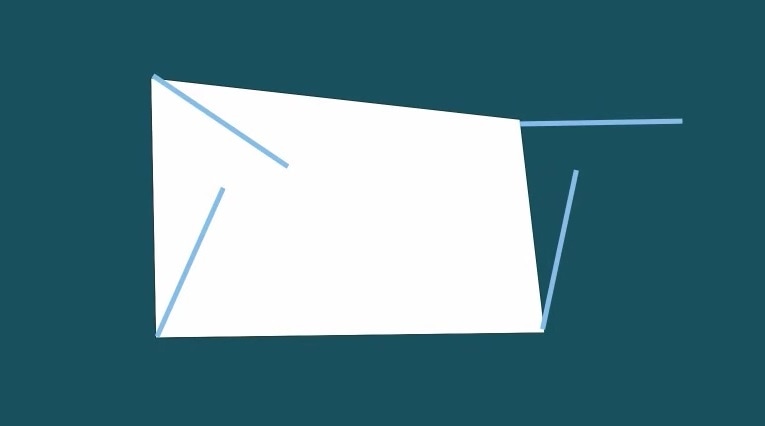
I wanted to get some feedback about the model I created for my level so I asked some of the fellow students in my class to have a look at my model in unreal engine and leave a comment in my book after reviewing it. 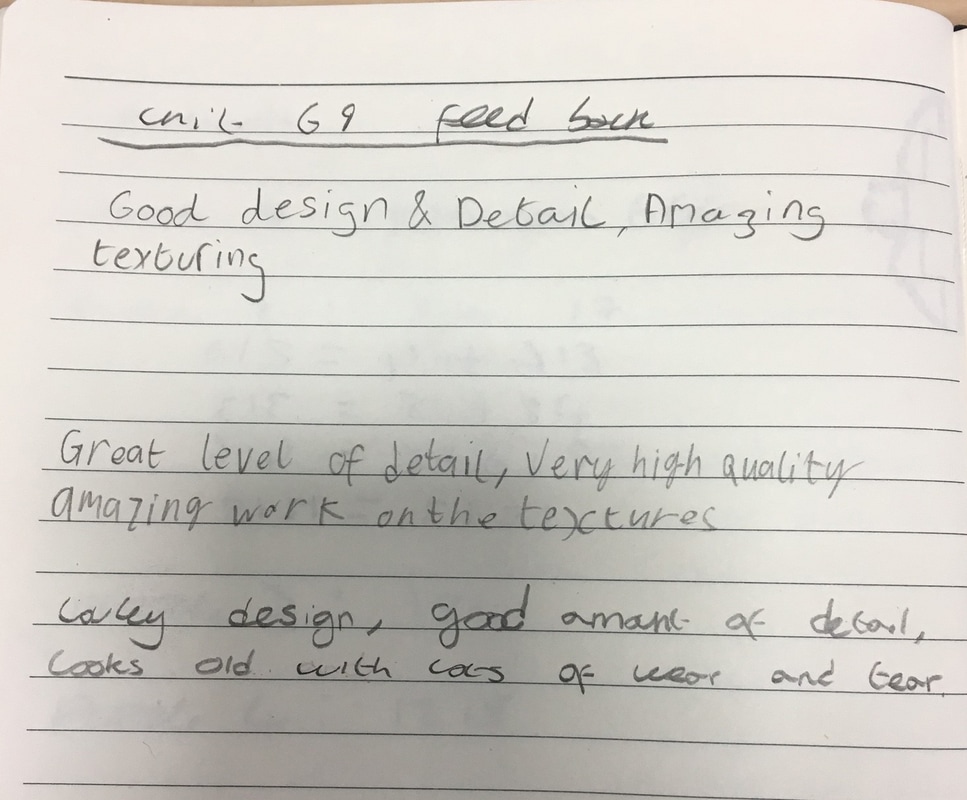 This is a photo of the feedback, looking at the comments, I received excellent feedback about the model. I got three comments all about how good the design, textures and the amount of details I was able to put on the model.
Changes Since receiving my feedback, I decided to leave the model how it since I got all positive feedback and nothing negative/about how it could be improved
1 Comment
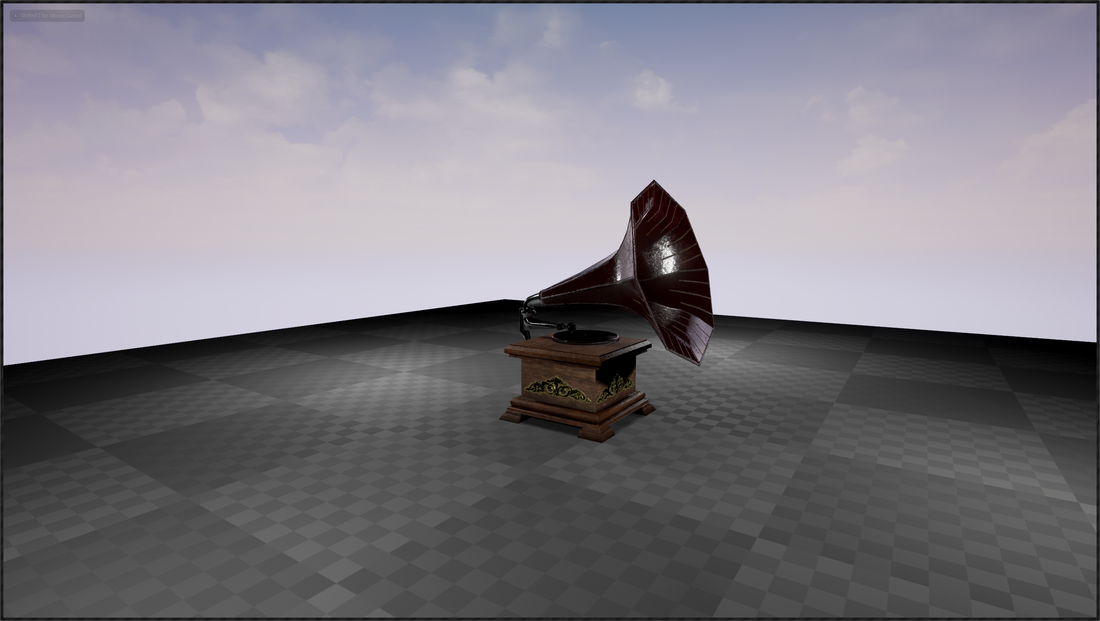
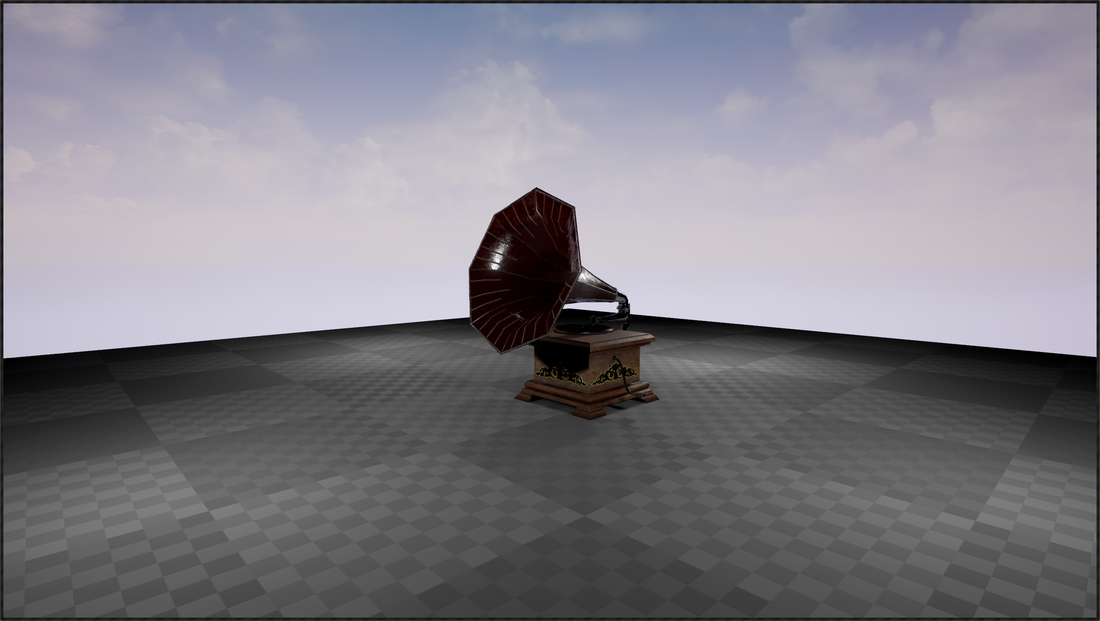
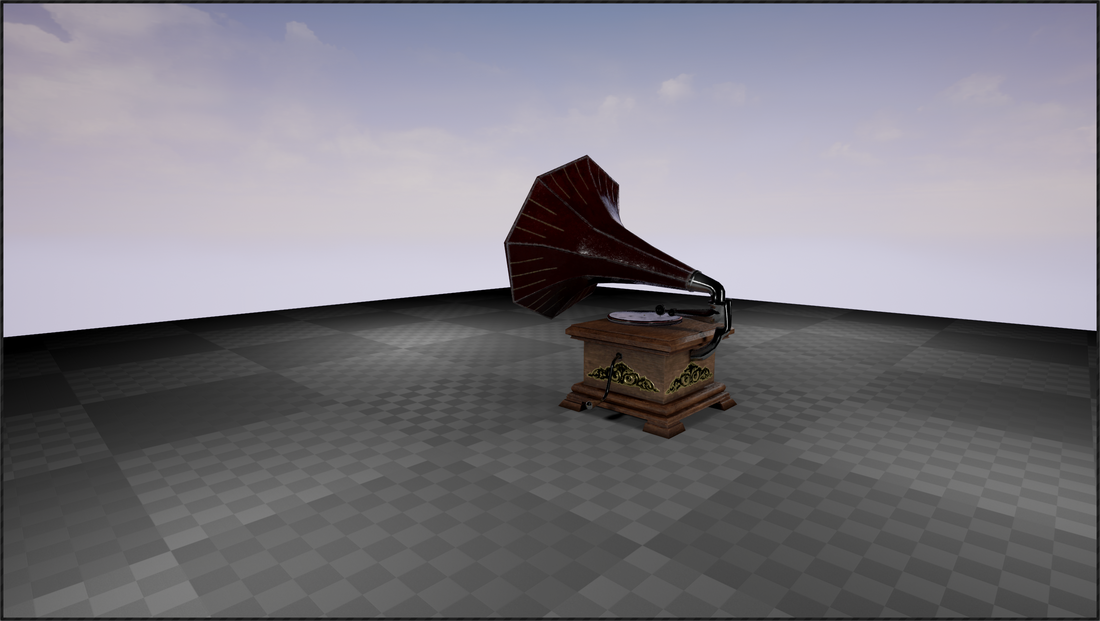
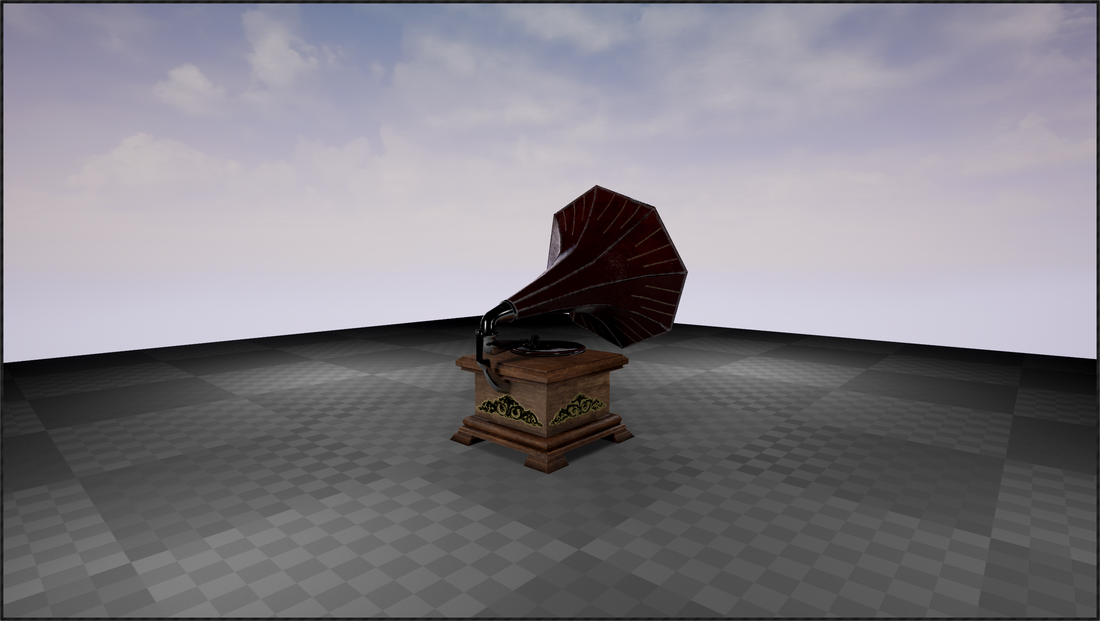
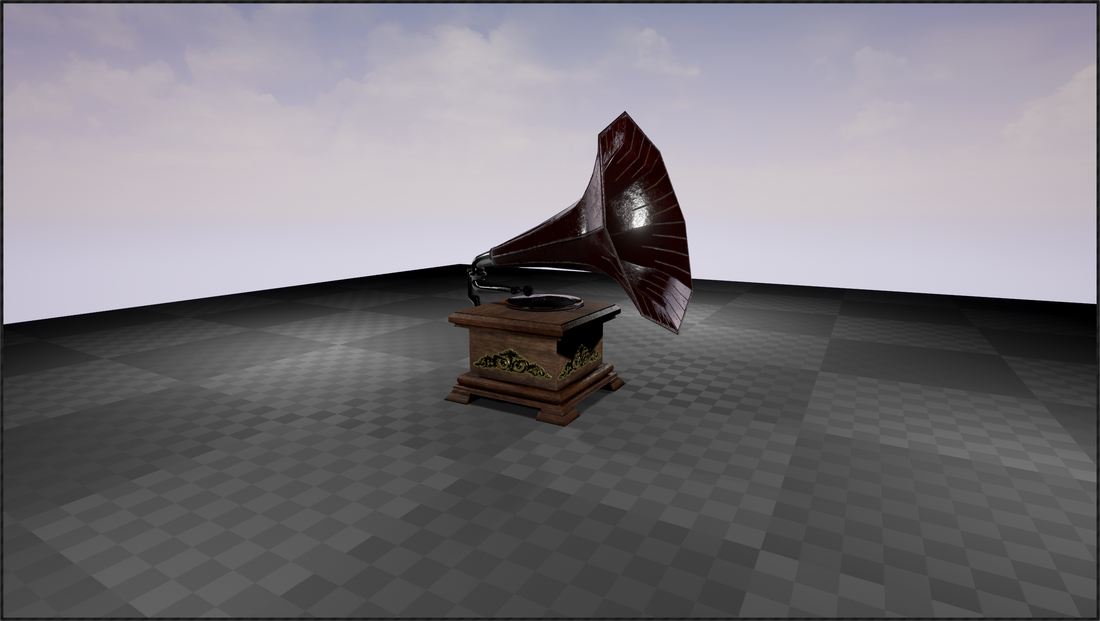
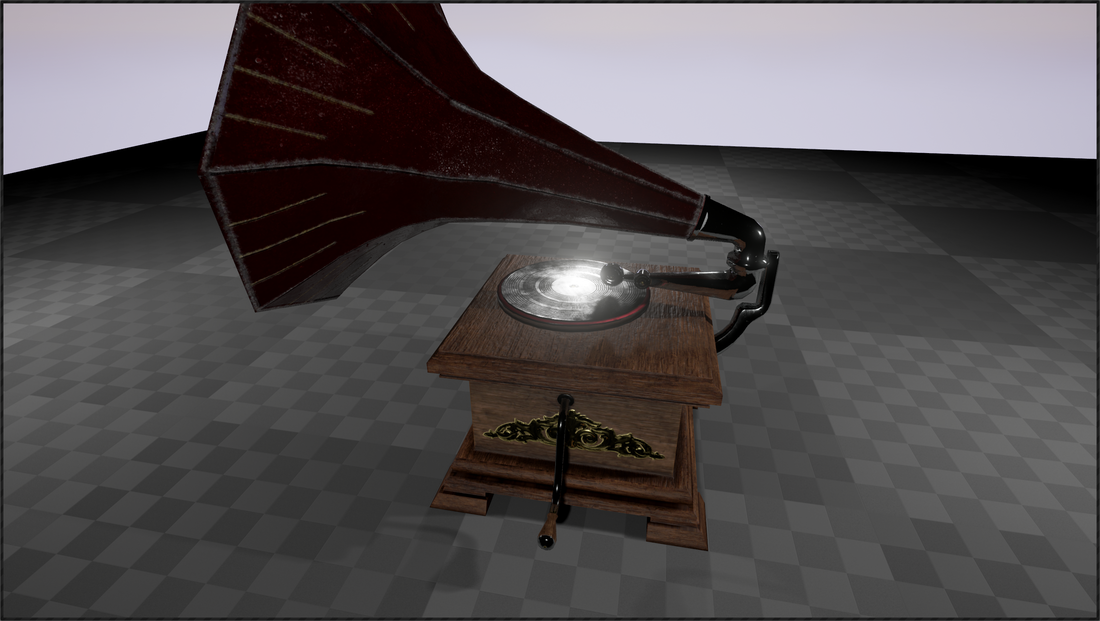
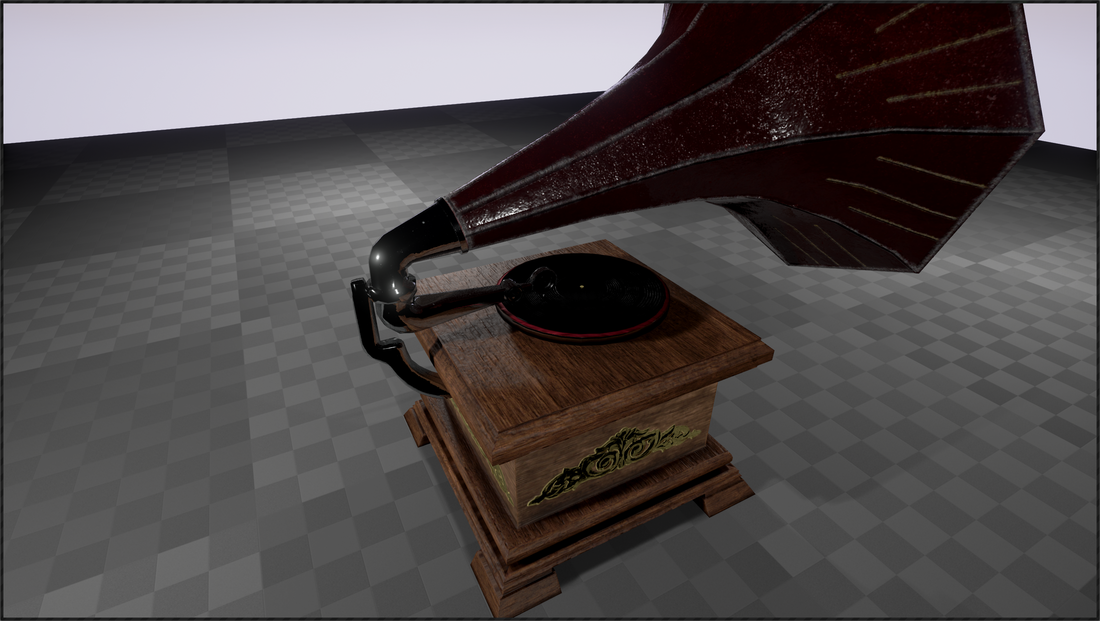
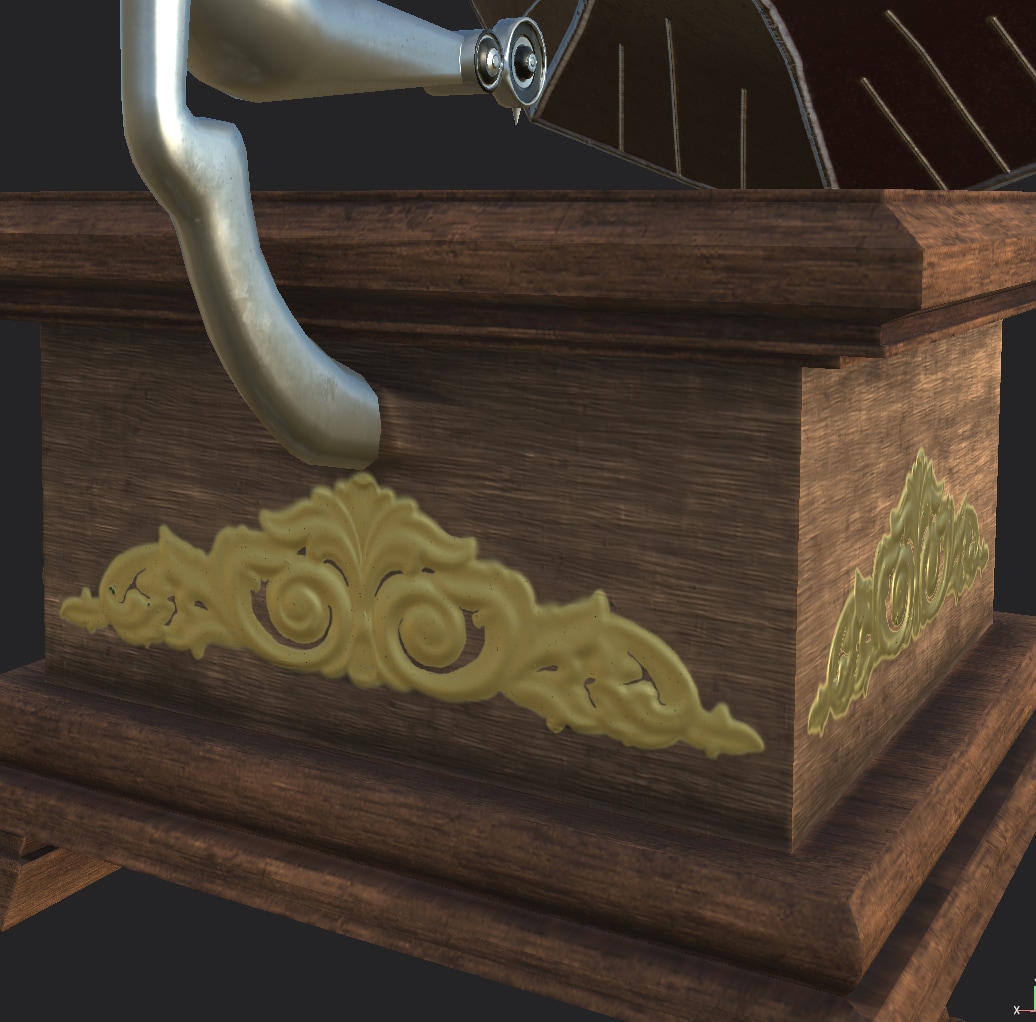
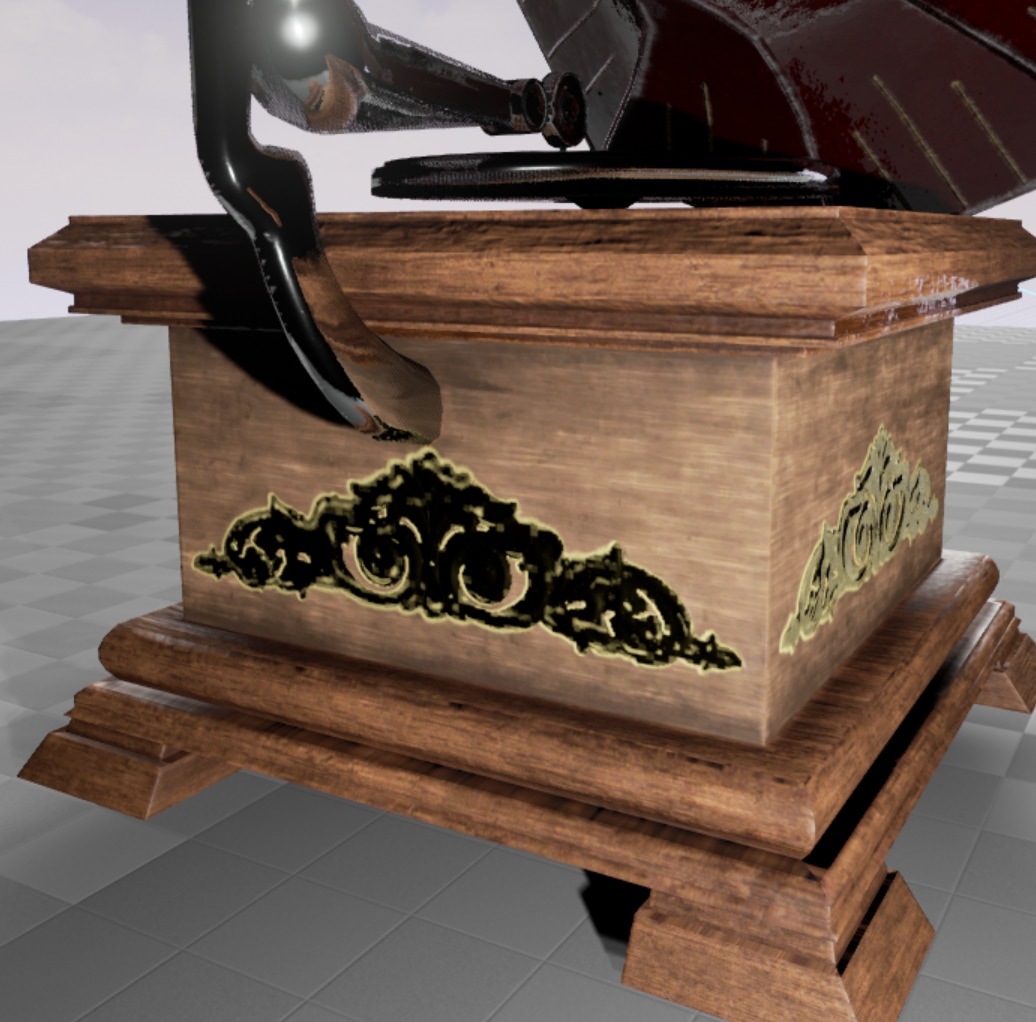
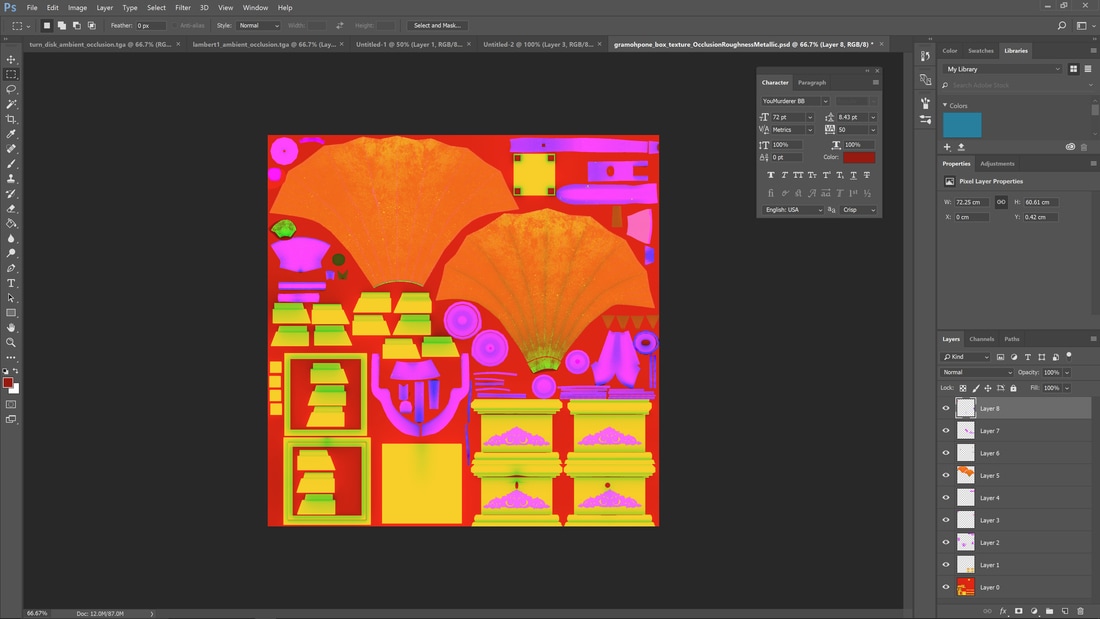
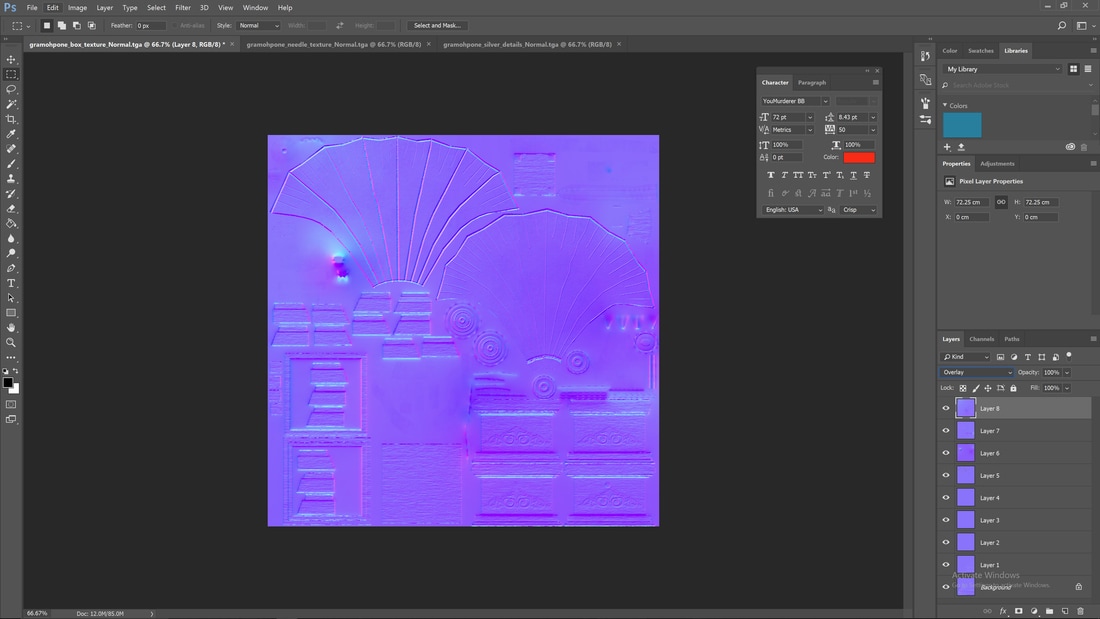
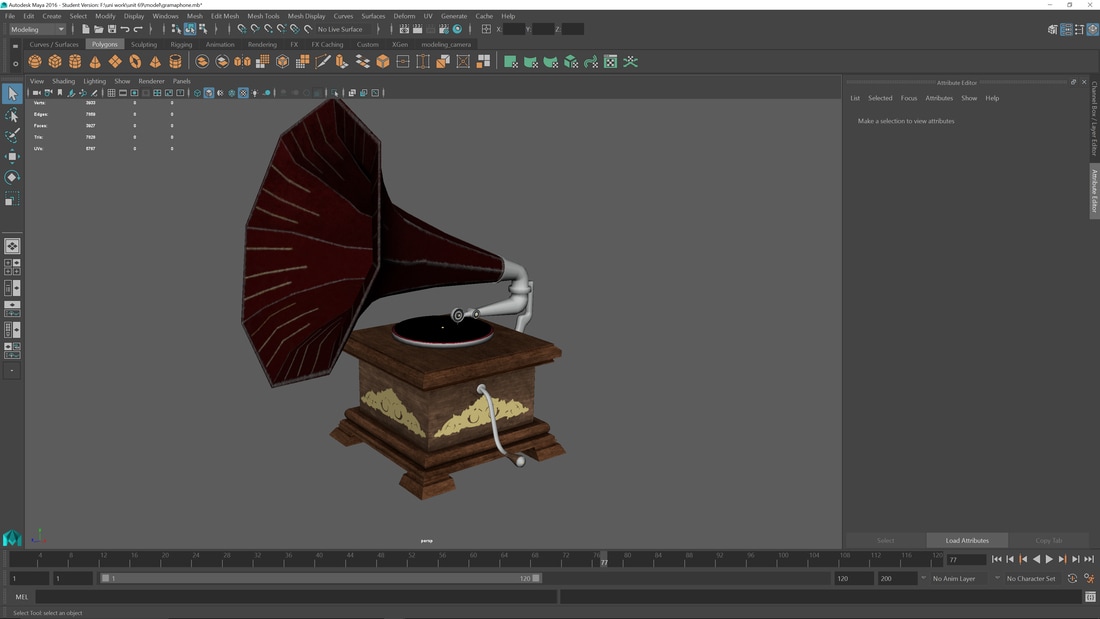
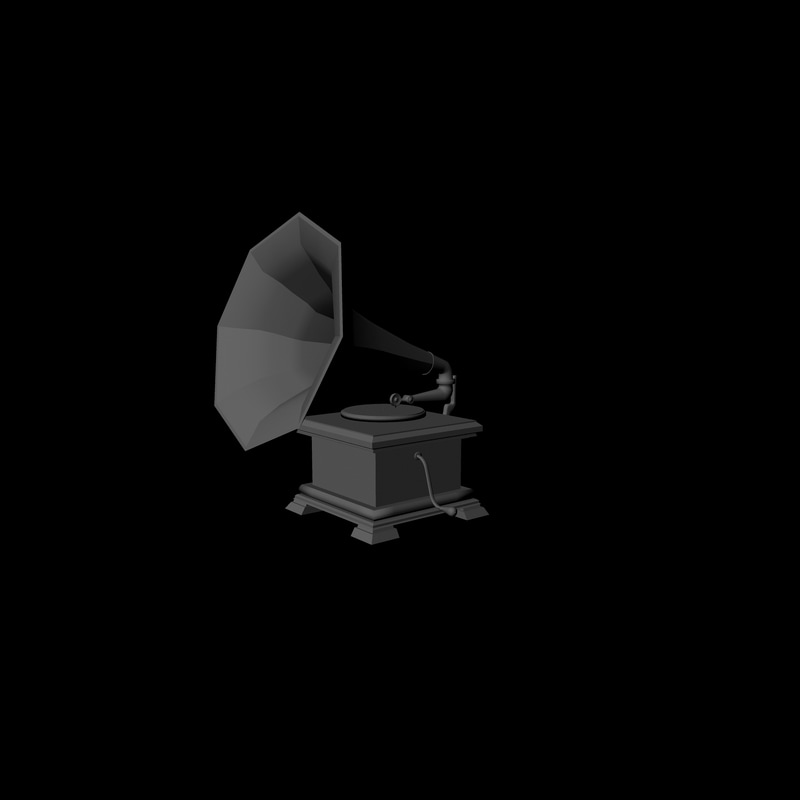
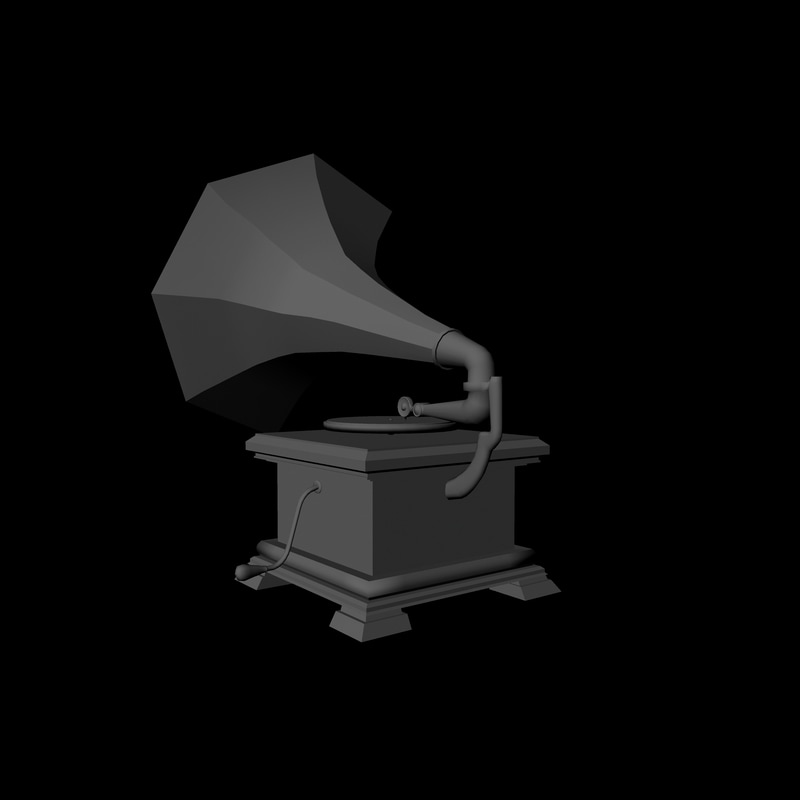
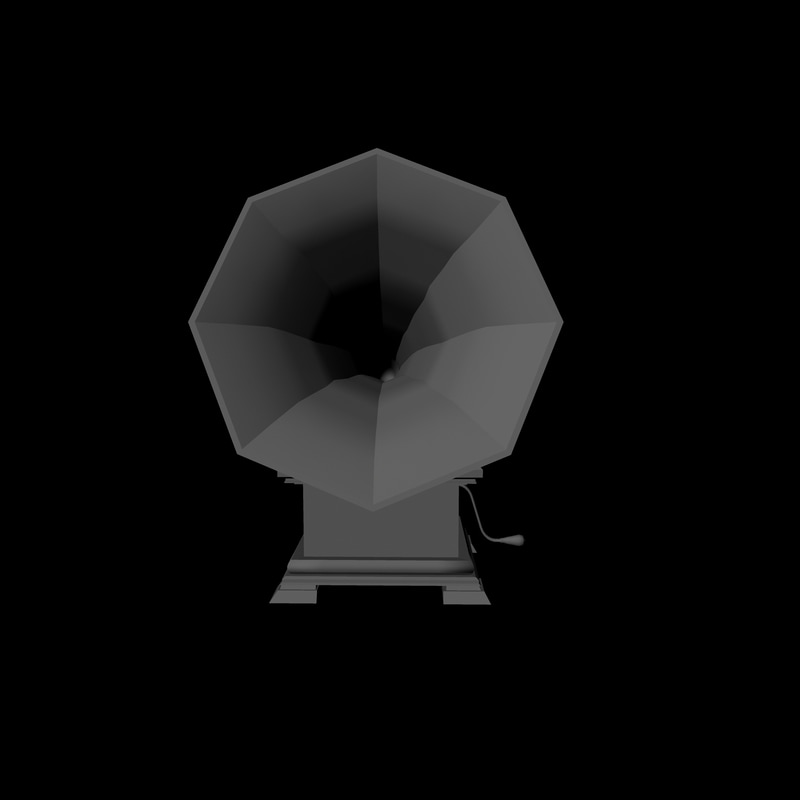
I imported all the models and texture files into unreal engine and placed the meshes into a blank scene, then I added 4 lights around the model placing them far enough away not to cause too much shadow and not bleach the model with light. 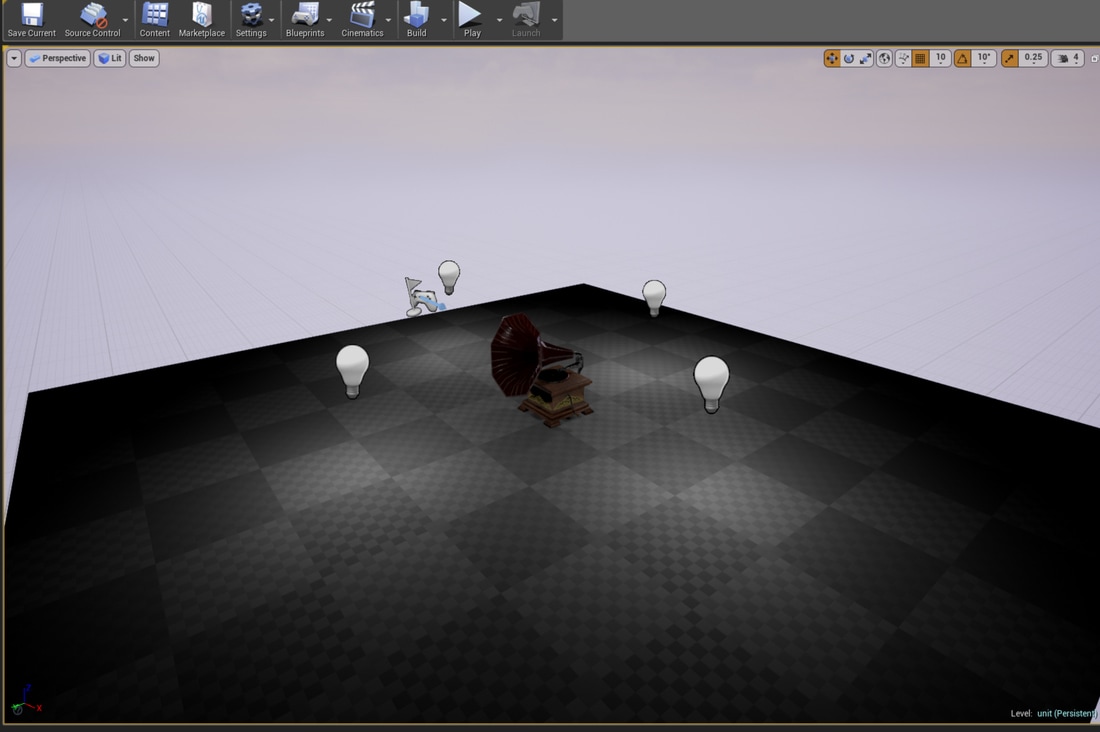 Then I created the materials for the gramophone and turntable by creating a material off the diffuse map, I then opened up the material and added the normal, AO and metallic and roughness maps to the material as well. I connected them up to the correct pins making sure I use the green pin for roughness and the blue pin for metallic. I then added a 1 vector and connected it to the specular and changed its value to 0.5 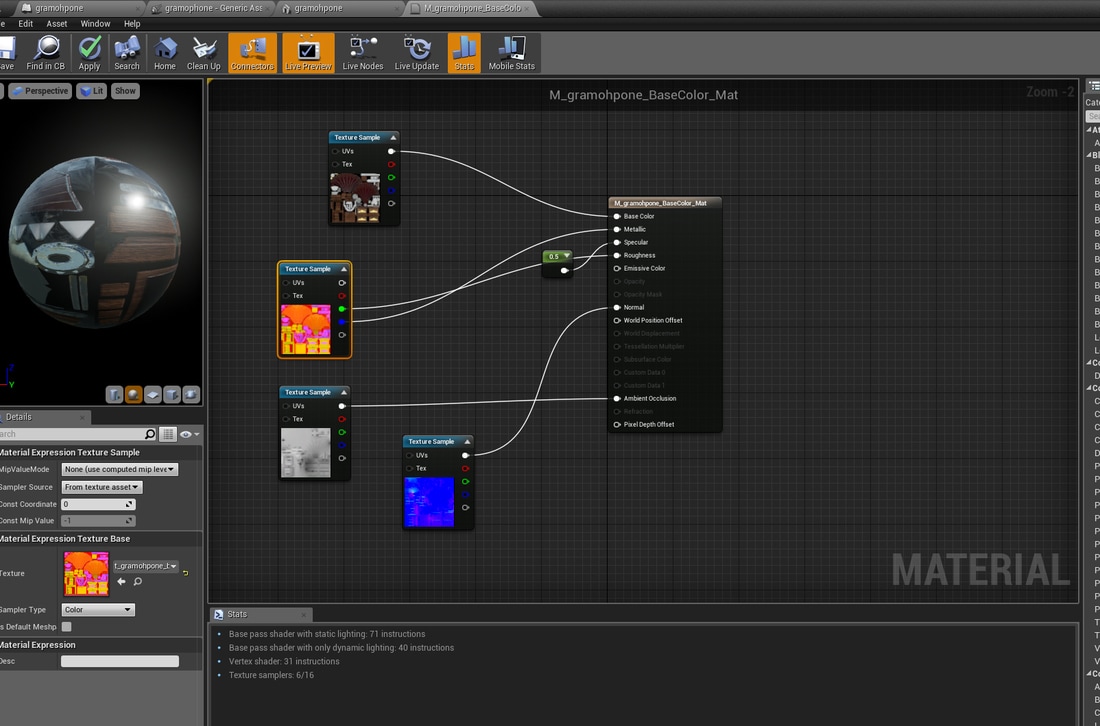 Then I took screenshots of the model at different angles to check the material is on the model and look for any discrepancies After I created the materials I turned both the models into blueprints and added a simple rotation to the turntable so it is turning slowly and added a sound to the gramophone blueprint so that it is playing music at the start of the level. In this blog post I am going to evaluate my gramophone that I made for unit 69, I am going to break it down into four sections which are: What went well, what didn't go well and issues/changes along the way and a conclusion.
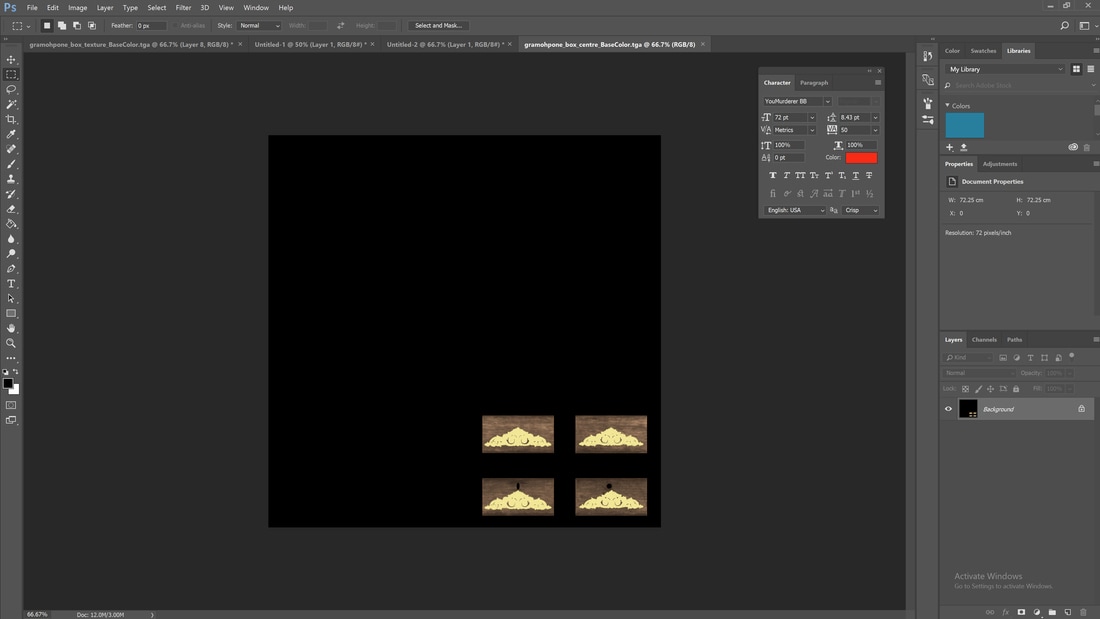
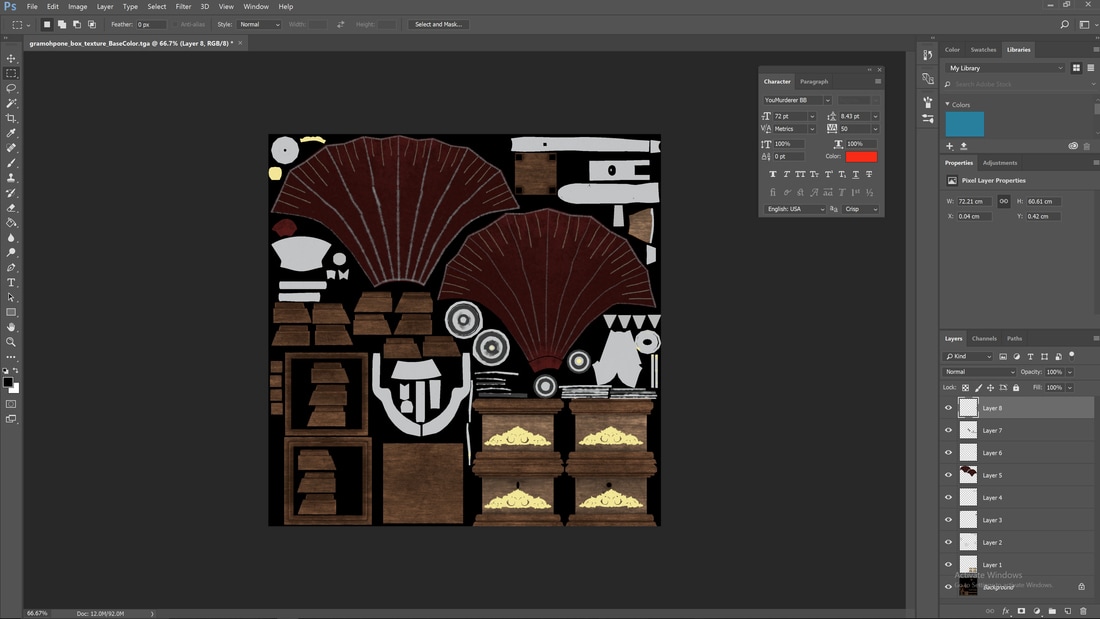
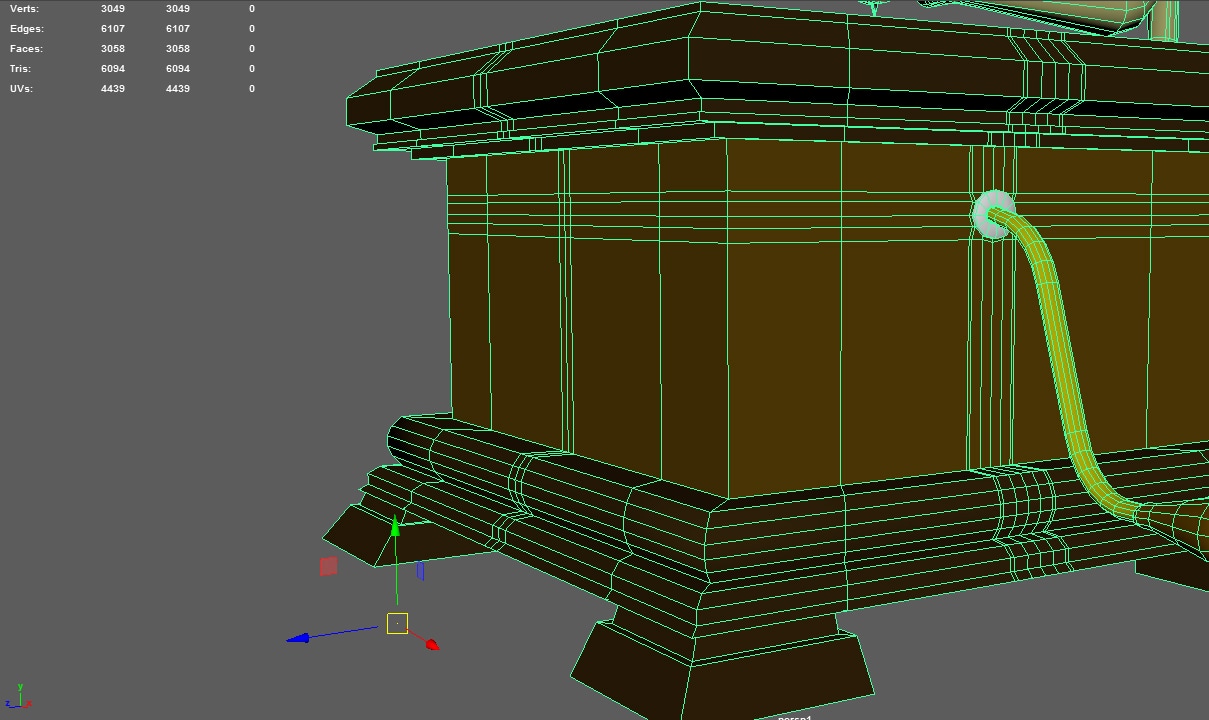
What went well in unit 69 Task 1 I found the research went well and came up with 5 ideas that I could create models from. I used three research methods, mind maps, mood boards and concept drawing. This helped me visualise what model I could make and how much of a challenge it would pose to me. In the end, I selected the concept that I thought would represent the level I am making in unit 18. I also found researching about modelling techniques helped me and I avoided big problems later. After I finished the research I started modelling my gramophone, I used a photograph as a reference guide which helped me a lot. I made the model into three seconds before deciding how I would connect those sections up. I was quite proud that I could connect hard and organic surfaces together and keeping the model below 8000 triangles. Task 2/3 I made sure I did research on how to UV map correctly and the different types of texture maps this helped me understand what these are for and how important they are needed for the model. When it came to the UV I manged to get all the UV shells into the 0 to 1 space and make sure when I had a checked texture overlaying it that all the squares were even. From this I was able to make a quick light map UV set. Experimenting with three different types high to low poly bakes helped me understand which works better with my workflow and how to avoid errors. I enjoyed using substance painter for making the texture maps as I found it a quick process and it was quite enjoyable using a tablet and felt like I was painting. Using masks on the layers helped my workflow and could have used less colour id maps if I did more research on the protentional of using mask in my workflow. Task 4 Even though this was a small task I was extremely with how the model looks in unreal engine when I had applied all the textures to the model. Learning about level of detail was interesting and I will be adding it to my workflow in the future as I think it is an import part of the game design process now and helps the performance of the game. Conclusion Overall I am extremely happy with how the gramophone has turned out. From the concept to the design process to the finished look. I have learned a lot about modelling techniques and how I can potential speed up my work flow, what works for my work flow and what high to low poly bakes work for me. Substance painter was a big part of my work flow for this model and I think I will be using it more in the future as part of my workflow with how easy it is to use and the high quality of texture maps it produces. What didn’t go so well in unit 9 Task 1 Even though the research went well and I came up with five concept ideas I felt I could have done more research on those ideas by getting actual reference material of my own and using that in my mood boards and I think I could have come up with more ideas for me to research. Creating the model posed a bit of a challenging creating hard and organic surfaces it left me with a few problems of floating vertices and double faces and a couple of n-gons which I wasted time on fixing but they were quick fixes and in the end the final model I produce was worth the trouble and provided me with a good learning curve. I would of also of liked to add extra geometry to the model to make it look more Edwardian but I could not as I was close to the 8000 triangles and didn’t want to go over on my low poly. Task 2/3 The UV took me a long time and felt I wasted a lot of time here that I could have been placed elsewhere. I manged to get the UV how I wanted but I still feel I could have done a better job on them, maybe placing them over two UV squares instead of one to get better texture resolution. The high to low poly bake didn’t go so well in mudbox, I kept getting baking errors where it would randomly place lines all over the model, I fixed most of the error by adding extra geometry but it has taught me that mudbox isn’t the best software to always do high to low poly bakes in. I got less errors from using Maya and substance painter by combining the two together. I had to still edit the normal maps that mudbox produced in photoshop as it created raises areas when it should have been a smooth. Creating the texture maps was relatively easy the only problems I ran into was the lack of materials in substance painter to use and the fact I had to compress my texture maps into one map via photoshop. Task 4 The only thing that didn’t go to plan in this task was I could not get the lighting correct in unreal engine, and found it hard to get the right angles for the light without casting to much shadow on the model its self or using too much light and ruin the contrast of the model. Conclusion Even though I ran into a few problems along the way with geometry and the high to low poly bake it has helped me learn how to avoid these problems in the future and that I need to start not using mudbox for all my high to low poly bakes as there are many ways of making them now. I also need to work on my UV as I felt this is the area I lost the most time on the model and slow down the workflow dramatically. Issues and changes I had along the way in unit 69 I didn’t make much changes from the research to creating the model, there was only minor changes that involved not adding detailed geometry to the model so that I did not go over the 8000 triangles and try to place that detail geometry into the high to low poly bake. I had to change what stencils I wanted to use in mudbox because I could not find one that would suit my model but I found a nice floral design that was used in wood carvings in the late 1800 so I decided to change my design to incorporated the new design. Other than this there was no other changes. The issues I had along the way was mainly with mudbox and not baking to my model correctly I found the reason to this and it was mainly down to not having enough supporting geometry lines in the model which cause the errors in mudbox. But this has taught me not to always use mudbox for my high to low poly bakes. Other issues have been noted about the time I spent on the UVs but in the end, they have worked and I will consider more research and practice more on this area in the future. Conclusion Overall I am extremely pleased with how model has turned out, I like how it looks and the textures I have created for the model. It was a learning experience for me I learned what could go wrong with high to low poly baking and what I could improve on in the future. I have enjoyed the whole experience from concept to design to the final product. I decided to use substance pointer as my main Texturing tool and then use photoshop as a touch up / editing the textures when once exported. When by substance painter, I mainly used materials and smart materials for the base coats, then I used white and black masks to overlap and use a new material to add / remove the new material away from the old one. This worked brilliantly for the brass effect on the box and from scratch and line the details of the horn. I used the same process for the turntable, but this was a lot quicker as there was no defined detail that I needed to paint on compared to the main part of the gramophone. This is a time lapse video of how I painted the gramophone and how I used masks to use multiple textures. 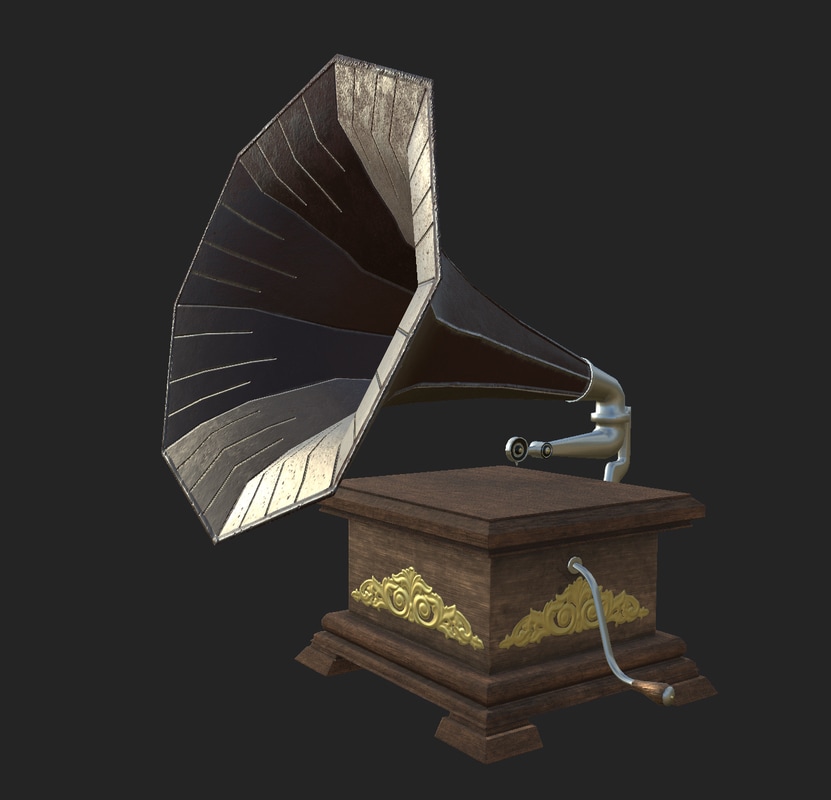 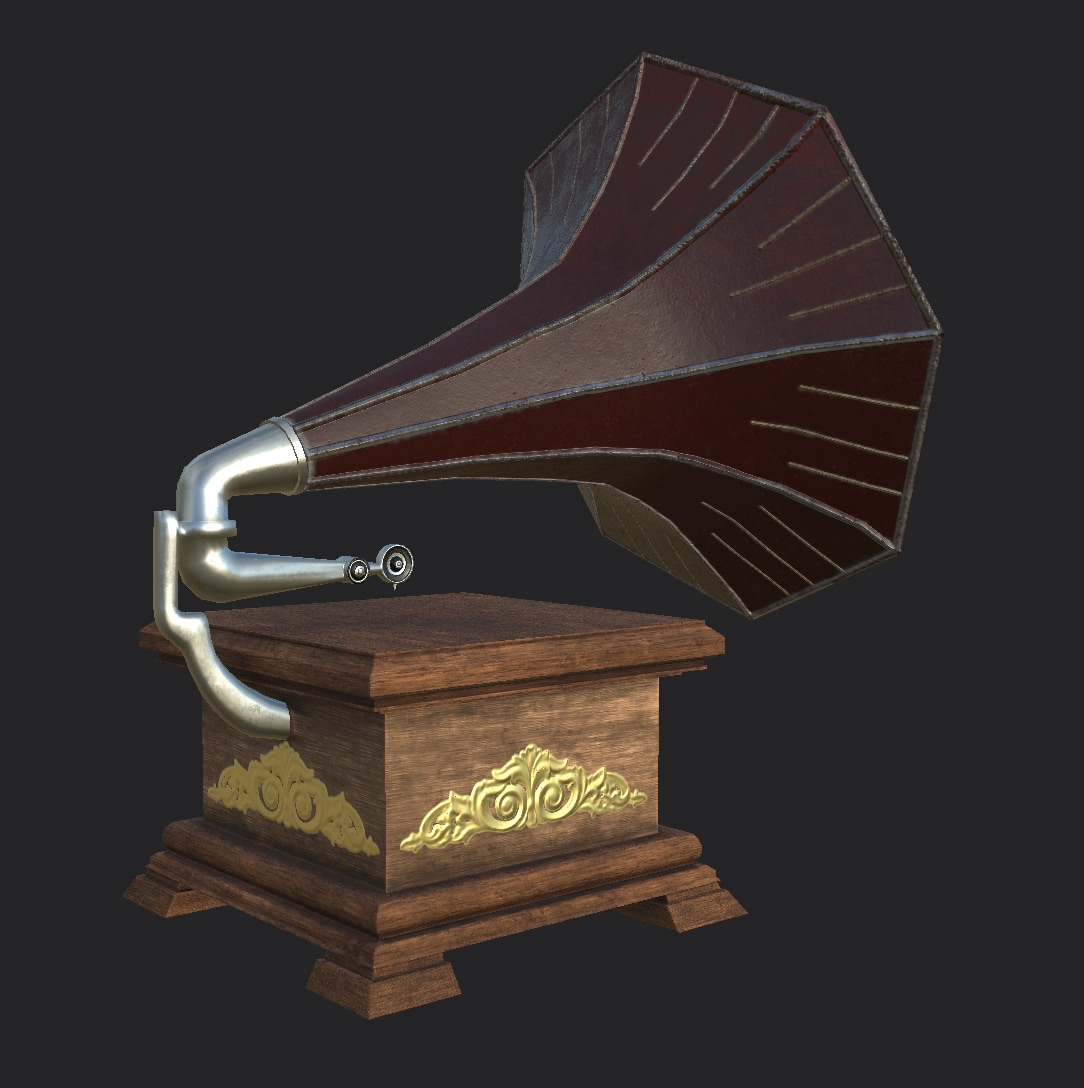 After I finished the painting of the model I needed to export the textures. After doing my research I knew there was an option for unreal engine and it would compress the AO, metallic and roughness into its own channels in the textures. So I selected that option and changed the format to target because it has an alpha channel. I then changed the common padding to dilation + transparent because I wanted to merge all the textures into one file as having 9 separate texture files for one model is not practical and can effect the performance so I decided to merge the 9 layers into one in photoshop. 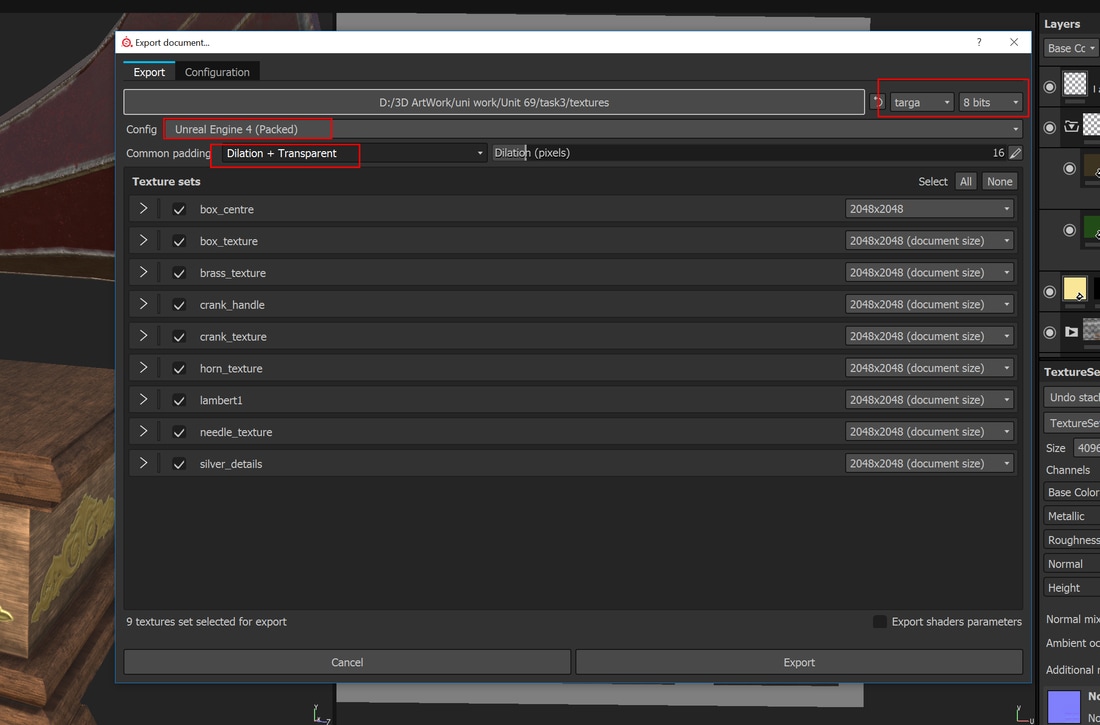 Once in photoshop I opened all the colour id maps and added them all into one image on their own layers. Because I selected for the background to be transparent, it has exported it as black which made it easy to select around the image and delete the background to revile all the layers underneath. I didn't need to edit any of the textures as I felt happy with how they looked. When I was painting the model I noticed that there was something wrong with the normal at the back of the model. I then waited till I could see what was happening when I photoshop and it looks like the normal map think it was raising out so I used the clone tool and removed the imperfections to make it all level. 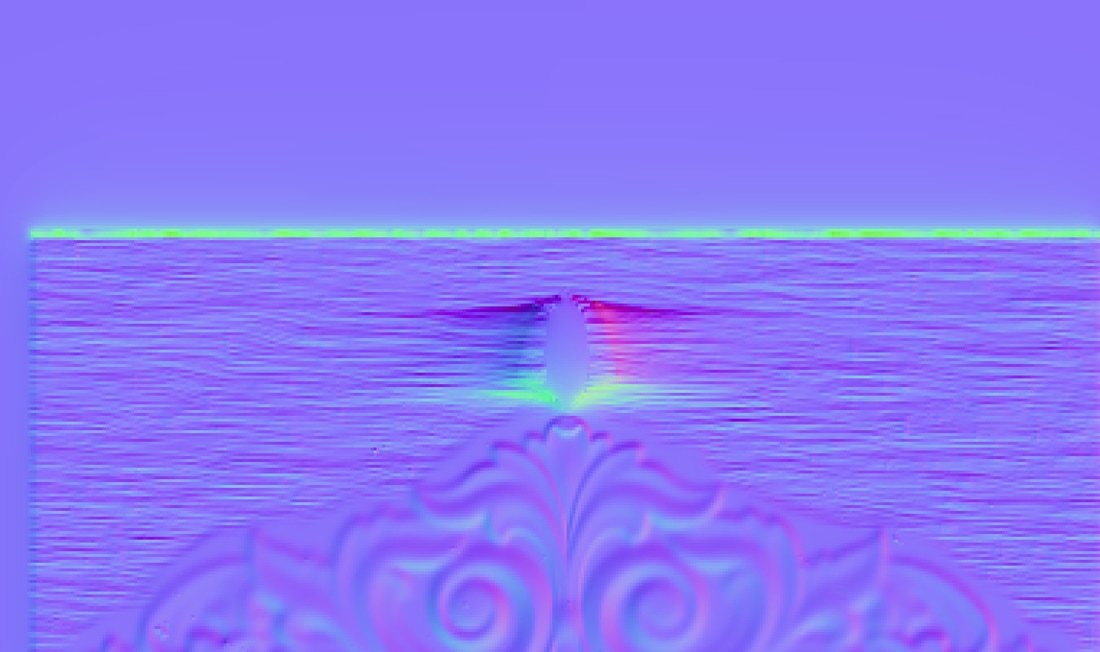 In the photos below you can see the before i edited the normals and after I did the same procedure I did with the caller id map with the remaining maps by placing each one into its own layer and removing either the background or overlaying them I wasn't happy with how the ambient occlusion map came out so I went back into substance painter and just exported an AO map and combined the 9 texture maps together in photoshop like I did with the other maps and got a better result. 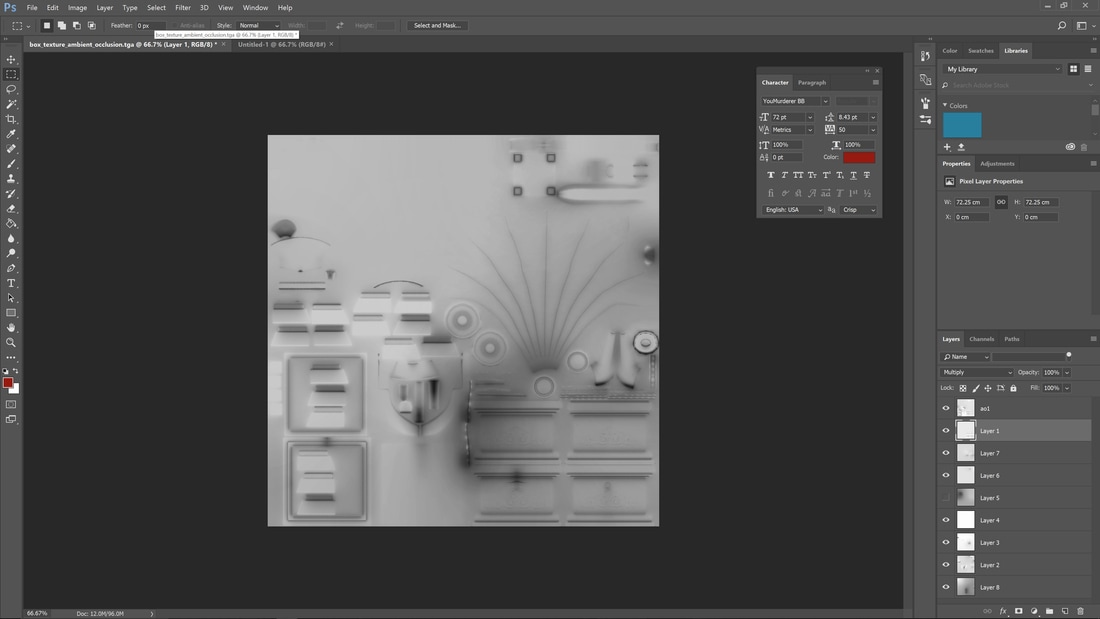 When it comes to connecting the texture maps in unreal engine I will just use the green and blue channel out of the compressed texture map and the so will use its own node. After I have finished the gramophone texture maps I did the same process with the turntable by combining its texture maps into one. I then went into Maya and changed the gramohpnoe model so that it only had one lambert texture connected to it and same with the turntable. Then I applied the caller id map, normal map and AO map to the lambert and made sure the model has preview texture enable on it. I used this method to see if the textures sat correctly after being edited. For my gramophone model i wanted to create a levels of detail on the model for when it is ready to go into unreal engine. Level of detail is when the model decreases the tris of the model when the player moves away from the model, this helps performance on all platforms as there is less geometry for the graphics card and processor to process and render. The level of details has to a gradual decrease so there is no noticeable change between the normal model and the level of detail models I did some research on how to apply level of details to models in unreal engine and found this video on it, even thou they used 3D max as the 3d application it can be easy translated to Maya. I started off by duplicating my model in Maya and adding it to a new layer, i select edges that are not needed as much as the core edges in the model that would change the shape of the model In the photos above i removed the edges i placed in the model to keep the edges sharp for the high poly bake this reduced the the tris down from 7102 to 6094. i repeated the process by duplicating the level of detail model and placing it into a new layer and removed more edges from the model with out changing the shape to much. 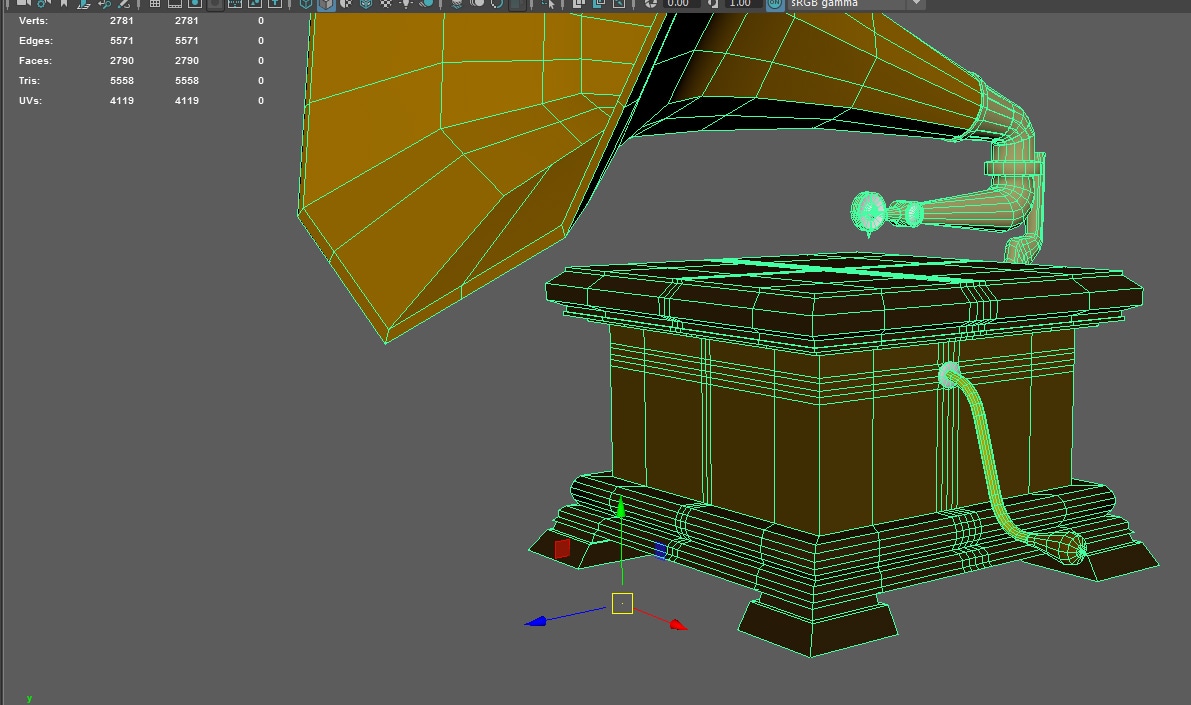 i lowered the second level of detail down to 5558 tris which is over 600 less between the level 1 and 2 this till be the furthest way level of detail and the level one will the middle distance. In total i lowered the tris by 1544 which would improve the performance of the game when far away with the model in view. After i created the models i exported them as FBX files and opened the level with my model in and open the settings of the model and went down to the LOD settings and imported the two level of detail models 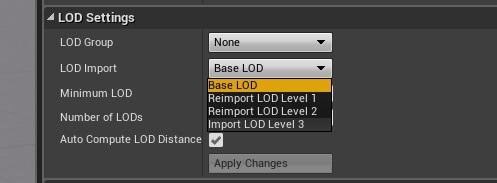 Each LOD has it own settings and displays how many triangles and vertices each model has and at the distance it changes to that model. the LOD1 is set to come when the normal model is 0.333 of the size of the default scale and the level 2 comes on when its 0.167 of the size of the default scale. 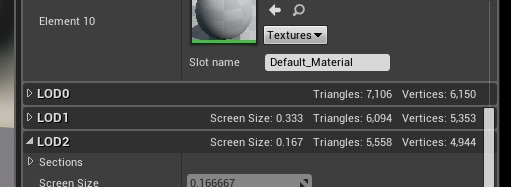 here is a video of me scrolling out and into the model to see if the model changes to different level of details and to see if there is any major changes Before I can start to texture my gramophone model I need to look into what type of maps I need to create for my model that will be the most effective in unreal engine, also how each map works. There are many different types of maps out there, but only a limited few work with unreal engine, this narrowed my research down and just researched the maps that are compatible with unreal engine. Colour maps There are many different types of colour maps, but the most common is the diffuse map. These maps are usually only base colours, the colour maps can be combined with other texture maps to add more details.  Bump maps Bump map is a grey-scale image that acts as a fake height map. it gives the illusion of raising or lower details on the map. black to 50% grey will appear as lower detail on the model and white to 49% grey will appear as raised geometry.  Displacement maps Displacement maps are like bump maps by using a grey-scale image, unlike bump maps that give the illusion the geometry has been changed, displacement maps actually change the geometry of the mesh. Displacement maps are usually booked out of the high poly model which then can be a applied to the low poly model and transfers the extra geometry in a texture map. normal maps Normal maps are a little like bump and displacement maps where they give the illusion of extra geometry. Normal maps are different because it is an image of which way your geometry normals are facing. This is ideal with video games because of real time rendering and takes advantage of lighting angles and how it affects the model. Normal maps are produced the same was as displacement maps being baked from a high poly mesh. 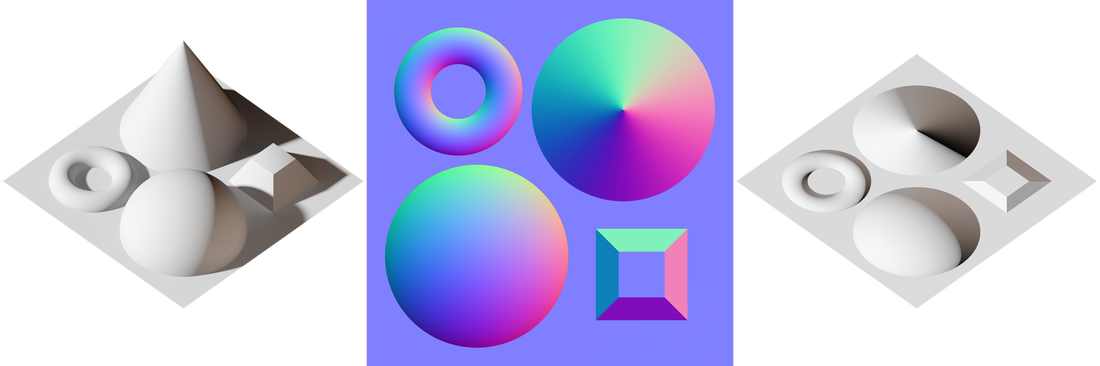 Specular maps Specular maps tell the engine which parts of the model to make shiny or glossy, mainly used in metal, plastic and ceramic materials. Both can be used only character models to give the appearance on the face where it is more greasy/shiny Roughness maps roughness maps are mainly used in a physically based rendering (PBR) materials or shaders and create information about how rough or smooth the surface should be. Metallic maps metalic maps the same as roughness maps are used in the PBR pipe line and gives the option of metallic or non metallic surface. ambient occlusion maps ambient occlusion maps are baked of the high poly model and is based off an ambient light to simulate global illumination and the ambient occlusion simulation of the shadowing caused by objects blocking the ambient light. The map creates a soft shadowing effect. 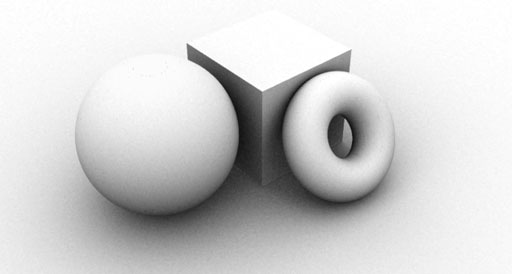 Using substance painter textures in unreal engine 4 Since substance painter compresses the metallic, roughness and ambient occlusion map I have to set up the textures correctly in unreal engine. It combined each map to its own channel on the RGB scale. using the support documentation of the substance painter website, it shows which map goes into each channel. Red channel = AO map green channel = roughness map blue channel = metallic map 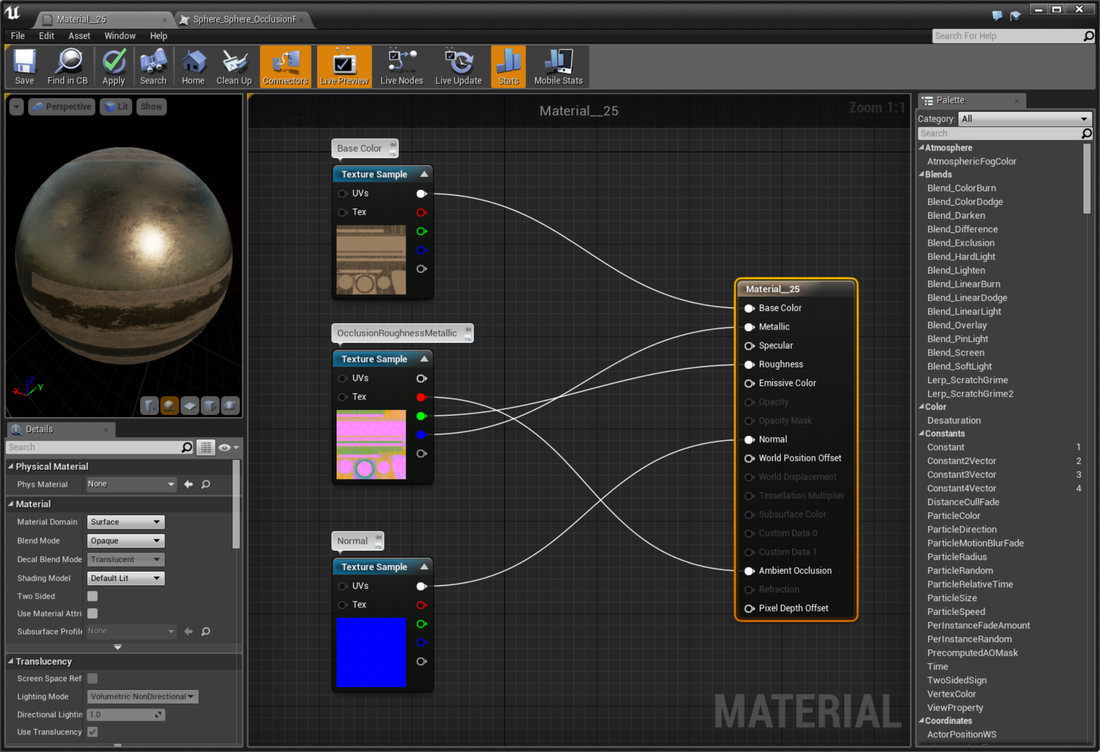 References
http://blog.digitaltutors.com/understanding-difference-texture-maps/ https://www.lifewire.com/texture-mapping-1956 https://www.reallusion.com/iclone/Help/iClone3/15_Multiple_Channel_Texture_Mapping/Types_of_maps.htm https://support.allegorithmic.com/documentation/display/SPDOC/Unreal+Engine+4 After researching the different texture maps I have decided I will only need a diffuse map, normal map, roughness, metallic map and an ambient occlusion map for my gramophone model After using Mudbox to add a slot to the gramophone and baking it within substance painter, I needed to add more detail to the rest of the model. I started off by going into Maya and duplicating my model and adding extra edge loops in the model to define edges that I want to keep sharp and crisp and added more edge loops around the areas I wanted smooth curve. I used the smooth preview button to see if the edge was staying as sharp as I wanted and find area that needed extra edge loops. After this I smoothed the model with a subdivision of 1. 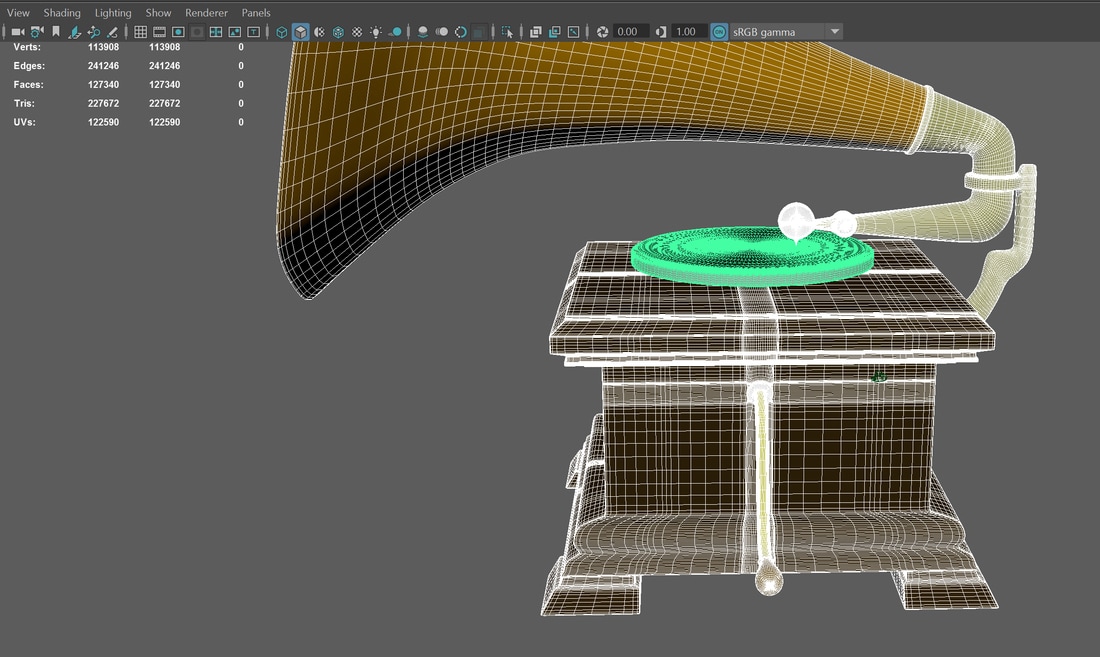 I then went into substance painter and baked each of the areas that I did not bake before 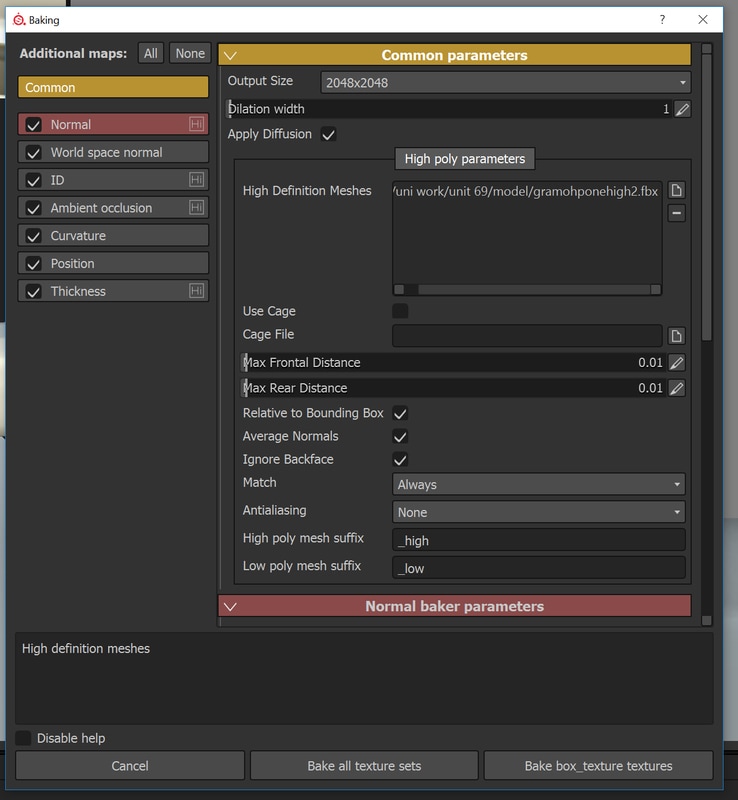
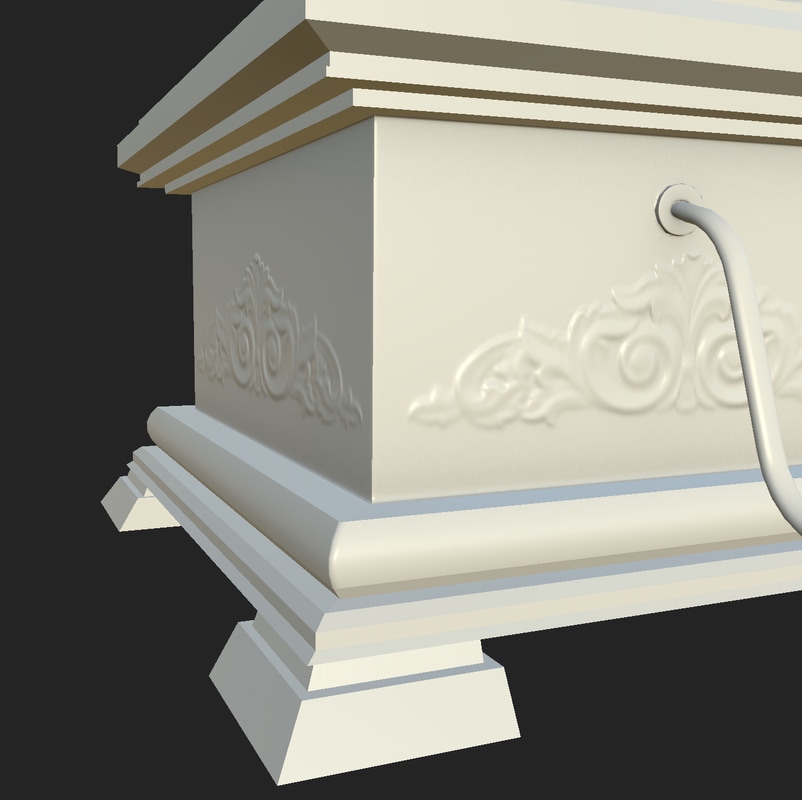
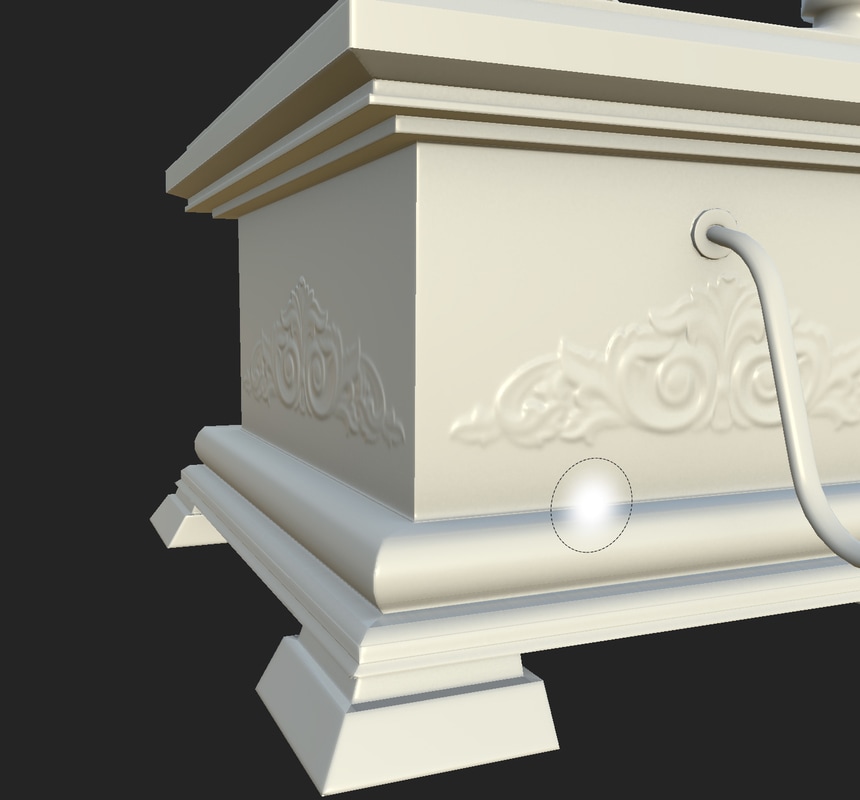
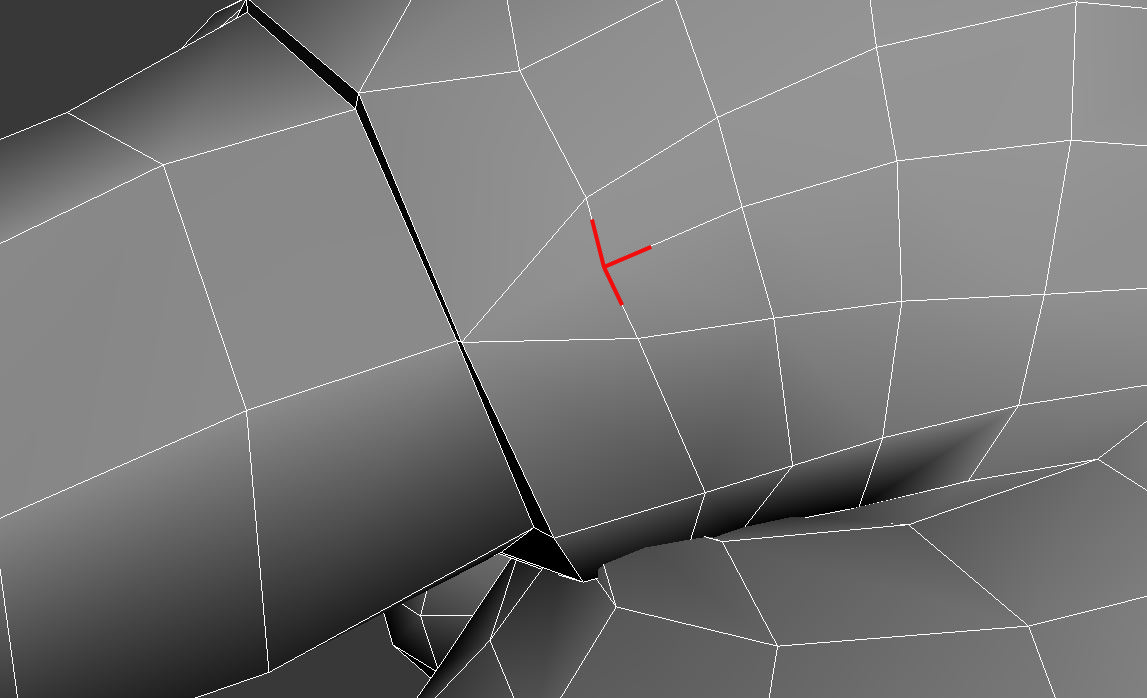
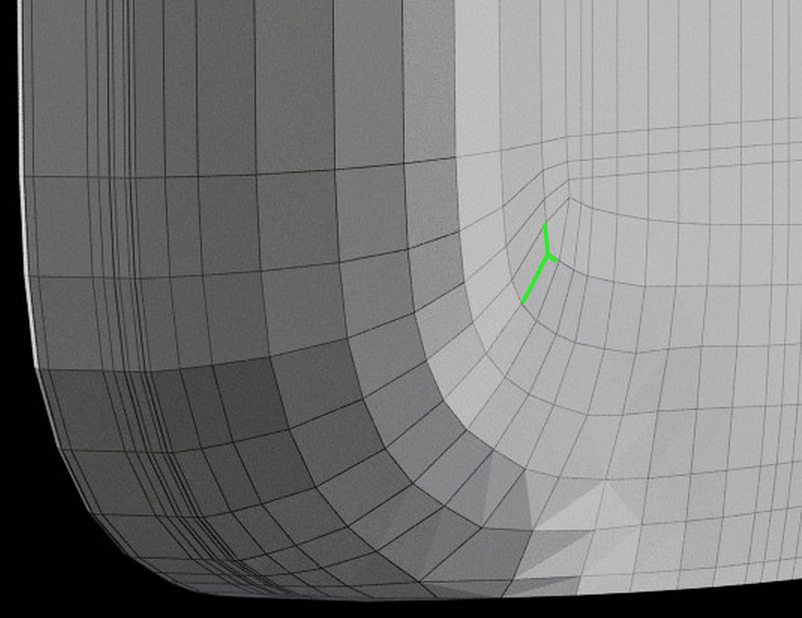
As you can see from the images above, there is slight differences, the book as made the wood that is curved more smooth and it has defined the edges and make them more crisp and sharp. I did this process for all of the gramophone except for the horn. For the horn as I wanted it to stay as it was designed in the low poly, I decided to add the final details in substance painter. Using an alpha brush and increasing the height I drew the lines on top of the model using the shift key to keep them straight. for the inside I used the height option but in the minors as I wanted to give the effect of it is indented and popped up on the other side. Using substance pointer for this drew the lines I made straight onto the normal maps without having to take it back into the substance or Maya to added extra detail or to sculpt on resulting in a quick process for this. 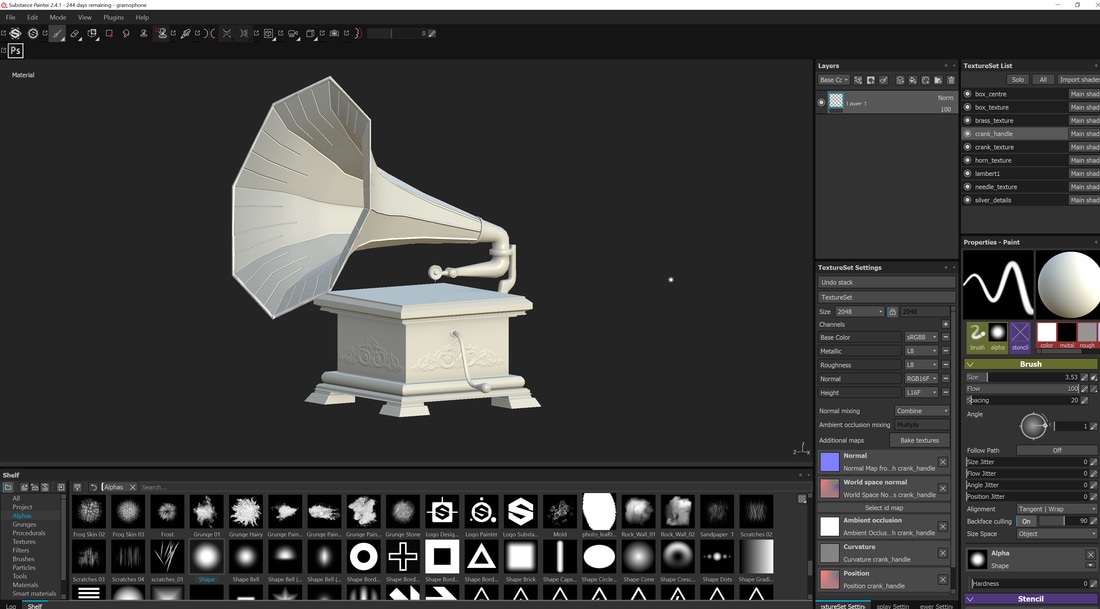 Few screen grabs of the finished process of the high to low poly bake using, mudbox, maya and substance painter. for the turntable I used the same process of making a high poly version of it in Maya so I could keep the edges I wanted crisp while making the disk look smoother than the low poly version. Then I baked the low poly model with the high poly model using substance painter. 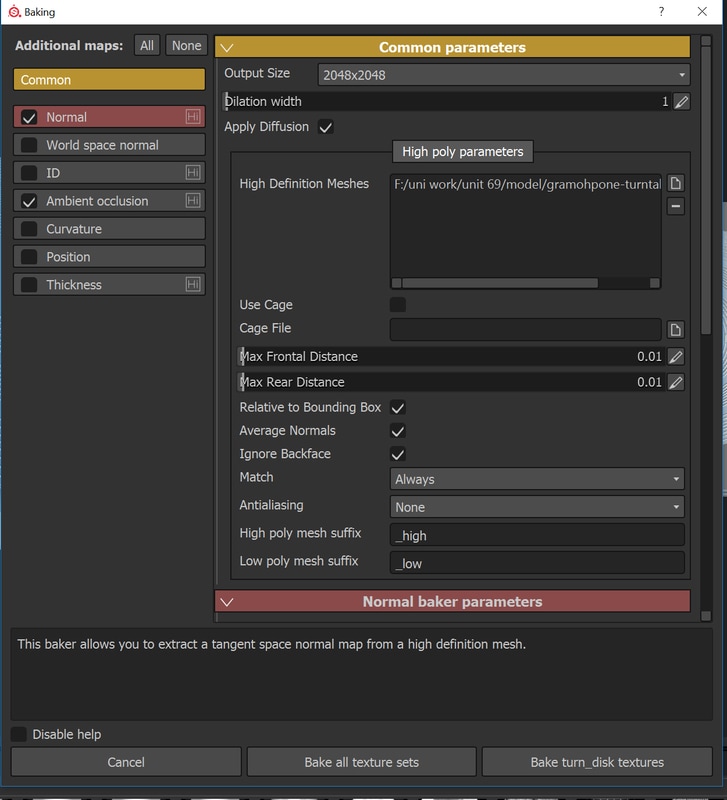 I needed to make my own alpha brush to make the bumps on the disk so I took a snapshot of the turn table us and opened them in photoshop. I used these as a size guidelines when making my first circle with the shape tools. I made sure to have my background black and the circles white as when using the height map it will read white as height and black as low. I made multiple circles, having different sizes in between the circles as shown below: 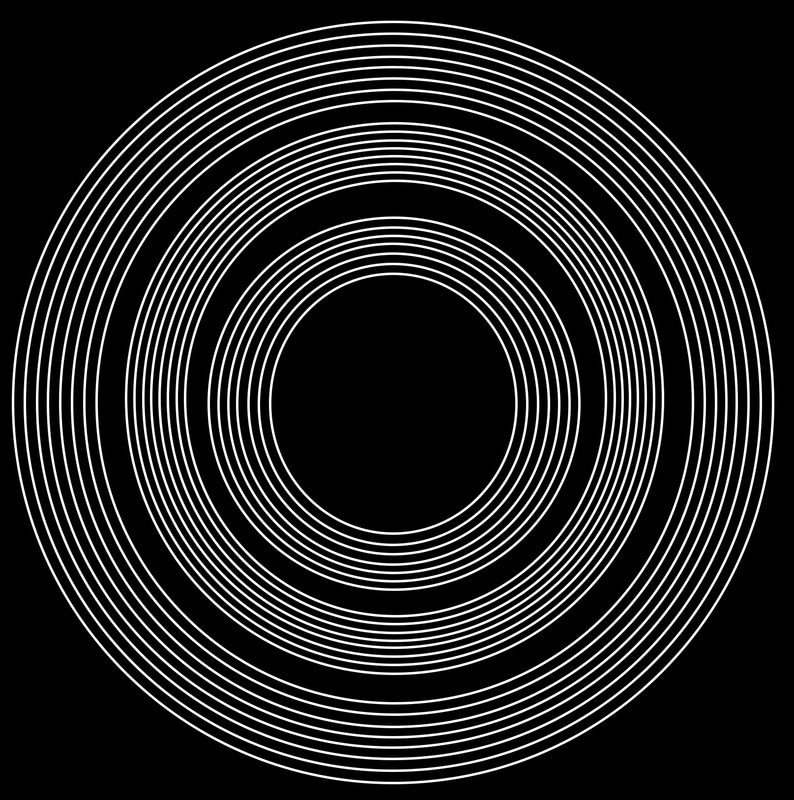 After I made the alpha brush I imported it into substance painter and applied it as a stencil and increased the height map of my brush and stenciled the circles on top of the disk as shown below: 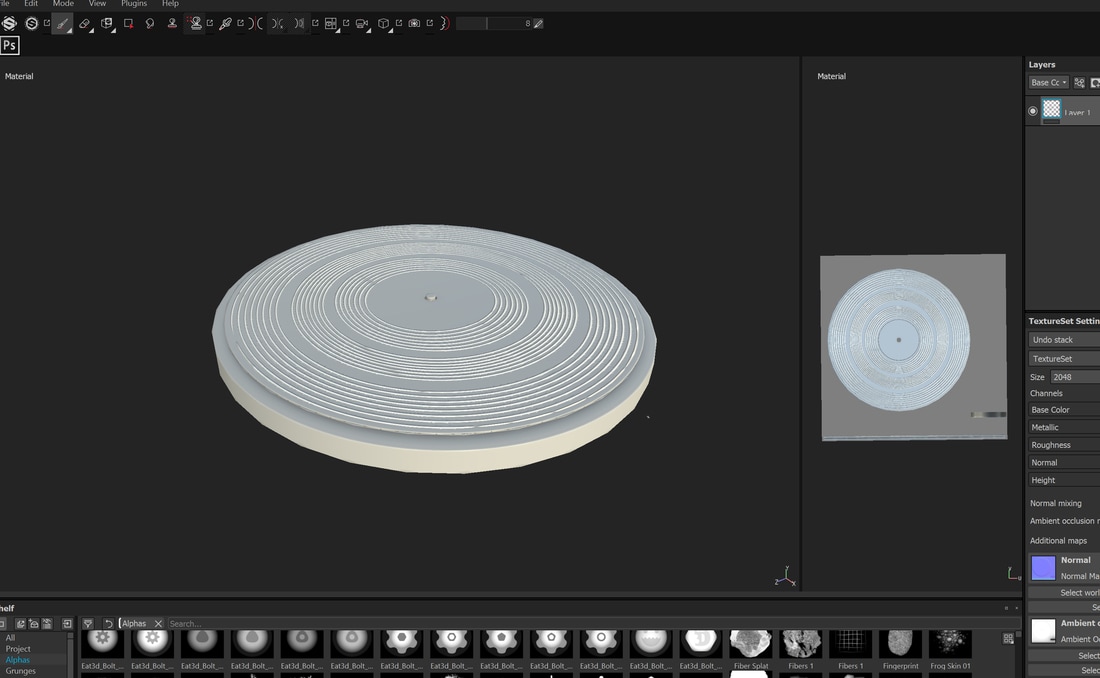 High to low poly bake is combining your high resolution model and low poly model by creating a normal or a displacement texture map and applying it to the low poly model to transfer all the details from the high poly and apply them to the low poly model via a texture. The information in the textures uses different shades or colour which will pass onto the software or render if should be high or low. This gives the illusion of extra geometry to the mesh, but isn't actually geometry and is just a texture map. This is ideal for games as it helps the engine load the models faster as there is less Geometry for the engine to low, increasing performance and optimizing the game play. I have two stages of my high to low poly bake, I want to create some extra detail geometry using Mudbox then import that into substance painter, where I can add minor details that are not as complex and then go straight into creating the texture. I started off by taking the gramophone into Mudbox and subdividing to level 6 and used a stencil of period style ornament in wood carvings as I wanted to make the gramophone look like it has come from the Victorian/ Edwardian time. I started to apply the stencil and I ran into the first problem of this stage, the mess caused bumps in the geometry after subdividing and has effected the model when sculpting onto it as shown below 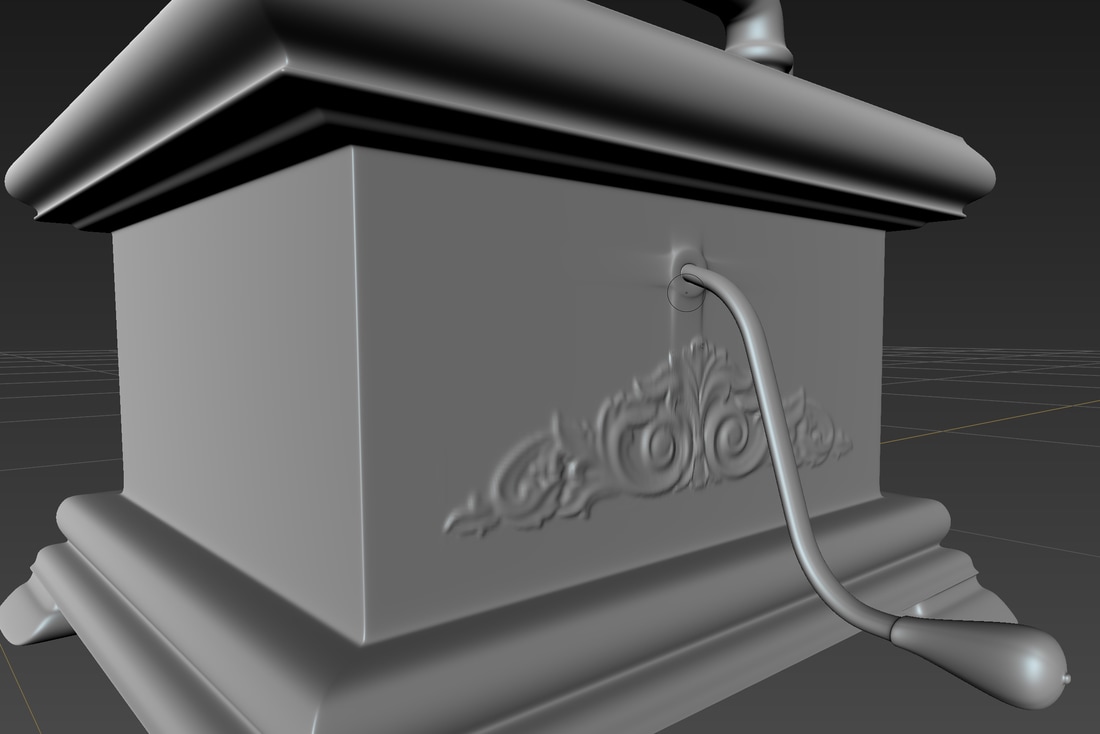 How I fixed this was by adding extra lines into the geometry of the model to stop the handle pulling out the box mesh. As shown below 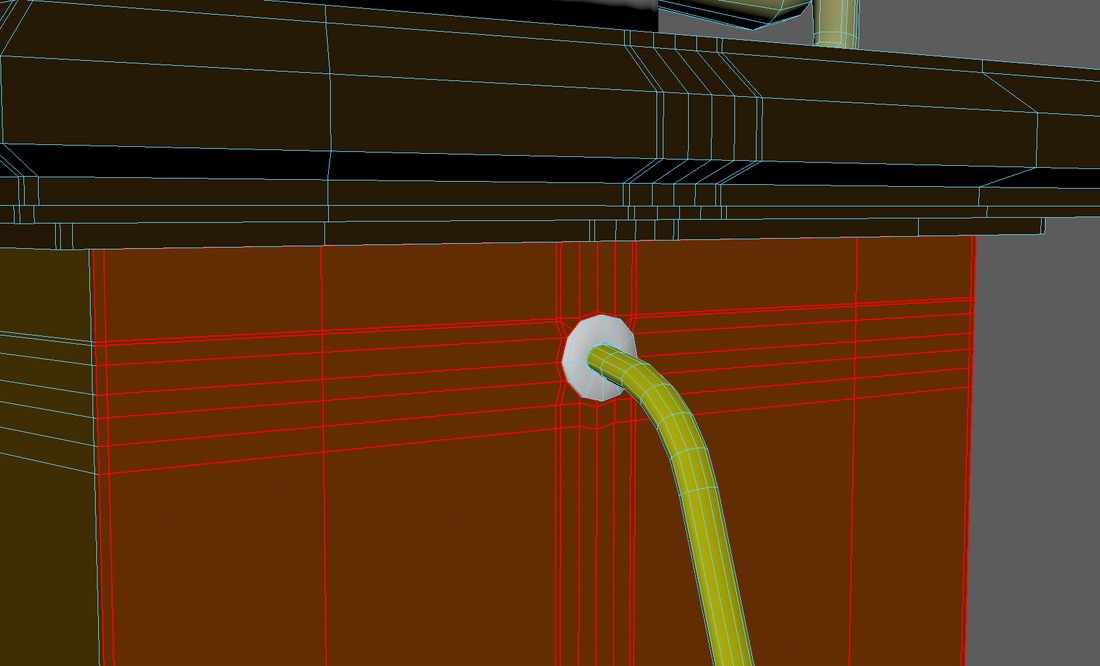 After I fixed this I was able to sculpt onto the model without any errors occurring, and I got the box to look how I wanted it to look like for this part of the sculpt. 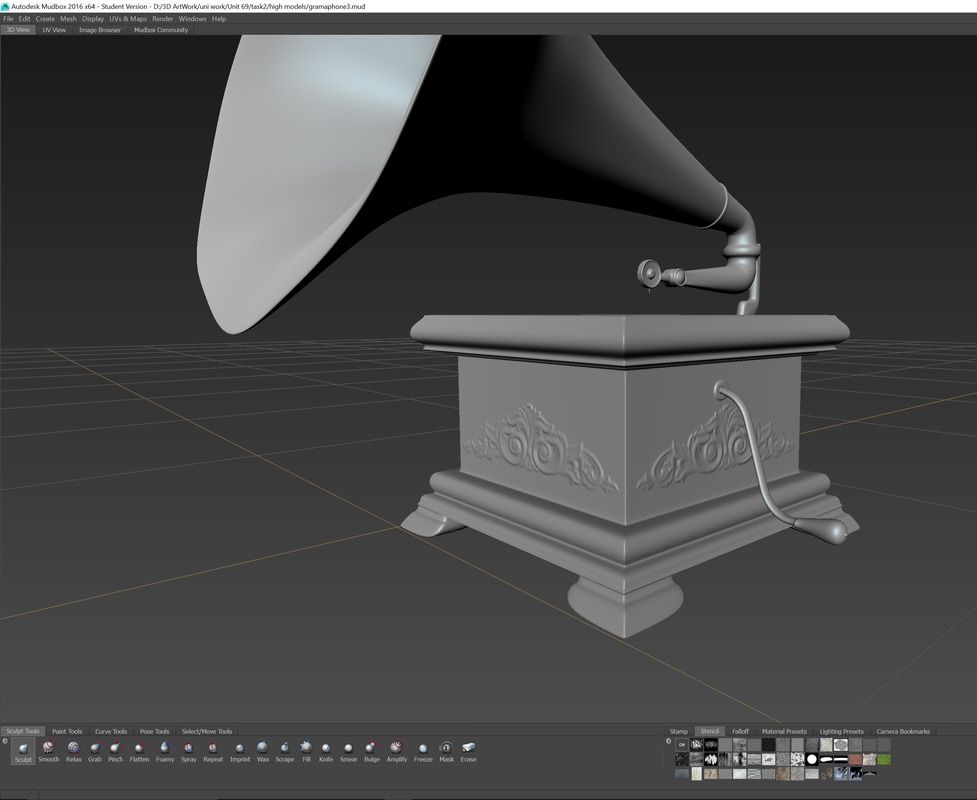 The plan was to use Mudbox texture map extraction. with this tool Mudbox would create a normal map for my model by selecting the high poly and choosing the lowest subdivision level possible for it to bake down on top, I extracted the maps as TGA format as it has an alpha channel and can choose between 16 and 32 bits. When I opened my low model into substance painter and applied the normal map to the box part of the gramophone, the baker had gone wrong and created extra geometry compared to what I had made. 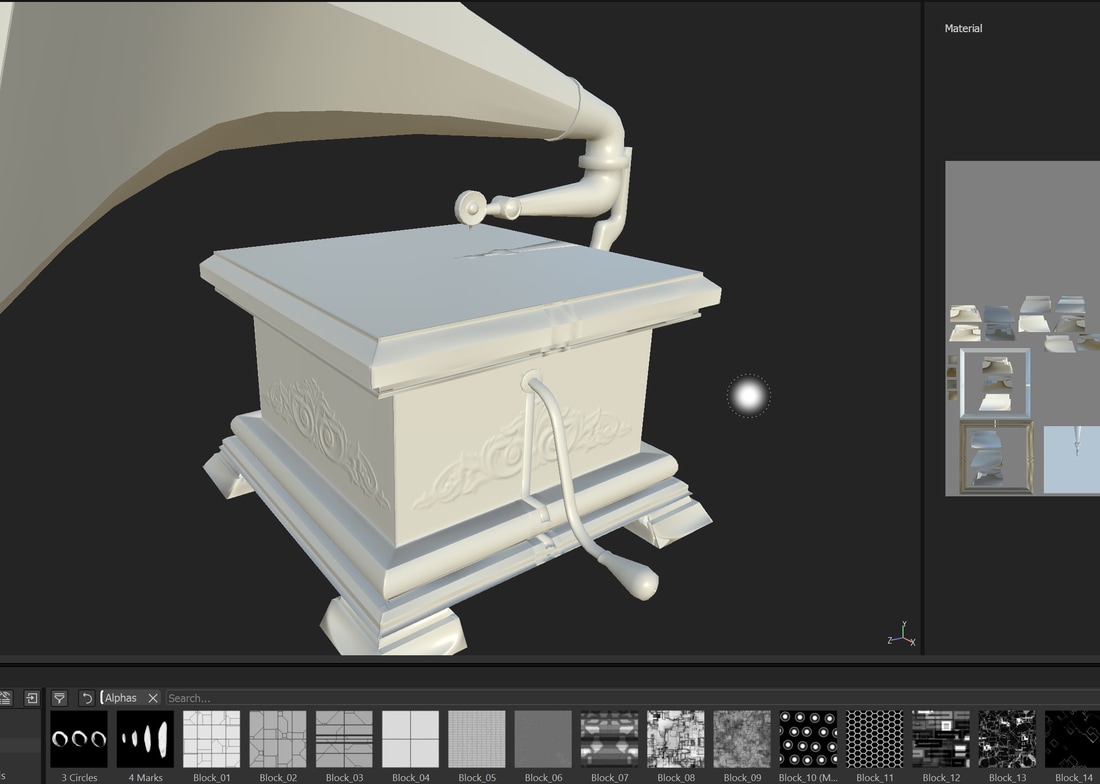 I tried numerous extractions with different file types and different settings and level of subdivision, but this only slightly improved the normal maps. So after the texture extraction didn't work from Mudbox, I decided to do the high to low poly bake from Mudbox inside of substance painter. I loaded my low poly mesh up and went to the bake settings and added the high poly model. 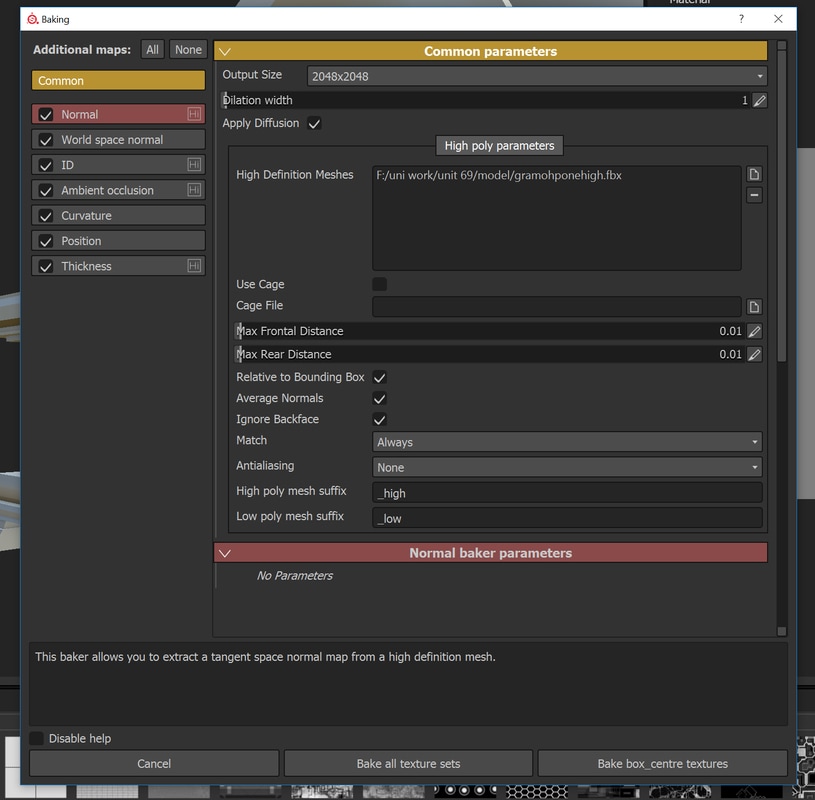 I selected all the texture maps inside of the list, but the only two I really need out of the list is the normal and ambient occlusion maps. Then I made sure that I only baked to the gramophone box and not all of the gramophone as Mudbox smooth the edges that I want to keep as hard edges and doing it this way I can have the best of both worlds. These are the results of the bake I did with substance painter using the high poly model I made in Mudbox 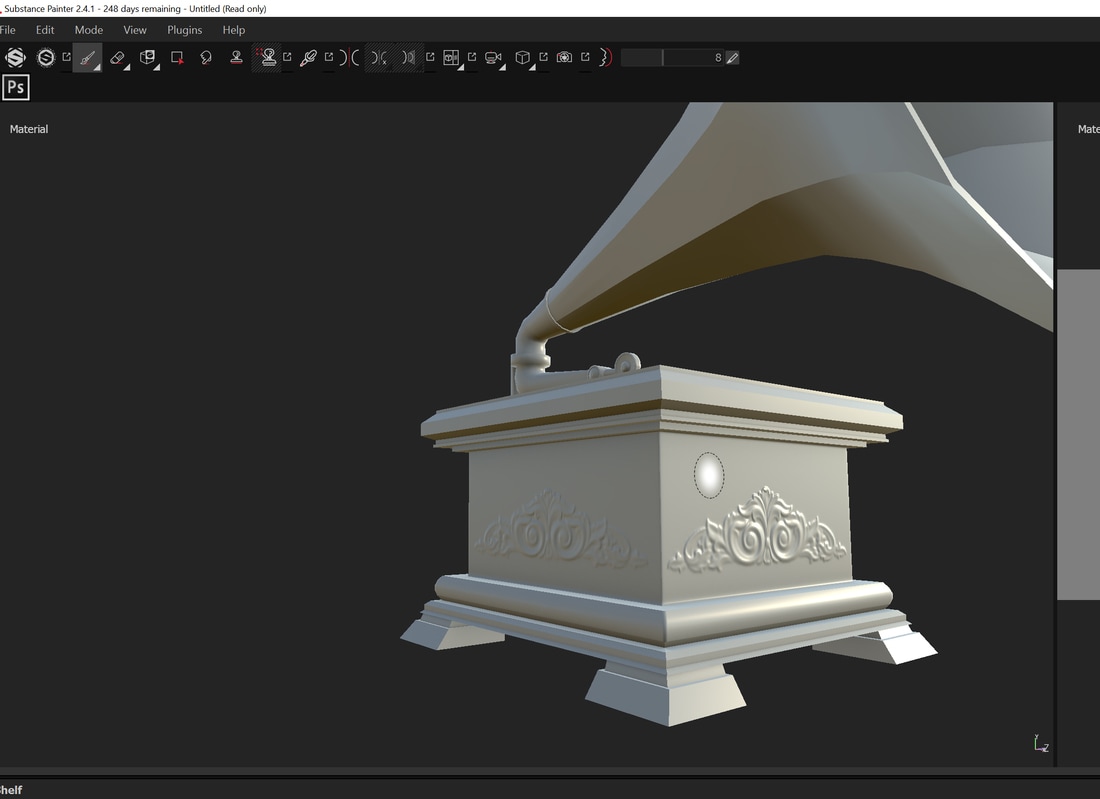 as you can see the high to low poly bake worked this time and i have a clean mesh with all the detail i added to the box applied to my low poly model by using a normal map created with substance painter.
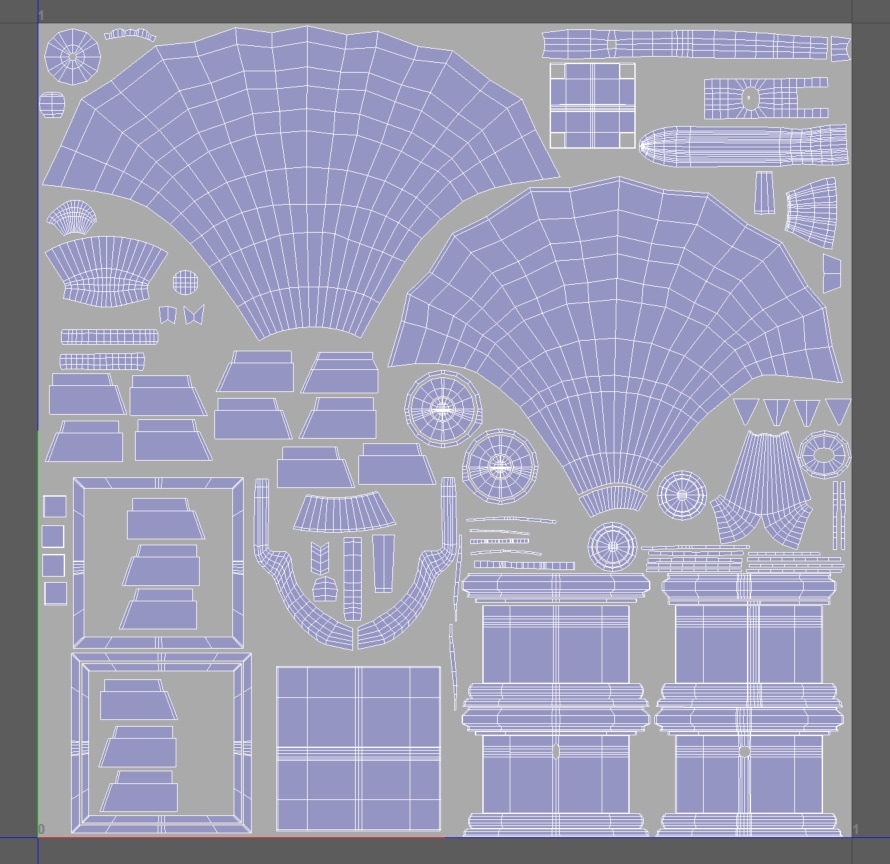
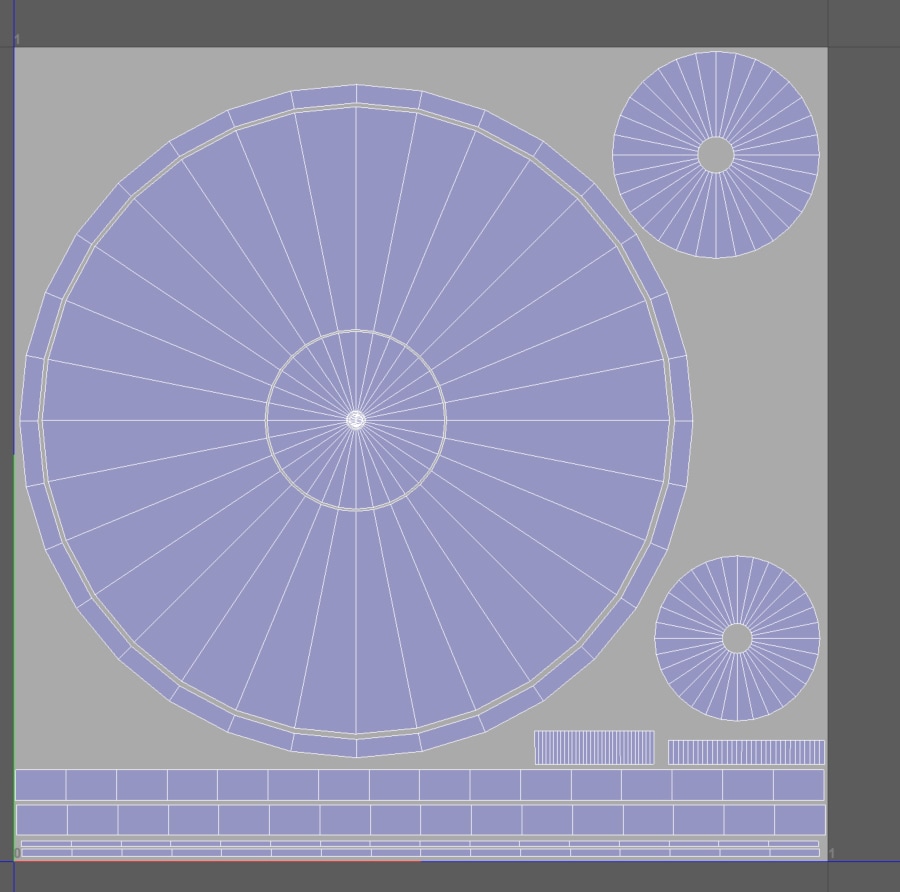
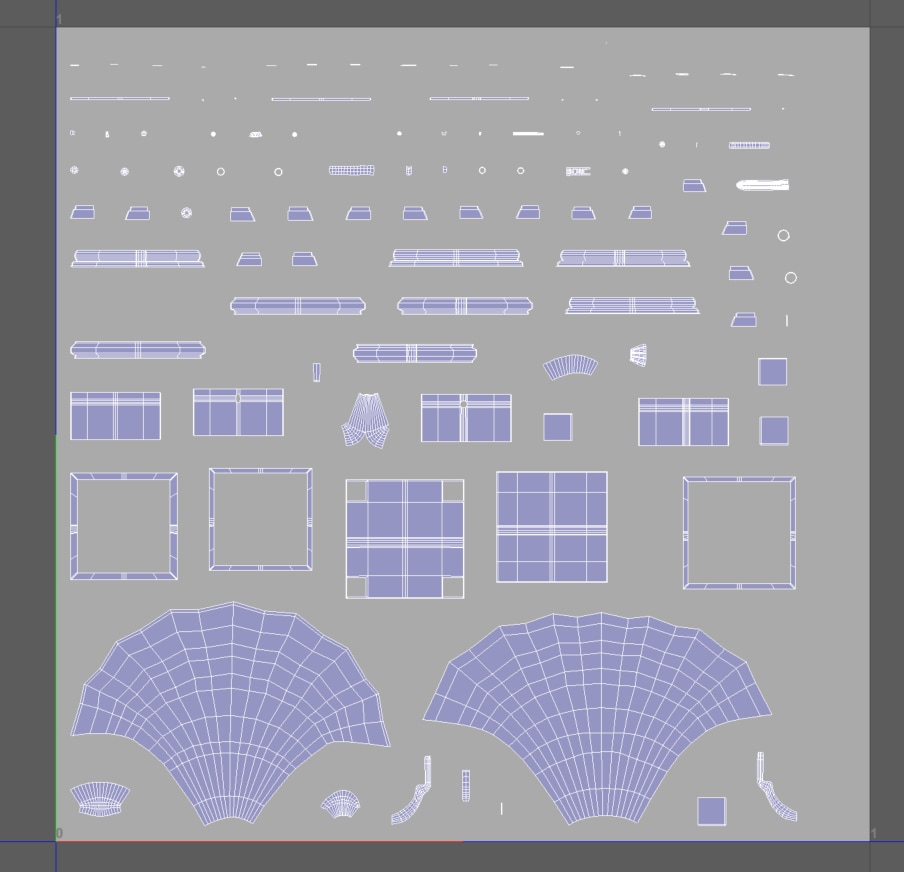
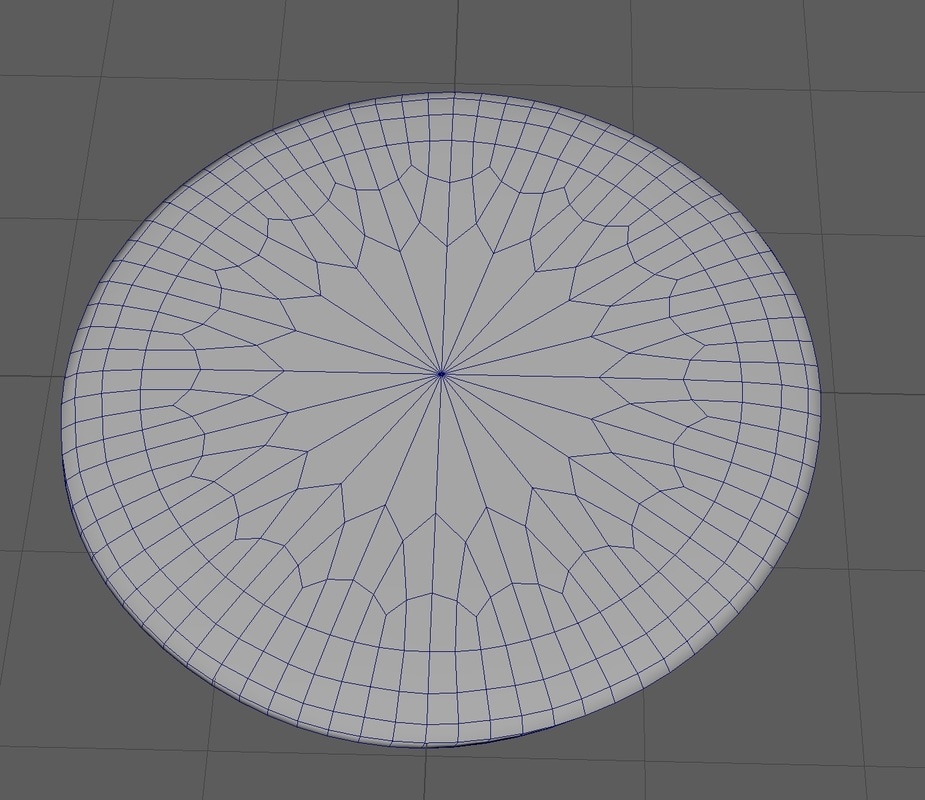
After doing my research on how to do the UV's correctly for my model, I then applied all the techniques to my model and created the UV for it. I made sure all the squares were as even as possible to stop stretching and made sure there was no overlapping and enough space between each shell so there would be no bleeding when I paint on the uvs later on with substance painter.I also tried to avoid having seams in the middle of the model and kept them to edges and hidden from the players view. in the images below you can see my UV for the gramophone and how I have laid them out.
In the image below you can see the gramophone with a checkered image onto to show how event the square are to avoid stretching and distortion. 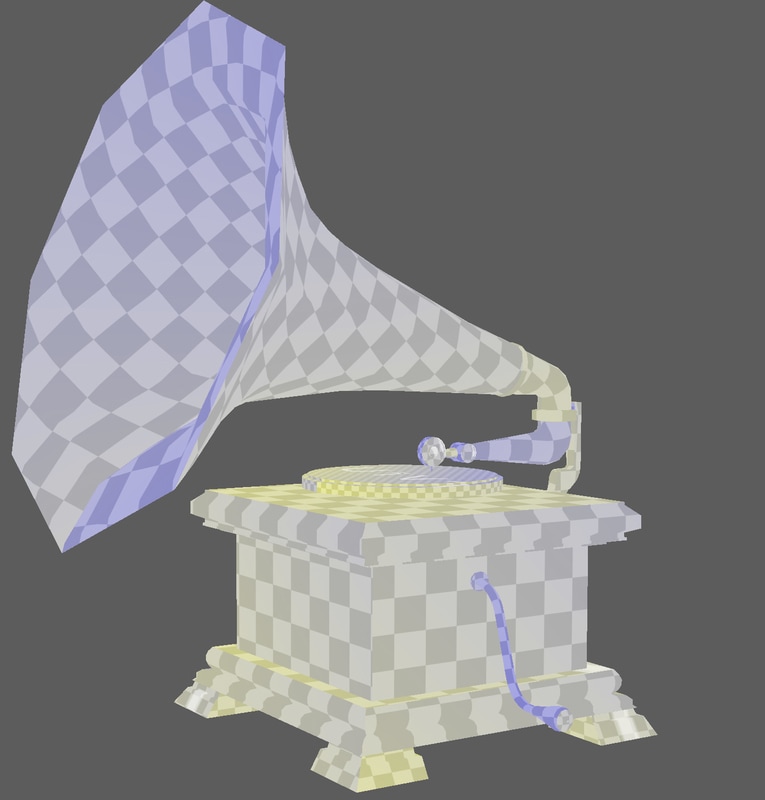 After I created the waves I copied the waves into a new layer and rename them lightmaps I then applied a layout of 2%, which should give enough space between the shells to avoid shadow bleeding in the game.
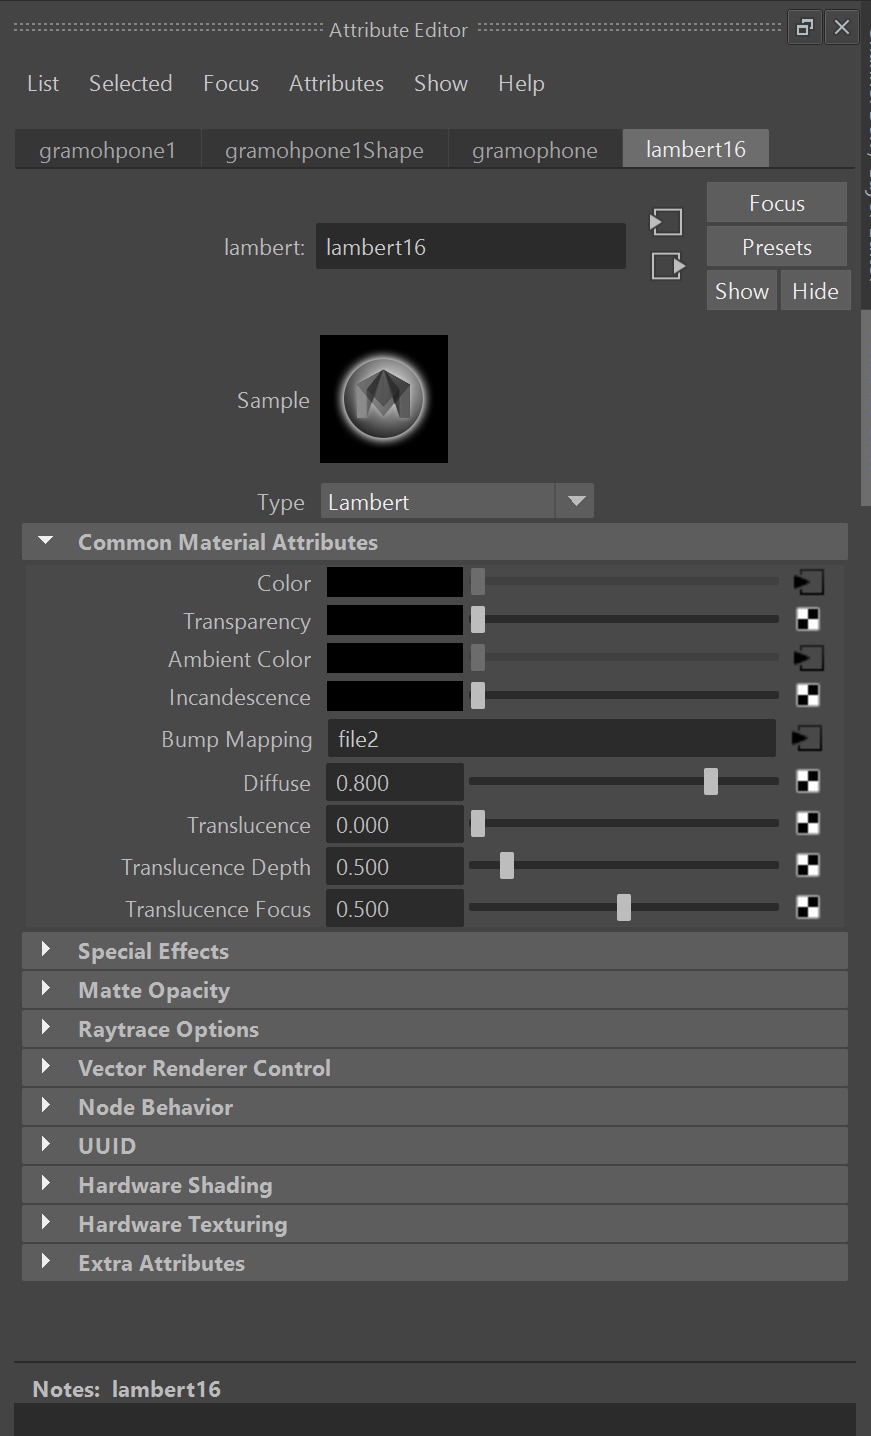
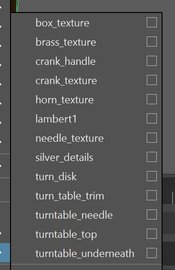
After I got my UV sorted I placed a lambert texture on each of the areas I felt will have different types of materials, this will help me when I come to textering and painting in substance as it will break down each lambert texture and place it into its own layer.
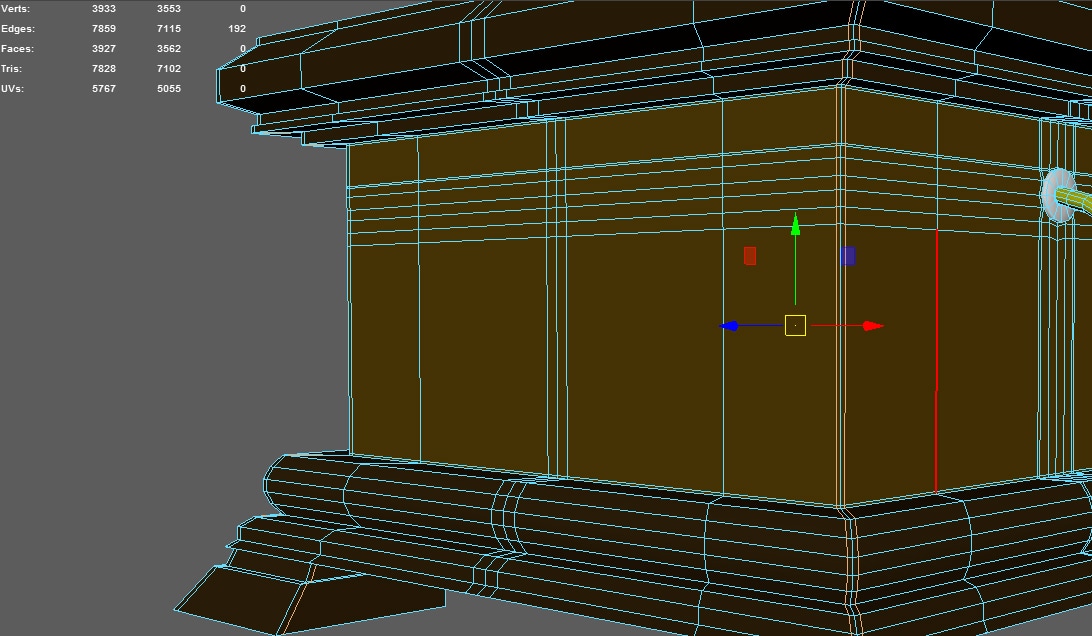
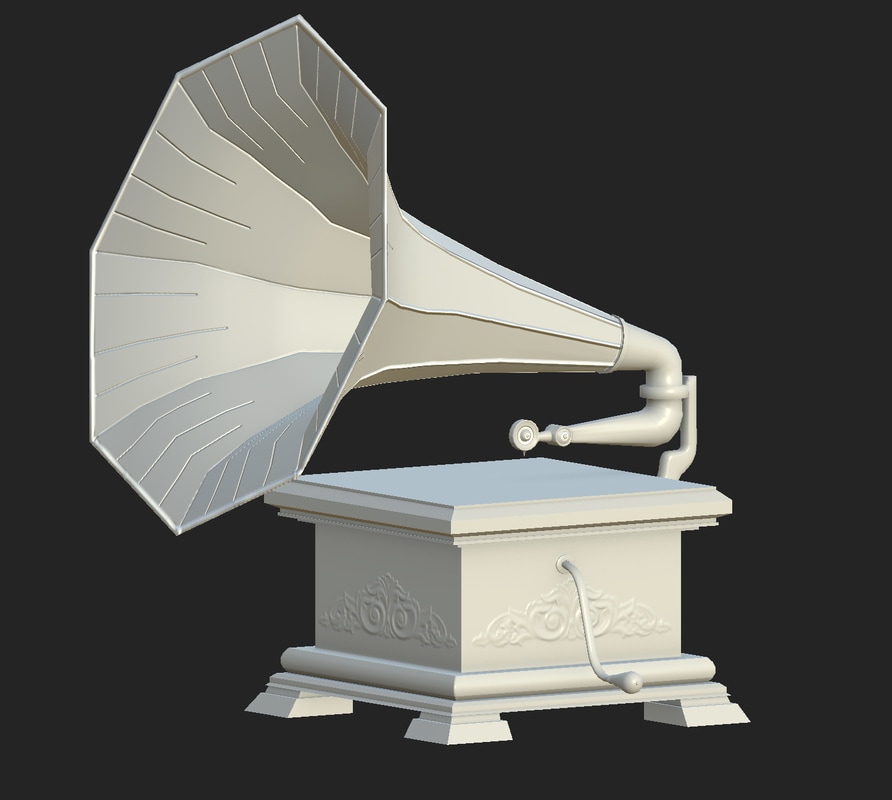
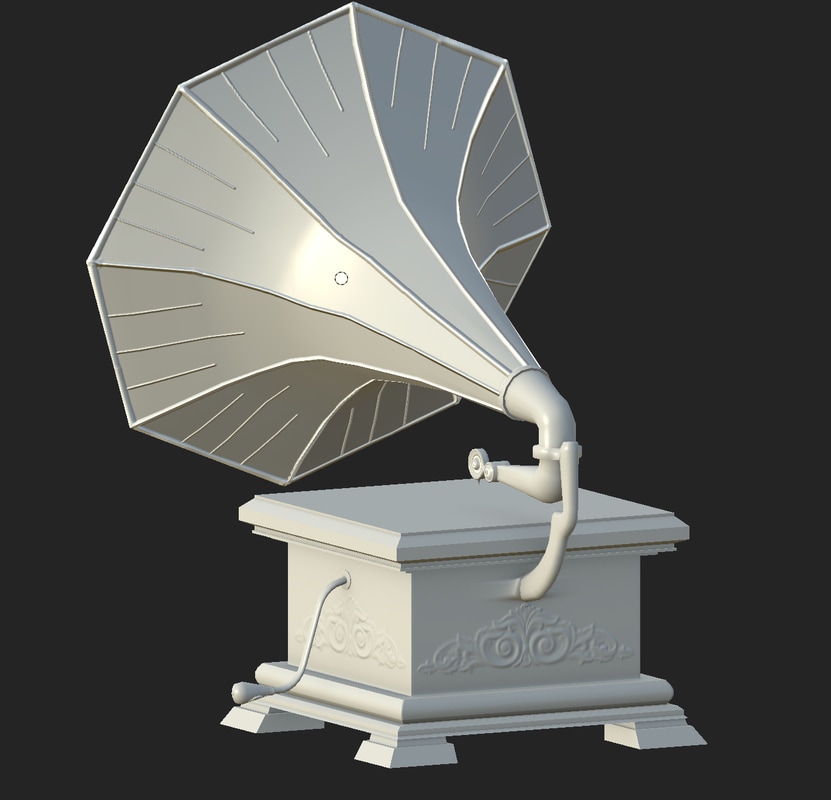
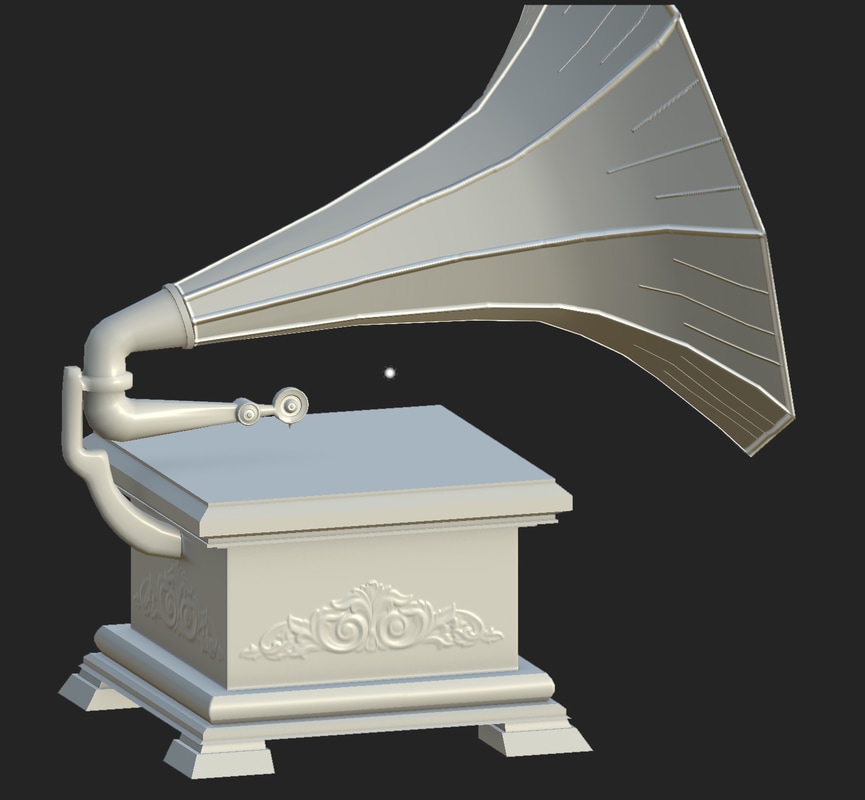
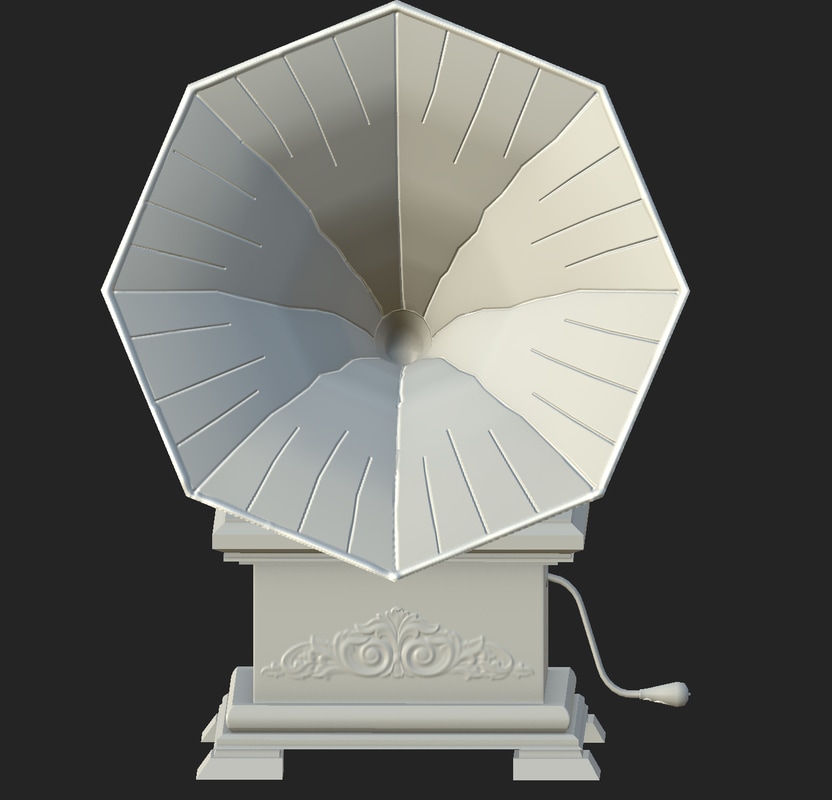
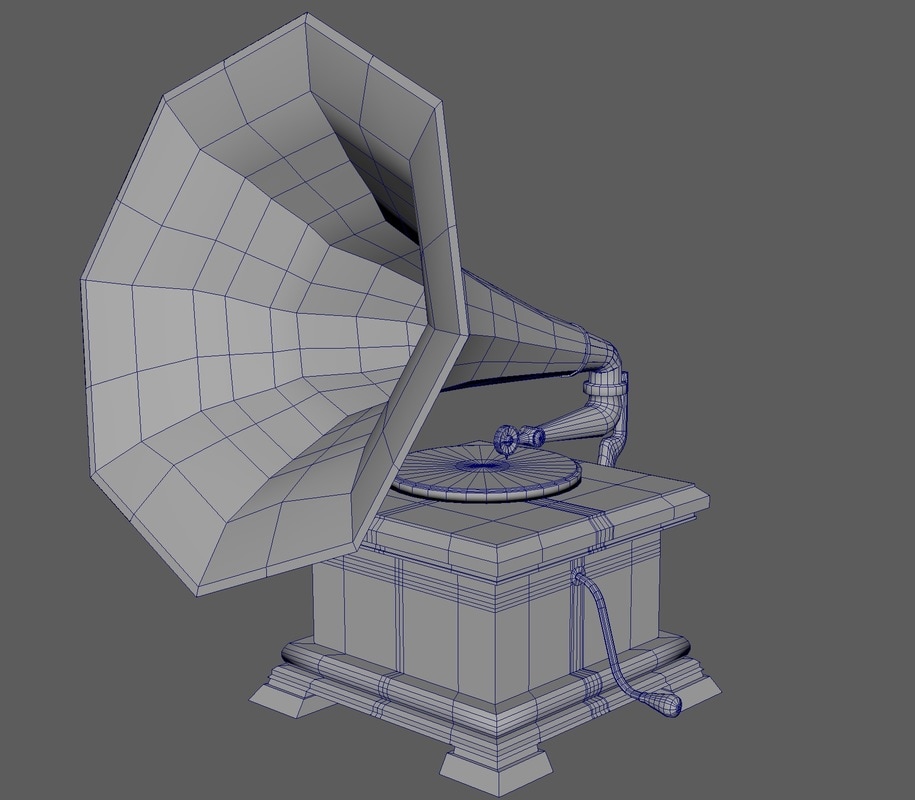
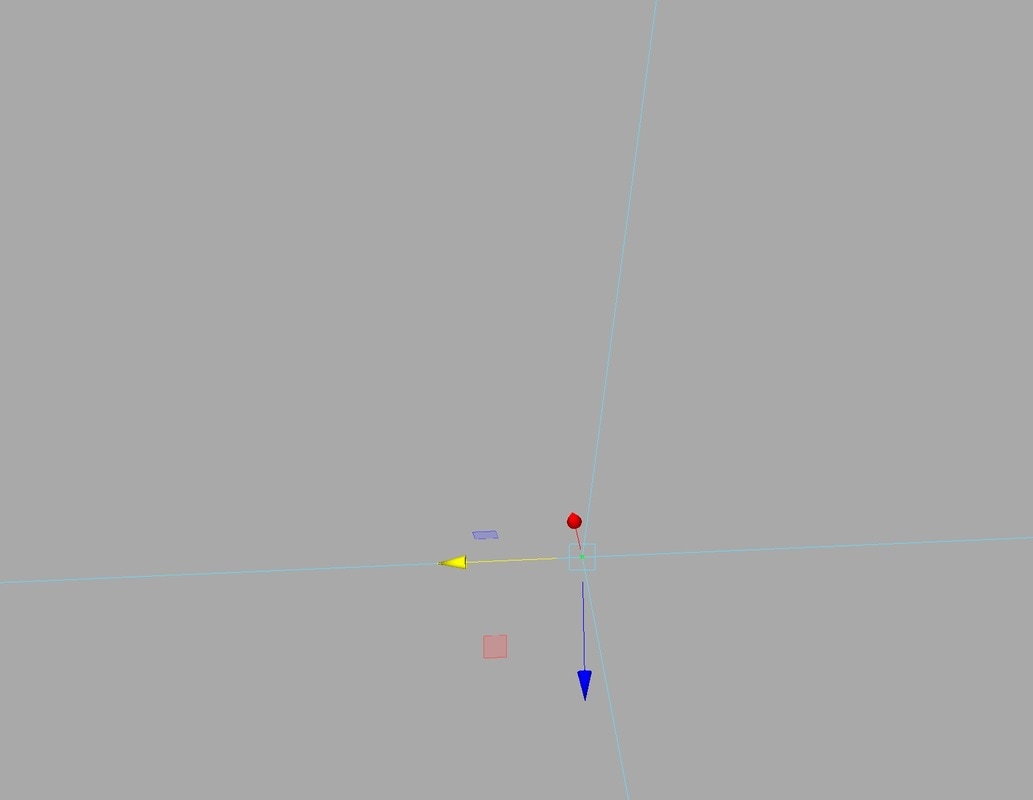
Uv maps UVs are two-dimensional texture coordinates that use the vertex information from the model geometry. UVs are important to the model because it tells the model how to apply the texture onto the surface. The XYZ axis are already used in the 3D space, we have to use U and V for the axis in the 2D space. So when these two are applied together U and V axis of the 2D texture it projects its coordinates onto the 3D models axis of XYZ. In the image below you can see 10 vertex selected in the model and in the UV map you can see where it corresponds to the 2D texture 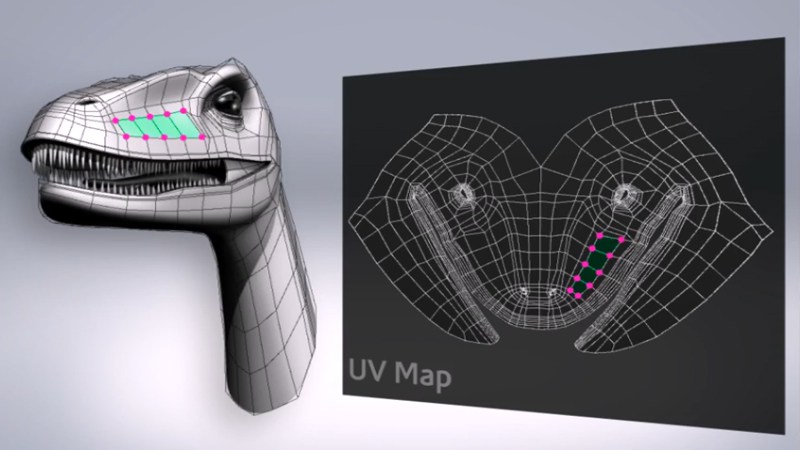 The UV map needs to unfold and flattened out and have no overlapping UV coordinates to stop texture deformations. Also, using a checked texture is ideal so that you can see where the texture would be stretched and if it has even squares. As shown in the image below, is bad UVs, stretched and distorted and not perfect squares 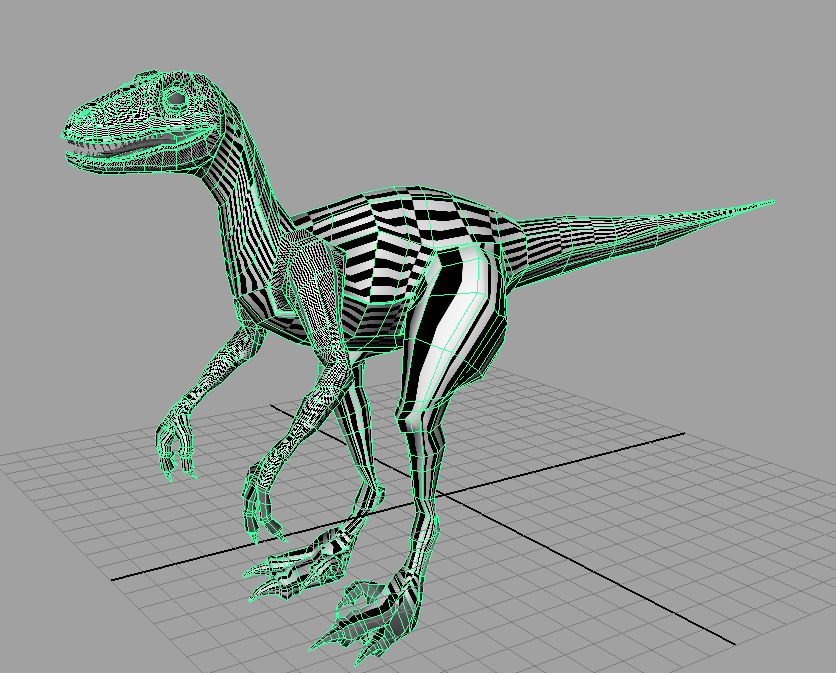 In the image show how correct UV unfolding looks like as there is no stretching or distorting. This is shown by even squares throughout the model 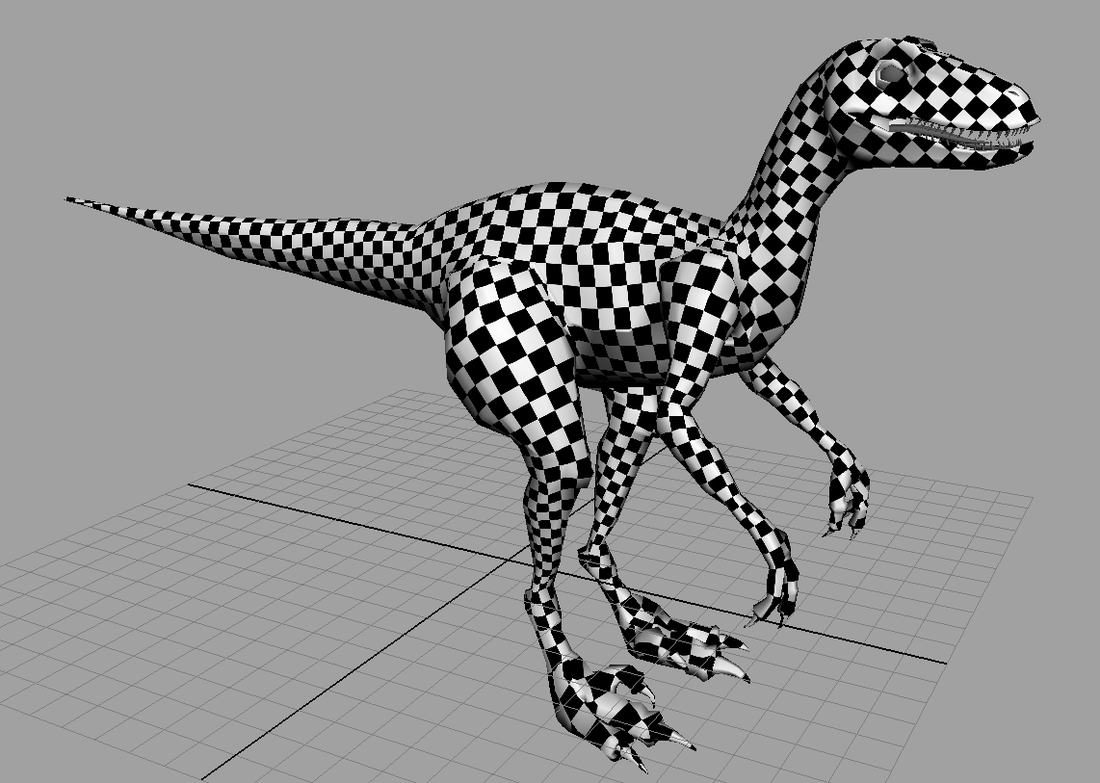 References https://biocinematics.blogspot.co.uk/2010_04_01_archive.html http://blog.digitaltutors.com/understanding-uvs-love-them-or-hate-them-theyre-essential-to-know/ Lightmaps Lightmaps are based off the models UV texture coordinates placed into a new UV layer. They are pre-rendered in the game engine and turned into a grey scale texture. When a light shines onto the model has cast a dark grey shadow of the diffuse texture coordinates. Lightmap UV's need more space between each shell so there is no overlapping and cause a shadow bleeding as shown in the image below what happens when lightmaps overlap and cause a shadow bleed.  The image below shows how correct lightmaps render in the game engine. 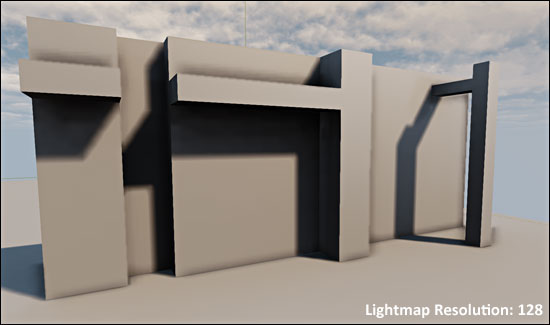 After researching good and bad topology I started to make my gramophone, I found a reference photo to use as guidance which I imported into Maya onto a background plane. 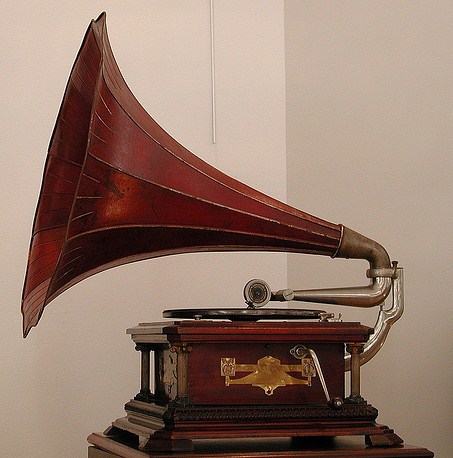 I decided to break the model down into four sections and model them all sepertley and then combinded them all together. I started off with the horn using a tube with 8 sides, I made one end big and wide and the other end the pursuit and resized the remaining edges to give a smooth transaction. After that I added an edge loop to the smaller end and extruded out from this to make a lip on the metal. I then got another tube and used a deform nonlinear bend, I used this process for the arm that attaches the horn to the box. After that I added extra edge loops to the horn and target welded the two together. Then I used two cylinders and target welded these to the end of the new horn. I then created the box using a cube, I added edge loops around the top and bottom of the box and then extruded out from these to add a bevel and detail to the top and bottom edges. on the bottom I added extra edge loops after this and moved the edges out to give the effect that there is a small smooth bevel. I then extruded the feet from the bottom of the cube and positioned the bottom edges out to give a sloping effect. After this i made the turn handle by using a cylinder and using the nonlinear bend tool again and then extruded out at the end to make the handle. The difficult part was attaching a cylinder to a cube and i had to place a lot of edge loops on the cube to connect the handle to the box The final bit of the model I made was the turntable, which is a cylinder that I used extrude on to add the effect that is a disk on the turntable and a pin it rotates around. I decided to not attach this to the rest of the model as it can be used as moving parts. For all the cylinders I removed the pole and bridged the caps and then used the Multi-cut tool to cut two or 3 lines in the centre to make the cap of the cylinder have quads for subdivided later. I also used soft and hard edge to effect the surface normals so on the areas that are smooth e.g the tube of the horn and the handle I use the soft edge tool and for the box where there is crisp lines I used the hard edge tool. In the images below are a few render shots of the model and a wireframe image The main tools i used inside maya to create my gramohpone are:
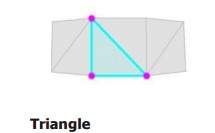
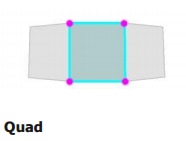
The tools that I used the most were the edge loop tool, it was great for adding extra lines to the geometry so I could connect each section to each other. I also found targeted wield and the bridge tool for connecting faces and vertices together, as well as recapping the top of a cylinder and using the append to polygon to finish the ends that I could not bridge. The extrude tool was also another major tool for me, I used it a lot to extrude out of shapes to add more geometry to either add extra detail or more shape. Before I start to design my assets model for unit 69, I decided to research about good topology, what is the correct topology for my model and what is not correct. Topology is the components that are connected and flow around the 3D objects, these are usual faces, edges and vertexes. As I’m making a game model I should optimised it to create a good silhouette, good edge loops for better deformation (mainly for characters) and for subdividing, extreme changes between surface normals (also known as vertex normals) and good UV seams. For good topology I want my model to be quads and little as possible triangles and avoid N-gons N-gons are shapes with more than four edges, these cannot be subdivided and would break the model when tried to be generated. N-Gons are also bad for games as well when put into a game engine as the engine tries to process the n-gon and puts more strain onto the graphics card and computer. The engine turns a quad into two triangles that it can render a N-gon will require more tingles and the more triangles the more time it takes for the engine to render causing a bottle neck known as lag or fps drops. Triangles are bad when trying to subdivide as it would not be able to subdivide the triangle and causes more errors Quads are more ideal as there are four edges and can connect easily to the next face, can be subdivided with out error and can be deformed with extra edges in the area e.g. bends or limbs References: http://blog.digitaltutors.com/ngons-triangles-bad/
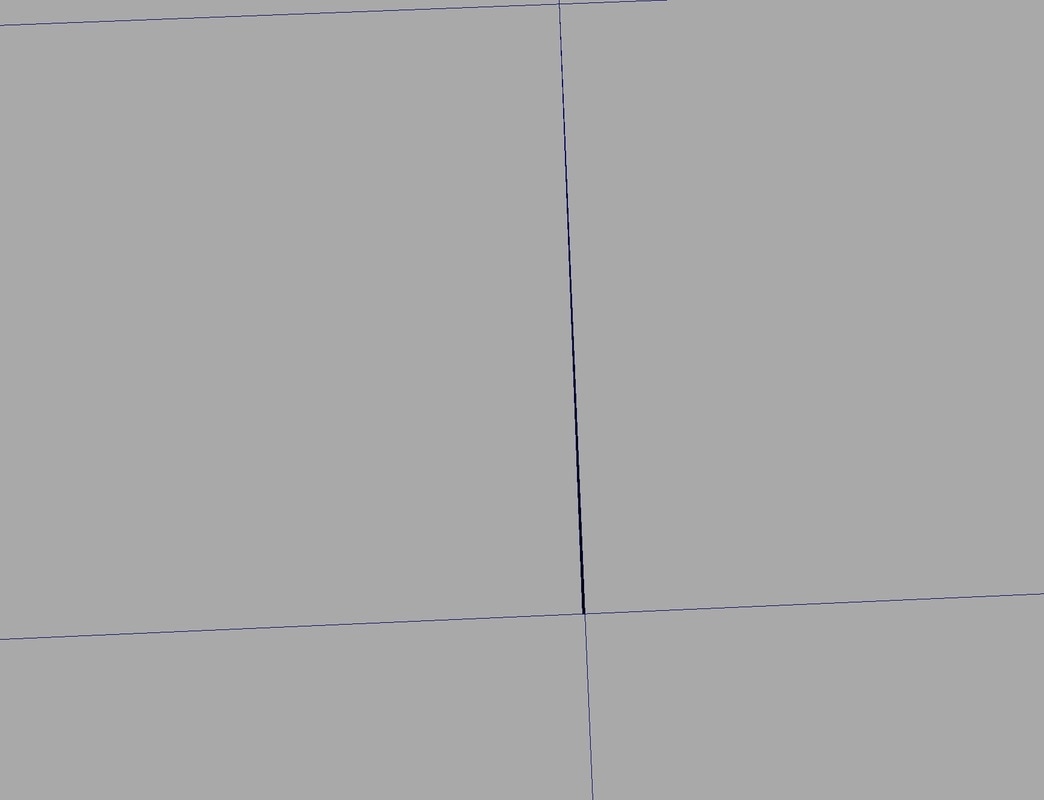
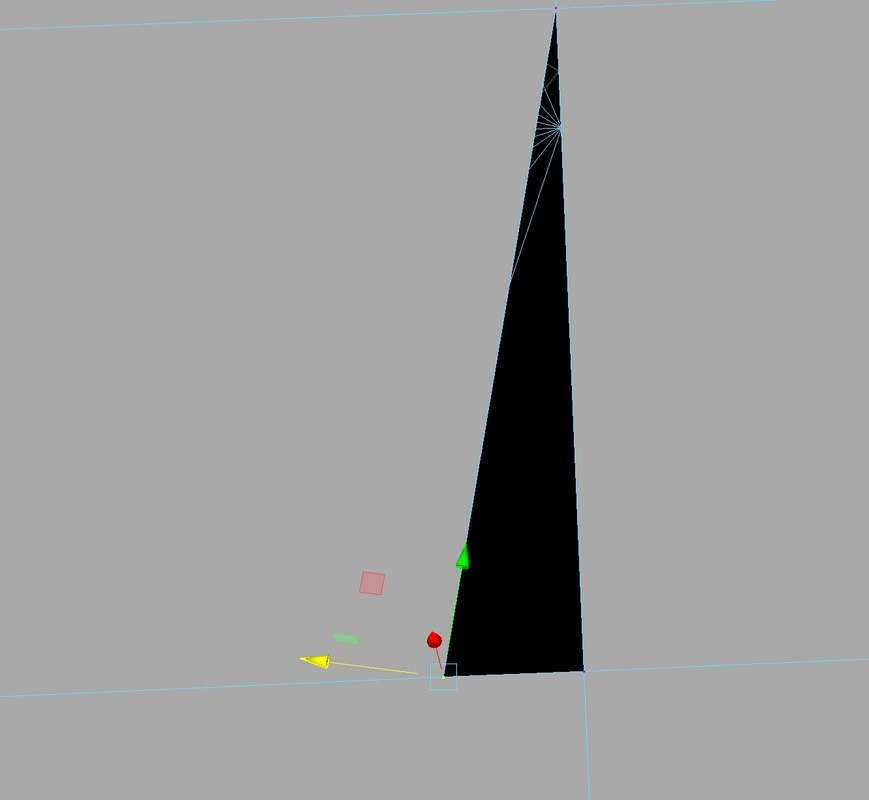
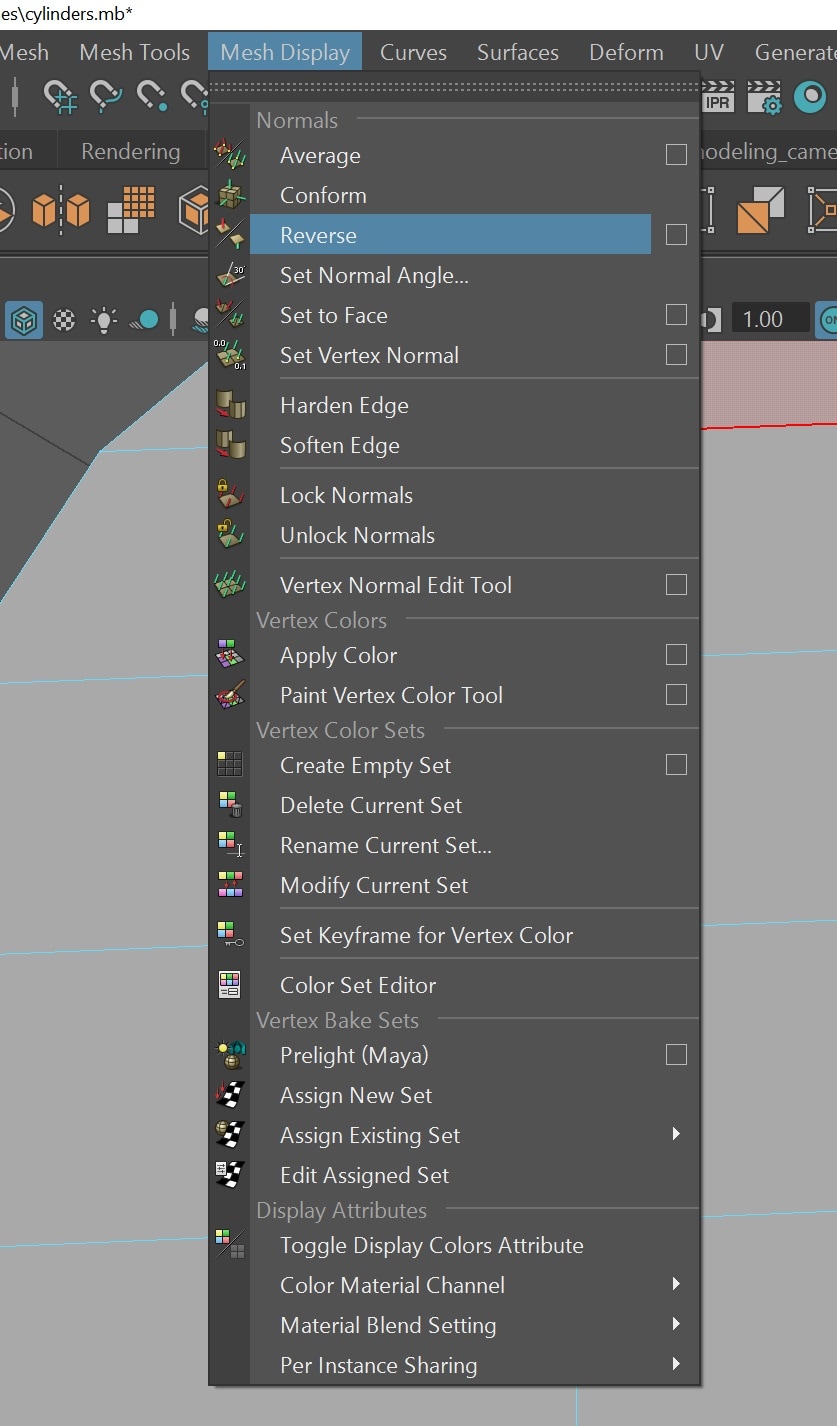
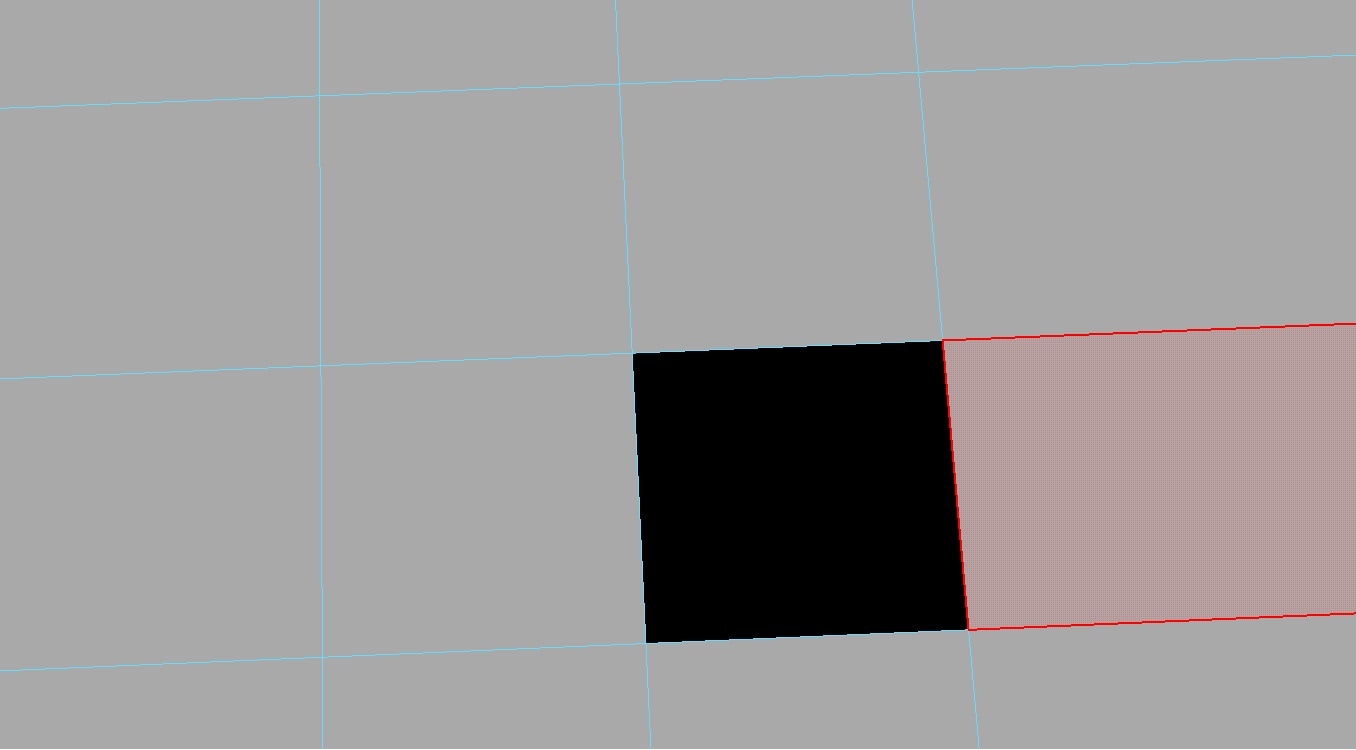
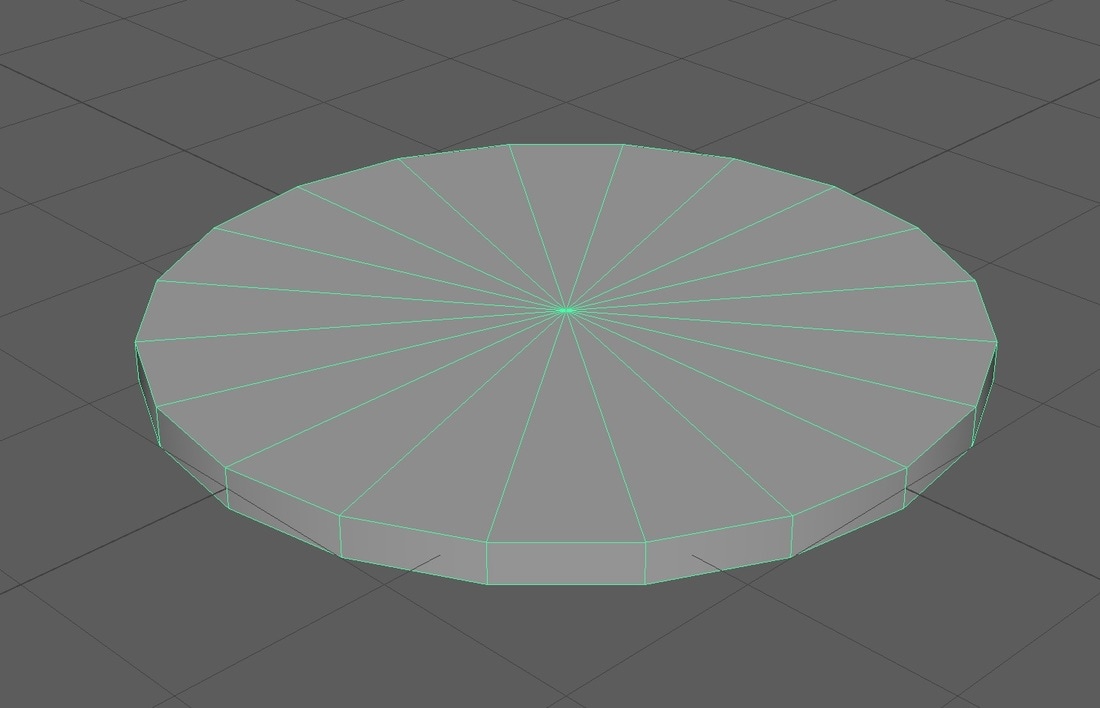
Other type (manifold Surfaces) of bad topology I need to avoid to get good topology is: T-Vertices are when you have two edges connected and form a T-shape with the edges leaving a vertex, this can cause errors if not used correct. if a T-Vertices connects into a quad I can create an N-gon and won’t have edge flow and cause bad subdivision. Best used when the model edges are flowing around a corner and T-Vertices is connected to a triangle and this created a quad. But these should be avoided if possible. References: http://blog.turbosquid.com/2013/09/05/checkmate-pro-v2-specification-t-vertices/ Doubled faces usually caused by extruding twice and causes faces to overlap or when vertices / edges are target welded to other parts of the model and causes overlapping and double faces. Holes are usually created when faces have been deleted and existing faces have not been connected via vertex or edges as shown in the photos below. Reversed faces happen when the surface normals flip to show the black underside of the face and can be easily fixed by reserving the surface normals back. Unseen faces are internal faces that we forget to delete when connecting two parts of the mesh together via mirroring, extruding or combining Reference: https://accad.osu.edu/~sconroy/accad5002/notes_geo_problems.html 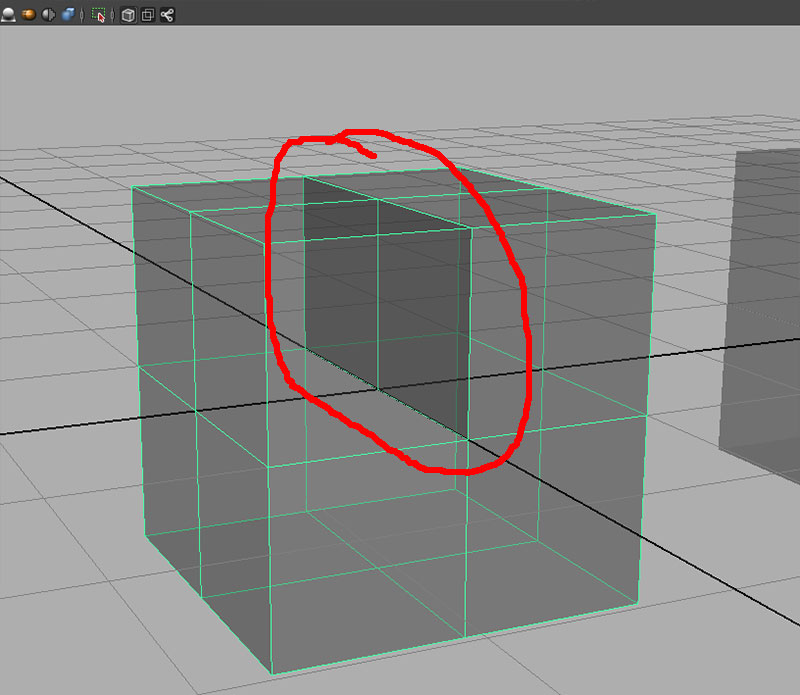 Floating vertices are when an edge has been deleted and vertexes have been left and are not connected to any other edges. these cause errors when subdividing and texturing and can cause problems when imported into the game engine. T-vertices can also be classed as this as well. 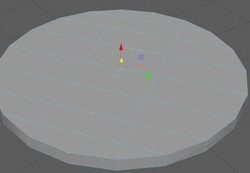 High-valence Vertex also known as poles is when 5 or more edges converge at a single vertexs, most commonly found when making a cylinder and the cap has all the edges going to one vertex. Having poles in a model will cause problems when applying a smooth or subdividing. Best way to get around this removing any poles and turn it into quads and tringles as show in the photos below, one photo with a pole and another with quads and triangles Now if add a smooth/subdivide to each of these, the pole will only subdivide so far while the quad model subdivided perfectly. These are all the different types of bad topology that I need to look out for when i am creating my model. Surface normals I also researched about surface normals so I could get soft and hard edges in my model. Every polygon includes information about how light will bounce of the face of the polygon, by changing the direction of the surface normals we can change how the light bounces of the surface creating face that look more soft or have hard crisp edge lines. Maya has lots of tools to change the surface normals, I will only be using two of these tools: mesh display > Hard edge and soft edge. In the photos below show a face with default surface normals and once that have been edited In the photos below show a model been effect by hard and soft edge
I was given the task to make one unique model for my puzzle level for unit 18, I had to come up with an idea that fit the style of the level and blended into the science but was still a major focus point.
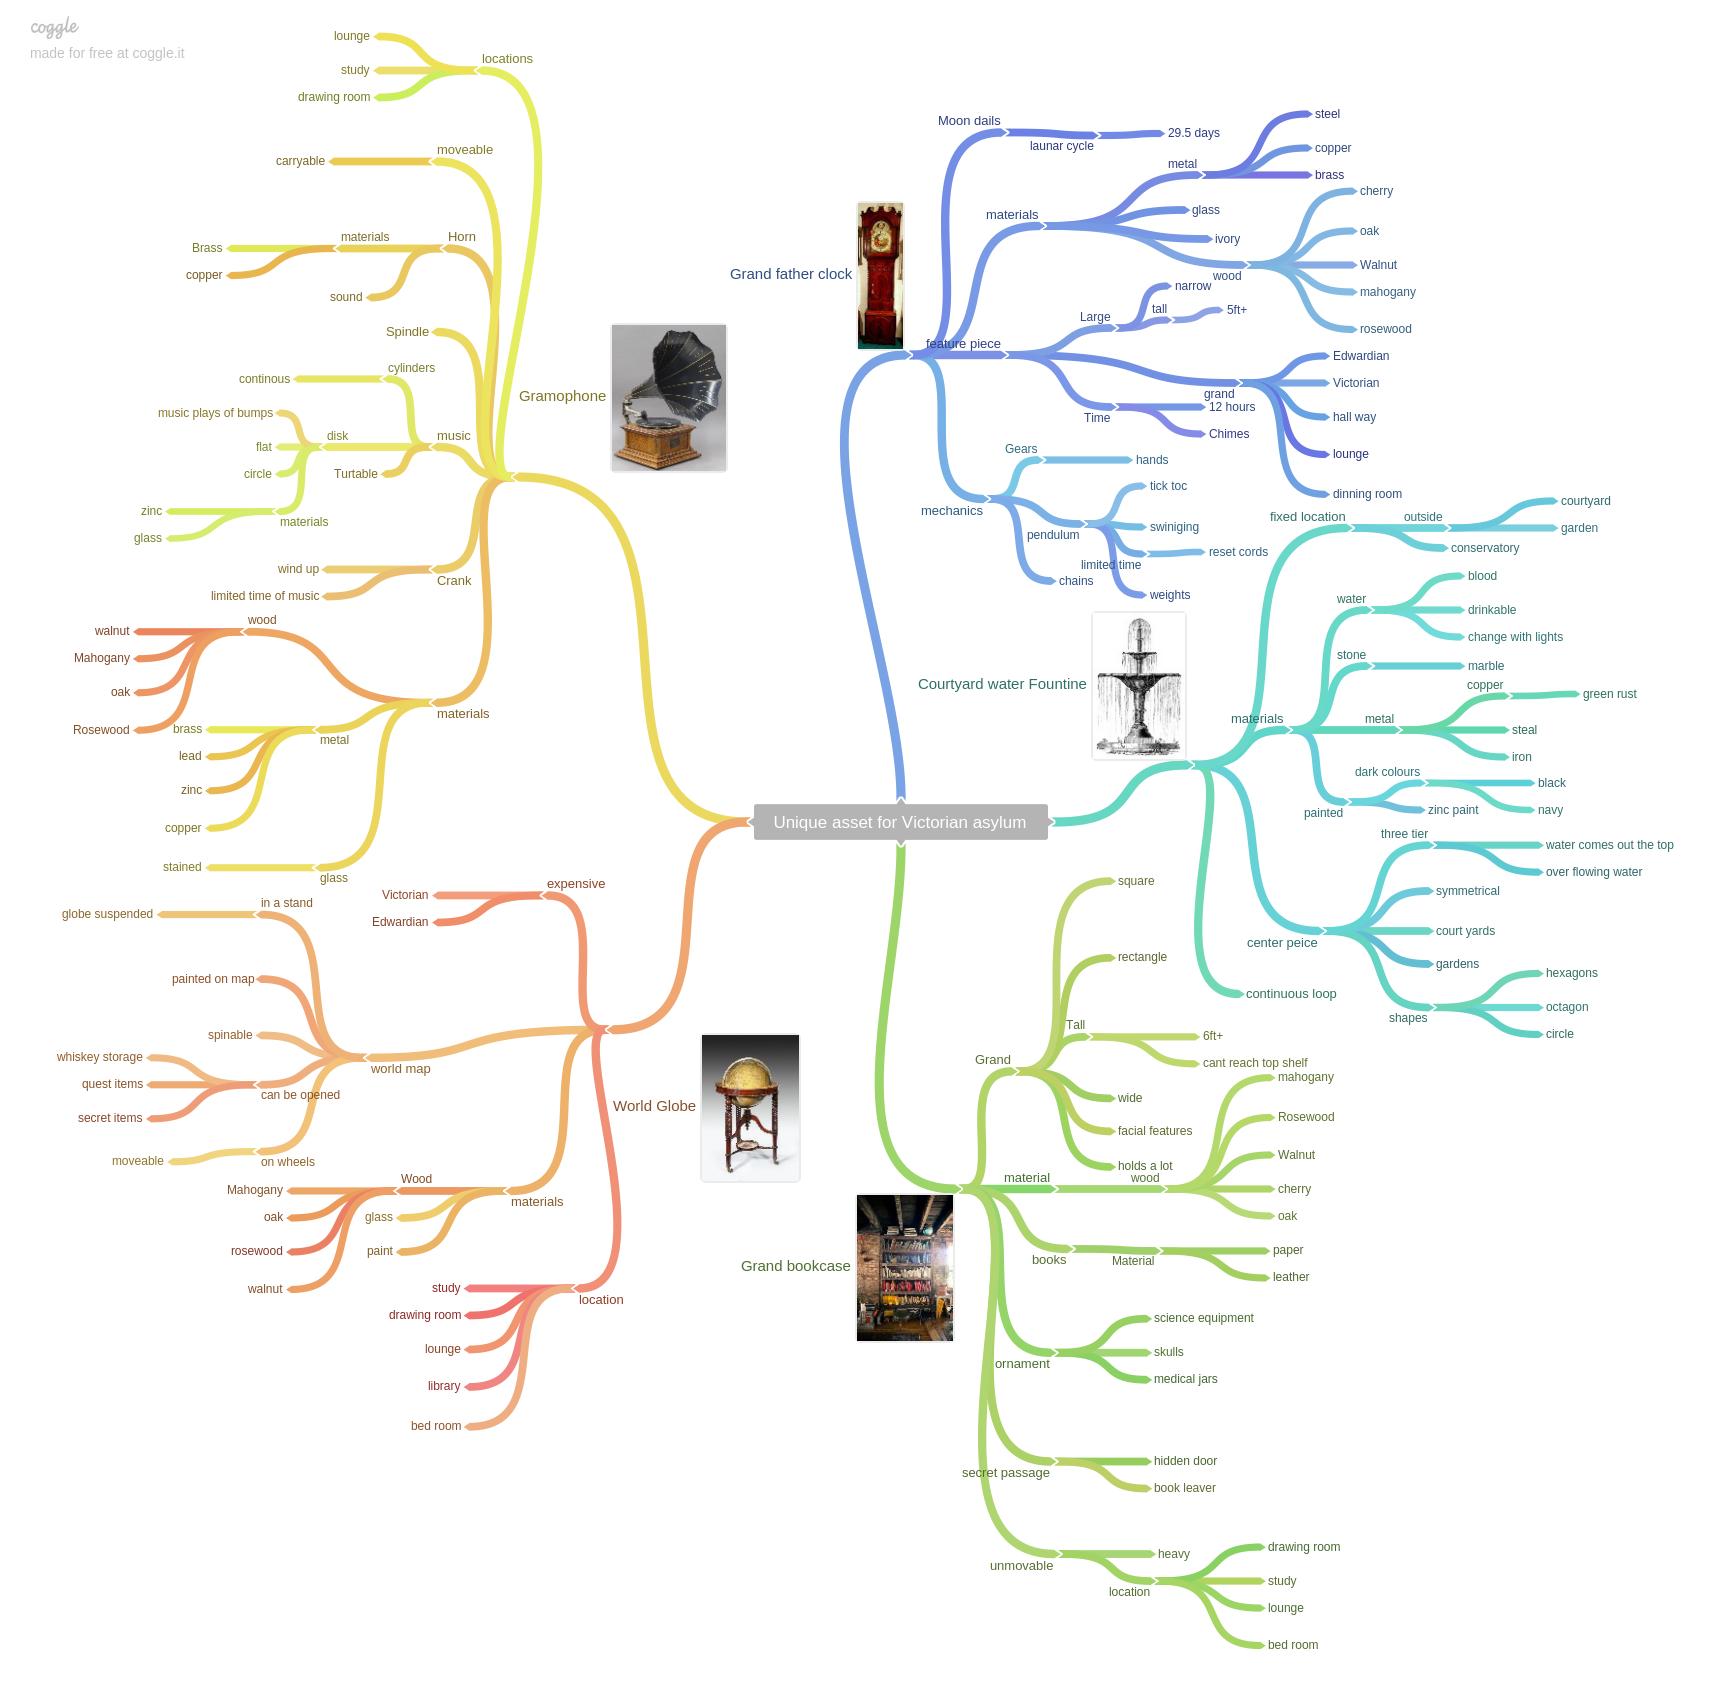
I started of by mind mapping a few ideas. 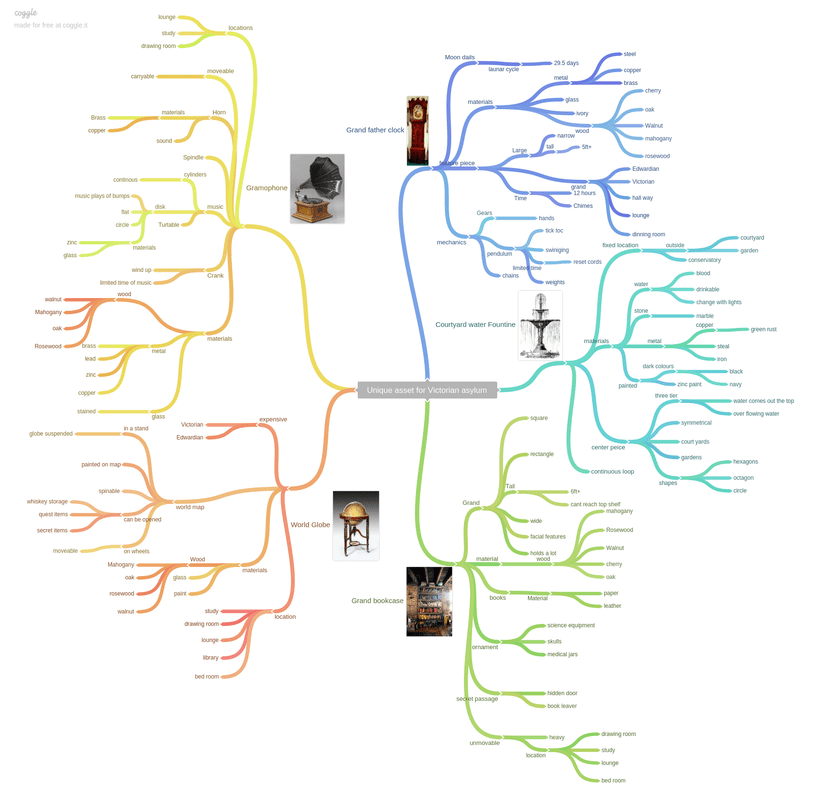
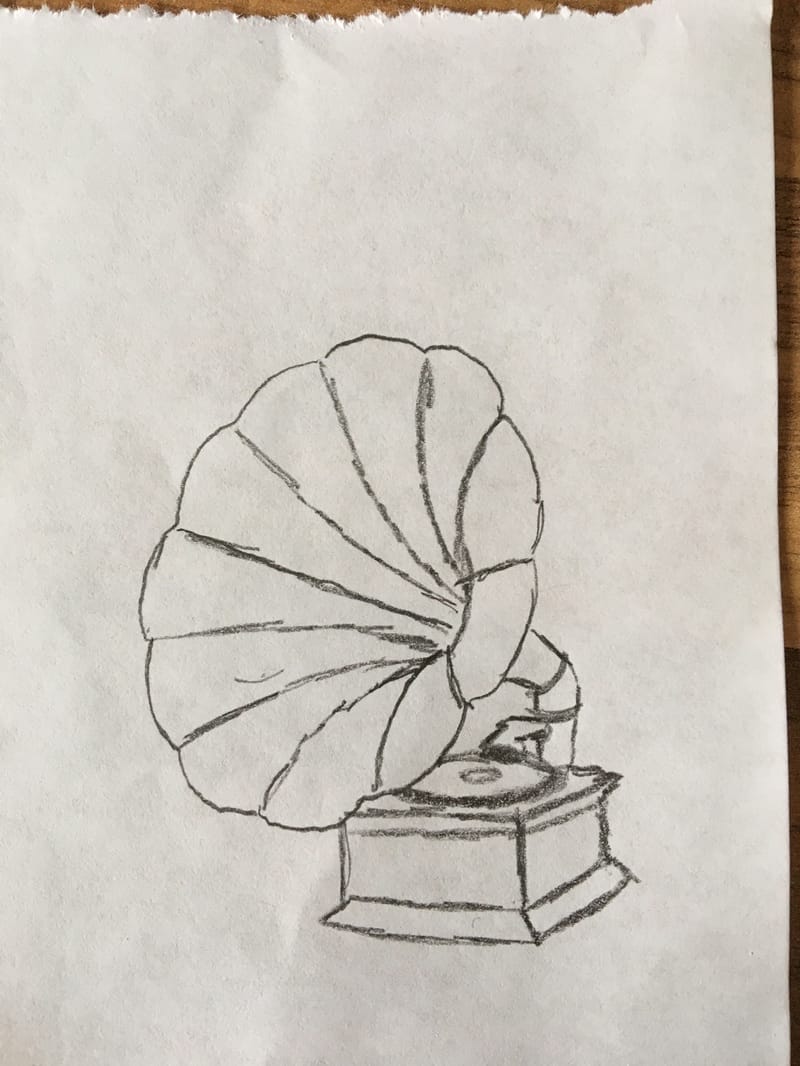
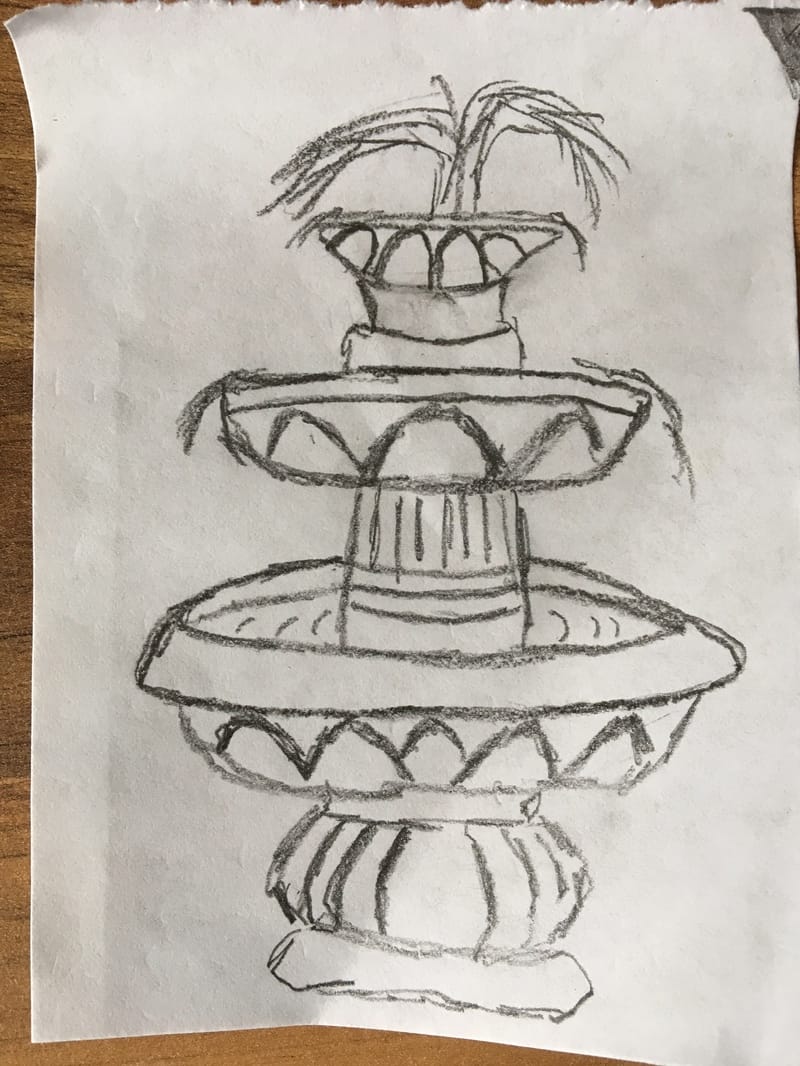
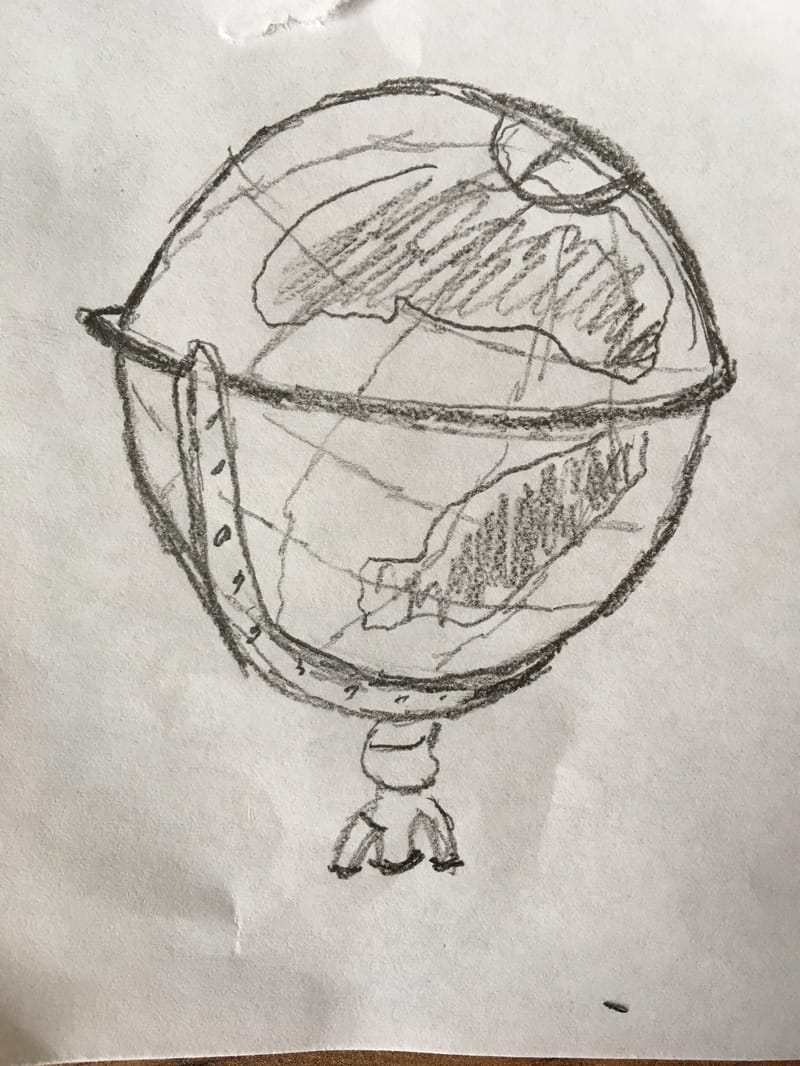
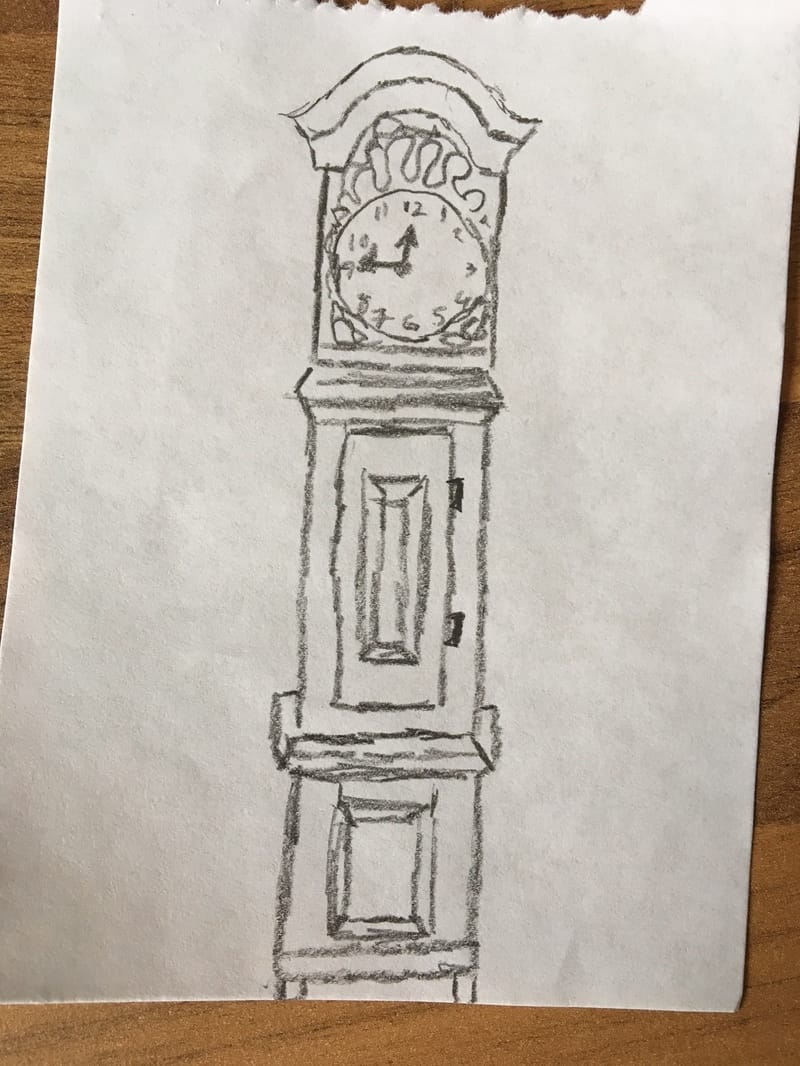
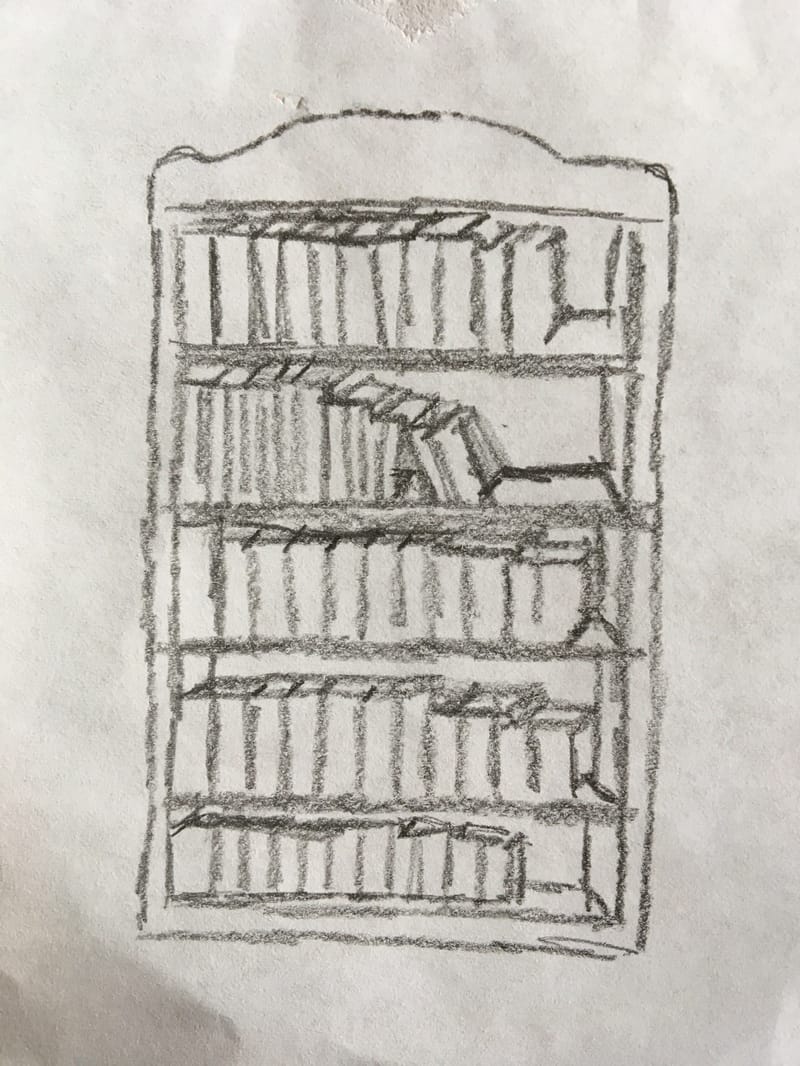
I came up with 5 ideas, which are; gramophone, grandfather clock, a water feature, world globe and a grand bookcase, that would all be Victorian / Edwardian era.
After I did my mind map I research each idea on pintrest and from the images I created I made a mood board. 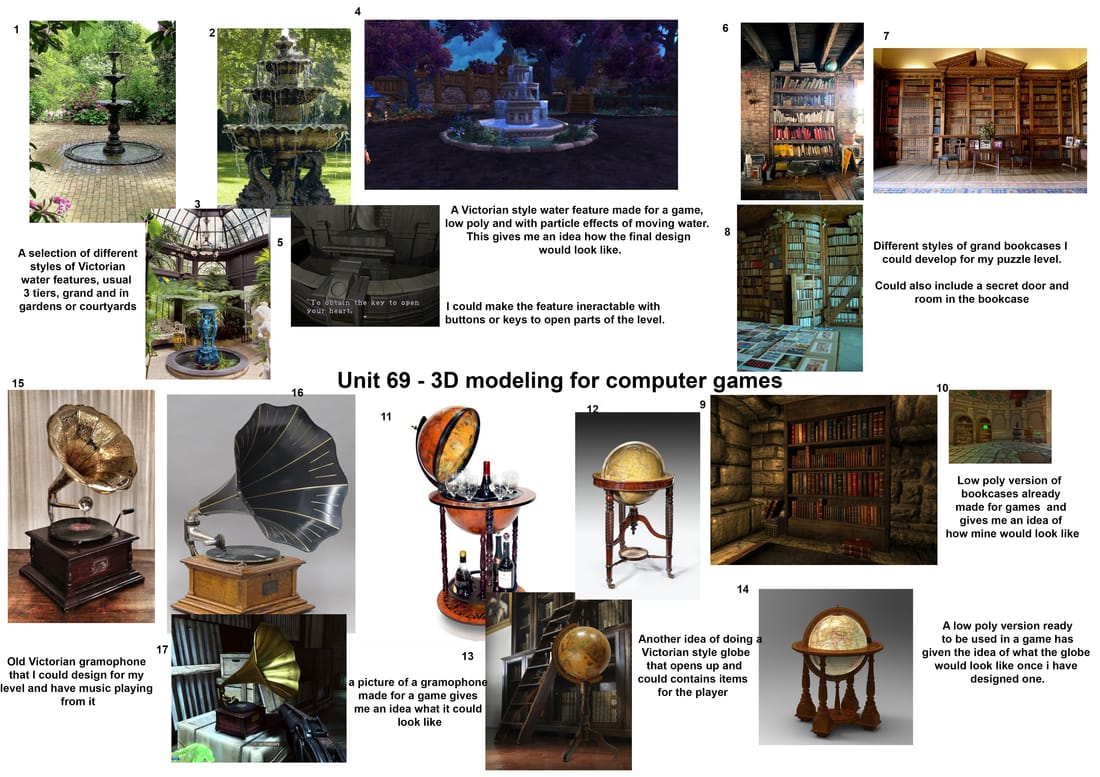
Any my pintrest board that has a few more photos than what was included in the mood board.
After I did my mood board I decided to conceptualize draw some of the ideas to get a feel of what they could look like
Throughout the whole concept and brainstorming, research there were two ideas that stuck out to me and I thought those two would be perfect ideas for my level. They were the Gramophone and Grand father clock.
I decided to narrow down to these two as my unit 18 level is based around a timer and both those ideas are connected in time some how. After great consideration I decided to choose the gramophone I thought it would be different and isn't commonly seen in games and would pose a bit of a challenge for myself as I felt a bookcase would be far too easy and there is plenty of them out there, same with the water fountain. The Globe would of been an easy design. I was torn between the grandfather clock and gramophone as both pose a challenge but went with the latter as it is a rare sight in video games. 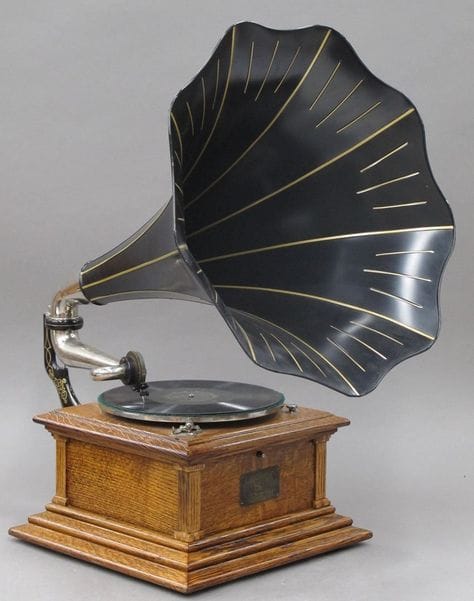
Conclusion
With the research of using three methods, a mind map, mood board and concept drawing I am quite happy that I came up with 5 ideas to choose from. I think if I applied more research I could of found more ideas to concept draw and research. I found narrowing the choose down quite easy, but deciding between two ideas was the tough bit as I like the idea of a grandfather clock or a gramophone. I ended up going with the gramophone because it posed a challenge for my modeling thickens as it has a hard surface and organic surfaces to it and would require me to think on my feet about how to combine the two together. |
AuthorWelcome to my blog about my game design and 3D modelling work Archives
February 2017
Categories
All
|
||||||||||||||||


 RSS Feed
