|
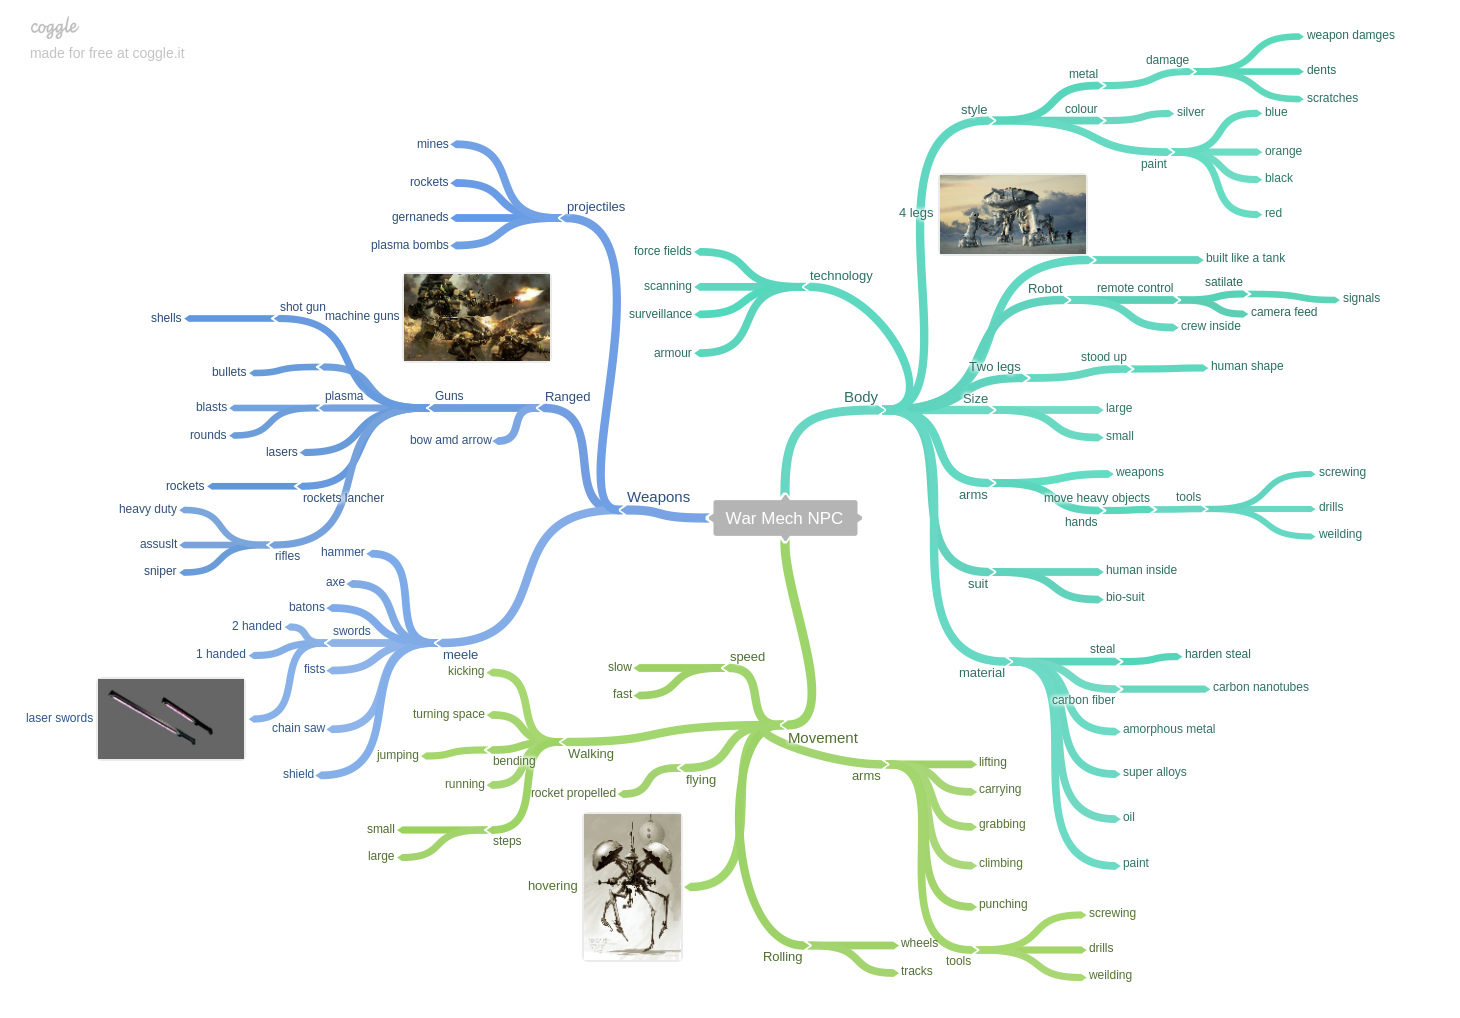
Brief Update Since developing my original character, he was based on a horror survival brief theme and I think I met the brief description for making my character. After under taking unit 75 I wanted to create a futurist / sci-fi game for the second year of my course and move away from the horror survival. I plan on updating my character to meet these needs, I will change the body so the outfit has a more futurist look, but I will keep the head as the time spent on creating and sculpting I don't want to change the look of his facial features. I will also be removing the neofur as a hair feature and going back to using a more traditional way. The plugin was a great learning experience but I found it over complicated to use and found it quite unstable with in the game engine and feel going back to using planes will suit me better. As well as rebuilding the body I will remake the hands as these have gloves on and will need changing. NPC For the NPC I decided to change this as well as I wanted to keep away from the horror survival brief and not create a zombie or something similar. I decided to make something futurist for the NPC to fit in with my unit 75 brief. I look at many ideas and came up with making a robot of some sorts that can be a friendly NPC and an enemy as well. I started of by making a mind map to come up with some ideas around robots. 
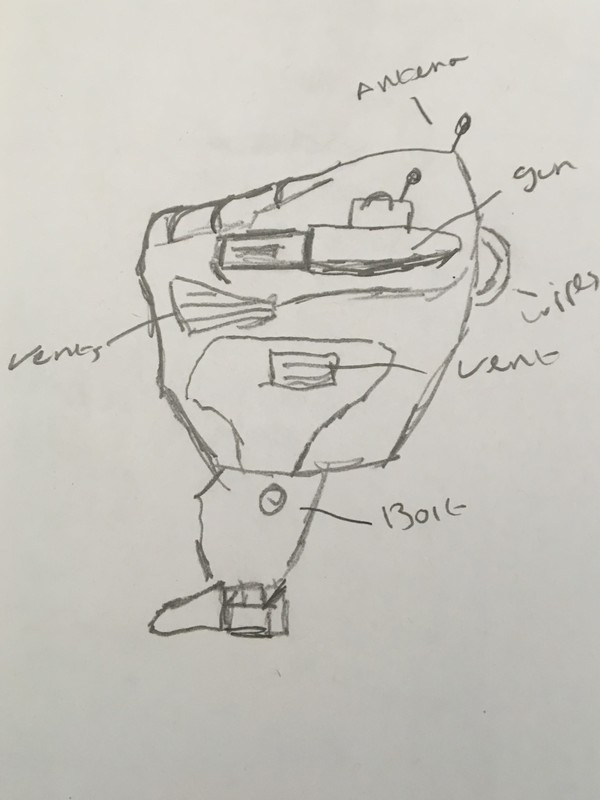
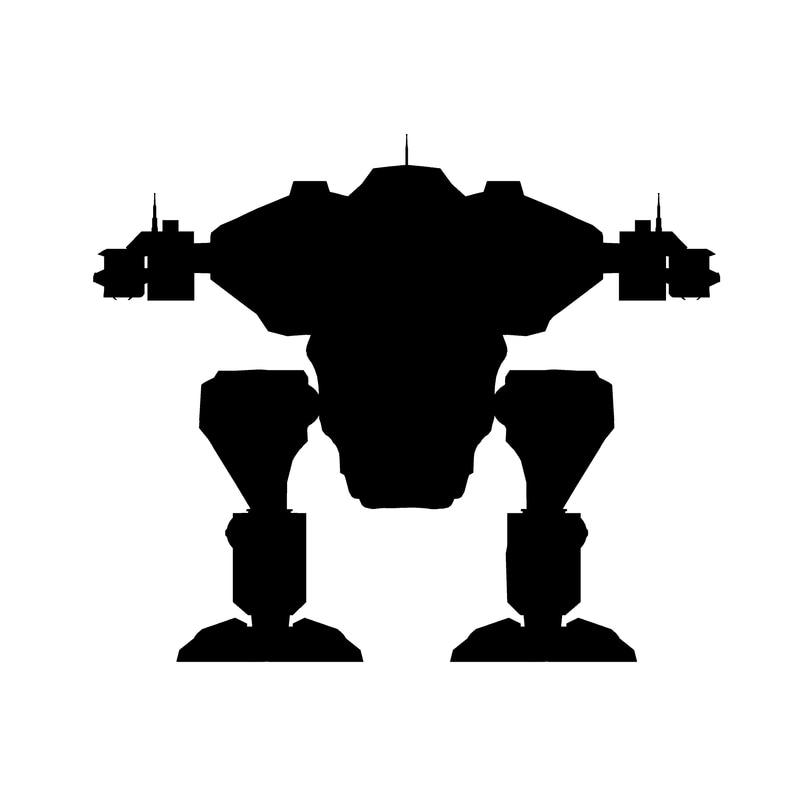
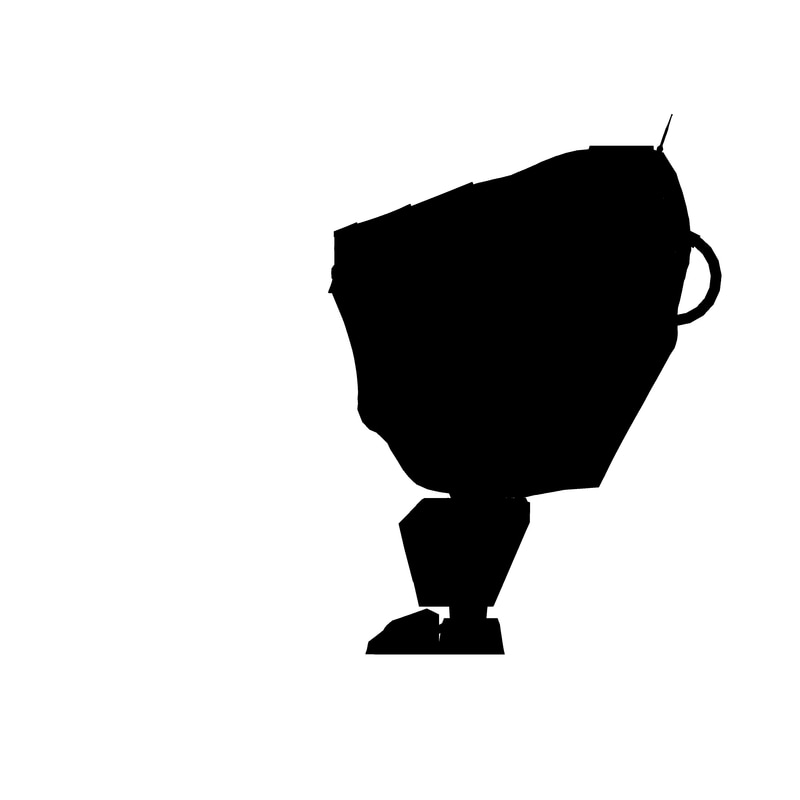
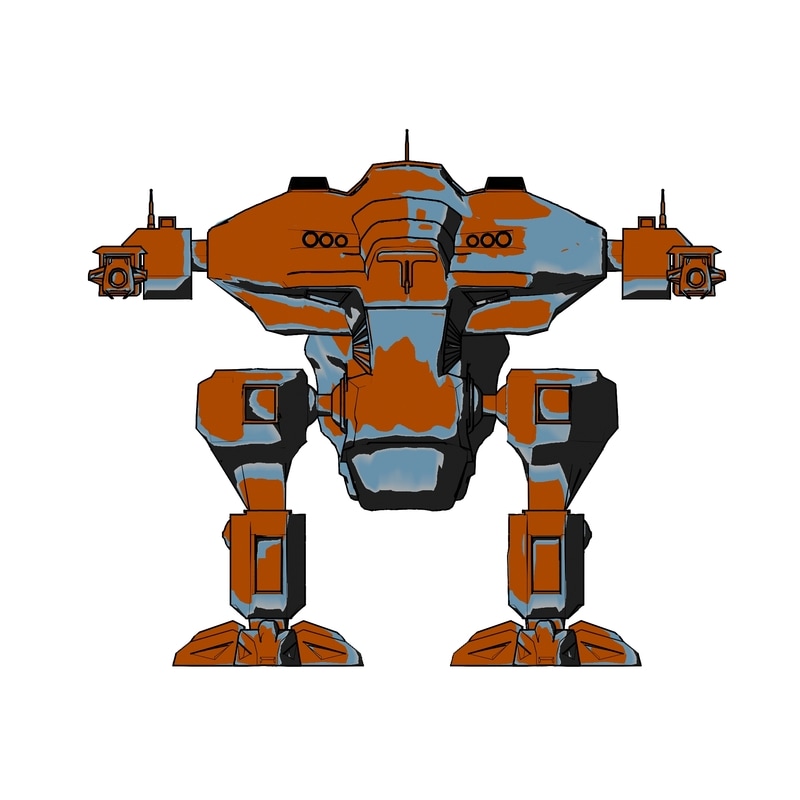
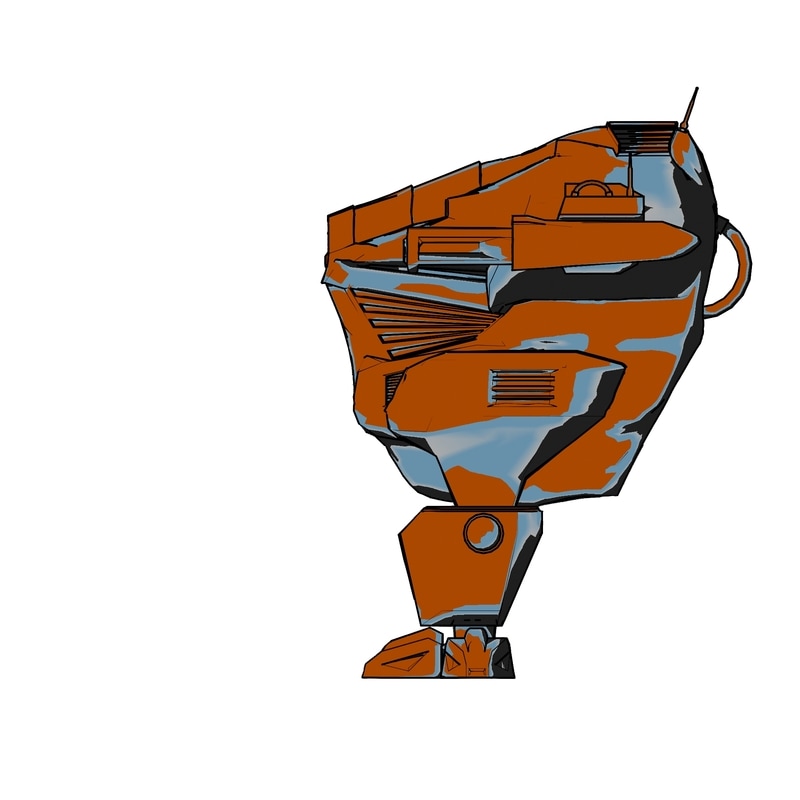
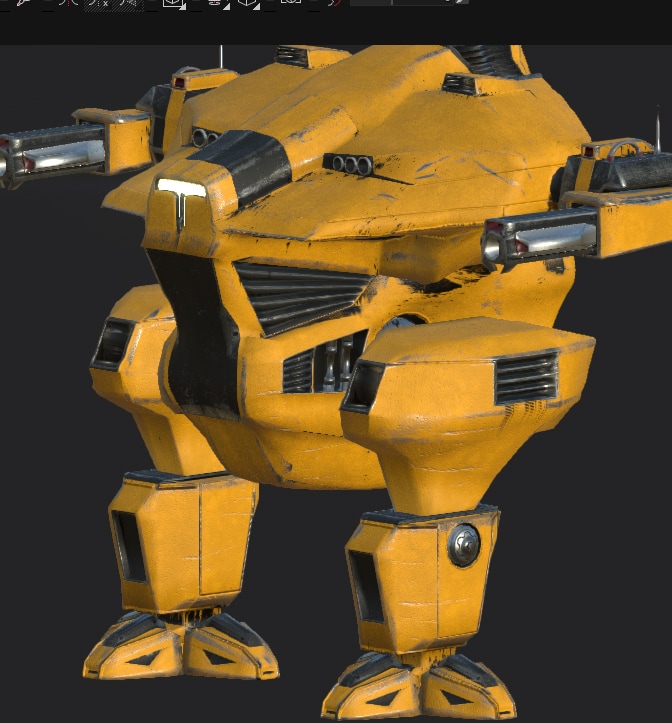
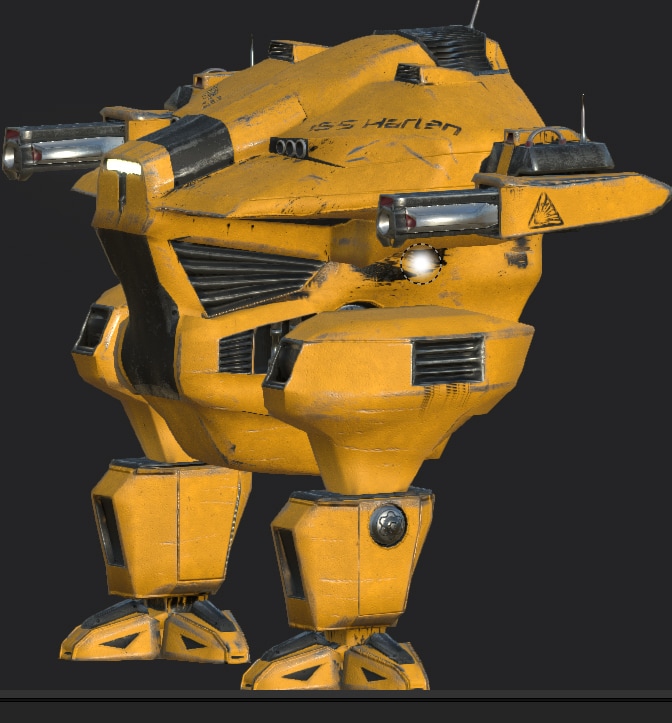
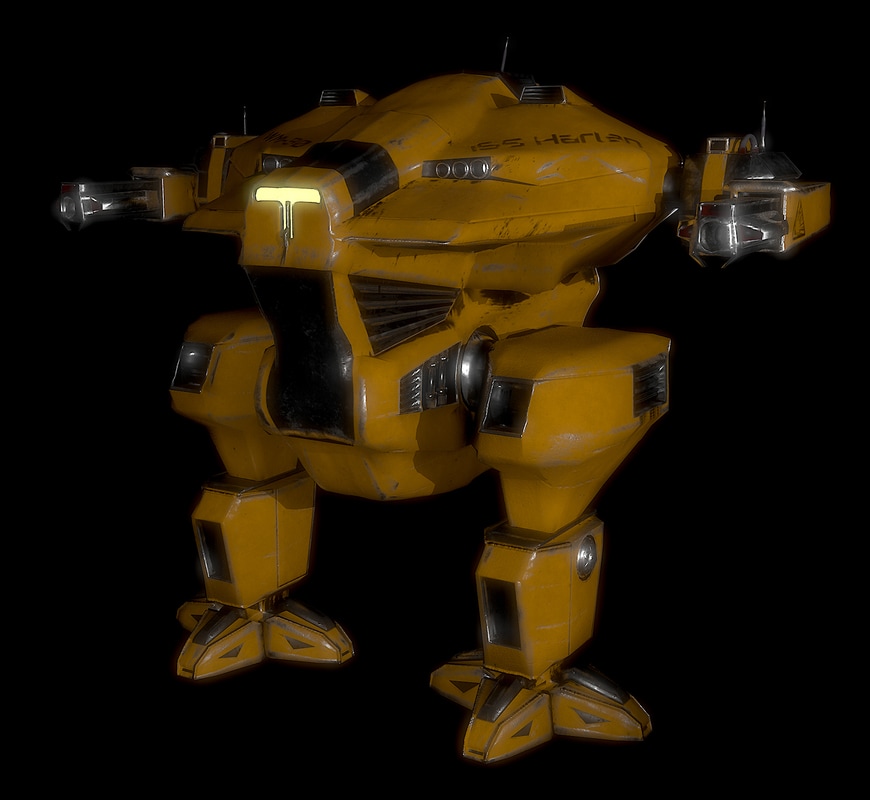
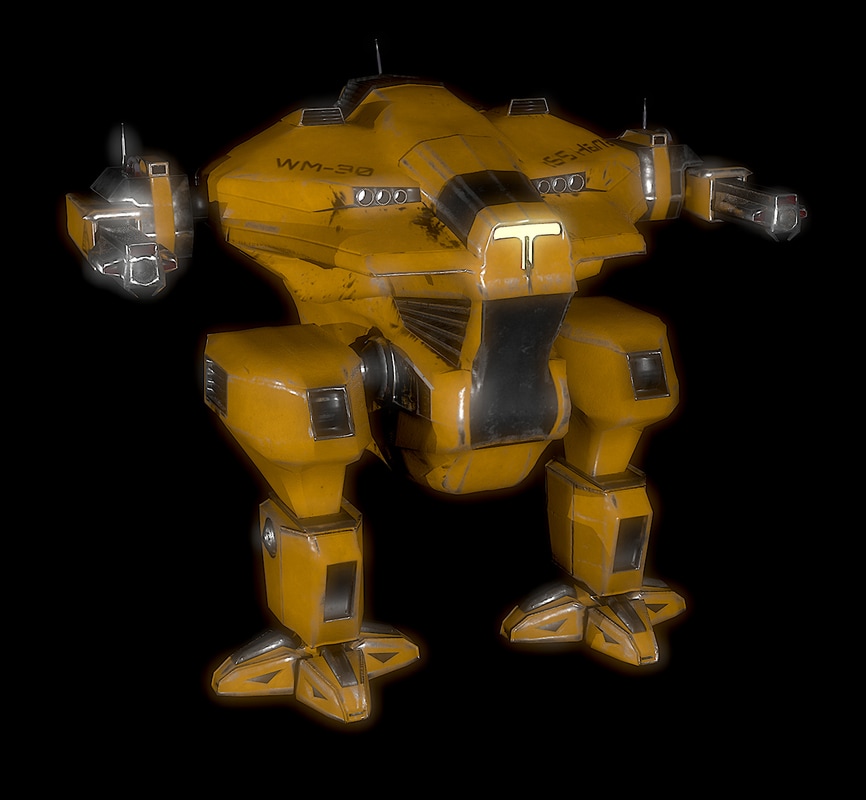
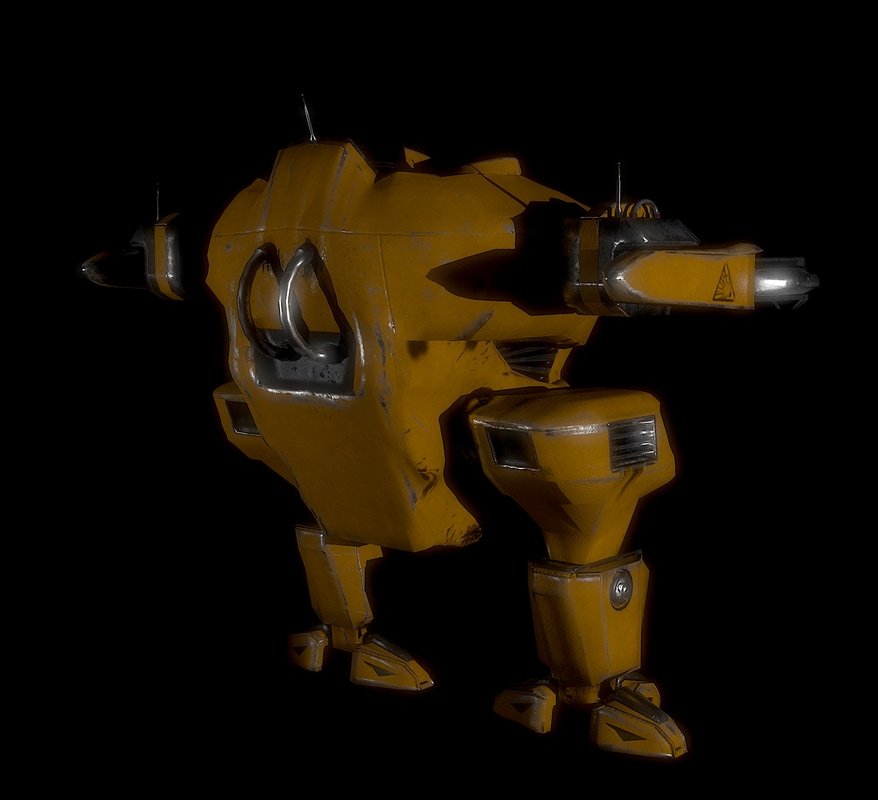
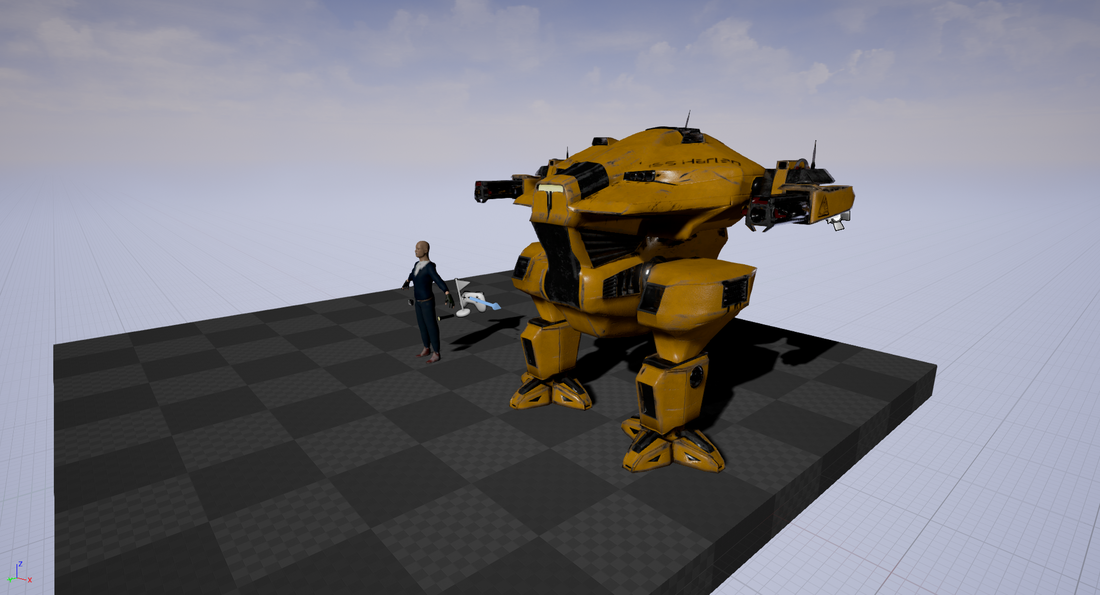
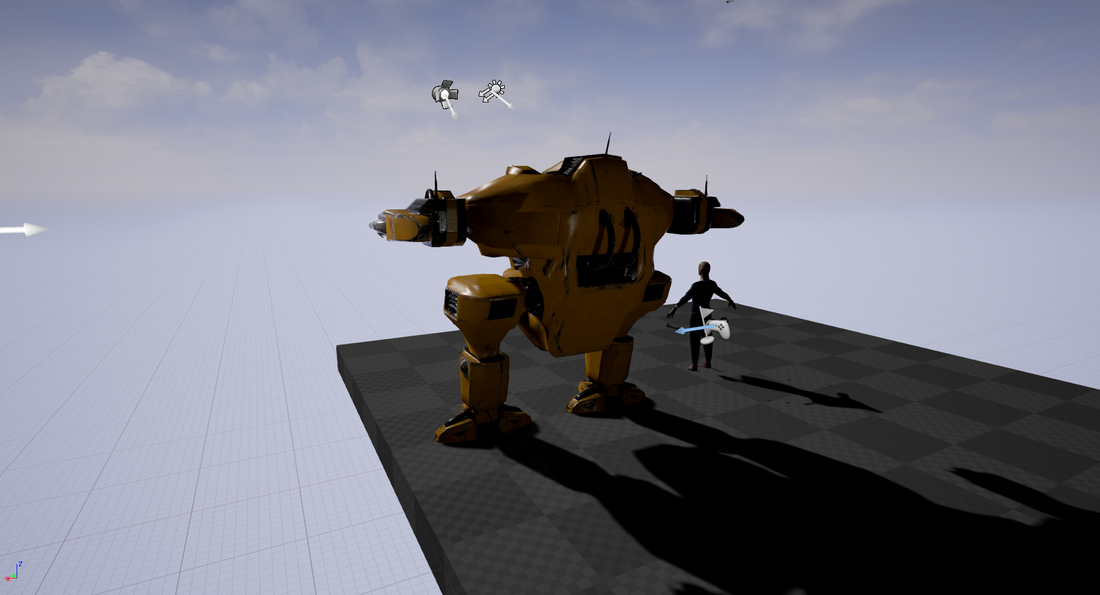
Then after this i created a mood-board after this.  After doing some research I decided I wanted to create a war mech like the one found in the original robot cop. where the war mech has two legs, a large body and two arms as weapons. I then drew some concept images to get my idea on to paper. Then i created some silhouettes of the front and side of the NPC Then i made a colour version of the silhouettes Blockout I started of creating the war mech in maya by using a cube and extruding and moving the edges, then adding cubes where the vents and lights would go to make a rough idea of the body and then i started to combined all the geometry together to get a rough block of the body, and cut circles out using spheres so i know where the arms and legs would go and then i cut it in half as i plan to mirror it over later on. 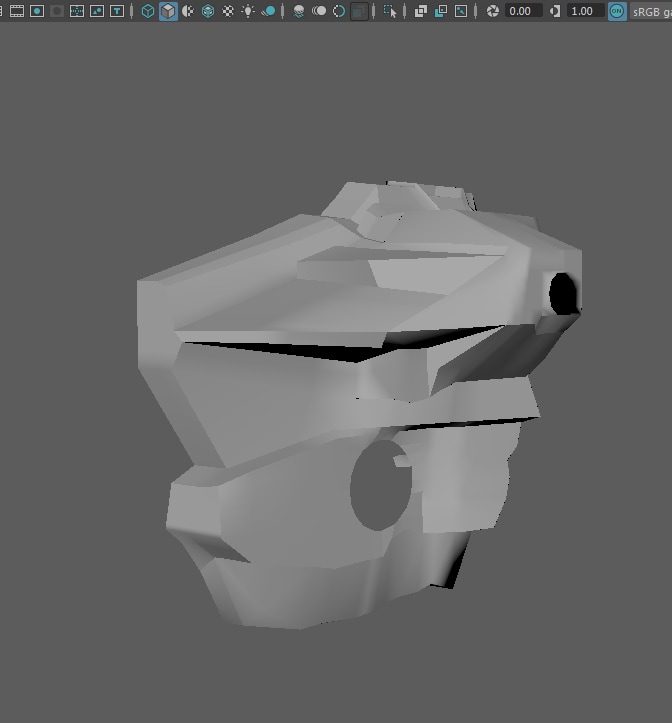 After creating the body I created the arms and legs using cubes, extruding them and adding edge loops to add more geometry. 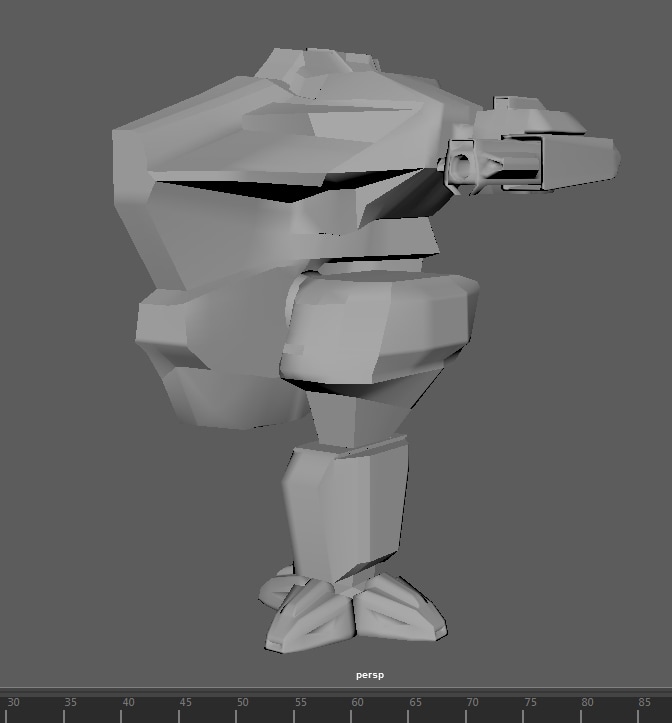 i Made sure the line down the middle was flush to the centre line and then i mirrored the mesh over and placed symmetry on the x axis so it copies what i did to the other side. Modeling I created a low poly model from the blockout by adding details in such as vents, joints, light sockets, pistons, pipes and other details such as large panels. I made sure the model was all connected as one model, the downside to this it increased the poly count quite dramatically. 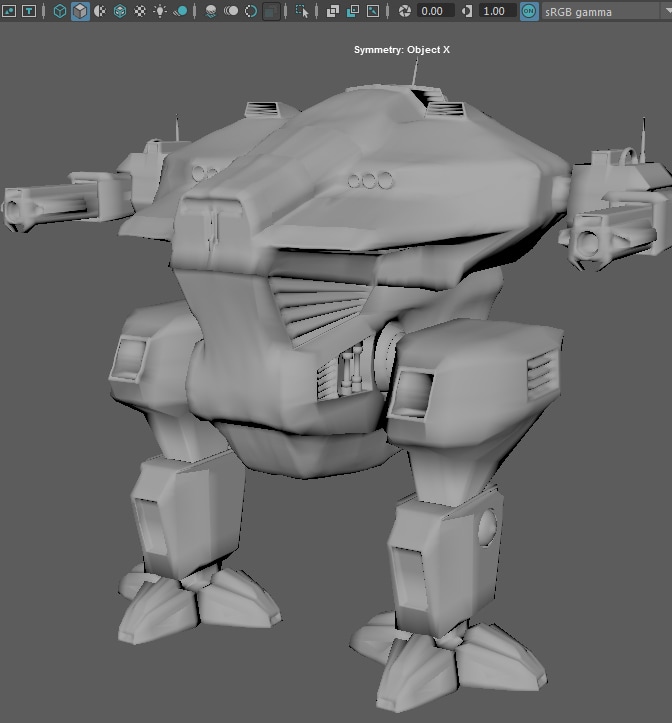 I tried to make a high poly to back down onto the low poly of the model, but after creating the high poly and backed down it got a few errors that I tried to fix, but was becoming time wasting so I decided to add the fine detail that I wanted in the high poly to add it in substance painter instead. UV The UV process for the war mech was a long process, because it is a complicated mesh with a lot of hard edges and lots of organic edges and curves trying to get large UV shells quite hard and ended up with lots of little UV. Because there was so many UV shells i had to use more than one UV tile. The whole model ended up using 7 titles. as i was taking it into substance painter i had arrange the tiles next to each other as substance painter will process these as UDIM tiles and place each UV tile into its own texture set. 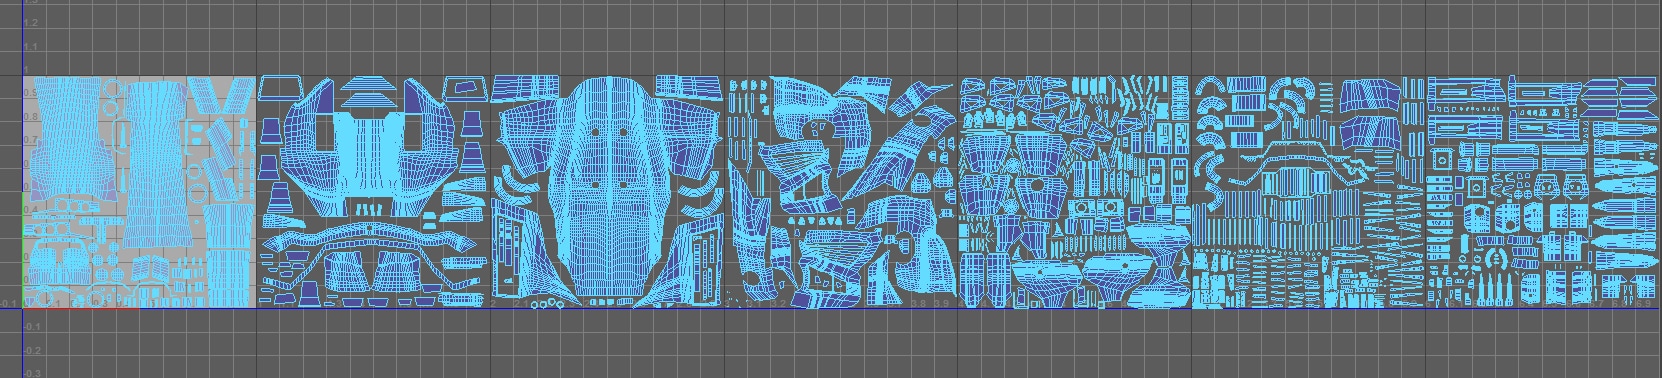 Then so i can use the uv's in unreal engine i copied each tile into its own map 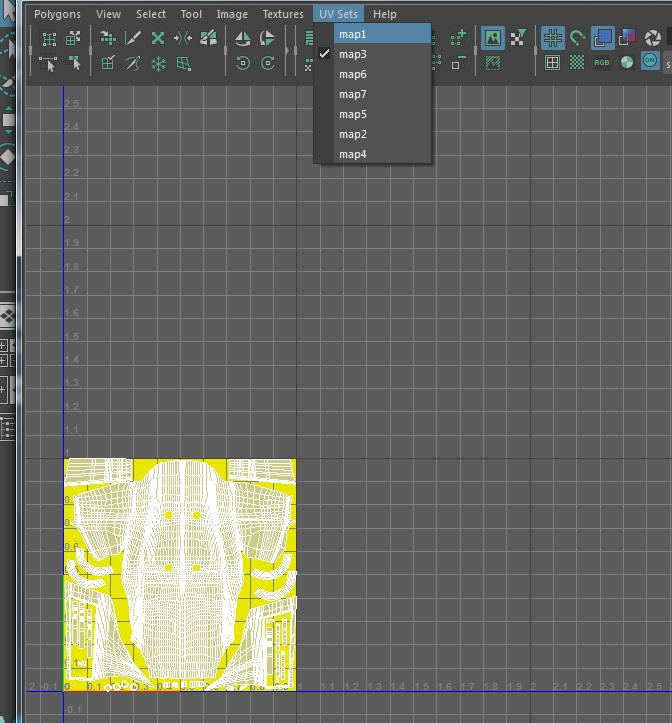 Texturing Before I took it into substance painter, I assigned each UV map its own colour ID I did this for two reasons, one for a visual reference guide for myself so I know which UV map is where and when I import it to unreal engine I can apply to right texture maps to the right UV maps. 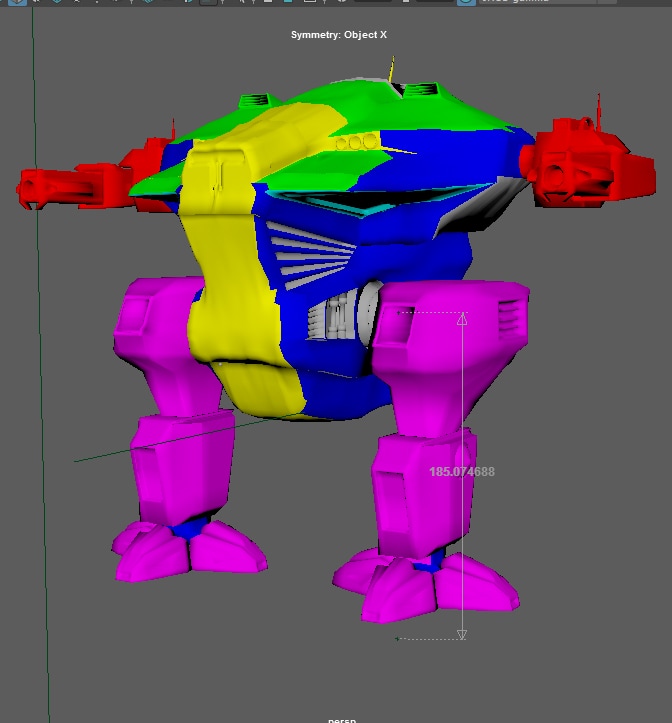 I imported the model into substance painter and made sure the UDIM box was ticked to create a texture map list based on the UV tiles. 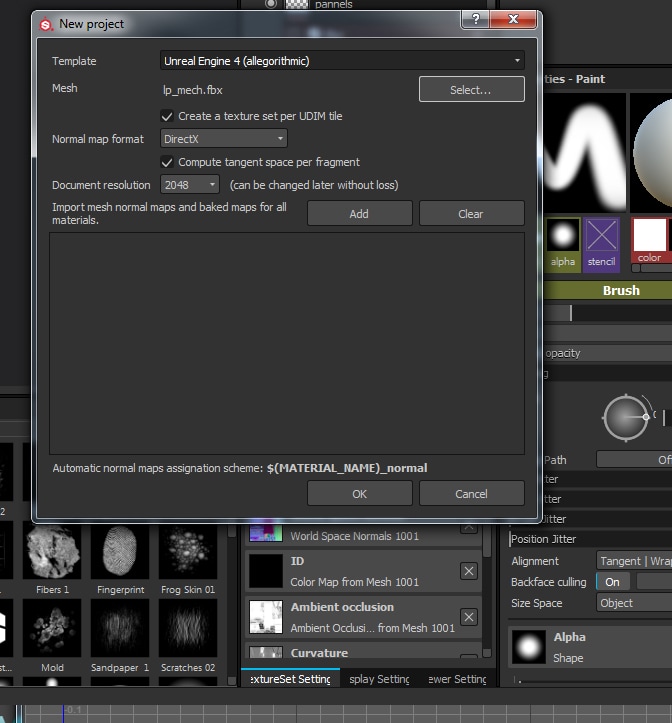 Then I went onto each tile and made it solo so I could see the area I am working on, used a fill material and applied a black mask on the fill layer and selected the areas I want that colour by using the polygon fill tool. 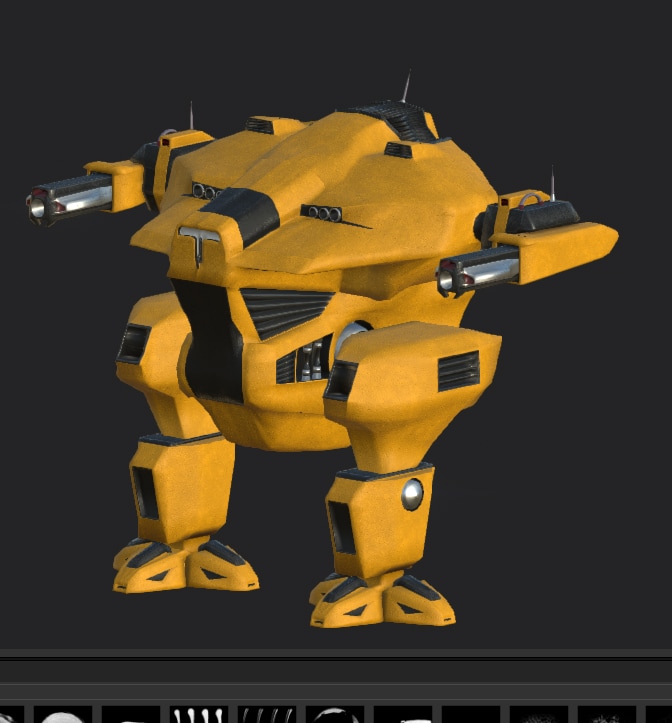 After i applied the basic colours i added fine details such as bolts, welding and panel dent details. 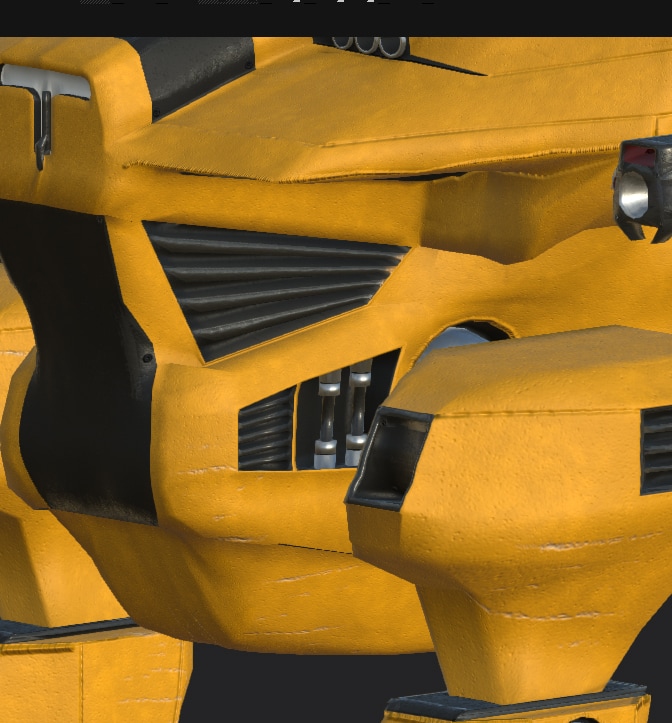 After this i added new fill layers and used generators to add oil and edge damage and then i added a paint layer to this and i could choose where i wanted these. After i added these i placed emessive light map onto the lights on the model and then added decals as well. After this i looked at the model for any visible seams and created a layer when i found one and set it to pass though and used the smudge tool to blur the lines so it wasn't as obvious. Look Dev and Unreal engine I started off by doing my look dev in substance painter to see if there are any obvious problems as shown below. 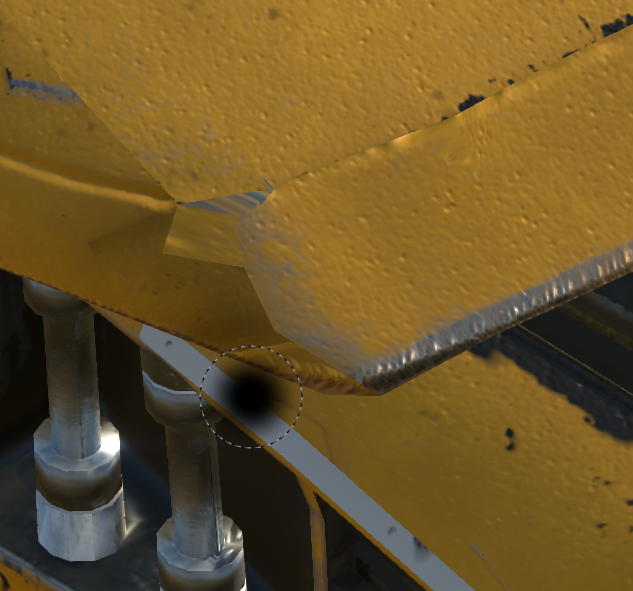 This was an easy fix by just fixing the UV maps in maya and then updating the model in substance painter to remove the UV problem. After that I took the war march into marmoset toolbag 3 and added the materials to the model. in the scene I added three different types of lights Back light - to bring out the silhouette shape fill light - to bring out the highlights full light - to light the front of the model this is a basic technique used in modern photography and its a good way to look at the model in look dev as it shows me how the light will bounce of the model. 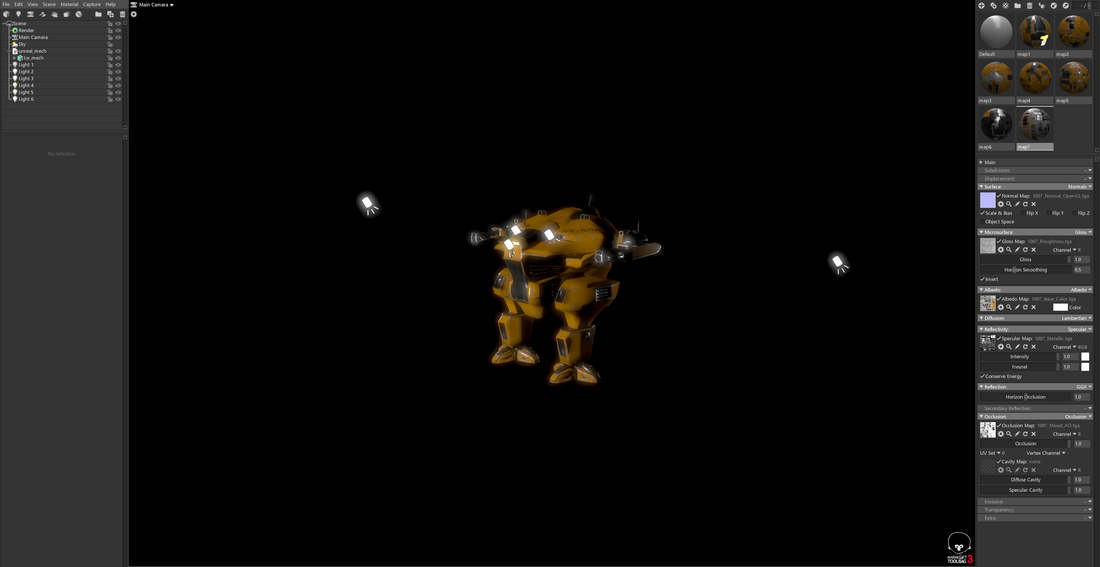 Here are a few renders from the look dev After this I imported it into unreal engine and created the materials for the model and then placed the same light set up around the model to check for seams and how the light works with the model.
1 Comment
|
AuthorWelcome to my blog about my game design and 3D modelling work Archives
June 2017
Categories
All
|
||


 RSS Feed
