|
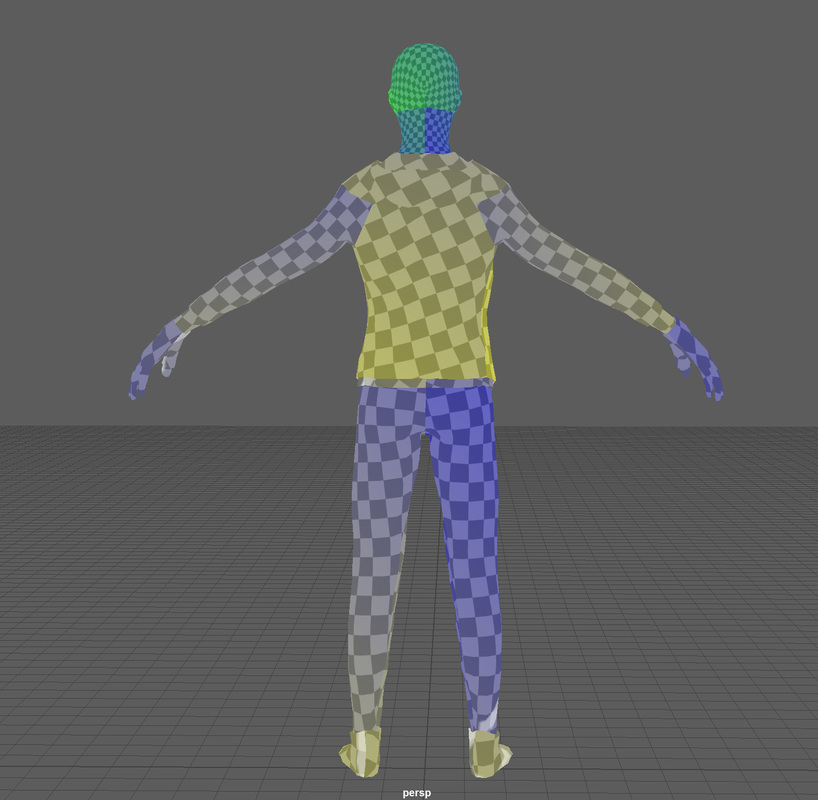
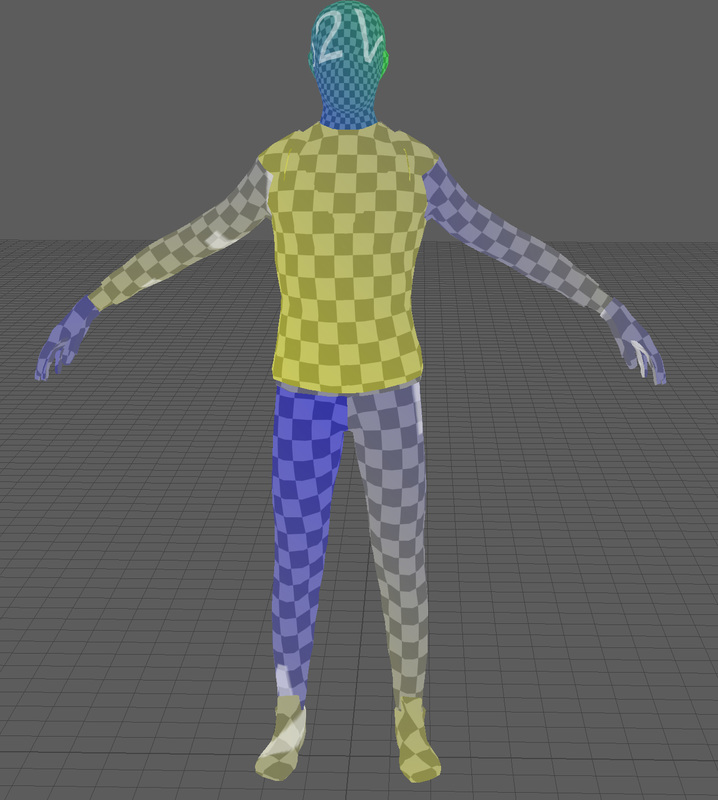
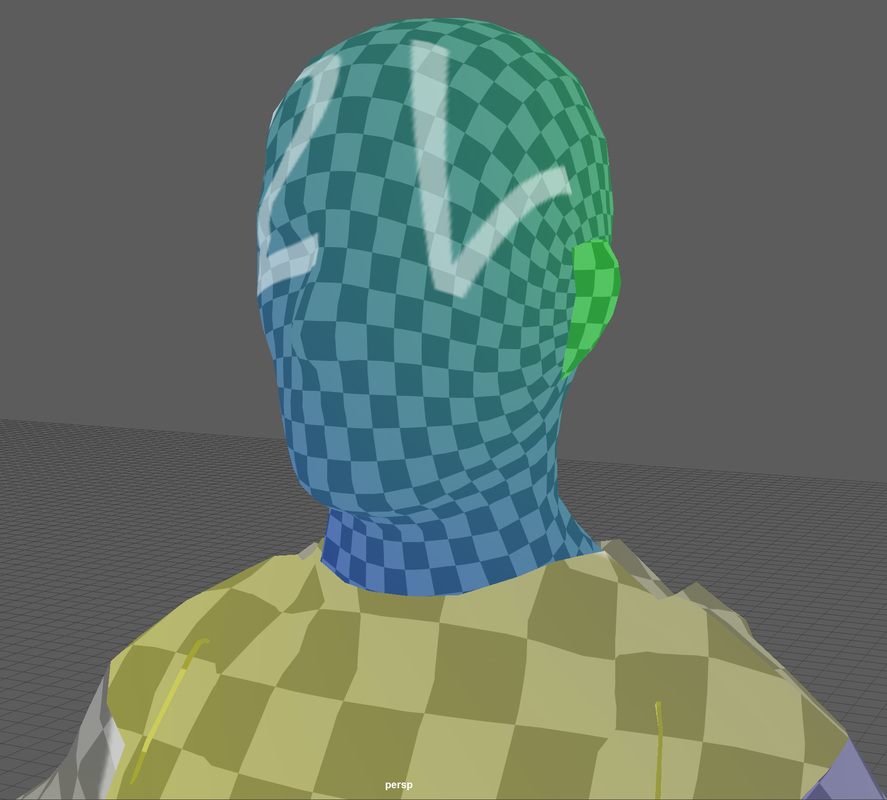
Uv maps Research UVs are two-dimensional texture coordinates that use the vertex information from the model geometry. UVs are important to the model because it tells the model how to apply the texture onto the surface. The XYZ axis are already used in the 3D space, we have to use U and V for the axis in the 2D space. So when these two are applied together U and V axis of the 2D texture it projects its coordinates onto the 3D models axis of XYZ. In the image below you can see 10 vertex selected in the model and in the UV map you can see where it corresponds to the 2D texture  The UV map needs to unfold and flattened out and have no overlapping UV coordinates to stop texture deformations. Also, using a checked texture is ideal so that you can see where the texture would be stretched and if it has even squares. As shown in the image below, is bad UVs, stretched and distorted and not perfect squares 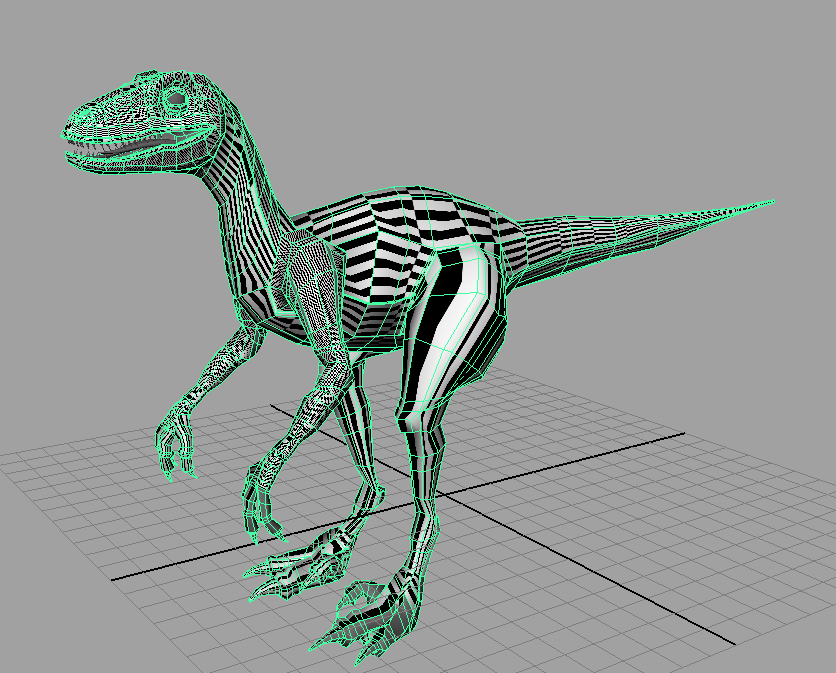 In the image show how correct UV unfolding looks like as there is no stretching or distorting. This is shown by even squares throughout the model 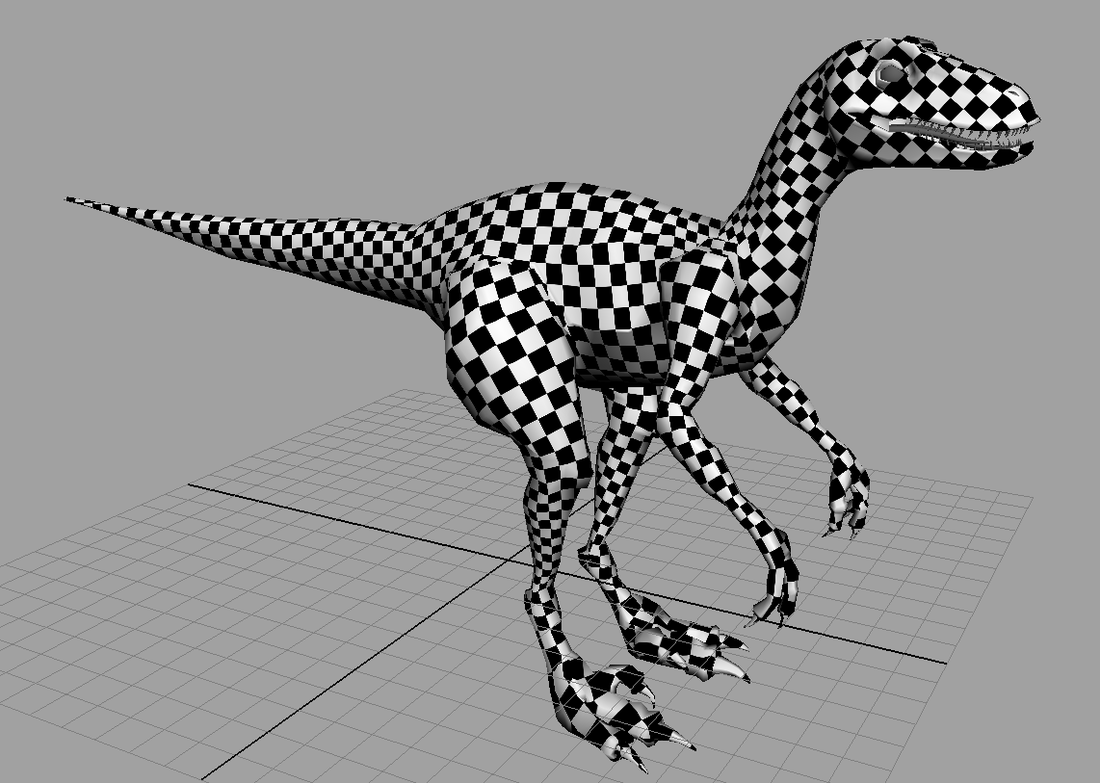 References https://biocinematics.blogspot.co.uk/2010_04_01_archive.html http://blog.digitaltutors.com/understanding-uvs-love-them-or-hate-them-theyre-essential-to-know/ As I wasn't 100% sure how to UV a character I did some research on the best way to UV a character and where to hide the seam lines. I found this video very helpful: In the video it shows you how doing it a manual way which takes time and a quick way using plugins. I decided I wanted to follow the manual way as I thought it would help me in the long run and make UV mapping a lot easier in the future. For my character I decided to use two UV maps, One for the head so I can get more detail onto the face when it comes to texturing the character and one for the rest of the body. 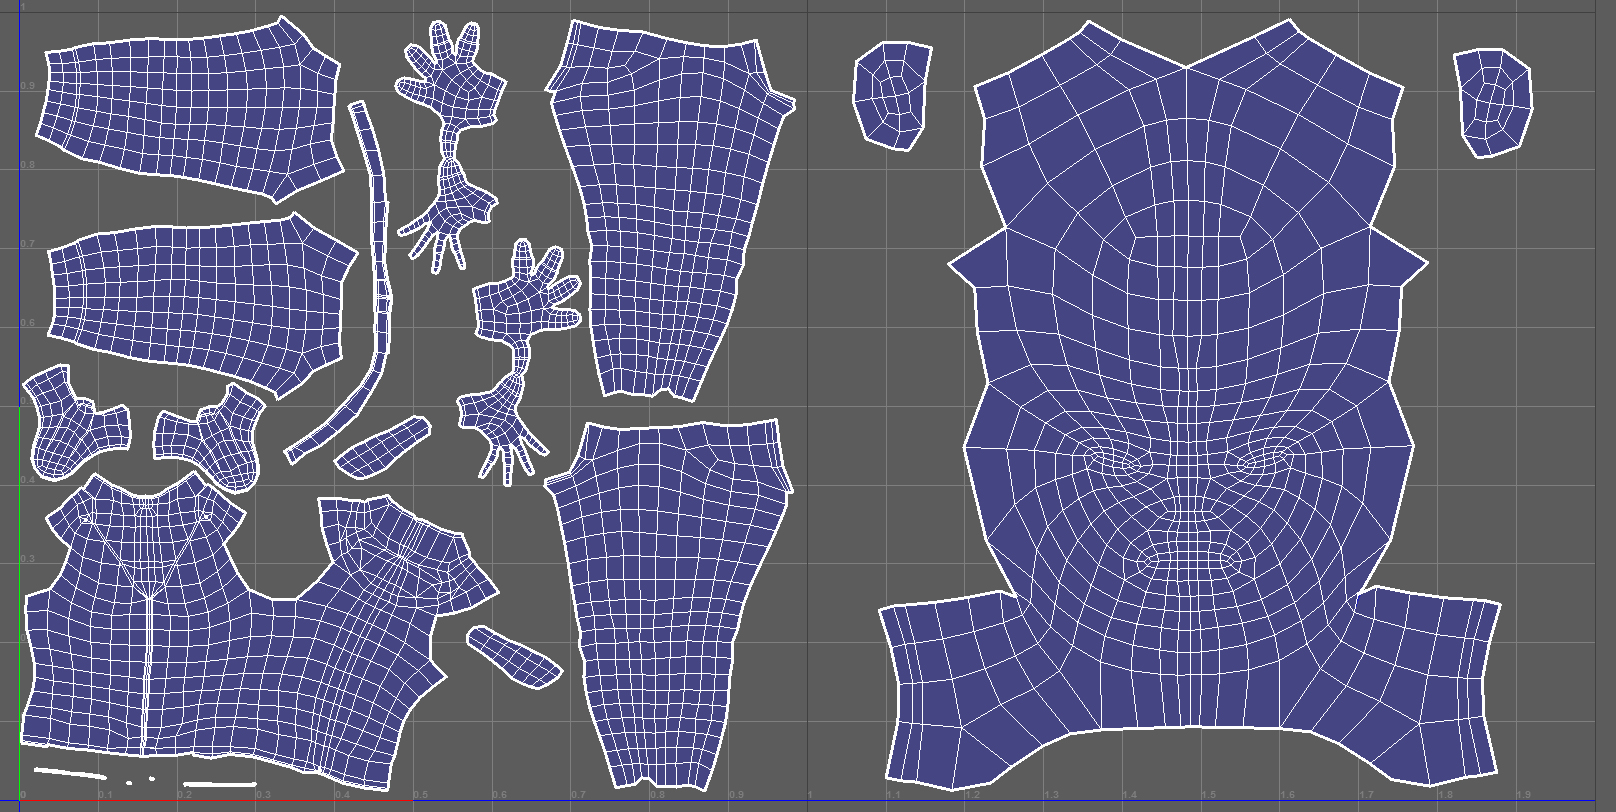 After I did the UV I put a chequer tiled overlay on my character because if I use the UV distortion Maya will highlight the body in red for distortion because the head has bigger UV even know there is no distortion of the body. With the chequer overlay I can make sure all the squares lined up and flowed in the same direction and the body had the same size squares.
1 Comment
2/7/2024 05:27:06 am
Our 3D creation engine is a powerful tool for bringing your imagination to life. With intuitive controls and advanced features, it empowers users to design stunning 3D models with ease. From intricate architectural structures to lifelike character animations, our engine offers versatility for various creative projects. Experience the seamless workflow and limitless possibilities of our 3D creation engine, revolutionizing your digital creations and unleashing your creativity like never before. Leave a Reply. |
AuthorWelcome to my blog about my game design and 3D modelling work Archives
June 2017
Categories
All
|
 RSS Feed
