|
The purpose of this unit is to understand how create animations for characters and assets using Maya, look into rigging a character and then creating a lip sync video. For task one it is looking into creating different types of animated assets, for task two is creating lip sync and character animations. Pre-production Start date:25/11/17 Completion date:1/12/17 I have given myself a week to look into pre-production such as mind maps and mood boards, looking into animation research and looking into how to rig animate characters. Animated assets Start date:30/11/17 Completion date:4/12/17 I have given myself just under a week to create 8 animated assets. This should be a quick process as all the models are pre-made. Lip sync Start date:5/12/17 Completion date:21/12/17 I have given myself just over 3 weeks to create an lip sync video based of a video from youtube, this will take a large portion of the time frame as it is a big task to copy the actions from the video. Character Rigging Start date:28/12/17 Completion date:3/1/18 I have given myself a day to complete a character rig so that I will be ready to animate. Character Animations Start date:3/12/18 Completion date:12/1/18 I have given myself 10 days to complete 5 character animations. The timeline for this project has taken into account the Christmas holidays and has been fitted around the holidays, making this task schedule tighter. Pre-ProductionIn this blog post I will look into the ideas of the animations I want to create for my character such as movements like walk cycles and then consider animated assets I could use following my unit 75 brief. I will then create a mood board to get visual ideas of how to animate my movements for my characters and assets. After this I will produce digital sketches to highlight bones, NURBS handles and the movement paths. I started of by creating my mind map consider character movement animations and general animations I could use for my character, I then look into different types of animated assets I could use in my game and I quickly looked into the animations I could create for my boss NPC. Below is the mind map I created: 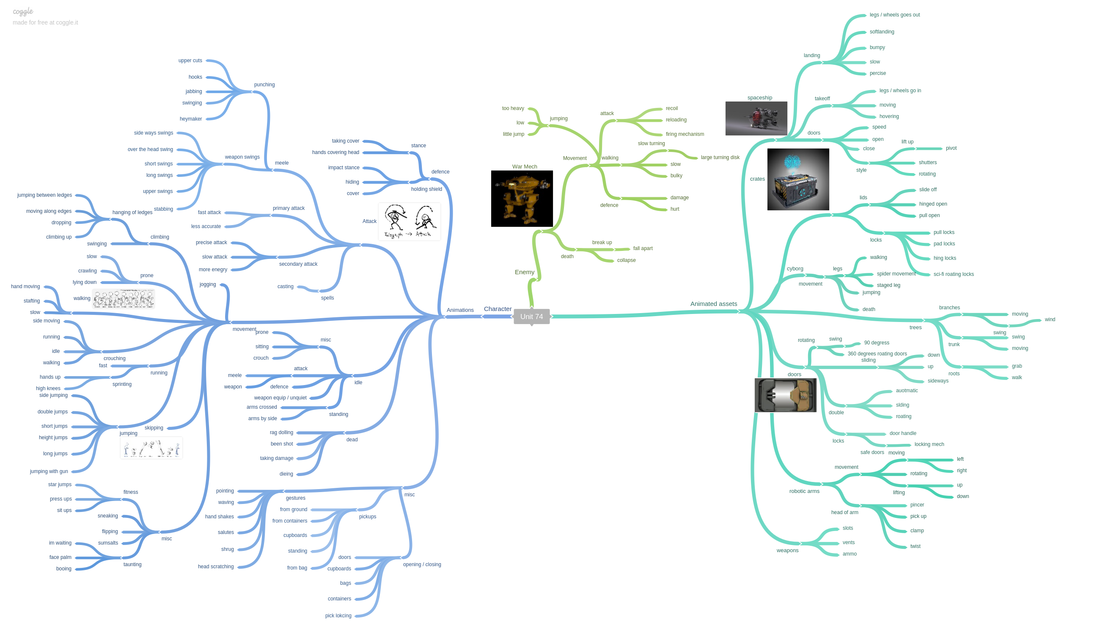
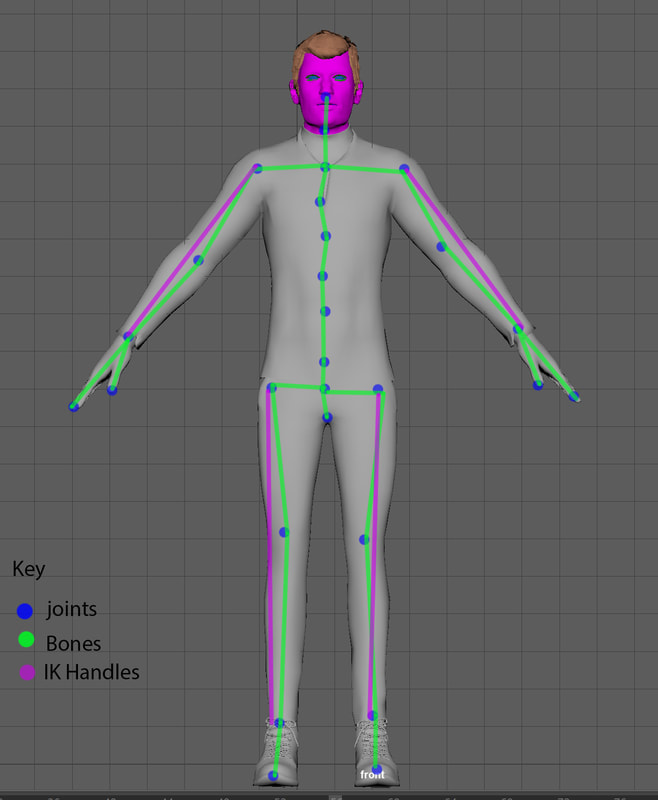
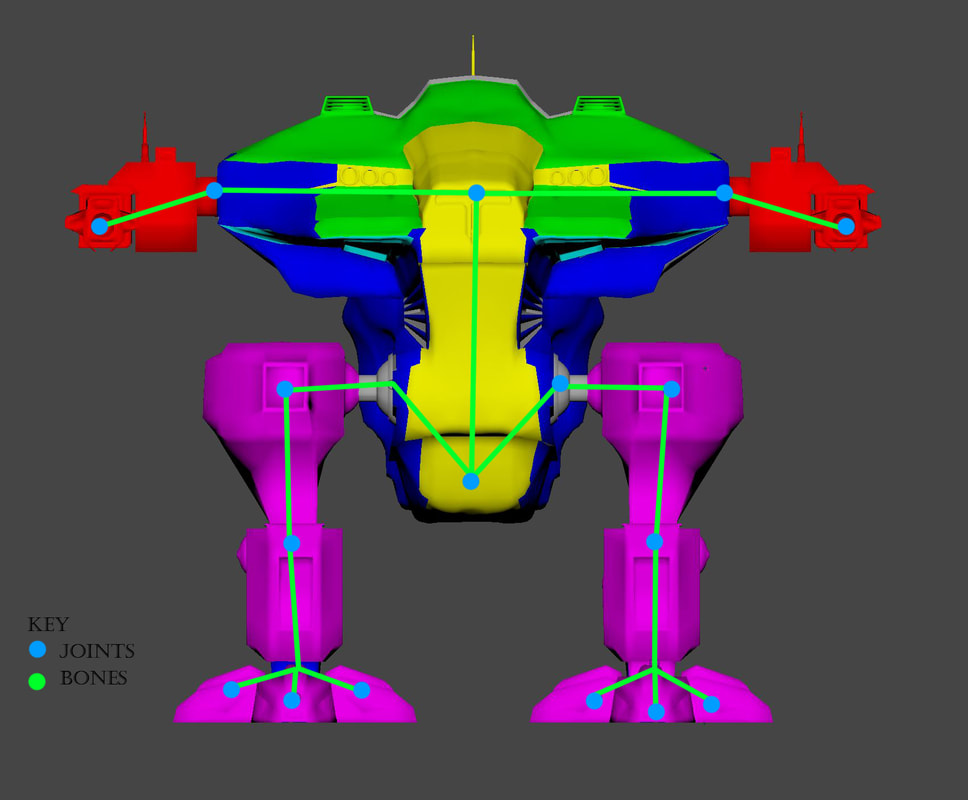
After getting my ideas down onto paper in the mind map I then wanted to get some visual referencing to help me with my animation, I looked into walk cycles, facial expressions, idle and movements, fighting and also looked into some ideas for my animated assets. 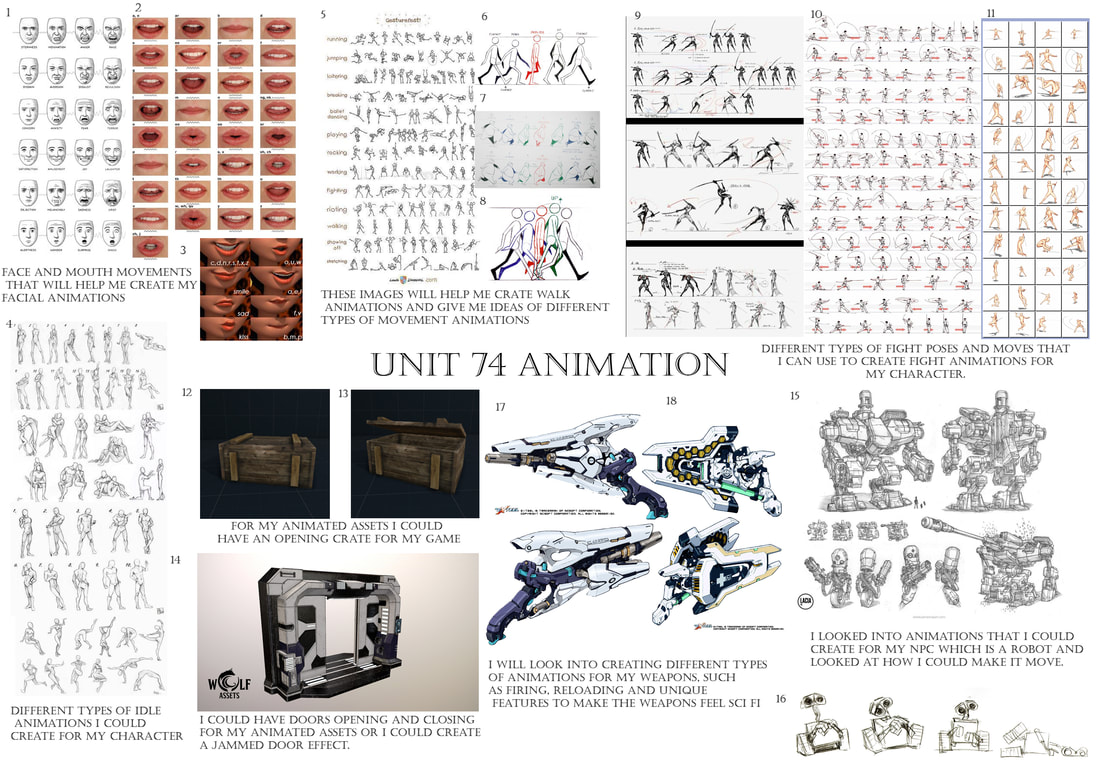 I then drew sketches of the assets that I plan on turning into animated assets, once I got the basic outline of the assets, I then looked into where I would place; joints, bones and how it would move so I could get a visual reprehensive. 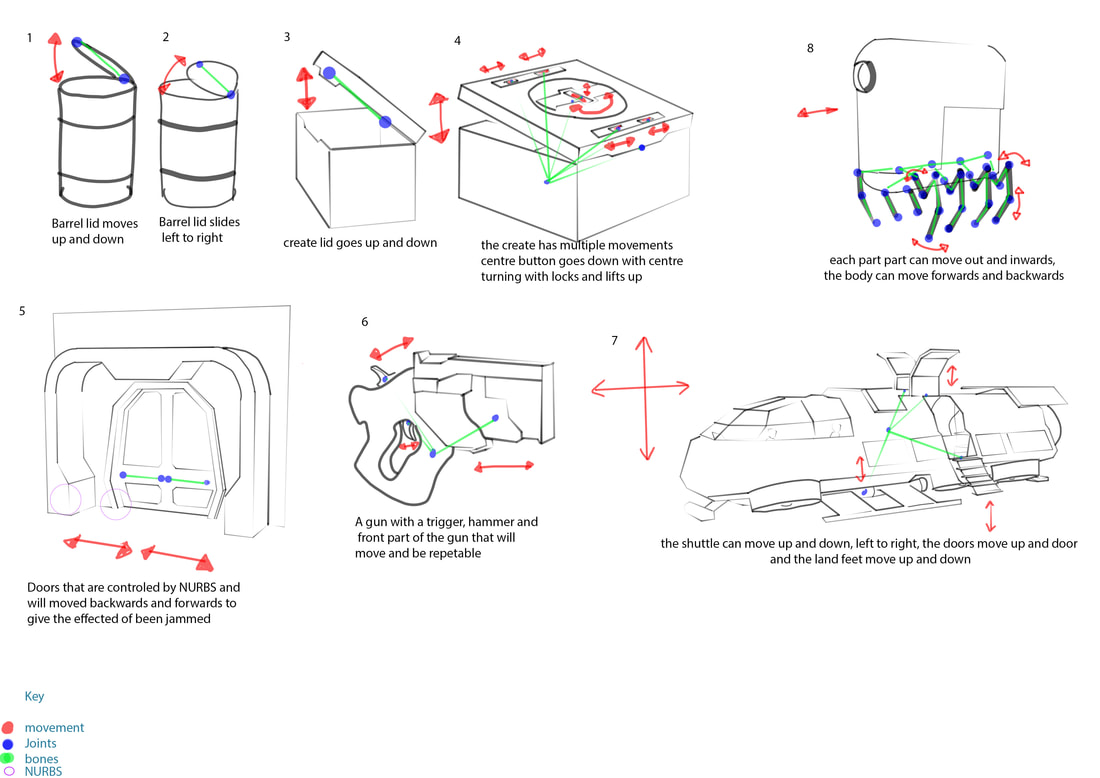 I then repeated the process for my character bone structure.
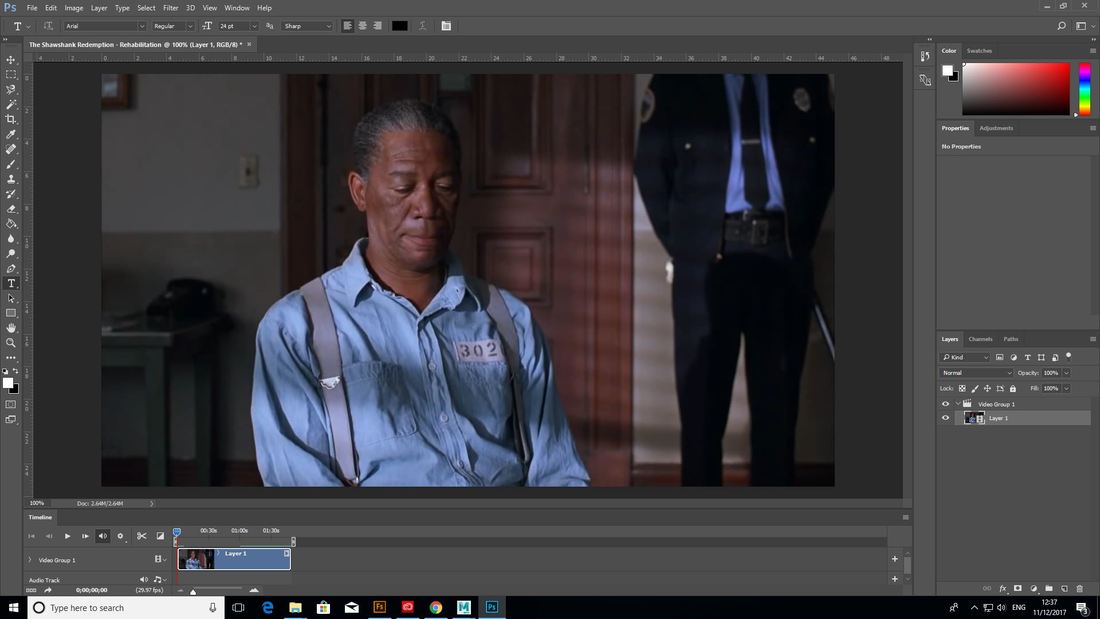
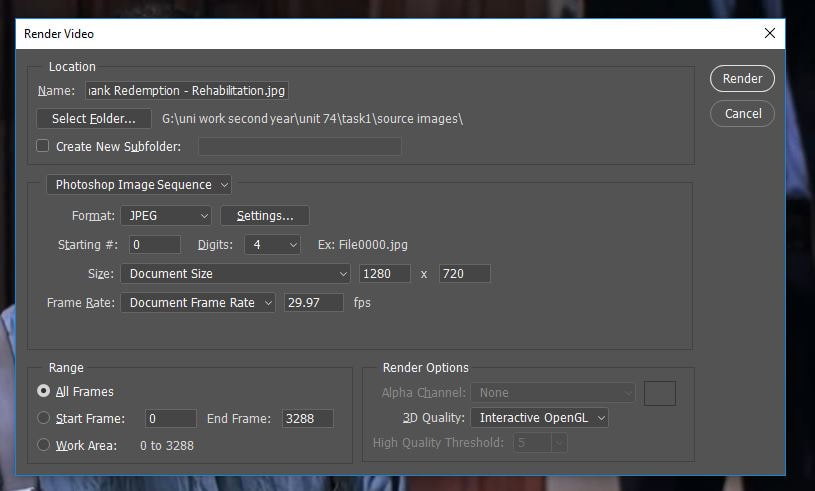
Task 1 - animated assets Another part of task one I had to create animate assests, for this I wanted to start of by learning how to add joints and over each asset I want to make it more complex. For my first asset I wanted to learn how to use the key frames, so I started off by crating a simple box with a lid. I started of by moving the axis point to the edge of the lid. I then press the S key to set the key at frame one I then moved the box lid to the side and downwards and then set the key when I got the lid in the place I wanted. I created a short video of how this animation looks: For the second asset, I decided to use a joint for this asset. I wanted to create a barrel opening and using the same process from asset one to key the movement but by the joint. Below is a video of the asset rotating Then I did the same barrel but with the lid sliding off For the next asset I wanted to add controls to the next asset, for this I wanted to make it easier to select the joints. Below is a video of the asset rotating For my next asset I wanted to have a more complex joint system using a root bone and have multiple joints moving and rotating Below is a video of the asset For the next asset I wanted to create jammed doors, I edit the graph to create a more stagged effect. For the next asset I wanted to combined the graph and multiple joints to create a weapon firing. Below is a video of the asset I then created another smaller weapon so that I had two different types of weapons for For the next asset I wanted to create a long animation that combines moving, multiple joints and graph For the next asset I wanted a more complex joint system, as it a complex skeleton I had to learn to paint the weights of the mesh to stop deformations. Task 1 - lip sync For my lip sync I wanted to create one using a character that I create by keying each of the facial movements by hand inside of Maya and then I want to look into using a camera to capture facial movements that is then transferred onto a 3D character. I started off by creating a character that I can use inside of Maya, I created my character using adobe fuse and then uploaded it to mixamo to get a skeleton and facial blend spaces. I then opened this inside of Maya and used the mixamo facial rig plugin on the character to add NURBS controllers to the face and body so that I can control the animation and set keys. I then went and found a video on YouTube that I wanted to recreate, one of my favourite films is the Shawshank redemption and I decided to do a famous speech of Morgan Freeman at his parole talking about rehabilitation. The clip is around 2 minutes 30 but when broken down the actual time Morgan freeman is talking is just over 60 seconds. I plan on making a scene in Maya and exporting a render of my character talking as Morgan and then edit the two clips inside of an edit software to make a seamless video. I started of by opening my video in photoshop, I only want the main part of Morgan freeman talking now so I cut it down to his bit only this part. I then went to export and selected render video I then chose image sequence in the drop-down box. This breaks the video up into images for each frame. I then exported this, I got over 3000 images from the video which is equal to about 1 minute 30 to 2 minutes depending on playing speed.
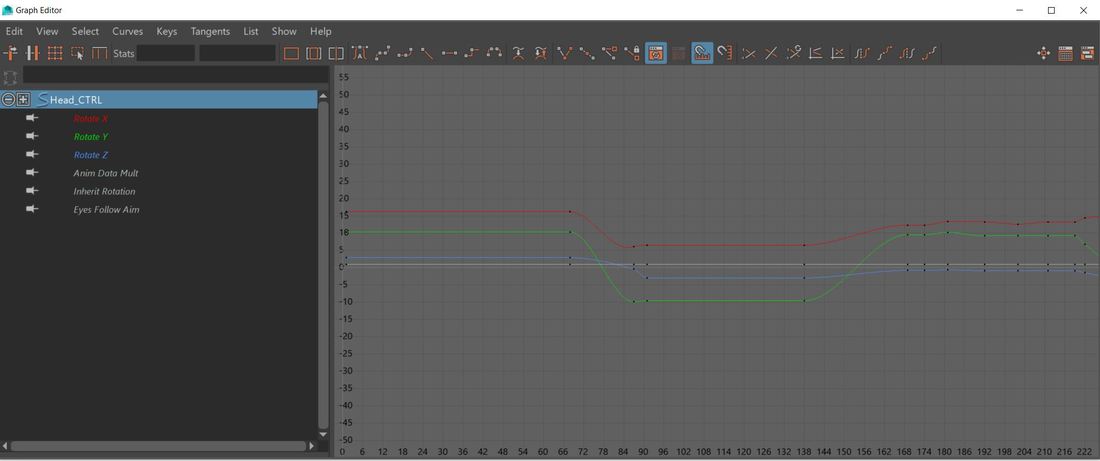
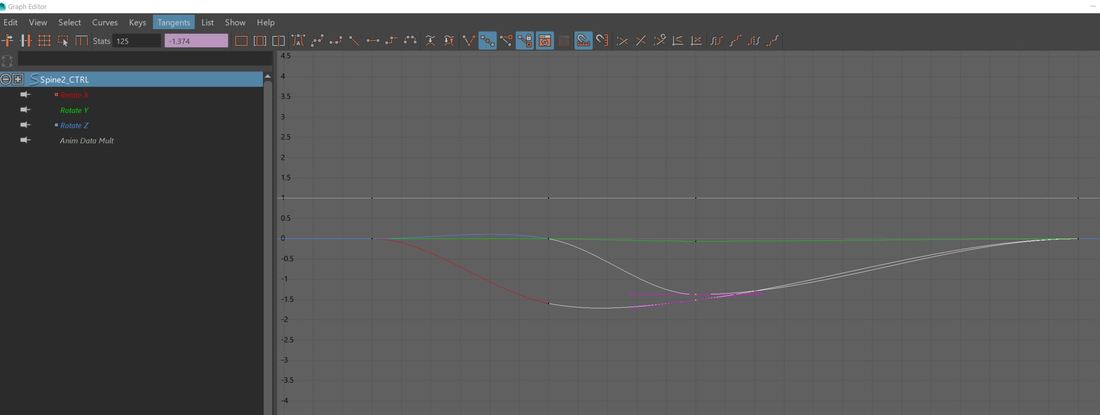
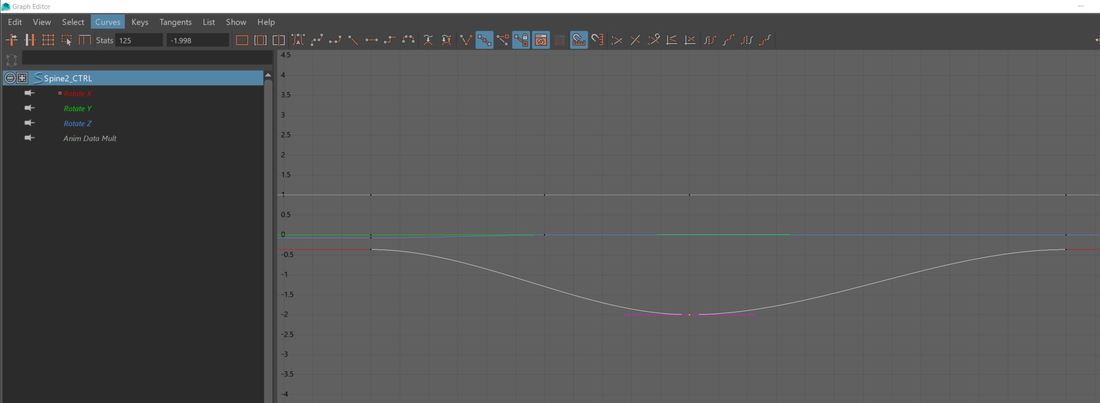
I then went back to my scene in Maya and added a new camera to the scene I then went to the details panel and selected create an image plane for this camera, I then loaded up the first image of the clip. Then I ticked the box that says use as an image sequencer this will player each image at every frame rate. 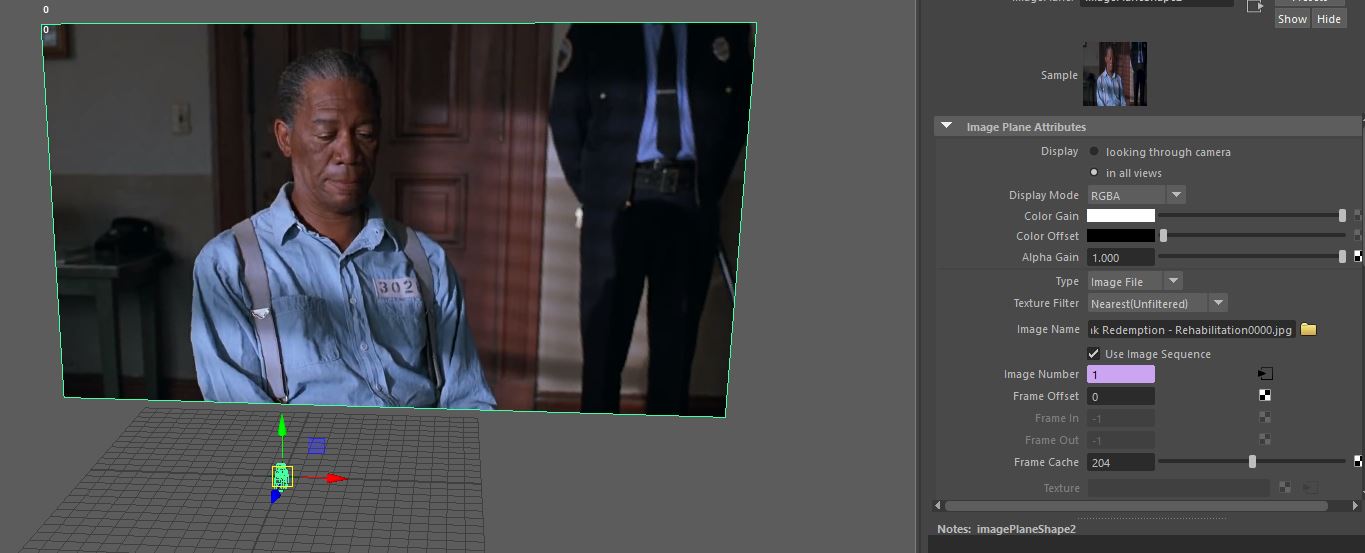 I started to key frames at key moments of movement. I decided to use a stop start type system when I would add a key at the start of the movement and the end of the movement, when it came to complex lip movements this involved a sequence of keys to make this happen. 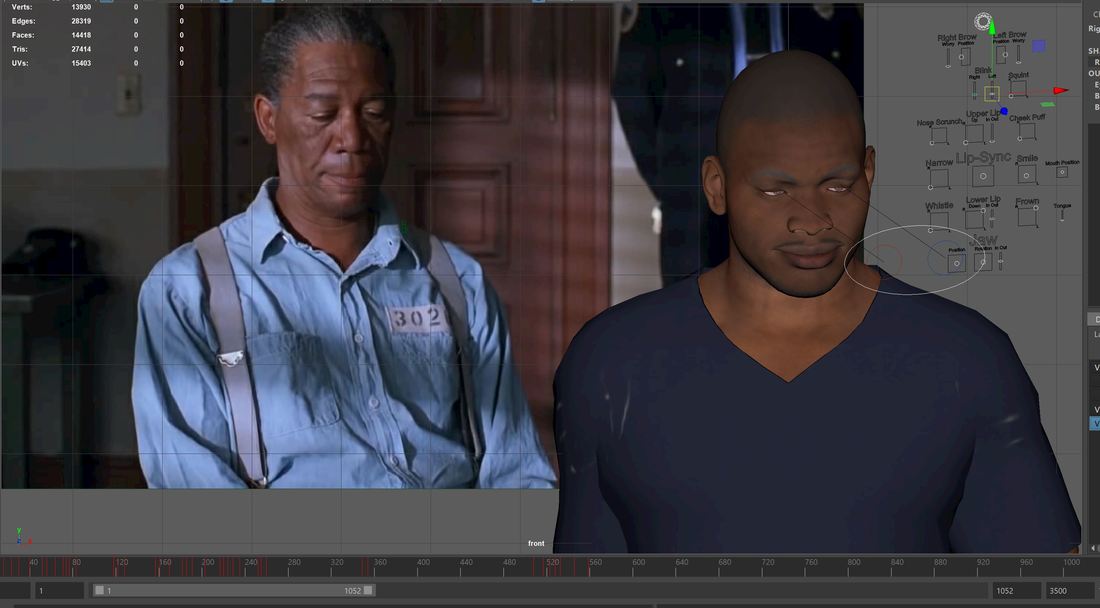 Clean up For the clean-up process I want to go though my recorded keys using the graph editor and change the smoothness of the keys and edit any movement that looks sharp or doesn’t fit the source image as I could of add extra during the keying the frames stage. I started off by going though the animation using the graph I changed the curves of the animation to be smoother and to make them flow better. I also added a tangent of linear to the curves as well.
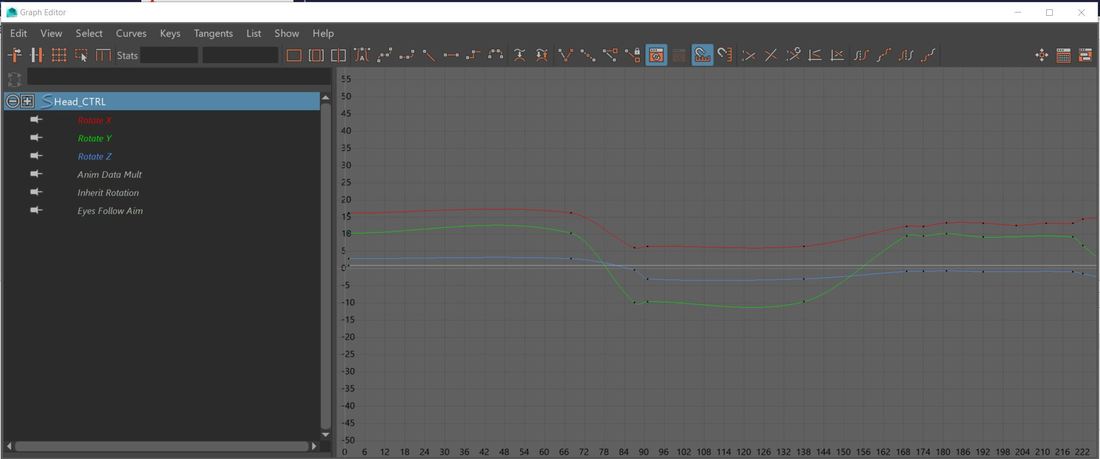
I then went thought the animation deleting and adding keys to parts of the graph editor that I felt need a smoother animation or need some extra keys to add to the animation. To do this I selected on the curve and right clicked to add a key to delete, I selected the key and pressed delete.
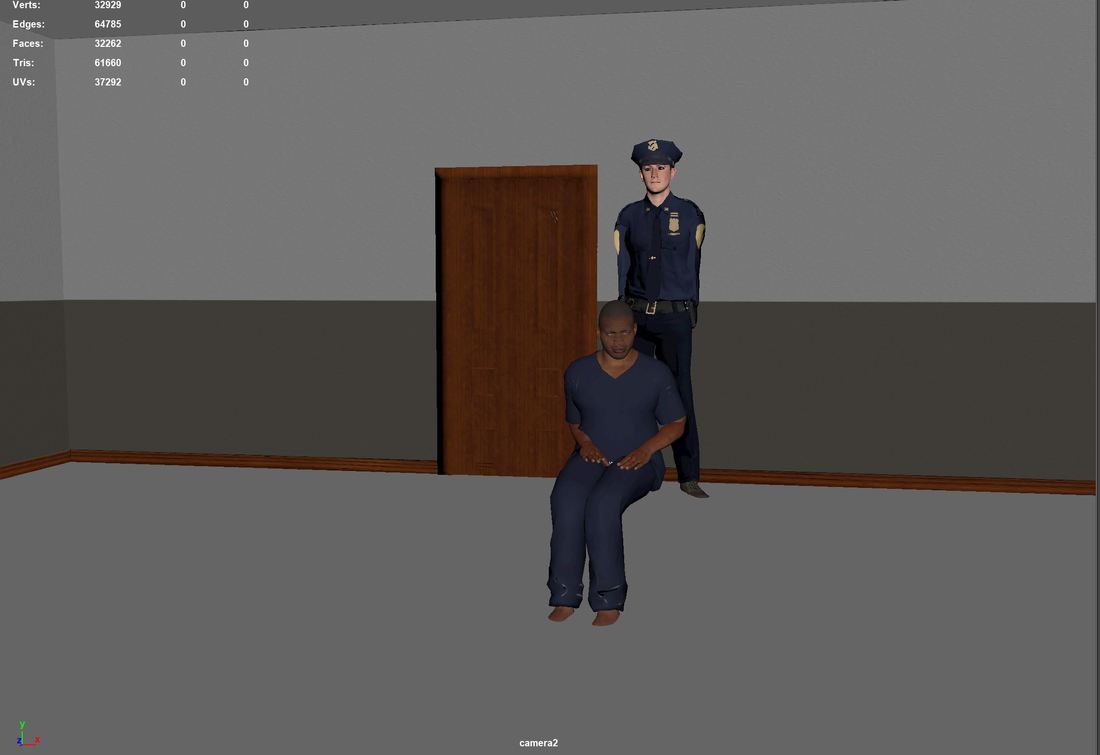
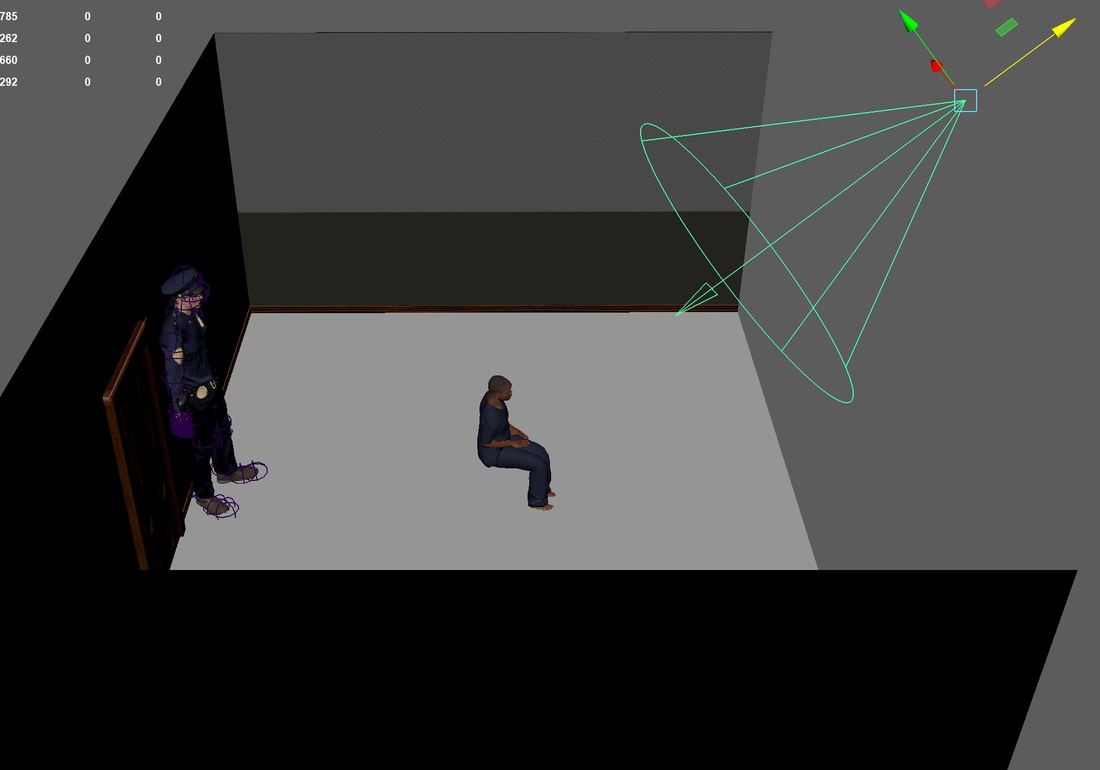
Below is a video of the clean-up Scene and export Before I export my animation, I want to create a basic scene to give the impression of what is seen in the video I created a basic 3 wall room and a door which I then took into substance painter and textured them. I then went into fuse and created a prison guard like in the video. I then added different types of lighting to the scene to get the right balance. I found this extremely hard and did multiple renders before finally finding a lighting system then I was happy with; a directional light to light the scene up and then a point light to light up the character up.
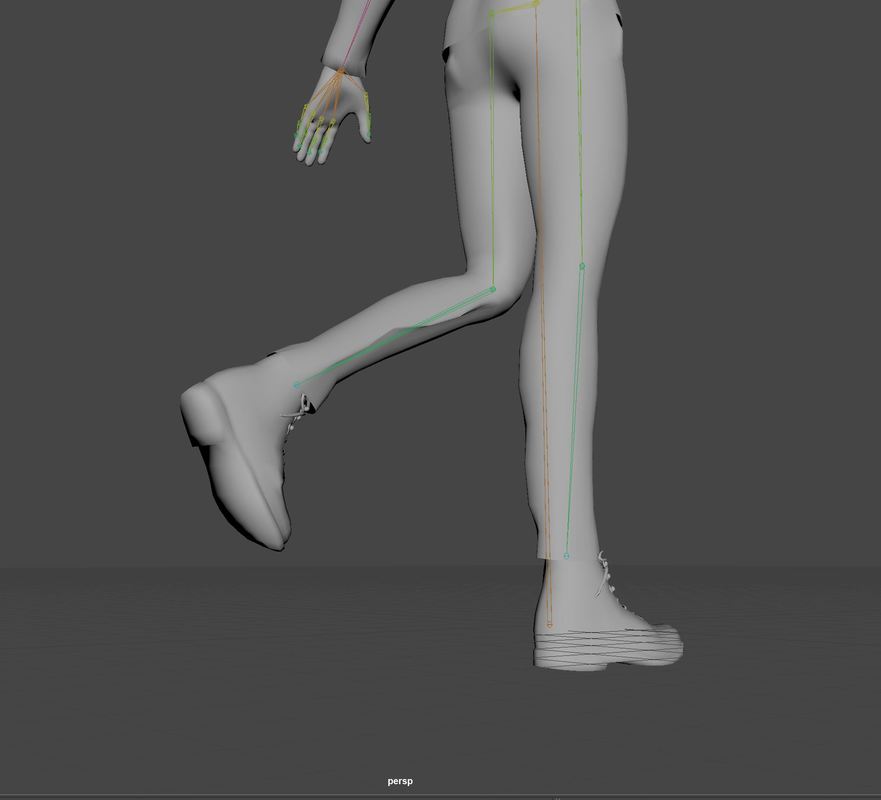
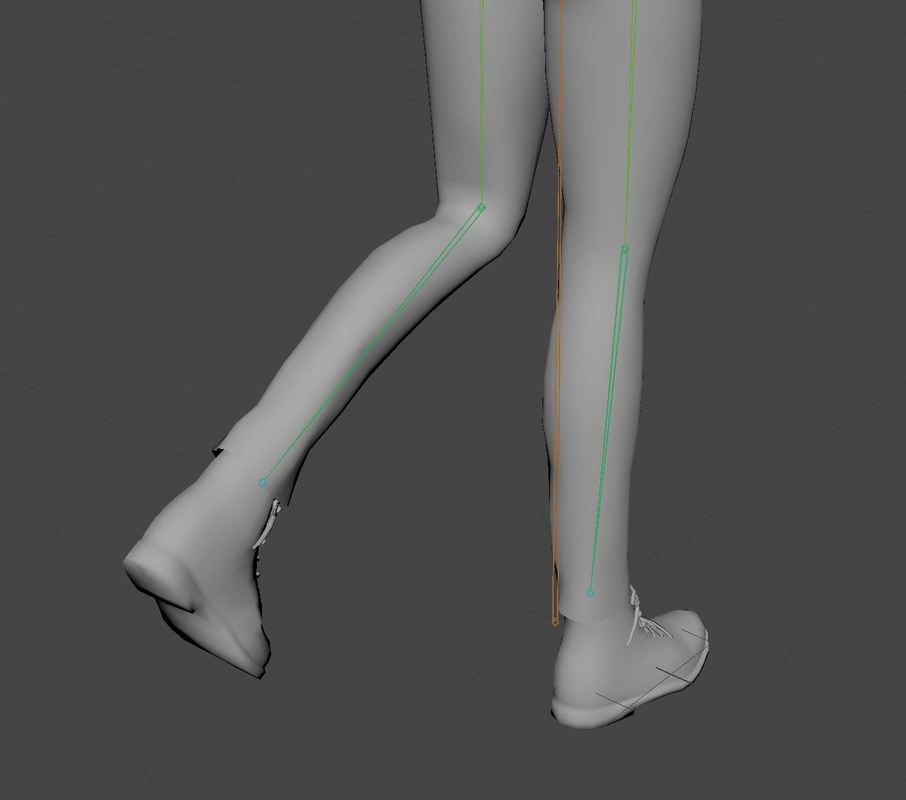
After exporting them I wanted to turn the images into a video, so I went to adobe premier and created a new project. I then went to import to import my images and selected the first one, I then clicked the box that says image sequence. If I don’t do this, it will import each image and add a 5 second duration to it. I then synced the edited video to my lip sync and played it, I adjusted it but there is a slight out of sync towards the end of the clip but only slightly noticeable. I then brought in the original video and edited that, so it displayed the start and endings and placed in parts where Morgan Freeman isn’t talking. I then created a picture in picture to see the original vs my lip sync. task 2 - character rigs In this task I want to create a skeleton for my character and non-playable character so that I can animate my own animations onto the skeleton and use these custom animations in my game. I started off by creating a basic skeleton for my character 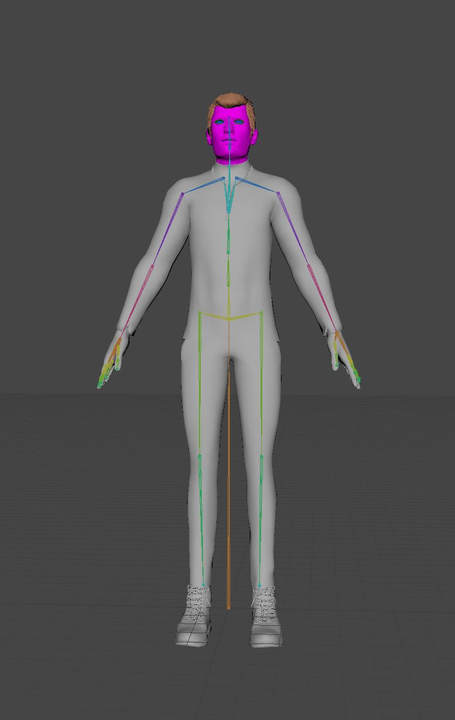 I then painted the weights to stop any deformations 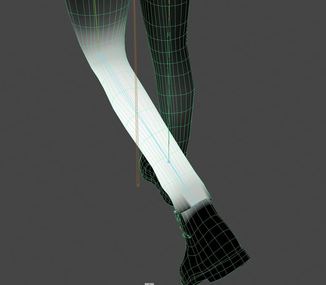
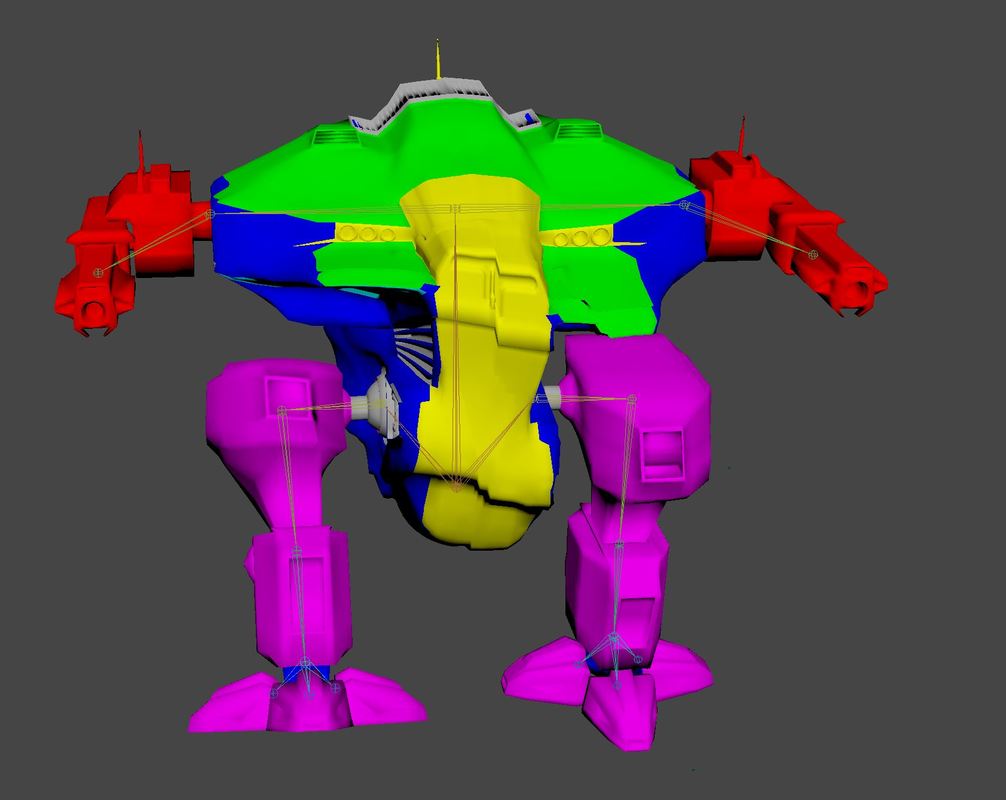
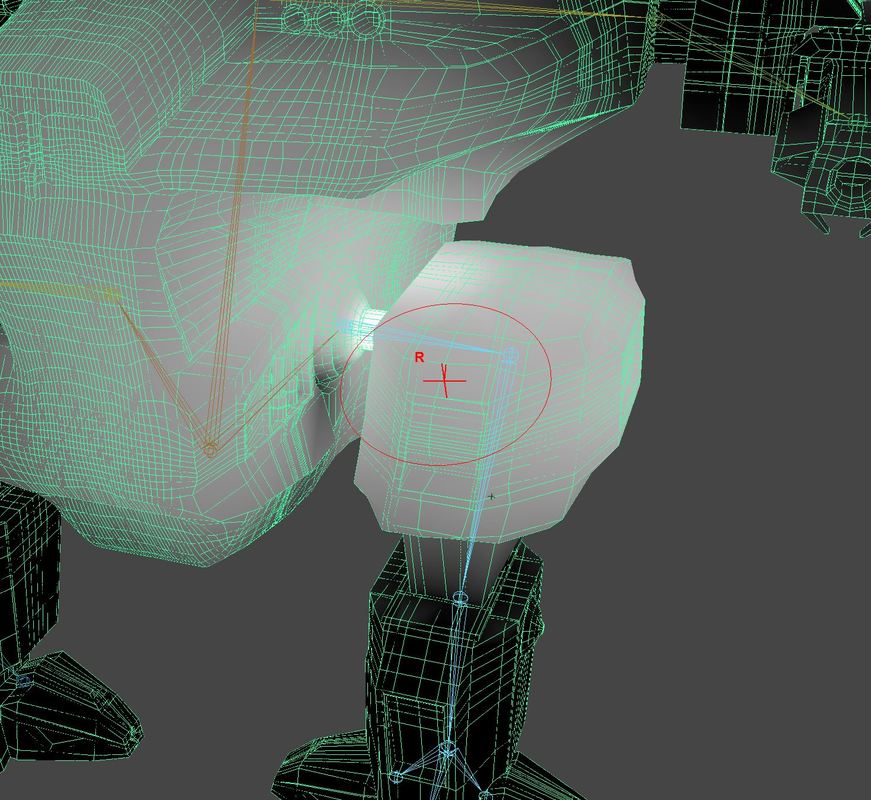
I then used unreals animation tool set to set up an NURBS control system. 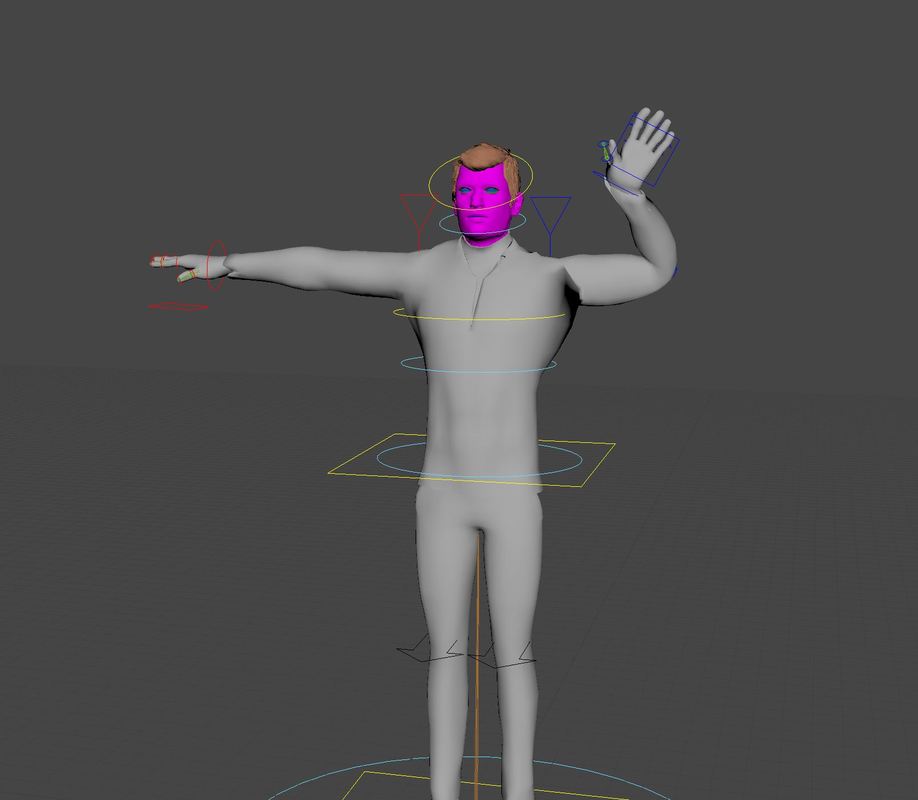 Rigging the NPC For my non-playable character which will be a mini boss in my game I have decided to rig that character myself without using any auto rigging tools, mainly for the reach as it is not like a normal biped and is quite unique. I started off by placing joints at those locations and renamed them according. I then parented those joints to the root bone and make sure the arms and legs followed the correct parent / child chain. 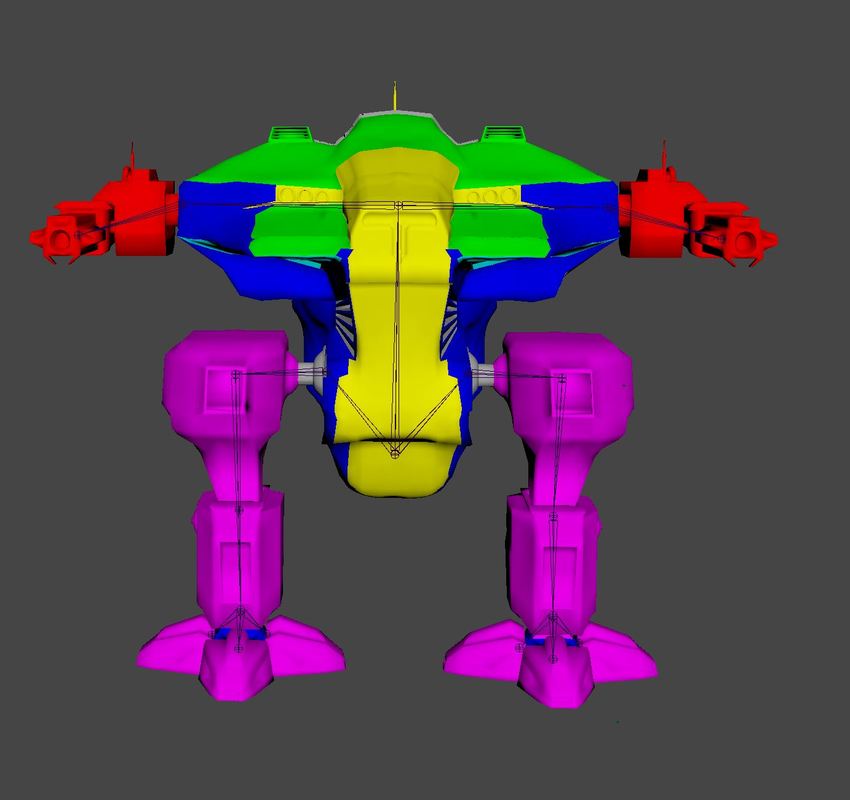 Issue I then tested all my joints and I had a massive problem with the deformation of eacj joint pulling the mesh from all areas. I decided to look at the painted weights and noticed that the joints were pulling the mesh from all over. I fixed this by tidying up the painted weights by removing the white areas that I did not need by painting them black.
After fixing the painted weights I then need to create some controls for each of the joints, I did this by using the NURBS and placed them at each joint and named the controls for each joint. I then needed to connect these controls to the joints, I started of by selecting the root control and parented it to the root bone. For all the others I selected the controls and then the joints and used a parent constraint for each of these. 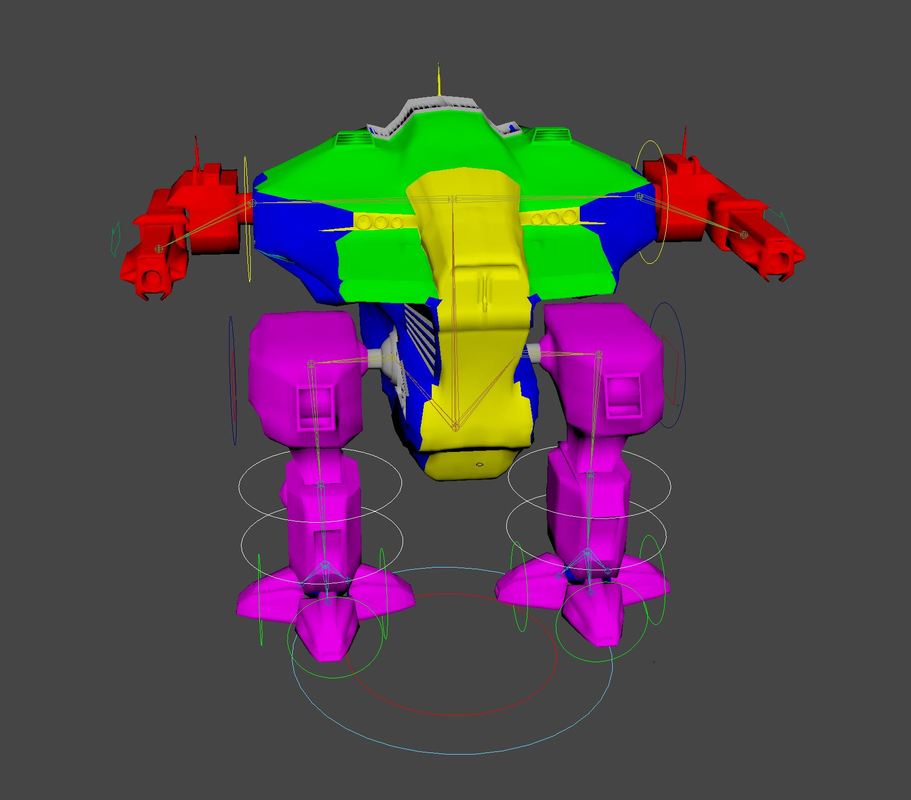 Animating the character After trying to use motion capture and unable to sync the two together I have decided that I am going to key my animations for my character. I am going to create animations that will be for my game only and will be unique to this game. To create this, I will use props I have created for my game to give me the idea of world space to help me create these animations: I am going to create the following animations:
I started off by importing my rigged character into an new project and then I imported the doors and button to the project, I then lined everything up as it would be in game and positioned the player to roughly the same location it needs to active the button 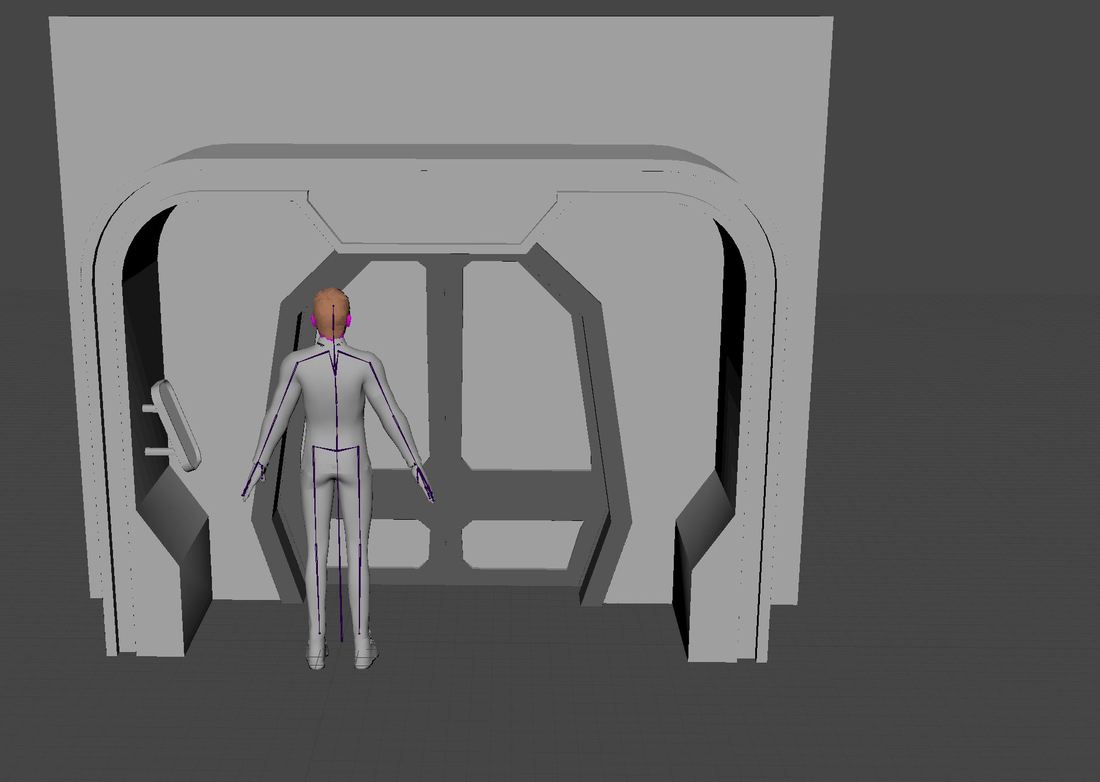 I then keyed the character to move its arm to press the button, adding bend and a twist and lifting the palm up to tap the button I then twisted the spine and other arm to move with the head to give the impression the character is looking at the button and pressing it. 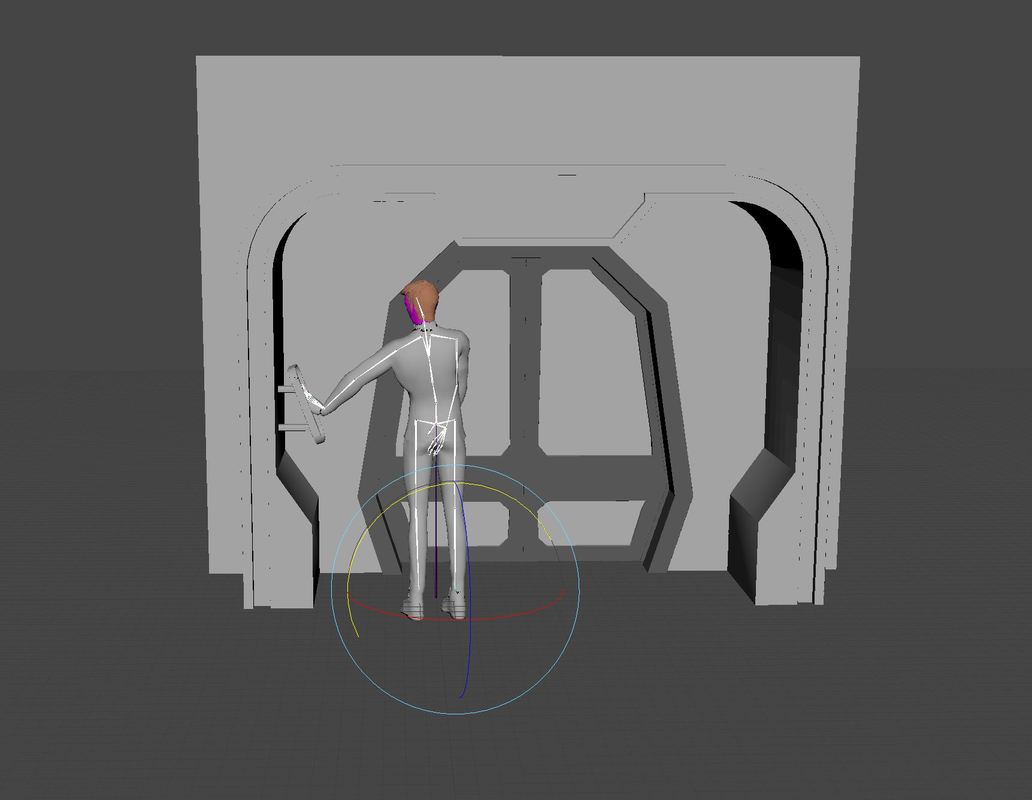 For the single door animation I imported all the files that create the door and positioned the button to the same height in the game and positioned the character when it would be active in game. I then created the animation bring that character arm up and turning the body, arm and head towards the button to look like it is looking towards it. Salute For my next animation I decided to do a salute as the game follows a type of military rank system, I thought it would be good to have a salute for the captain and other high-ranking officers. I broke the animation down into two parts I wanted to create a similar army salute so started off doing the formative stance with the character, I brought the legs closer and the arms straight against the body with the back straight, I then added the salute where I brought up the right arm to the forehead and then back down. Alien salute For my fifth animation I wanted to do some unique but staying to the military salutes but think on the lines of what about alien cultures how would they salute. I decided to create a mash up of 3 salutes, I wanted to incorporate Leonard Nimoy famous Vulcan salute and a royal salute by kneeling onto one knee. I then wanted to add a finishing touch to the salute by adding a type of war beat to the chest but more of a loving one than intimidating salute, I did this by gently patting the palm of the hand on the check back and forward. Evaluation
This is the first time I have ever tried to animate any of models and I have learned an incredible amount from it for this part of the character pipeline. It has shown me how to use bones, create animations using Maya, create a lip sync following a video and how to import my animations into my game. Learning animation has shown me how complex and it is and how difficult it can be at times but is extremely rewarding with the final product. the animated assests was enjoyable as it showed me how to create animations for my assets using bones and without, how to use the graph editor and outliner, it was a good learning curve and I felt I progressed and improved on each animation I did trying something new. I am quite proud with how some of the assets have turn out such as the jamming doors and the create that has multiple animations. What didn’t go to well for this task was trying to get some of the assets to skin correctly to the assets and I had deforming on some assets this was down to the lack of knowledge of painting weights and how I can stop this using this tool. I also had a few problems trying to export the models to unreal and found that using controls cause all sorts of errors and set my project timeline back a day or so trying to figure out this problem. The final version of the lip sync was worth all the hard work that came with creating the lip sync, I am extremely pleased with how the lip sync turned out and I feel I got most of the facial expression matching to the video as well as getting the mouth moving in time with the audio even thou in some places it does look out of sync. I felt some parts of the lip sync could have been improved like before starting adding ribs to the character to add breathing as the video had big inhale/exhales and feel this ruins the effect of the lip sync a little, also issues with the lighting could be improved as I found it hard to get the correct lighting when rendering out. for my character using software and technology, with this task I also decided to create my own rig for my characters as I had a unique biped in the form of a war machine which would need unique bone structure. Creating the rig went was a huge learning curve as it wasn’t expected but I wanted to learn this, I followed online videos of how to do this as well as using industry standard pipeline tools to help me rig and add controls to on my characters. When it came to animating these character I found it straight forward after my practice with the assets I found animating a lot easier as I had already practiced on this before. I am pleased with how these animations turned out especially the war machine animations, I feel this make the machine look more real. What didn’t go to tell was the technology I wanted to use when I tried to use motion capture I could not get the technology to work, I had a lot of huddlers setting up and running the software and once I got my animations recorded I came across more problems trying to get the animation onto the character and encountered a number of more problems. This left me with an option to create my own character animation which I felt look a bit robotic and need more work in making them more smooth and fluid. Conclusion Overall, I feel like I have a love, hate relationship with animation, I found certain parts extremely difficult but the end results are amazing when they turn out correct. I feel like my knowledge has increased over the unit and I feel like I understand more about the animation pipeline. It was a challenging unit but extremely rewarding, I don’t think character animations is something that I want to progress not but understanding how the pipeline works is great. Creating animated assets is something I am going to keep working on as I feel like I can use a lot of this in the future on other projects. This unit has also shown me areas where I need to improve on such as my researching techniques to find more information to understand tools before trying to use them as something I felt that I didn’t look into this enough and struggled to grasp the tool. Future development In this blog post I will look into how I can use animation in the future for my projects and how I look into how I could include this into my development. I plan on creating more animations for my characters for unit 52 this is a unit about character implementation and will be look into blend spaces which uses the combination of animations and blends them together. With this I could look into creating more movements for my characters, such as jumping, side turning and walking sideways I can also look into adding the animation for weapons and how the character could move with these weapons. Also creating assets for this current project and future projects is going to help massively and it is something I am going to counting to develop as I feel it adds so much more dynamics to any game and will help with any development.
0 Comments
Leave a Reply. |
Archives
June 2018
Categories |
||||||||||||||||
 RSS Feed
