|
I wanted to get feedback on my camera and control systems that I created for unit 49, I used the videos that I took after creating the controller effect or camera effect and placed them all into a video as submitted it to the peer review forums to get feedback. Here is the video I created: With the video i also asked a set of 5 questions for the people who reviewed my work to answer, these questions are: What did you think of the player camera system? What did you think of the player controls / layout? What do you think of the camera effects? (post processing, portals, etc.) What do you think of the control effects? (QTE, slow time, etc.) Any recommendations for improvements? Results:  I only got one feedback to my video of the camera and control system. the feedback helped me understand what was noticed the most and it looks like the fluid movement of the cameras on the character and the fixed camera in the level as well.
conclusion The only downside to this is the feedback is only by one person so I cannot compare it against other peoples opinions and I wasn't recommended any improvements for camera or control system. But overall I am feeling positive about the feedback I have received up to now and how I have used the systems in my game as seem to go down well. Since there were no recommendations to improve my systems I have left them how they are till I receive more feedback.
0 Comments
After I created my level I wanted to make a small obstacle course that combined the two together. I used a fixed camera for the player to view from while using the jump and crouch, then I turned the camera back to the player so they can fire the weapon and use the quick time events before going though the portal. For camera systems, there are many ways I can use these in my games I will look at as many ways possible using: Camera, Render targets, post processing effects on the camera and scene captures. As I am researching my camera and control system for unit 75 I will be looking into camera systems that I could use for my sci-fi game. Scene captures and render targets I started off taking inspiration from my research and Moodboards of portal the game, it makes it possible to see through walls using portals that would then teleport the player to the area in the portal. 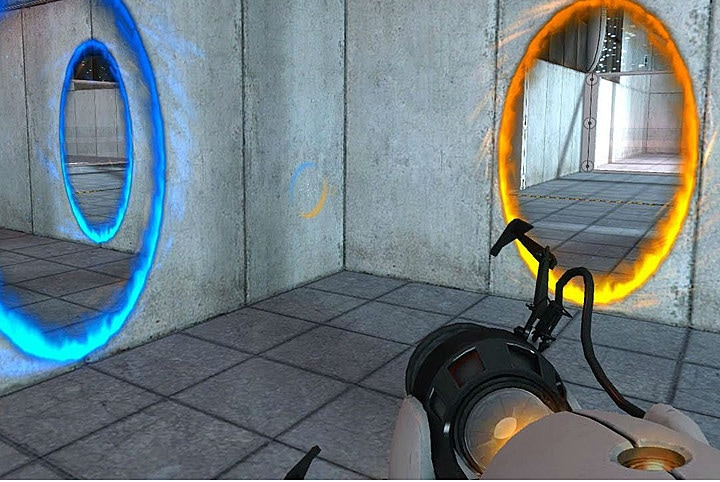 I found a few ways how I could do this, using a screen capture in my level in an area and placing the feed from that onto a texture in another part of my level, or building a similar function in the blueprints. I found a tutorial guide on how to create door portals and follow it along. After following the results I found that mine was quite buggy the portal never always renders correctly, would reflect my character and cause performance issues. After doing some research on how I could make the portals more effective, I found out a few important things about scene captures and render targets:
I then went back to the portal system and changed where my camera was on my player, moved my portals away from each other and I found I got better results but still get the clipping issues. After this I tried to replace the event tick with a timer, but found the portal render to be lagged and not as smooth as I would like, and only a slight improvement in the FPS The portal idea is interesting and I am glad I got it to work, but it is something I might use in my game, but very sparingly due to the fact there is a lot of errors involving this in unreal engine. Live Feeds After trying out the portals I used the same technique using screen captures and render targets, I started off using the BSP box and placing that in the world, then I placed a scene capture camera in my game and then created a render target adding that to the camera and then I turned the render target into a material and added it to the BSP block and I had an instance live feed. 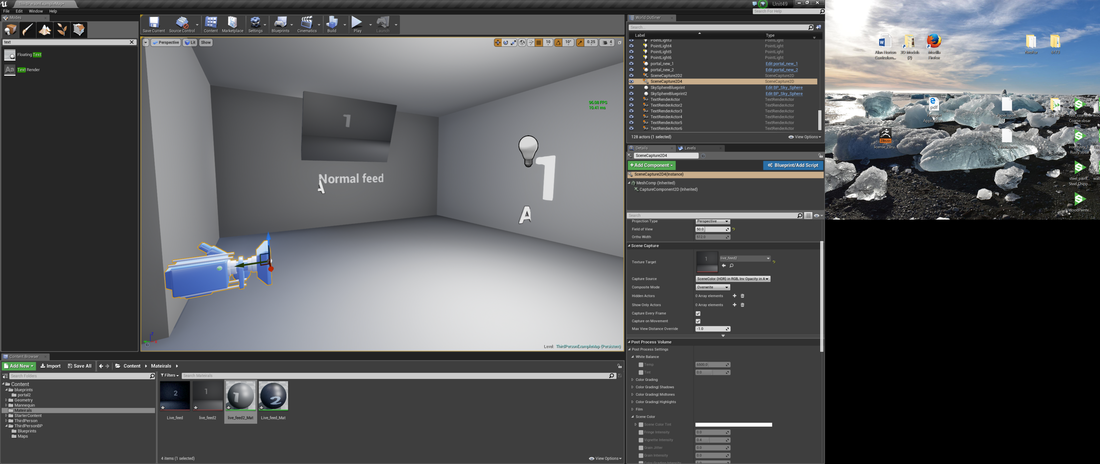 After this I duplicated the system and applied post processing effects to the camera by playing around with the settings on the camera, I am ending up adding a glittering grain and changed the temp colour of the feed. Player camera Even thou i created a camera system in unit 18 for first and third person view i wanted to improve on that so i draw a basic concept of what camera i wanted for my game. 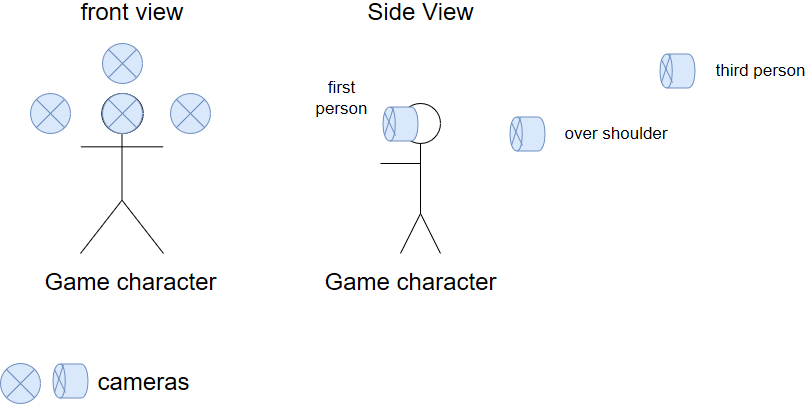 I wanted the third and first person perspective to stay and want an option so when i pulled out the weapon it would go to a view of over the shoulder. i started of by creating the unit 18 first to third person view After creating this camera system I wanted to improve the system and add more features, I started looking for tutorials about camera systems and the styles I found in my research in previous tasks. i found this video, that showed me there was a way to place the camera behind each shoulder, which was better than what i orignal concepted as i planed to have two camera but this uses the third person camera and uses it with an off set. After watching the tutorial i was able to resemble the same results Post Processing For this part of post processing I wanted to look into to blendables, using a material array to change the world when the player enters a post processing volume or uses a button to trigger the post processing. I did some research on the unreal forums and technical guides provided by unreal engine and I found a guide how to create Nightvision using materials and post processing https://forums.unrealengine.com/showthread.php?26829-Porting-Night-Vision-PP-Effect-from-UDK I was able to make something similar to the project, changing it slightly so it wasn't affected by light. The night vision I like and I plan to use this in my unit 75 project, when the player character is wearing the bio-suit it can use a button to toggle the night vision on and off as I plan to have some dark areas in my game. When looking for post processing material effects i also found another tutorial on the forums. https://forums.unrealengine.com/showthread.php?51685-Radar-Sonar-Pulse-Post-Processing-Material&highlight=sonar this tutorial shows how a material can move over objects in the level and lighting up each object in the light when it reaches it. I was able to replicate it but i was not happy with the results from it. After creating this I felt that the scan was too large and ruins the level, I looked at the technical guide on the unreal engine website and read about nodes I could use. I ended up using a vector length and using powers, divides and clamps to make a fake mask, so it turns the scallion into a circle that flies out from the player. The results are better from the original design and I feel it looks cleaner than the other scan. it is something I could use in my unit 75 game, the player could have it connected to its biosuit and use a button to scan the area for secrets / items that would a appear via a line trace. Or I can use it as part of a model that when the player activates it, it scans the area producing a map for the player. Class lesson - Cell shading in todays lesson we looked at materials and how they could influence the game, we followed the instructions on how to change the light the player sees and turn it into flat colours. this is known as cell shading. after following a tutorial given by the tutor which involved creating images inside of photoshop and then creating a material to cast this onto the object by using masks. in the photo below is the results I got: 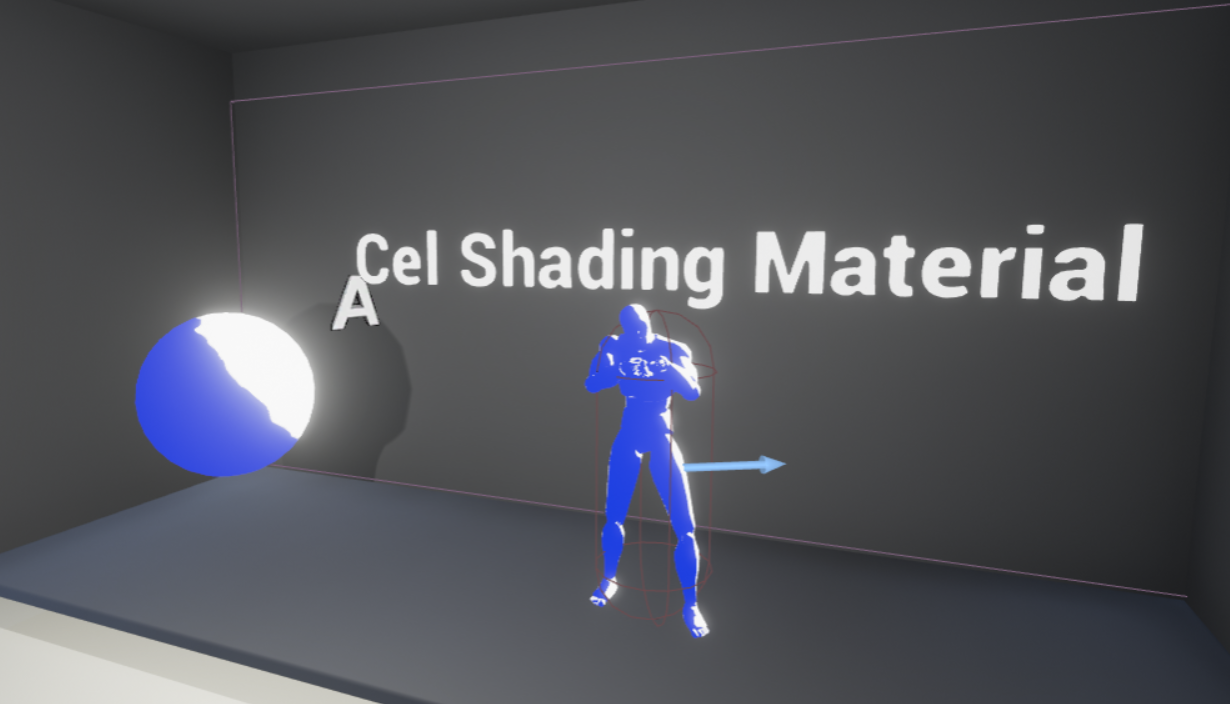 After creating this and liking the two toned effect I could cast on to objects I started researching if I could apply this to a post processing effect after finding the information on the unreal websits I used the same material I created in Photoshop and turned it into a post processing effect. After this I looked at other ways I can use cell shading and found a tutorial about how to make a Gameboy style cell shading using colour grading and changing the screen resolution. I was able to replicate the effects on my own level, minus the boarders I tried many ways to get a black boarder around the assets in unreal engine, but was unsuccessful I tried many tutorials but could not pull off the effect. the overall effect still works, but I felt it would of been better with a thin black line going around the assets. after failing many times I left it at the last working position shown above as it still looks like a Gameboy with the basic green colours and low resolution.
Conclusion I have learned a lot about camera in this task and the potential that can have on my game I am designing for next year. I think I will use the camera system that I designed works really well and like the over the shoulder look when the weapon is out. The AFK is good, but it is something I don't think I would use in my game and I think it could cause too many errors with my keys and camera system. The camera feed is simple, but works and could turn it into a CCTV system. The post processing is where I learned the most, my first attempt at making the scan effect wasn't the greatest, but after research I was able to improve it and I am planning on using it in my game next year to scan the environment. I would like to use the cell shading I think it's a cool effect and could use in a dream world or on the holodeck simulation. |
AuthorWrite something about yourself. No need to be fancy, just an overview. Archives
May 2017
Categories
All
|
 RSS Feed
